
 New AI features are available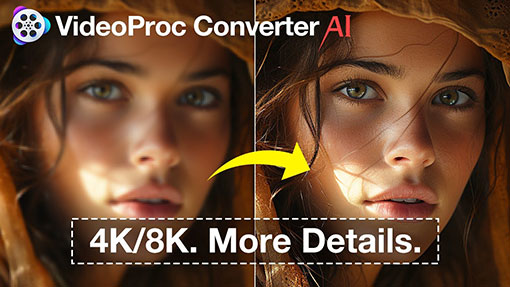
You may have tried enlarging an image, only to end up with a blurry, pixelated mess. Let's be real for a second. When most people search for "how to improve image quality," what they actually mean is, "How do you upscale an image in Photoshop without losing quality or making it look like a blurry Minecraft block?"
True image quality isn't just about forcing a tiny photo to be bigger. Beyond resolution, enhancing image quality also involves reducing noise, sharpening details, and more. It is actually a two-part process. Ensure you have the right data, and then polish it. The number of pixels in a file is directly related to image quality. The more good pixels an image has, the higher the quality will be.
Ready to stop guessing and start editing like a pro? This guide will show you how to improve image quality in Photoshop, one of the best image editing software programs.
Ensure You Have the Right Data
Fix structural damage before you do anything else. When you stretch an image to increase its resolution, Photoshop literally magnifies whatever is already there. So, before you even think about changing the image size, reduce the noise and fix the structural blur first.
Duplicate your background layer and convert it to a smart object for non-destructive editing. This way, you can always go back if something is off.
1. Generative Upscale
Generative Upscale is the newest AI-driven tool available as of Photoshop 2026 (version 27.0). It increases image resolution while intelligently reconstructing missing details with generative AI. The AI model actually understands the context of what it's looking at. When you use it to improve your photo, it generates brand new, photorealistic textures from scratch to fill in the gaps as the image gets larger.
Follow the steps below to improve image quality in Photoshop with Generative Upscale.
- Open your image in Photoshop.
- Go to Image > Generative Upscale from the top menu bar.
- Choose a model you want to use to upscale the image.
- Set the desired output scale (2x or 4x) as needed.
- Click Upscale. Photoshop will create the upscaled image in a new document.
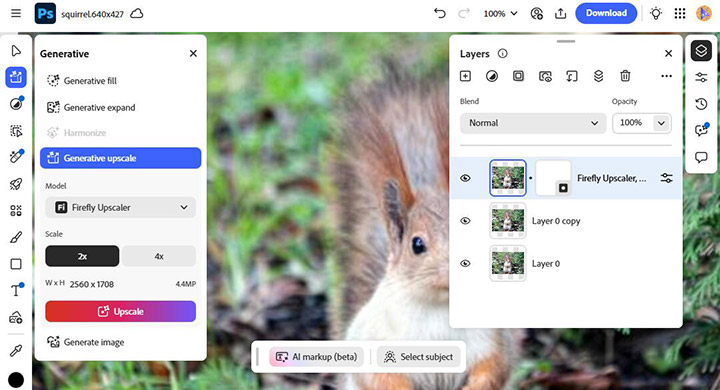
Generative Upscale is best for rescuing lost details. When you need the software to step in and literally invent realistic details (like hair, fabric textures, or foliage) to save an otherwise unusable photo, generative tech is the way to go.
2. Camera Raw Super Resolution
Super Resolution in Adobe Camera Raw is the fastest way to double your image size and sharpness. Adobe trained a machine-learning model on millions of pairs of low-resolution and high-resolution images. The AI studied these pairs to learn exactly what a crisp edge, a textured leaf, or an eyelash should look like. When you feed it your tiny image, it uses that vast knowledge to actually hallucinate and reconstruct missing details that weren't captured by your original camera.
How to enhance image quality in Photoshop with Adobe Camera Raw.
- Open your image in Photoshop by clicking File > Open.
- Right-click anywhere on the image itself and select Enhance.
- Check the box for Super Resolution and hit Enhance.
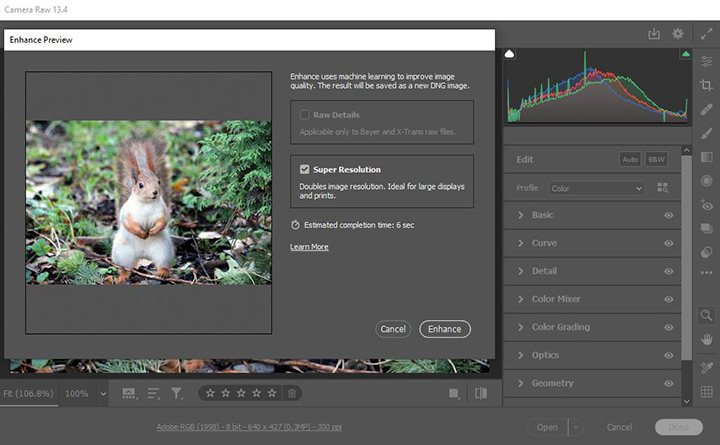
Photoshop will churn for a few seconds and spit out a brand new file. It literally doubles the width and the height, and packs four times the total data, while remaining surprisingly crisp.
Pro Tip:
- You can only open the image directly in Camera Raw to use Super Resolution.
- RAW images will open in Camera Raw by default. To open JPEGs or TIFFs in Camera Raw, you'll need to use Adobe Bridge or adjust Photoshop Preferences to open them automatically.
3. Resample via Image Size
Resampling is the classic resizing method to improve image quality in Photoshop. It uses pure mathematical algorithms. When you tell Photoshop to increase the resolution of an image, the software creates thousands of empty grid squares on your digital canvas. To figure out what colors belong in those empty squares, Photoshop looks at the surrounding pixels and guesses how these newly added pixels should look.
Here's how to improve image quality in Photoshop by resampling.
- Head up to the top menu and click Image > Image Size.
- Look for the crucial checkbox labeled Resample and ensure it is checked.
- Under the Pixel Dimensions area, type in the exact Width or Height you need.
- In the Resample dropdown menu, choose Preserve Details 2.0.
- Click OK.
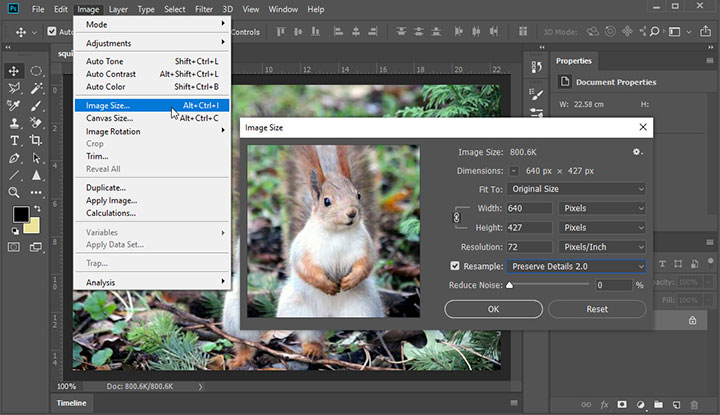
By keeping that Resample box checked, you permit Photoshop to alter the actual data of the file, seamlessly injecting new pixels to reach your target resolution.
A Quick Side Note on Print (PPI):
There's a Resolution box measured in Pixels/Inch (PPI) in the Image Size menu. If your image stays on a digital screen, you can just ignore it. Changing the PPI does nothing to improve how an image looks on a digital screen.
PPI only matters if you are printing the image with physical ink on paper. If you were sending this to a printer, you would uncheck the Resample box and set the Resolution to 300. That tells the printer to squeeze the existing pixels tightly together for a crisp physical print.
Polish the Visuals
Now that we've ensured your image has enough clean pixels, here's what you can do to polish these pixels to get a clearer image.
- Establish the tonal range using Levels or Curves. This ensures shadows are rich, highlights pop, and the image has depth.
- Restore color accuracy with White Balance and Vibrance adjustments to bring the colors back to reality.
- Clean distractions using Healing Brush or Clone Stamp to remove sensor spots, stray hairs, or background trash.
- Dodging (lightening) the subject and burning (darkening) the edges to subtly force the viewer to look exactly where you want them to.
- Sharpening the image can help counteract some of the softening caused by enlargement.
- Add a gentle blur to soften images and smooth over those rough pixels.
Improve Image Quality in Batch with AI
Let's be completely honest for a second: Photoshop is the undisputed king of digital image editing, but it also comes with a notoriously steep learning curve and a monthly subscription fee. If you looked at the multi-step professional workflow above and would like a one-click solution instead, you should look into VideoProc Converter AI. Despite having "video" in its name, this desktop software packs a remarkably powerful, dedicated suite of Image AI tools.
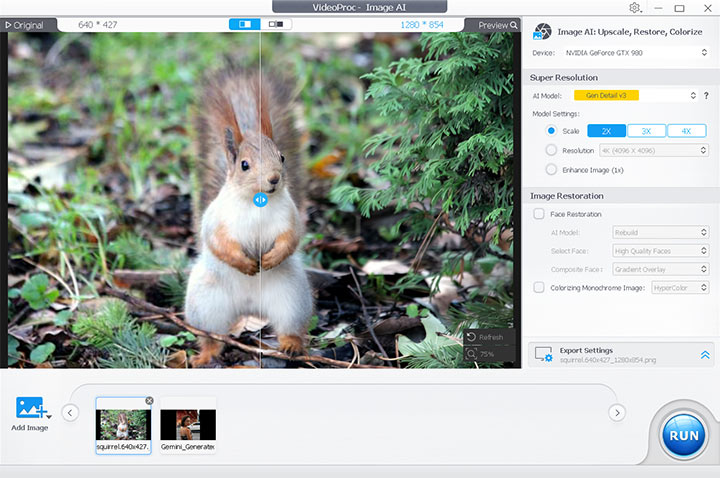
Just like Photoshop, VideoProc Converter AI uses AI models to enlarge your images up to 4X their original size, reaching ultra-high resolutions of up to 10K. The software features several AI models tailored for different types of images.
Unlike Photoshop, denoising, deblurring, adding details, and quality improvement are core processing steps that have been directly trained into its Super Resolution models. It does all of this automatically and supports batch processing. The Face Restoration and Photo Colorization models further enhance the quality of vintage photos and portraits.

Follow the steps below to improve image quality with VideoProc Converter AI.
- Open VideoProc Converter AI and click Image AI from the main screen.
- Drag and drop one or more images straight into the interface.
- The software automatically applies Super Resolution. If you prefer not to alter the resolution, simply enable the Enhance Image (1x) option.
- Choose an AI Model. Gen Detail is the overall recommended.
- Activate the Face Restoration and Photo Colorization options if needed.
- Click the RUN button when you are happy with the preview.
The Bottom Line: If you are a professional designer who needs surgical control over every single pixel, stick to the Photoshop workflow. But if you are a casual user, a content creator, or someone looking for a fast, buy-it-once solution to automatically upscale and improve image quality, VideoProc Converter AI is a fantastic addition to your digital toolkit.
Conclusion
Improving image quality in Photoshop is never about finding a single, magical "enhance" button. As you now know, it is a deliberate, step-by-step process.
Increasing the resolution of your image builds a rock-solid foundation. A professional workflow also requires balancing the light, correcting the color, cleaning the canvas, and saving the sharpening for the very last second.
More sophisticated AI photo enhancers, however, integrate all of this into an automated workflow while providing you with the capability for fine-grained adjustments. Feel free to download and try VideoProc Converter AI.