
I'm a new user of Vegas... 4.0. I haven't even edited anything. I tried to import .mov files. I got this message:"The Sonic Foundry Quicktime plug-in was not able to initialize the Quicktime components in your system. It appears quick time for windows is not properly installed." A follow-up message says:"The film format plugin for the specified file format was not properly initialized." I have re-installed Quicktime. I have re-installed Vegas video 4.0. Any ideas?!
Many Sony software users have come across the error notice"Sony QuickTime Plug-in Was Not Able to Initialize". This issue might be frustrating since it prevents users from quickly accessing and working with their media files. QuickTime is an essential tool for handling various media formats, so fixing this issue is necessary for a smooth video editing and playback experience on Sony products like Sony Movie Studio (Vegas). In this post, we will look at various possible options to resolve this issue and get your Sony QuickTime Plug-in back up and working.

Part 1: Causes of the Issue
Multiple factors can cause the"Sony QuickTime Plug-in Was Not Able to Initialize" problem. The Sony QuickTime Plug-in supports multimedia playback within web browsers. It is common to experience initialization issues, which can be caused by a variety of circumstances including outdated software, browser cache and cookies, conflicting browser extensions, or even a failed installation.
- Outdated QuickTime Player: If QuickTime is not updated to the latest version, it might become incompatible with Sony software.
- Corrupted Video Files: Video files can become corrupted, making it difficult for QuickTime to decode them.
- Codec and Format Issues: Some video files may have missing codecs, incorrect extensions, or incompatible formats.
- Operating System Problems: System issues, such as malware or other internal faults, could hinder QuickTime performance.
Solutions to Resolve the Issue
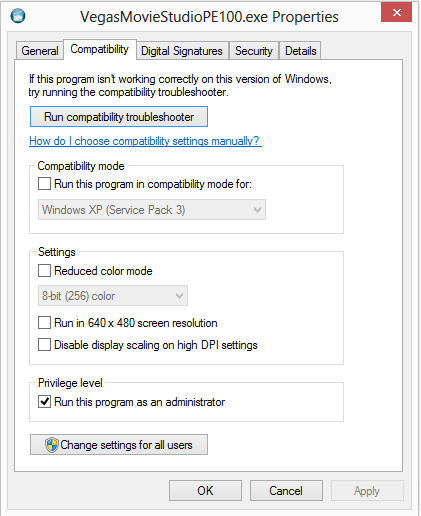
Solution 1: Reinstall QuickTime Plug-in and Run as Administrator
If the QuickTime Plug-in's installation files are corrupted, reinstallation may be required. Follow these steps to reinstall QuickTime Plug-in on the computer.
1. On Windows: Navigate to Control Panel > Programs & Features. Locate the QuickTime Plug-in, right-click it, and choose"Uninstall."
2. On Mac, launch Finder and navigate to Applications. Locate the QuickTime Plug-in and drag it to the Trash, then delete it.
3. Visit Sony's official website or QuickTime Plug-in download page. Download the latest QuickTime Plug-in for your operating system.
4. Run Sony Movie Studio (Vegas) as an administrator. Go to File > Import Media. Find your MOV files and import them. You'll find the files on the Project Media tab, where you may drag them to your timeline.
Solution 2: Disable Conflicting Plugins or Software
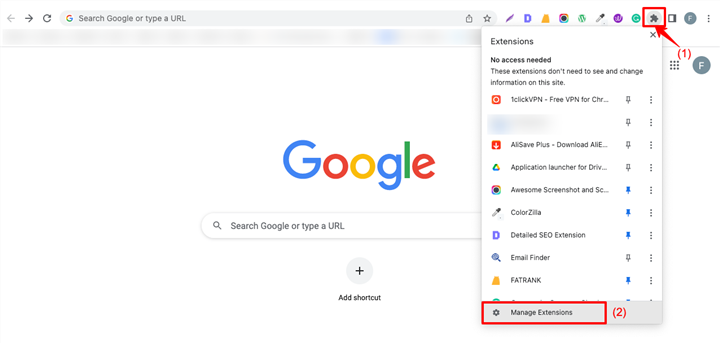
Whether you think that other installed plugins or software are causing issues with the QuickTime Plug-in, consider temporarily disabling them to see whether the initialization error is resolved. You can disable plugins or software by going to the settings or options menu of your multimedia application or web browser like Chrome.
Solution 3: Check for System Updates
Outdated system software can also cause initialization problems with the QuickTime Plug-in. Follow these general steps to look for and install system updates:
For Windows users:
Navigate to"Settings" from the"Start" menu.
Select"Updates & Security."
Click"Check for updates" to have Windows search for available updates.
If updates are found, select"Install" to update your system. Restart your computer after the updates have been installed.
For Mac users:
go to the Apple menu and select"System Preferences."Select"Software Update."
If any updates are available, click"Update Now" to install them.
Restart your computer after the updates are successfully installed.
Solution 4: Clear Browser Cache and Cookies
Your browser's cache and cookies can interfere with the QuickTime Plug-in's correct activation. Clearing them can help solve the problem. To remove your cache and cookies in popular browsers, follow these steps:
Take Google Chrome as an example.
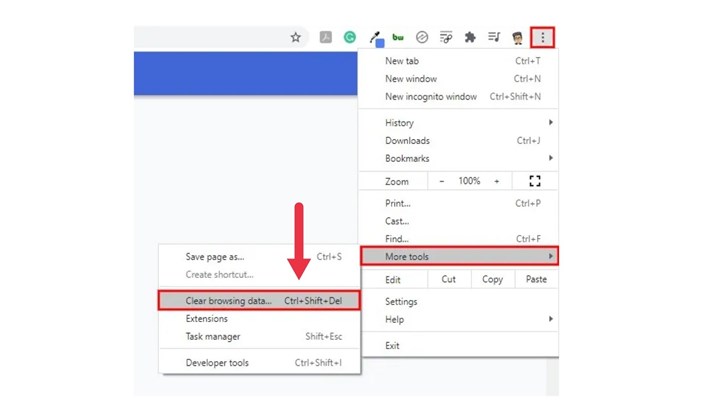
1. Open Chrome and select the three-dot menu in the upper-right corner.
2. Go to"More tools" and choose"Clear browsing data."
3. Select the time range, then"Cookies and other site data" and"Cached images and files."
4. To clear the cache and cookies, click"Clear data".Restart the browser.
Solution 5: Convert File Formats
Convert your video file to a format supported by QuickTime. Third-party video conversion applications, such as VideoProc Converter AI can efficiently transcode incompatible video formats to QuickTime-supported formats for smooth playback.

VideoProc Converter AI - Convert Video to MOV and other Formats
- Compatible with both Windows and macOS.
- Simple and intuitive interface.
- Quality-oriented video conversion for 420+ codecs and formats.
- Fast conversion speed with GPU acceleration.
- Batch conversion supported.
- Serves as a video compressor, free downloader, and screen recorder as well.

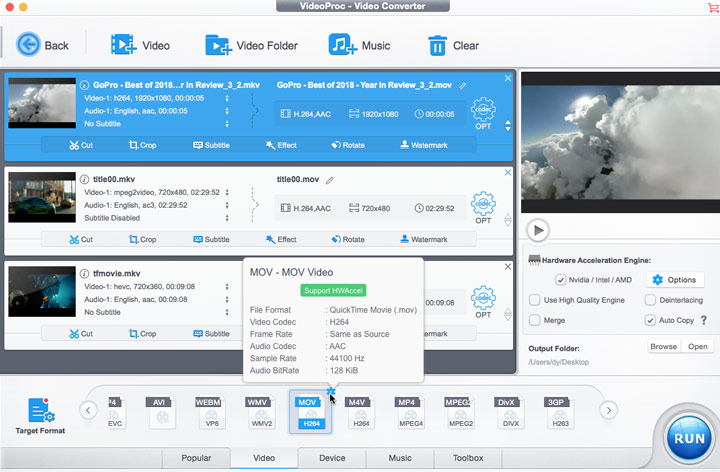
Step 1: Launch the VideoProc Converter and select the Video menu.
Step 2: Drag & drop your corrupted video files, or import them using the +Video button in the upper left corner.
Step 3: Choose MOV or another file as the Target file from the Video option at the bottom of the screen. Press RUN to begin converting video files to MOV or other formats.
Conclusion
Finally, we hope that these methods are useful in resolving the"Sony QuickTime Plug-in Was Not Able to Initialize" error, allowing users to resume their playing activities without interruption. From updating QuickTime to converting video files, there are several simple solutions available to resolve the error and provide flawless media playback and editing experiences.


