
 VideoProc Converter AI
 New AI features are available




Wonder how to make facebook YouTube videos? You've come to the right place. Starting a YouTube channel is no longer limited to those who want to be on camera. Faceless content—ranging from educational tutorials to immersive storytelling—has become a dominant and highly scalable format on the platform. This guide covers the entire production workflow: choosing a niche, writing scripts, and assembling visuals. We will also explore how to integrate AI-powered tools, such as AI voiceover and outline generator, to streamline your process, making Faceless YouTube video creation faster and more accessible than ever.
- What Is a Faceless YouTube Video?
- What Do You Need to Create Faceless YouTube Videos
- How to Create Faceless YouTube Videos in Easy Steps
- Step 1: Choose a Specific Topic and Audience
- Step 2: Research the Topic Before Writing
- Step 3: Write a Script That Holds Attention
- Step 4: Record or Generate the Voiceover
- Step 5: Collect or Create Visual Assets
- Step 6: Build a Rough Cut
- Step 7: Add Captions, Music, and Finishing Details
- Step 8: Review and Export the Video
- Step 9: Upload the Faceless YouTube Video
- Can Faceless YouTube Videos Be Monetized
- Do You Need to Disclose AI-Generated Content
- Common Faceless Video Mistakes to Avoid
- Final Thoughts
What Is a Faceless YouTube Video
Simply put, a faceless YouTube video is content where the creator stays entirely behind the lens. You hear their voice—or perhaps an AI-generated one, but you never see their face. Instead of the typical "talking head" setup, the screen is filled with visuals that tell the story, such as stock footage, screen recordings, or animations. It's a format that lets the topic take center stage, allowing creators to build a massive audience without ever needing to step in front of a camera.
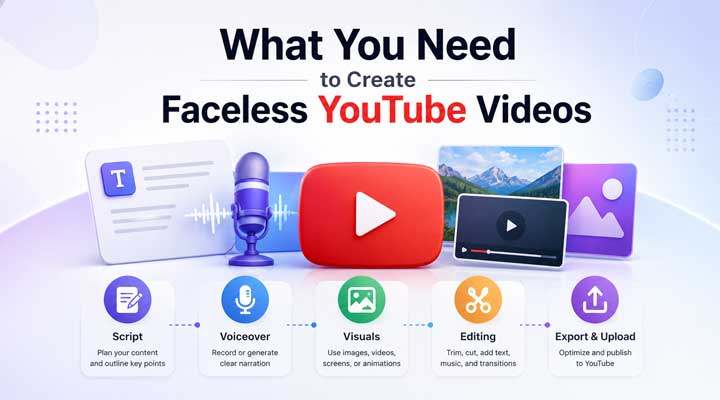
What Do You Need to Create Faceless YouTube Videos
Most tutorials will tell you that a faceless video requires a strict workflow: a script, a voiceover, and a library of stock footage. While that's true for some channels, it's often much simpler than that.
In many cases, the "video" part is barely even a video. There are plenty of successful channels that use nothing but a static image or a simple loop paired with background music or ambient sounds. If you're moving in that direction, you don't even need editing software; a basic graphic tool is usually enough.
The same applies to the planning stage. If you're doing something talent-based, like a piano cover or a singing vlog, you don't really need a script or an AI outline generator. Your audio is the main event, and the visuals are just there to set the mood. In these niches, the production side of things almost disappears. You really only need a way to capture your audio and a single visual to hold the screen.
How to Make Faceless YouTube Videos in Easy Steps
Step 1: Choose a Specific Topic and Audience
Before creating any footage, decide exactly who the video is for and what it will help that person do. A broad topic such as “personal finance” is difficult to turn into one focused video. A more specific angle, such as “how college students can start budgeting,” gives you a clearer audience, title, script, and visual direction.
Ask four questions:
- Who is the intended viewer?
- What problem or question brought them to YouTube?
- What should they understand or accomplish after watching?
- Why should they watch this video instead of another one?
Your channel niche can help guide your overall content, but every individual video should address one primary search intent. For possible channel directions, see our guide to faceless YouTube channel ideas.
Step 2: Research the Topic Before Writing
Search your target topic on both YouTube and Google before creating the script. Review the videos that currently appear near the top and note:
- How their titles frame the problem
- Which questions they answer
- How quickly they reach the main point
- What visual format they use
- Which details viewers ask about in the comments
- What information is missing, unclear, or outdated
The goal is to understand the existing search results and identify how your video can be more useful. For example, competing videos may explain which AI tools to use but leave out copyright concerns, editing techniques, export settings, or quality control. Covering those missing steps gives your video a clearer reason to exist.
You can also use YouTube autocomplete, Google Trends, keyword tools, community forums, and audience comments to identify related questions. Choose one primary keyword for the video and a few closely related terms. Avoid forcing every variation into the narration. Natural language usually covers related searches without making the video sound repetitive.

Step 3: Write a Script That Holds Attention
A faceless video lives or dies by its script. Since you can't rely on facial expressions to keep things interesting, your writing has to be tight, fast-paced, and purposeful.
The Hook
Don't waste time with a long channel intro or a "preview" of what's coming, the viewer already clicked because of your title and thumbnail. You need to hit them with the value immediately. State the problem you're solving or show the end result right away.
👎 Bad: "Hi everyone, welcome back to my channel. In this video, I'm going to show you how to..."
👍 Good: "You can build a massive YouTube audience without ever showing your face or buying a single piece of camera gear. Here is how we do it."
The Body
Once you've hooked them, move straight into the content. The goal here is to minimize "dead air." Instead of a rigid list of chapters, try to make each point lead naturally into the next. In faceless videos, viewers are often looking for information or a story—if the pacing slows down even for a few seconds, you'll see a drop in your retention graph.
The Exit
Avoid the traditional "recap" or "summary" at the end. As soon as a viewer hears "So, to wrap things up," they know the value is over and they will leave. Instead, move directly from your final point into a quick Call to Action. If you want them to subscribe or watch another video, do it while they are still in "learning mode."
A Note on Using AI for Scripting
AI tools like ChatGPT and Gemini are great for organizing your thoughts, but they might give "fluff"—generic sentences that don't actually say much. To keep your script from feeling like a robotic AI response, use AI to create the structure, then go back and add your own specific examples, data, or personal observations. If an AI writes a paragraph that could apply to any video in your niche, just delete it and replace it with something unique to your perspective.
Step 4: Record or Generate the Voiceover
If your video requires narration, you'll need to decide between recording your own voice or using an AI voiceover generator.
Option 1: Recording Your Own Voice
Recording on your iPhone or a basic headset is a perfectly fine way to start. The real challenge is usually your room—background noise can ruin a good script. Traditionally, you'd have to learn a tool like Audacity to scrub out those sounds, but that comes with a steep learning curve. If you're just starting out, I'd suggest using VideoProc Converter AI. Its Audio AI tool automatically clears out distracting background noise like traffic noise or hiss, which saves you the headache of manual editing.
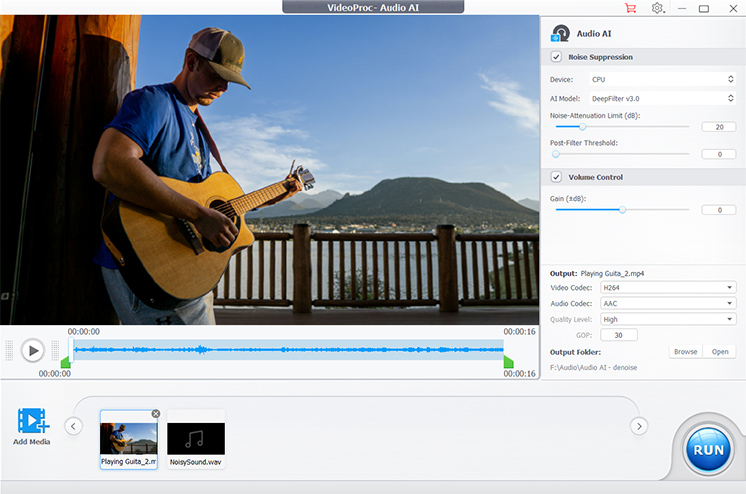
Download VideoProc Converter AI for free and remove background noise with its Aduio AI!

Option 2: Using AI Voiceover
For creators who prefer to remain anonymous or do not have a suitable recording setup, a text-to-speech tool can turn a written script into a voiceover. Before choosing one, check that its voices are licensed for commercial use, especially if you plan to monetize your videos. This can help you avoid licensing or copyright problems as your channel grows. A great tool to start with is TTSMaker. It's free, web-based, and offers a wide range of natural-sounding voices that can be used for YouTube monetization without a complex setup.
Step 5: Match Your Visuals to Your Niche
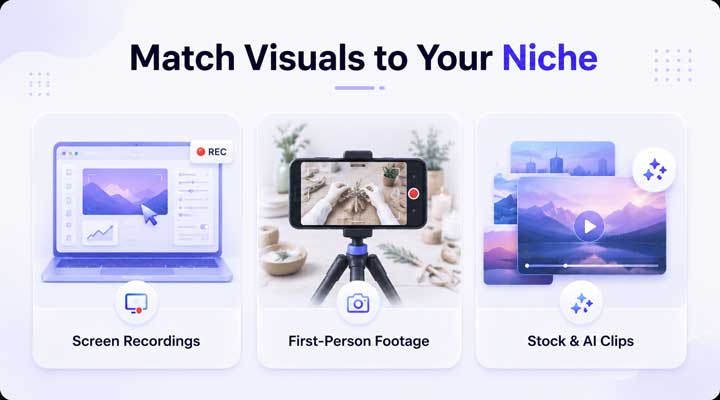
Once your audio is ready, you need to layer in visuals that actually fit your topic. Depending on the direction of your channel, you'll likely use a mix of these three approaches:
Screen Recordings (For Tutorials & Gaming)
If you're doing software walkthroughs, website demos, or gaming, your screen is your main stage. You'll need reliable recording software to capture exactly what you're doing. Just a quick tip: clean up your desktop first—close unrelated tabs and hide any private info so the viewer stays focused on the task. VideoProc Converter AI is a solid choice here since it handles both the recording and the eventual conversion in one place.
First-Person Footage (For Vlogs & DIY)
For "hands-only" vlogs, cooking, or craft channels, you'll be filming your own original footage. You don't need a film crew; an action camera or even just your phone on a tripod works perfectly. This gives your channel a much more personal, "hand-made" feel that stock footage just can't replicate.
Stock Clips & AI Video (For Decoration & Fillers)
For educational or storytelling videos, you'll often need "b-roll" to keep things interesting. You can find high-quality background clips on free sites like Pixabay, or even generate specific scenes using AI video generators. A common headache with free AI video generators is that they usually export at 720p, which can look a bit blurry on a big screen. To fix this, I recommend running those clips through VideoProc Converter AI to upscale them to 4K. Not only does this make the final video look way more professional, but it also gives you more "room" to crop or zoom in during the editing phase without losing quality.
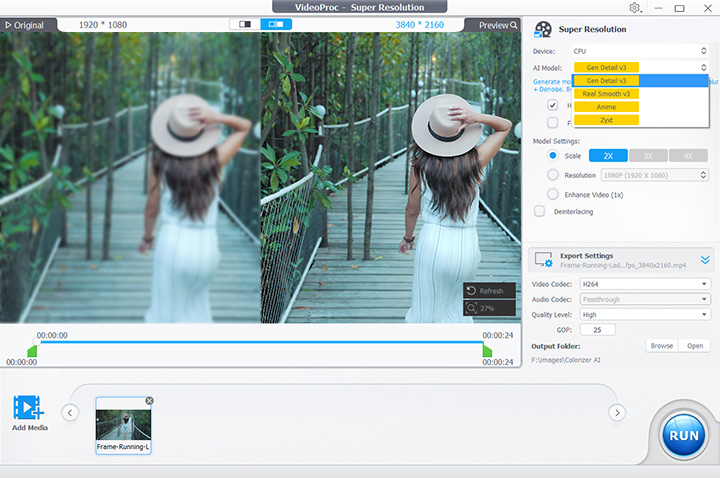
Download VideoProc Converter AI for free and upscale your low-resolution video to UHD 4K!
Step 6: Edit Them Together
Once the audio and visual assets are ready, the next step is to assemble them in a video editor. This usually involves:
- Placing the visual assets on the timeline and matching them to the narration.
- Trimming clips and removing unnecessary pauses to keep the pacing smooth and consistent.
- Adding transitions, text, overlays, and other elements where needed.
Recommended tools: Adobe Premiere Pro and DaVinci Resolve are good options for experienced editors who need professional-grade features. Beginners may prefer VideoProc Vlogger for Windows and Mac or VideoProc Editor for iOS and Android. Both are free and offer a useful mix of basic and advanced tools for turning raw footage into polished, engaging videos.
A Few Tips for Better Results
Check your source files before you start editing, and keep the highest-quality versions throughout the project. For example, AI-generated clips can sometimes look soft at full size, so you may want to upscale or sharpen them when necessary. You may also need to remove background noise from the voiceover or convert clips that do not play smoothly in your editor.
Thanksfully, you don't need a cluttered desktop to get these results. VideoProc Converter AI handles everything from upscaling and enhancing visual quality to cleaning up audio and compressing files, so you don't have to bounce between different apps.
Step 7: Add Captions and Mix the Audio
Once the main edit is complete, add the final text and audio elements before exporting the video:
- Captions: Review auto-generated captions carefully. Technical terms, brand names, numbers, and specialized vocabulary are often transcribed incorrectly.
- Background music: Keep the music below the voiceover so that it supports the video without overpowering the narration. Use only tracks licensed for commercial use.
- Sound effects: Add subtle effects to emphasize transitions, text overlays, clicks, or important visual changes.
- Branding: Use consistent fonts, colors, text placement, and graphic styles across your videos to create a recognizable channel identity.
Step 8: Review and Export the Video
Before exporting, watch the full video from beginning to end. Check for sudden changes in volume, visual glitches, awkward cuts, and caption errors. It is often easier to notice these problems when you watch the video without stopping to edit. Use a 16:9 aspect ratio for standard YouTube videos and 9:16 for Shorts. In most cases, the export resolution should match the resolution of your project and source footage.
Step 9: Upload Your Faceless Video to YouTube
Write a title that clearly tells viewers what they will learn or gain from the video. Keep the thumbnail simple and easy to understand, with a clear focal point and only a small amount of text. If the image you want to use is a low-resolution screenshot, you can use VideoProc Converter AI to upscale and sharpen it before uploading. Asides, you should add a description that summarizes the video and includes any relevant sources, products, or links. For longer videos, add timestamps so viewers can move directly to the section they need.
Can Faceless YouTube Videos Be Monetized
Faceless channels can qualify for monetization, but hiding your face does not exempt the channel from YouTube's originality and quality requirements.
YouTube's monetization policies emphasize original, authentic content that adds value. Reused footage can be monetizable when the creator makes a meaningful transformation through commentary, a new storyline, substantive editing, analysis, or other original contributions. Minimal changes may not qualify, even when the creator has permission to use the source material. video made from stock clips and an AI voice is not automatically disqualified. However, repeatedly publishing nearly identical videos, copying other creators' scripts, or making only minor changes to existing material can create monetization risks.
To make a faceless channel more original:
- Write or substantially revise each script.
- Add commentary, analysis, examples, or demonstrations.
- Use visuals that are specifically selected for the narration.
- Create original diagrams, recordings, or graphics.
- Develop a recognizable editing and storytelling style.
- Fact-check AI-generated information.
- Avoid producing large numbers of nearly identical videos.
Do You Need to Disclose AI-Generated Content
YouTube requires disclosure when content is realistically generated or meaningfully altered in a way that could cause viewers to believe a real person, place, scene, or event is authentic.
Examples can include making a real person appear to say something they did not say or generating realistic footage of an event that never happened. YouTube provides an AI-use setting during the upload process for applicable content. ion assistance generally does not require disclosure. YouTube lists tasks such as script assistance, thumbnail creation, captioning, video sharpening, upscaling, repair, and audio enhancement among examples that do not normally require disclosure by themselves. ing VideoProc Converter AI to improve resolution, stabilize a clip, repair audio, or enhance an image would not ordinarily trigger disclosure on its own. The nature of the underlying content still matters, so review YouTube's current requirements before publishing realistic synthetic media.
Common Faceless Video Mistakes to Avoid
A few simple mistakes can tank your audience retention. Keep an eye out for these common traps:
Irrelevant Stock Media: Don't use "filler" clips that don't match the script. If the visual doesn't directly illustrate the point being made, it's just a distraction.
The "AI Fluff" Trap: AI output is often repetitive and vague. If you don't edit the script to add your own voice and specific examples, the video will feel hollow.
Poor Audio Mixing: If your background music is too loud or your voiceover is muffled, viewers will leave. On YouTube, clear audio is actually more important than high-end visuals.
Static Visuals: Leaving a single image on screen for too long is a retention killer. Use cuts, zooms, or text overlays to keep the screen moving in sync with the narration.
Lazy Automation: Don't trust AI to get everything right. Mispronunciations or factual errors make a channel look amateur and untrustworthy.
Final Thoughts
Learning how to make faceless YouTube videos is less about hiding the creator and more about finding other effective ways to communicate.
Start with a specific viewer problem. Write a clear, original script. Use narration that is easy to understand. Select visuals that explain the topic rather than merely filling the screen. Finally, edit and enhance the material so the finished video feels coherent.
AI can make each production stage faster, while tools such as VideoProc Converter AI can help clean up footage, improve images and audio, make quick edits, record content, convert incompatible files, and compress the final output.
The strongest faceless channels do not succeed because nobody appears on camera. They succeed because the videos consistently give viewers a reason to click, keep watching, and return for more.