So, you're in the middle of an important Zoom meeting, and suddenly, the video starts pixelating, the audio becomes choppy, and you can't help but wonder if you're stuck in a low-budget horror film. We've all been there. With the rise of remote work and virtual meetings, Zoom has become an indispensable tool for many of us. However, it's not uncommon to encounter issues with video quality, from pixelation to blurriness to lag.
But fear not! In this complete guide, we'll walk you through various methods to improve your Zoom video quality and ensure that you can make the most out of your virtual meetings.
Optimize Zoom App Settings
#1. Enable HD Video in Zoom
HD video in Zoom refers to high-definition video quality that allows for clearer and more detailed visuals during video calls. With HD video, you can see your colleagues, friends, and family members with greater clarity, making your Zoom meetings more engaging and enjoyable.
Here are the prerequisites and limitations of this feature:
- Account Type: To enable HD video in Zoom, you need to have a Pro, Business, Education, or Enterprise account. Unfortunately, the free Basic account does not support HD video.
- Number of Participants: HD video is available for meetings with up to 100 participants. If you have more participants, the video quality may be automatically adjusted to maintain a smooth call.
- Internet Speed: A stable internet connection is crucial for HD video. Zoom recommends a minimum bandwidth of 1.5 Mbps for both upload and download. For the best experience, a higher bandwidth is recommended.
- Device Compatibility: HD video is supported on most devices, including Windows, Mac, iOS, and Android. However, older devices may not support HD video due to hardware limitations.
Now that you know the prerequisites and limitations, let's get into the steps to enable HD video in Zoom for different platforms:
On Windows, Mac, and Linux:
- Open the Zoom desktop client on your computer.
- Sign in to your Zoom account.
- Click on the "Settings" icon in the top right corner of the window.
- In the settings menu, click on "Video & effects" in the left sidebar.
- Click the Camera tab.
- Toggle the "Enable HD" option to enable HD Video.
On Android and iOS:
- Open the Zoom app on your device.
- Sign in to your Zoom account.
- Tap More in the bottom right corner of the screen.
- Tap Settings > Meetings.
- Toggle the "HD video" option to enable or disable it.
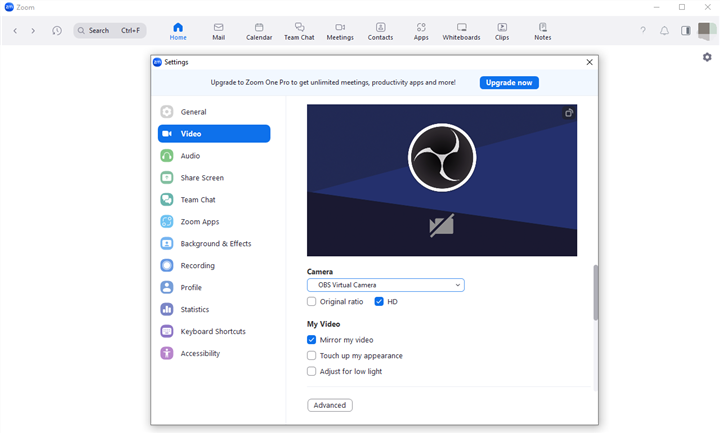
#2. Adjust for Low Light and Portrait Lighting
Zoom offers lighting settings to improve video brightness and quality. You can adjust Low Light and Portrait Lighting to improve your video quality in Zoom. Here's how.
- Open and sign in to the Zoom app.
- Click your profile picture.
- Go to Settings > Video & effects > Camera.
- Toggle the Portrait lighting and the Adjust for low light options to improve video quality.
Note: The Adjust for low light setting is not available on the Zoom mobile app for Android or iOS.
#3. Touch Up My Appearance
Touch up my appearance is a filter within Zoom that makes you look a little softer, less grainy, and overall, a bit smoother. To use it:
- Open and sign in to the Zoom app.
- Click your profile picture.
- Go to Settings > Video & effects > Camera.
- Toggle the Touch up my appearance option to enable or disable it.
- Drag the slider to adjust the filter strength.
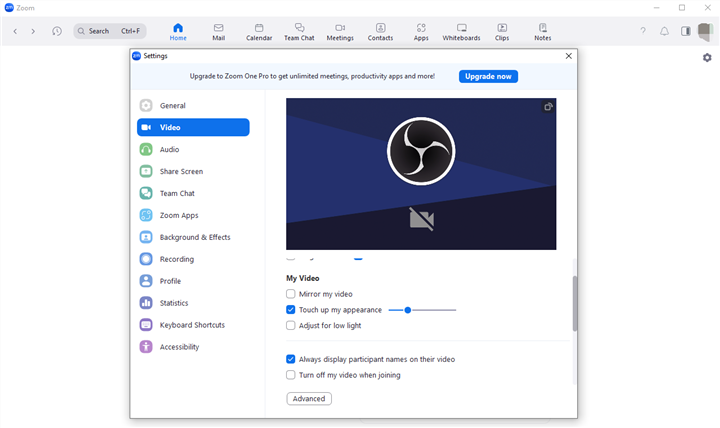
Note: While the "Touch Up My Appearance" feature can help smooth out your skin tone, it may also impact video quality. Use this feature sparingly or disable it if you notice a decrease in video quality.
Optimize Your Environment for Better Zoom Video Quality
Another one of the key factors that can greatly impact the overall video quality on Zoom is the lighting and background setup. In this section, we'll explore how lighting and background can affect video quality and provide some general guidelines on how to choose and set up the best lighting and background for Zoom meetings.
#1. Lighting
Natural light is generally the most flattering and provides a more balanced illumination. Position yourself facing a window or a natural light source to achieve a soft and even lighting effect.
If natural light is not available or insufficient, you can use artificial lighting sources, such as lamps or ring lights with a white or neutral-colored shade. If you prefer a more diffused lighting setup, softbox lights can offer a professional touch.
Place the light source in front of you rather than behind you, slightly above eye level, to minimize shadows and create a more flattering appearance. A light source located behind you may cause silhouetting and make it difficult for others to see your facial expressions.
You can even place a sheet of white paper or a reflective surface, such as a mirror or aluminum foil, opposite the light source to bounce the light back onto your face and reduce shadows.
#2. Background
Choose a plain or professional background that is free from clutter. A solid-colored wall or a neatly arranged bookshelf can work well as a background. Choose a color that complements your skin tone and doesn't clash with your clothing.
If you don't have a suitable background, you can use virtual backgrounds provided by Zoom. Ensure that you have a solid-colored wall or a green screen behind you to achieve the best results.
Also please ensure that the background is not too busy or distracting. Avoid patterns, bright colors, or items that draw attention away from you. Besides, pay attention to the framing and composition of your shot. Place yourself in the center of the frame and ensure that the background is well-balanced and visually appealing.
Note: Virtual backgrounds can sometimes impact video quality. If you notice a decrease in video quality, try disabling virtual backgrounds.
Optimize Your Hardware for Better Zoom Video Quality
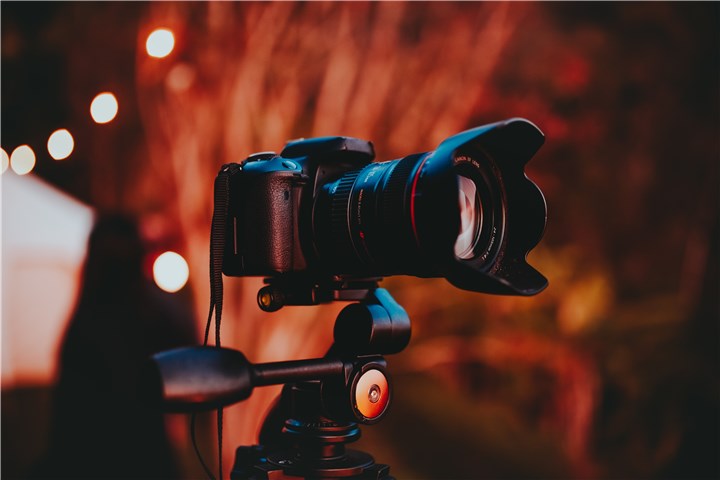
#1. External webcams
If the built-in camera on your device doesn't offer the desired video quality, consider investing in an external webcam. Logitech C920 and Razer Kiyo are popular options known for their high-resolution video capabilities. For professional-grade video quality, you can connect your DSLR or mirrorless camera to your computer using a capture card or HDMI-to-USB adapter. This allows you to leverage the superior image quality and depth of field control that these cameras offer.
#2. Tripods
Keeping your camera steady during video calls is essential for a professional look. Compact desktop tripods like the Joby GorillaPod or Manfrotto PIXI are versatile options that allow for easy positioning and stability. If you're using a DSLR or mirrorless camera, a floor tripod like the Manfrotto Befree Advanced or Benro Mach3 Series can provide added stability and flexibility.
#3. Microphones
While most laptops and webcams have built-in microphones, they may not provide the best audio quality. USB microphones like the Blue Yeti or Audio-Technica ATR2100x offer superior sound clarity and reduce background noise. For a more discreet setup, lavalier microphones can be clipped onto your clothing for clear audio capture. The Rode SmartLav+ and Audio-Technica ATR3350xiS are reliable options.
Bonus Tip: How to Troubleshoot Zoom Video Quality Issues
#1. Check Your Internet Connection
One of the primary culprits for poor Zoom video quality is a weak internet connection. If your internet is slow or unstable, it can lead to pixelated video, audio glitches, and overall poor meeting quality. To check your internet speed, you can use online tools like Ookla's Speedtest or Fast.com. Ideally, you should have a download speed of at least 1.5 Mbps and an upload speed of at least 1.5 Mbps for a smooth Zoom experience.
If your internet speed is below the recommended threshold, try the following:
- Move closer to your Wi-Fi router.
- Use an ethernet connection for a more stable internet connection.
- Pause any downloads or uploads that might be hogging your bandwidth.
- Disconnect other devices from your network to reduce network congestion.
#2. Close Other Applications and Background Processes
Running multiple applications simultaneously can strain your device's performance and impact Zoom's video quality. If you notice laggy video or audio during your Zoom meetings, try closing unnecessary applications and background processes to free up system resources. This will help Zoom run more smoothly and improve video quality.
To close applications and background processes:
- On Windows: Press Ctrl + Shift + Esc to open the Task Manager. Select the applications or processes you want to close and click "End Task."
- On macOS: Press Command + Option + Esc to open the Force Quit Applications window. Select the applications you want to close and click "Force Quit."
#3. Update Zoom and Device Software
Outdated software can lead to compatibility issues and affect Zoom's video quality. To ensure optimal performance, make sure both Zoom and your device's software are up to date.
To update Zoom: Open the Zoom desktop application. Click on your profile picture and select "Check for Updates."
To update your device's software:
- On Windows: Go to Settings > Update & Security > Windows Update and click "Check for Updates."
- On macOS: Click on the Apple menu > System Preferences > Software Update and click "Check for Updates."
Conclusion
By following the tips and methods outlined in this complete guide, you can significantly improve your Zoom video quality and enhance your virtual meeting experience. From enabling HD video to optimizing lighting and background, every little adjustment can make a big difference. Remember, video quality is not solely dependent on Zoom itself but also on factors like your device, internet connection, and external hardware. So, experiment, tweak, and find the setup that works best for you.


