OBS, Open Broadcaster Software, is an open-source video recording and live streaming program. It has gained immense popularity among gamers and streamers over the past decade. Even today, many users new to recording and live streaming will wonder how to use OBS to record screen. Maybe it's far from the most user-friendly software. But it's probably one of the best MP4 recorders by flexibility or power.
Despite the steep learning curve, OBS's functionality and versatility justify the initial setup efforts. So here in this article, we will show you how to record screen with OBS in different usage scenarios. Let's get started.
How to Record Screen with OBS Windows 10
OBS is widely compatible with most operating systems, including Windows 10 and 11. So if you are running on Windows 10, you are good to go. For earlier versions of Windows OS, you may need to download an earlier OBS Studio release. Follow the steps below to record screen with OBS on Windows 10.
- Download and install OBS from the official website.
- Open the software.
- Go to the Scenes section in the lower left corner of the interface, and click the + icon to add a new Scene.
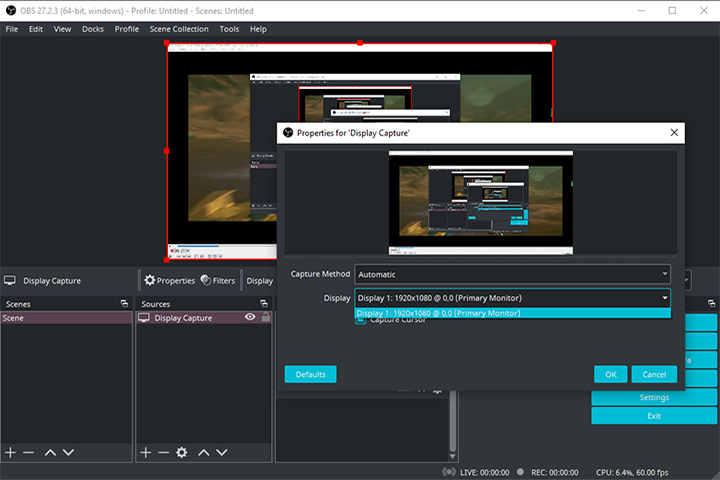
- Hover to the Sources box and click the + button. Then select Display Capture from the list to record your screen.
- Click OK in the pop-out window.
- Select the right display from the Display drop-down list if you are using multiple displays. Then click OK to finish the settings.
- Now you can click the Start Recording button to record screen with OBS.
How to Screen Record on Mac with OBS
Much like with Windows, OBS is also quite simple to use on Mac. Follow the steps below to record your Mac screen using OBS.
- Install OBS Studio from the official OBS Studio website.
- Open OBS and navigate to the Sources section. Click + to add a new Scene.
- Go to the Sources box.
- Click the + icon, then select Display Capture.
- Set properties like Capture Method and Display. Then click OK to complete the settings.
- Click the Start Recording button to let OBS record screen.
How to Screen Record on OBS with Audio
Using OBS record screen and audio is a common requirement. OBS can also record audio. The only thing you need to do is to set up open broadcaster software correctly. Otherwise, you may face the problem of OBS not capturing game audio, etc. Here are the steps on how to screen record on OBS with audio.
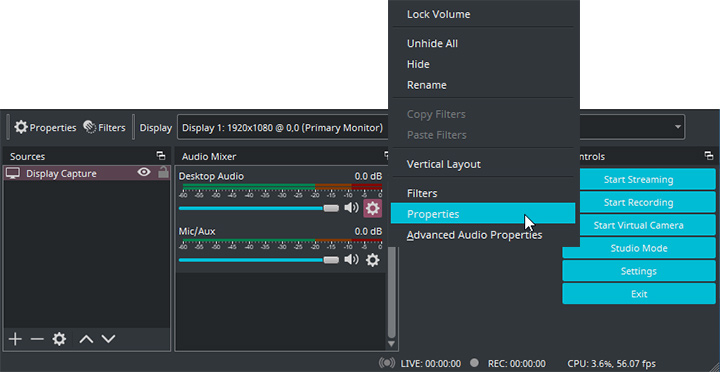
- Open OBS and go to the Audio Mixer section.
- OBS automatically enables both desktop audio and mic audio.
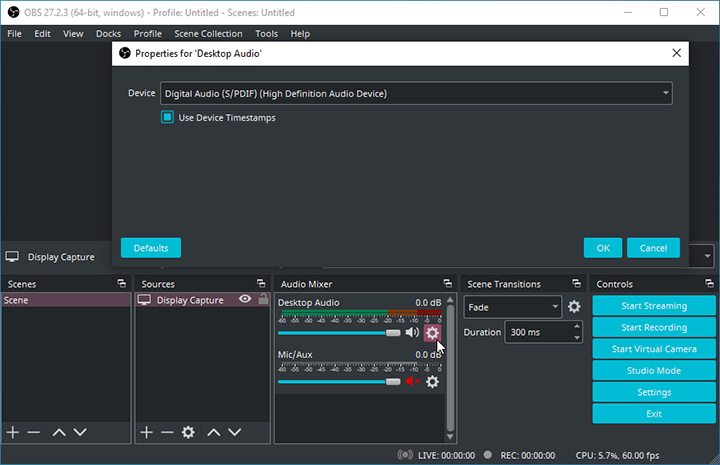
- Click the gear icon, then select Properties from the drop-down list.
- Set the corresponding audio device, and choose whether to use the device timestamp. Then click OK to confirm.
- Adjust the volume according to your needs.
- Click Start Recording to record audio on OBS with audio.
How to Record Desktop Audio OBS
Capturing desktop audio involves a few additional settings. There are several ways to do that. Please follow the steps below to record desktop audio with OBS.
- Head to the Audio Mixer section on the interface.
- OBS automatically enables both desktop audio and sound from your microphone.
- Click the gear icon under Desktop Audio, then select Properties.
- Select the corresponding desktop audio device.
- Click OK to save the changes.
- Mute the microphone volume to keep only the desktop audio.
- Click Start Recording.
How to Record Camera and Screen Separately OBS
Many YouTubers tend to record the gameplay and the camera separately for flexible further editing. This requires a few more steps, but it's highly valuable for those wanting different angles or views. Follow the steps below to record camera and screen separately with OBS.
- Open OBS.
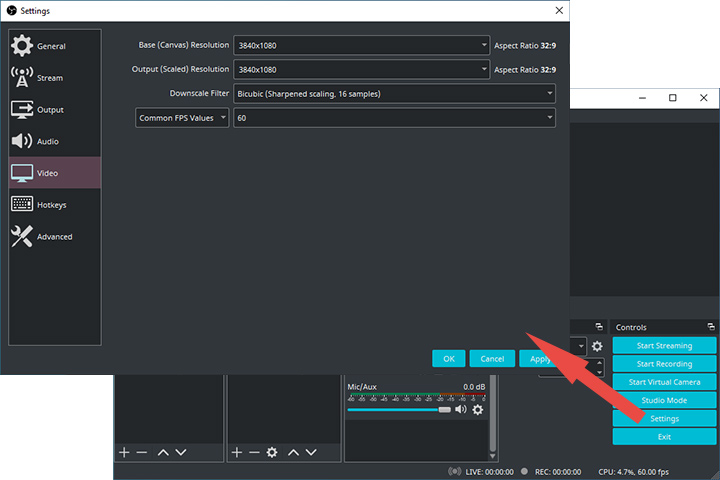
- Go to Settings > Video from the menu bar.
- Set Base Resolution and Output Resolution to twice the width of your screen. For example, set the recording resolution to 3840x1080 for a 1920x1080 screen.
- Go to Settings > Output, and set the Output Mode as Advanced.
- Set Rate Control as CBR and set Recording Format as MP4 in OBS. Click Apply then OK to save the settings.
- Click the + icon of the Sources box, then add a Video Capture Device. Set the Resolution as 1920x1080.
- Add a Game Capture Source in the same way and set the resolution as 1920x1080. Now you get two full screen images side by side.
- Click the Start Recording button to record camera and screen separately.
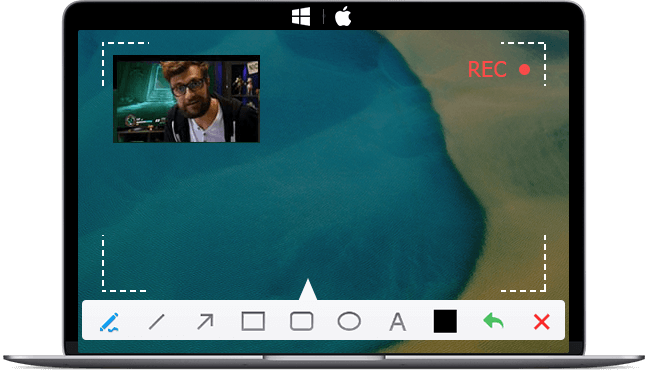
OBS Alternative
Although OBS is powerful, many novice users may find OBS overwhelming and lost in all its features. It's okay if you are not a big fan of OBS. There are so many recorders out there in the market. VideoProc Converter AI can be one of the best OBS alternatives if you only want recording features other than streaming.
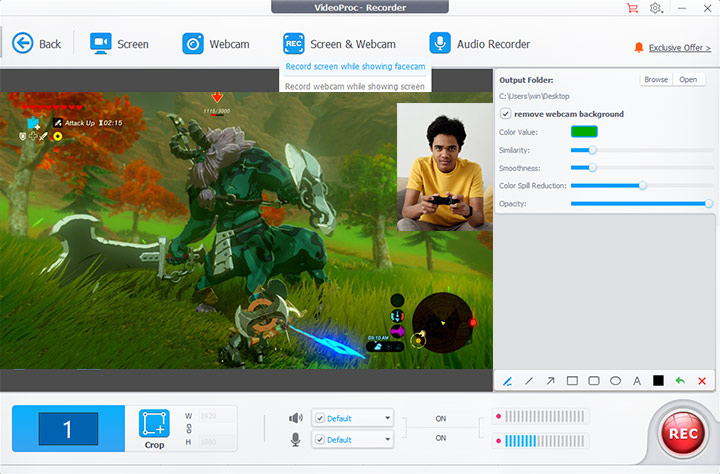
VideoProc Converter AI is much simpler to use than OBS right out of the box. It's beginner-friendly, with no complicated settings or setup procedures required. Also, it comes with no recording time limit. With VideoProc Converter AI, you can record your screen in high definition and popular formats like MP4, MKV, and MOV, ensuring high-quality results.
The software also boasts flexible recording options. You can record your desktop with or without voiceover, from a webcam, or both in PiP mode. It even supports the chroma key to remove backgrounds. Moreover, VideoProc Converter AI offers handy utility tools. You can draw, highlight content, add text, and more during the recording process. It's an excellent choice for educational, gaming, and commercial use.


