Get Started Editing
Edit Image with Effects & Filters
Using VideoProc Vlogger filters, you can make the image with quake, cinematic, aged effects, and more. It presets 50 beautiful filters. Thus, whether your target is correcting the color for your portrait photos or stylish a personalized opening credit for your YouTube channel, you're able to find the desired filter to improve your images.
Let's download, install and run VideoProc Vlogger. Follow the steps below to edit images with filters.
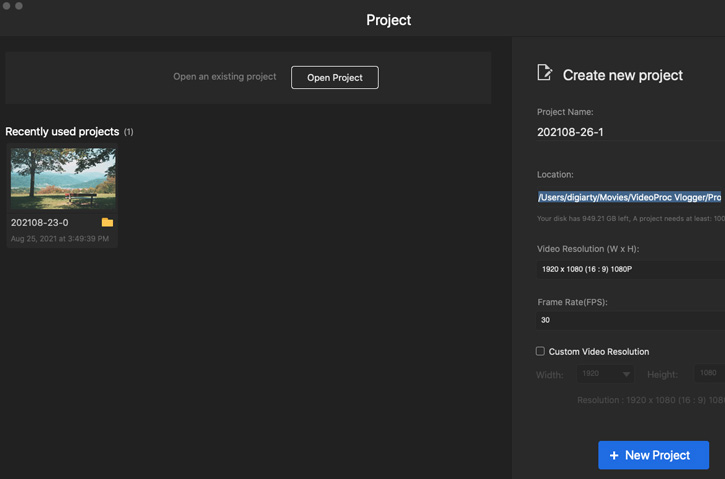
Step 1Create a new project
Launch up VideoProc Vlogger. Complete the general settings to create a new project. After that, drag the image files from the local disc to the Media Library of VideoProc Vlogger.
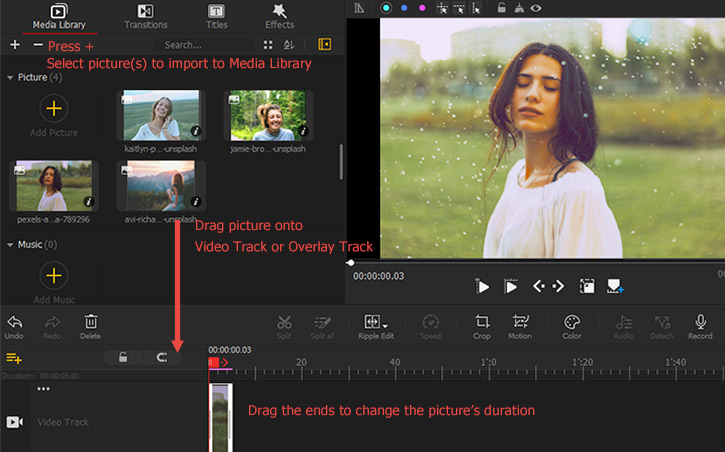
Step 2Add picture to Timeline
Drag the image file onto Video Track or Overlay Track. You can decrease or increase the image duration in the timeline by just dragging its end left or right.
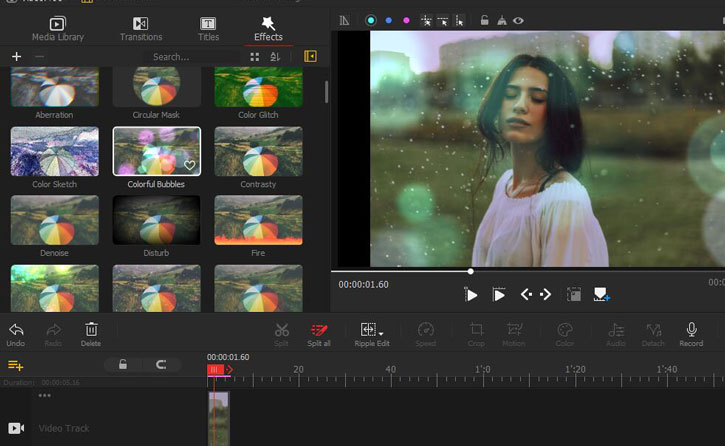
Step 3Add the loved effects and filters
Choose the Effects menu above Media Library and find Effects & Filters. VideoProc Vlogger provides users with 50 filters, including Wave, 3 Vertical Color, Time, Split Picture, and more. Choose the filter that you want and drag it onto Effect Track. You can add multiple effects to one picture.
 Editing Tips
- Move the picture left or right on Overlay Track to adjust its start and end time.
- Drag its end to change the duration and the end time.
- You can also come over to the Inspector Panel located on the right side of the preview window, hit Duration, move the slider of Start Time, End Time, and Duration.
- If necessary, go to the Inspector panel > Properties menu to find a bunch of options to do more customization to the filter.
- After its being customized, you can click the heart-live icon to add it to your favorite folder. So you can fast apply that filter with the customized properties next time.
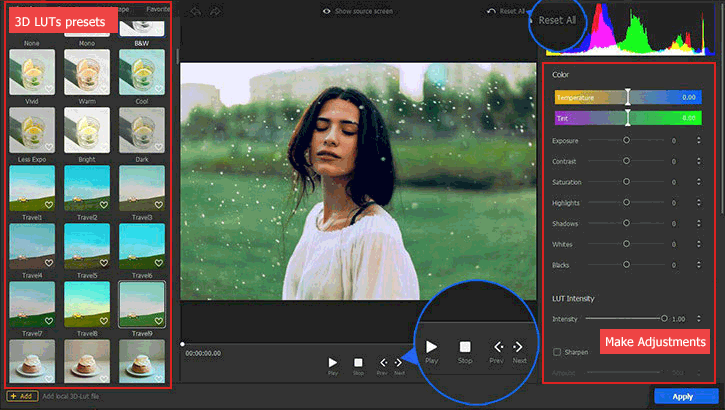
Step 4Correct the image color with 3D LUTs
Select the clip on the timeline. Go to the right Inspector panel to locate Color & Filter Editor. Click on this to open up the Color & Filter Editor panel. Herein, you can apply color grading with tons of stylish LUTs presets. Press Apply to confirm the changes.
Step 5Save the picture
Hit the camera button on the top right of the preview window to save the picture that you've applied with the loved filters on your local disc.
Related Guides
For more guides of VideoProc Vlogger, please visit this page >
If you have any question, please email us or visit ![]()
![]()
![]()
Is this page helpful?
