In-page Navigation
Introduction to VideoProc Vlogger Interface
VideoProc Vlogger is the next-gen video editing software aiming to assist beginners, semi-pros, and pros to make stunning videos with ease. On its intuitive interface, you can quickly get to know how to use it and start editing regardless of the editing skills.
Let's download, install, and run VideoProc Vlogger. And get to know the main features of its interface with the following introdution.
Watch video to get to know the interface of VideoProc Vlogger, or read text instructions below.
When you launch VideoProc Vlogger for the first time, a window will pop up to check your hardware info so to enable hardware acceleration to speed up the video editing process while guaranteeing smooth and stable performance even on low-end computers. Next, it'll ask you to create a new project and customize the file name, directory, and resolution settings.
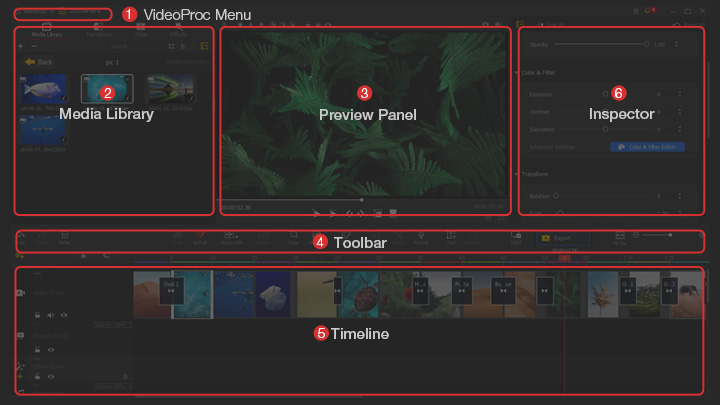
Then you come to the main interface. It is efficient, intuitive, and easy to manage according to your editing habits, such as editing videos on multiple screens and magnifying a certain panel by dragging its borders.
The interface is composed of 6 main panels that are introduced one by one in the following parts.
- VideoProc Vlogger Menus
- Media Library
- Preview Panel
- Toolbar
- Timeline
- Inspector
1. VideoProc Vlogger Menus
The app menus at the top of the screen aid you in accessing some commonly used features as follows:
VideoProc Vlogger: It offers all basic information about this software, updates, registration, services, preference settings, and a list of keyboard shortcuts for efficient work.

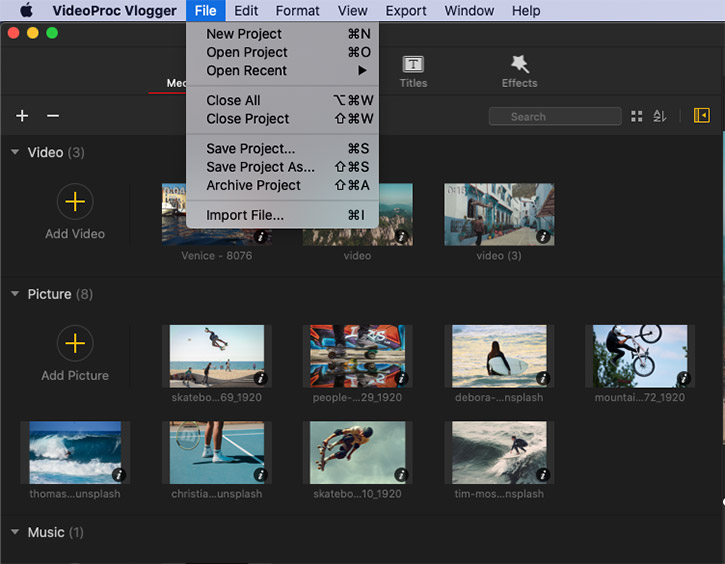
File: It is about project management – creating, opening, closing, and saving projects, archiving the current project together with media files, and importing media files to it.
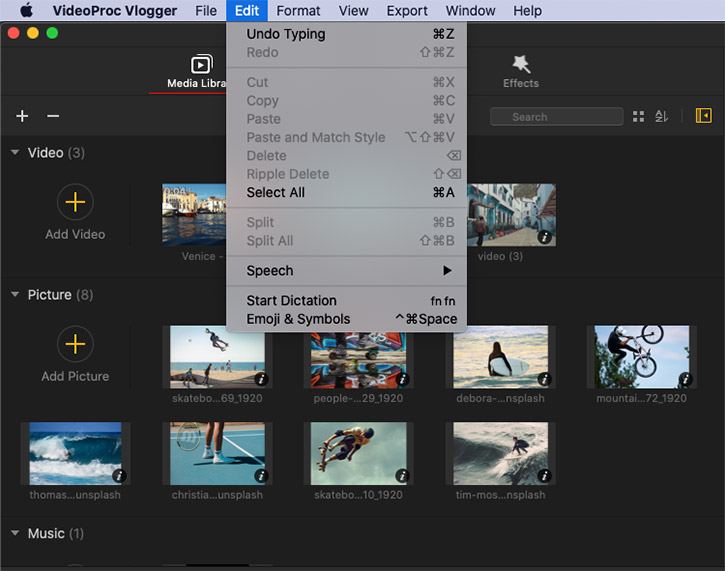
Edit: It lets you undo, redo, cut, split, delete, copy, and past. These features can be quickly accessed in Toolbar and Timeline, too.
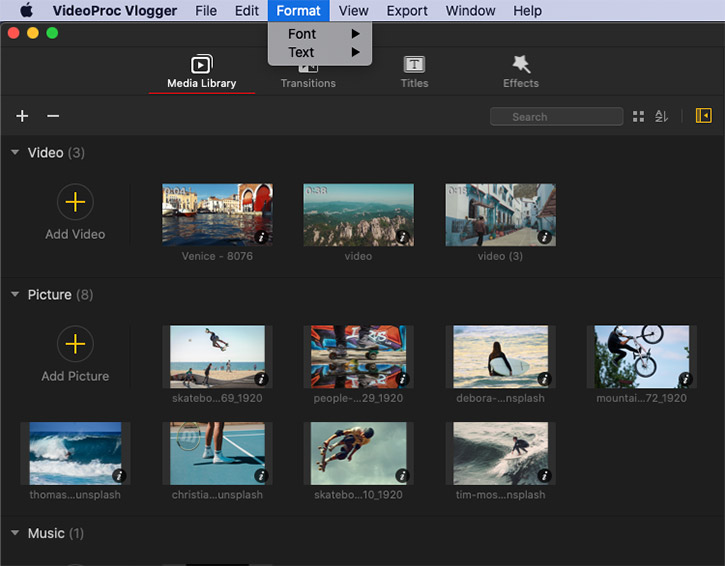
Format: It enables you to change font and text on your system.
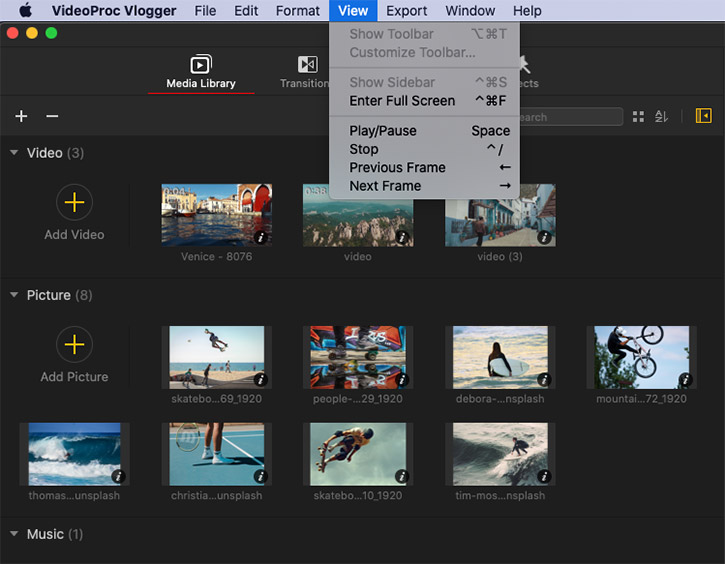
View: It controls the toolbar, sidebar, and playback of media in this software.
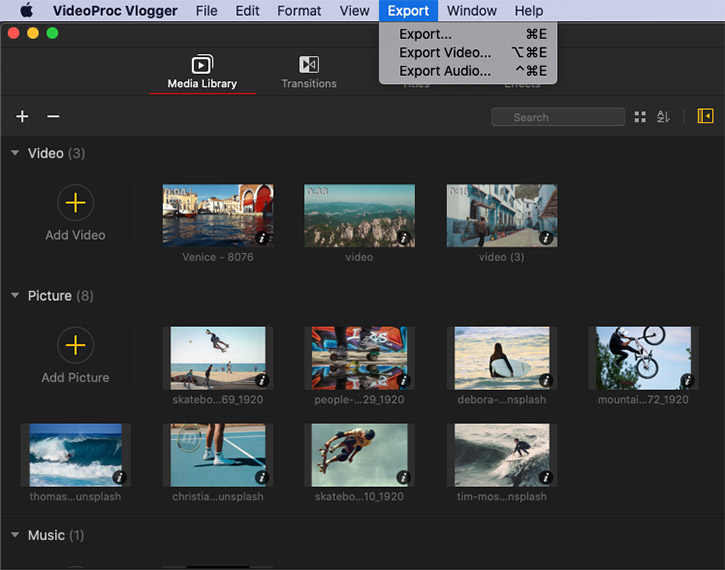
Export: When you finish editing, you can click this option and choose to export the project, video, or audio only.
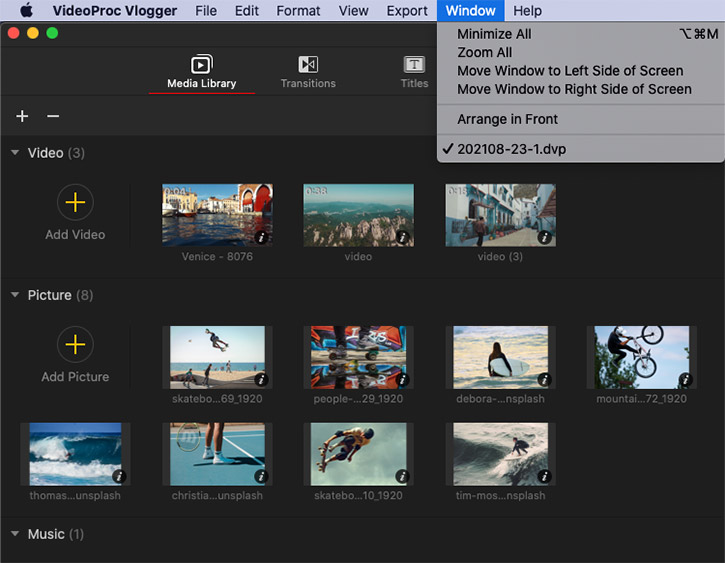
Window: It allows you to minimize, zoom, and move the entire window of VideoProc Vlogger. Also, it shows the current project name and you can switch to the Finder menu via this option..
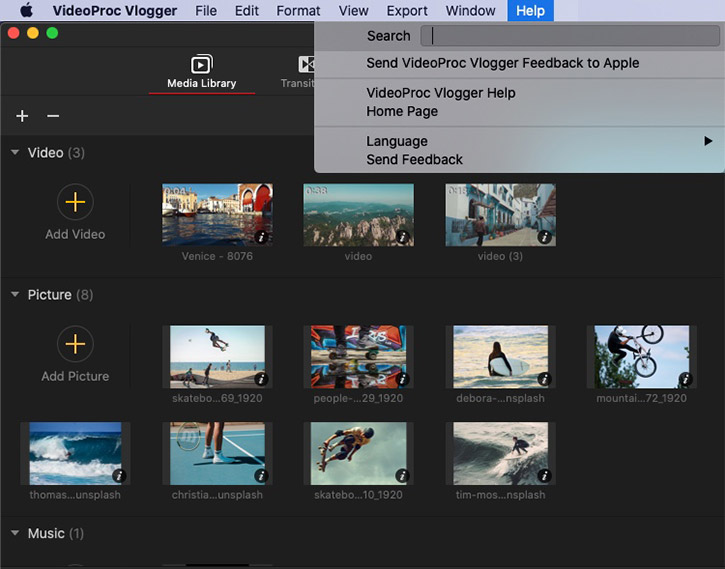
Help: It gets you to the full user guide, sends feedback, opens the homepage, and changes language in this software. And this menu also contains the macOS Help.
2. Media Library
The Media Library is a media management tool under the project menu. You can import various media files from your computer or external devices to this panel. In addition, you can easily locate, browse and preview your imported files.
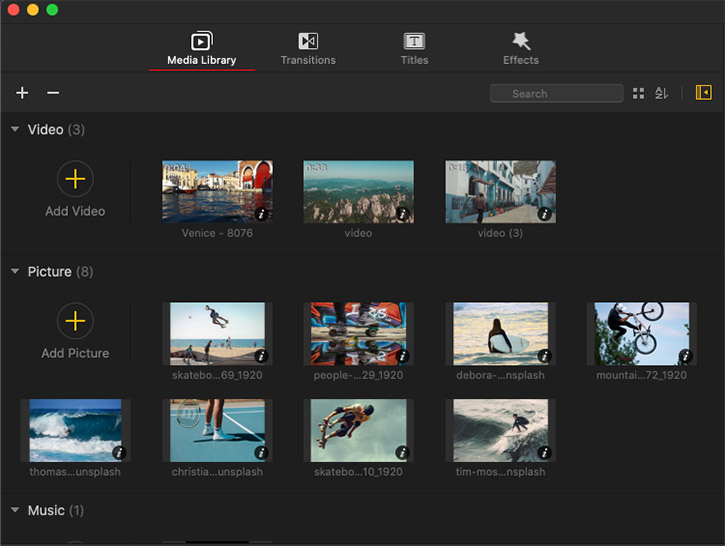
Types of Media You Can Import
You can import videos, audios, images, subtitles, and these files in folders to Media Library.
VideoProc Vlogger natively supports almost all mainstream formats and codecs for video (MP4, MKV, MOV, AVI, WMV, 3D, VR, H.264, HEVC, VP9, AV1, etc.), audio (MP3, AAC, M4A, etc.), image (HEIC/HEIF, JPG, PNG, GIF, etc.), and subtitles (SRT, ASS, LRC, etc.). For more details, please visit the official specs page.
And it has been remarkably optimized for better supports of videos from the latest DSLRs, action cameras, and drones, thus empowers you to import and edit videos of 4K 60fps/120fps or 10bit HDR without any error, lagging, or freezing.
Locate and Browse
Under the Media Library panel lay 3 options – Video, Picture, and Music. You can hit the triangle icon before each option to hide and expand all media files you've imported.
To locate or browse files, you can scroll down the panel or input the file name in the search box right above.
Right-click on the file, and you are allowed to play it in the preview panel and check its media information.
Preset Materials
In addition to local files, you can find a wide variety of preset titles, effects, and transitions next to the Media Library panel. The VideoProc Vlogger team is working on enriching the preset libraries, and shortly, you can access more cinematic and stylish effects, titles, and transitions.
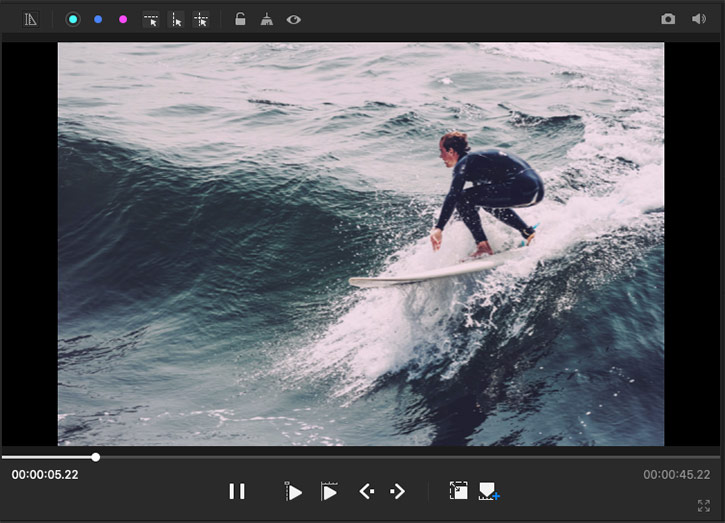
3. Preview Panel
The preview panel is placed at the center of the main interface. It helps you monitor editing results on the timeline in real-time and preview source files on the media library.
The preview area is designed with many handy tools, for instance, frame by frame preview, full screen preview, preview with marks, etc. For more details, please visit the preview panel intro page.
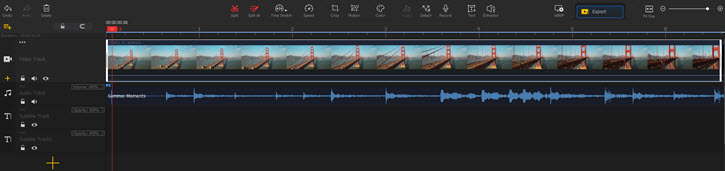
4. Toolbar
The toolbar is located between the preview panel and the timeline. It consists of a full set of editing tools including:

Split: To cut a video into two parts. While the Split all option beside it is to cut clips at the current time in all tracks.
Ripple Edit: To trim a video clip on the main video track and close gaps between trimmed clips automatically.
Time Stretch: To change the duration of a video by adjusting the speed at a constant rate to compensate.
Speed: To open the Speed Editor panel where you can speed up a clip, create a speed ramp, and more.
Crop: To open the Crop panel in which you can crop clips at different aspect ratios.
Motion: To open the Motion Editor panel in which you can re-design the camera movement by motion crop.
Color: To open the Color Editor panel in which you can apply filters, correct colors, and add 3D LUTs.
Audio: To open the Audio Editor panel after selecting an audio clip on the timeline. It lets you adjust volume, remove background noise, adjust audio speed, apply audio filters, equalizers, and beat analyzer, etc.
Detach: To separate audio from a video clip on the main video track.
Record: To record voiceover from an audio device and save in the media library.
Text: To open the Text Inspector panel beside the preview area. You can change the content, size, font, color, space, and text duration.
Extractor: To extract the soundtrack from the video in MP3 format for convenient conversion from audio to text.
5. Timeline
The timeline is at the bottom portion of the interface. It offers an overview of all tracks for video, audio, overlay, effect, and subtitle. You can add 999+ tracks to the timeline and zoom in/out on the timeline to preview clips frame by frame.
It also has been packed with tools to apply playback, split, mute, and rearrange clips in a few clicks. For more details, please visit the timeline introduction page.
6. Inspector
Inspector is on the right side of the preview panel. It shows the media info of a clip you selected on the timeline. And it provides multiple edits you can apply to varied elements on the timeline:
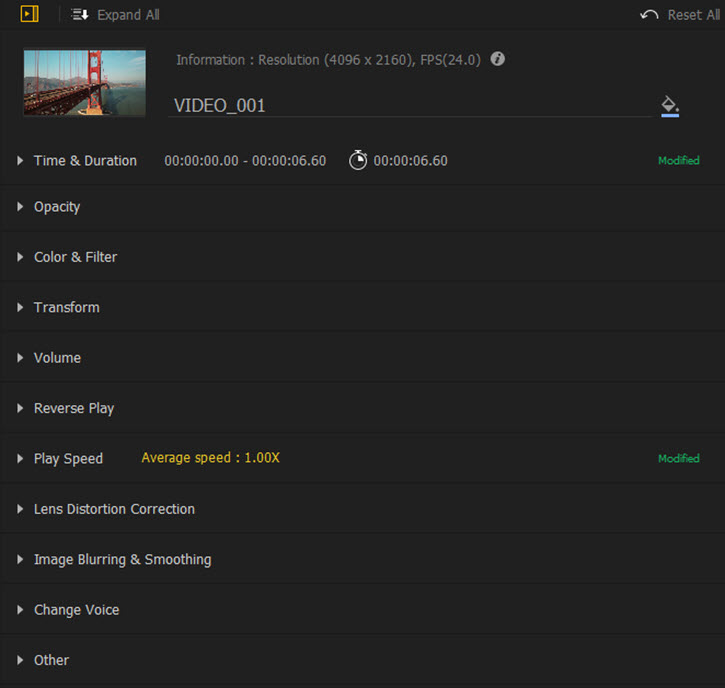
Video Track: Time & duration, opacity, color & filter, transform, volume, reverse play, play speed, lens distortion correction, image blurring & smoothing pitch, change voice, and others.
Audio Track: Time & duration, volume, reverse play, audio editor entry, and change voice.
Overlay Track: Time & duration, opacity, color & filter, fade and move, transform, reverse play, play speed, lens distortion correction, image blurring & smoothing, chroma key, compositing, and others.
Effect Track: Time & duration, properties, and scope.
Subtitle Track: Time & duration, text editor entry, and text properties.
Now free download and install VideoProc Vlogger to edit videos quickly with its intuitive interface.
Related Guides:
- > Create New Project
- > Using Timeline in VideoProc Vlogger
- > Introduction to Preference Settings
- > Introduction to Hardware Acceleration in VideoProc Vlogger
- > Import Media in VideoProc Vlogger
- > Preview Project in VideoProc Vlogger
- > Create a Video Quickly with VideoProc Vlogger in 5 Minutes
For more guides of VideoProc Vlogger, please visit this page >
If you have any question, please email us or visit ![]()
![]()
![]()
Is this page helpful?
