
Wonder how to optimize images for website? You've come to the right place. In web development and search engine optimization, unoptimized images are one of the most common causes of slow-loading websites. In many real-world cases, images account for around 60%–70% of a webpage's total file size. When they are not properly optimized, they can significantly slow down page performance, especially on mobile devices, and negatively impact user experience.
This also affects key performance metrics such as Core Web Vitals, including Largest Contentful Paint (LCP) and Cumulative Layout Shift (CLS), which are used by search engines to evaluate page quality. To make matters more challenging, modern high-resolution screens such as Retina and 4K displays require images to be both sharp and properly optimized, or they may appear blurry or pixelated. This guide will walk you through a step-by-step process to optimize images for the website, improving performance, visual quality, and SEO.
Why Should You Optimize Images for Website
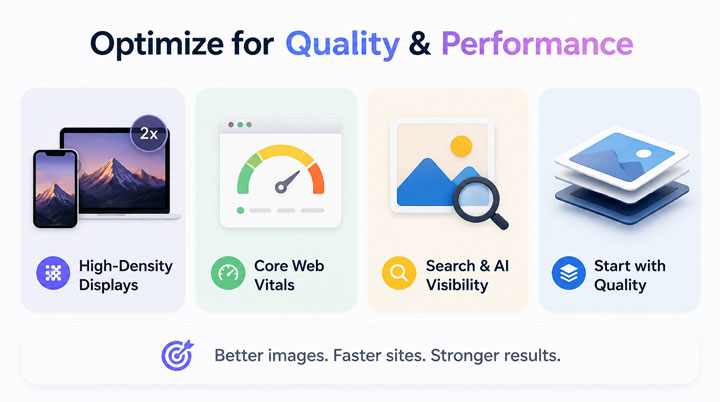
Image optimization used to be relatively simple: resize the image, compress it in Photoshop or a similar tool, and upload it as a JPEG. However, modern websites introduce new challenges that make image optimization more important and complex than before. Today, images need to balance several things at once:
- Fast loading speed
- Sharp visuals on high-resolution displays
- Stable page layout and Core Web Vitals
- Search visibility in Google Images and AI-powered search systems
1. High-Density Displays
Standard monitors typically display images at around 72–96 PPI. Today's devices, including smartphones, laptops, and 4K displays, often use double or triple pixel density (@2x or @3x screens). If images are not properly prepared for these displays, they may appear blurry or pixelated when scaled.
2. Core Web Vitals
Google evaluates page experience using Core Web Vitals, which include performance and visual stability metrics.
Largest Contentful Paint (LCP): measures how quickly the main content (often a large image) becomes visible. Unoptimized images can delay this significantly.
Cumulative Layout Shift (CLS): measures unexpected layout movement. Images without defined dimensions can cause content to shift as they load.
3. The Role of Images in Search and AI
Images are also indexed content. Google Images contributes a significant portion of search traffic, and modern AI-driven search tools rely on image context, file metadata, and surrounding text to interpret visual content.
4. Source Image Quality Matters
Before focusing on compression or file formats, it is important to start with a high-quality source image. Image compression cannot fully fix a blurry or low-resolution image. In many cases, it makes imperfections more visible. Similarly, low-resolution images often appear pixelated when displayed on high-DPI screens.
Step 1. Optimzie Images to 8K/10K Clarity with AI
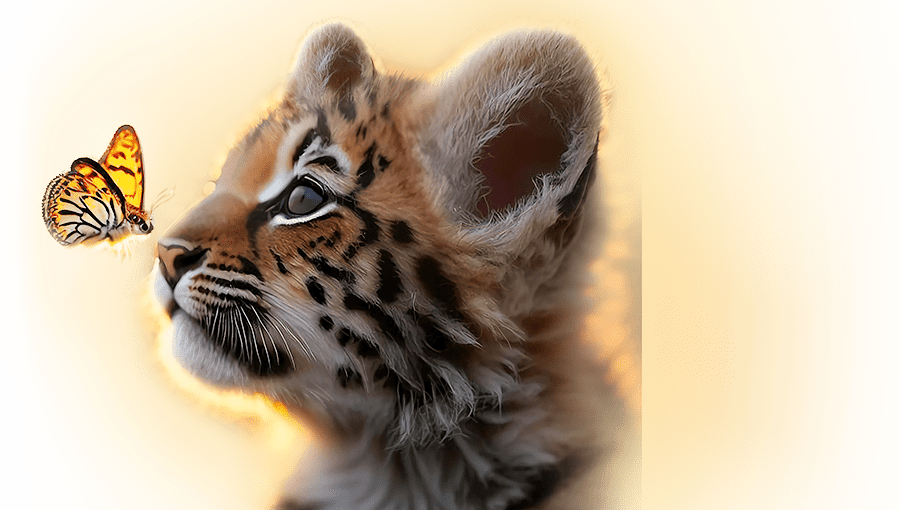
A simple rule in web development is: garbage in, garbage out. If the original image is blurry, noisy, or low-resolution, no amount of compression or resizing will fully fix it. In fact, it often makes the flaws even more visible. Asides, modern websites also need to support high-resolution screens such as Retina and 4K displays. If an image is too small, it will be stretched, which makes it look soft or pixelated. That's why the first step is always the same: start with a clean, high-quality image before doing any web optimization.
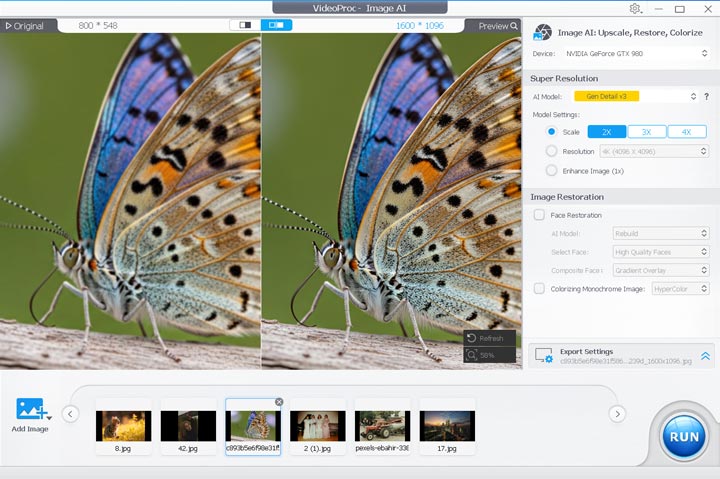
The problme is, in real-world cases, source images are not always ideal. You may have low-resolution stock photos, compressed assets, or images with visible noise and artifacts. In such cases, you can optionally use an AI image enhancement tool to improve image quality before resizing and compression. Below I share how to enhance image quality using VideoProc Converter AI, which is one of the best photo enhancer that can help upscale images and reduce common issues such as noise, compression artifacts, and pixelation, while preserving as much detail as possible.
1) Download, install, and run VideoProc Converter AI. Click Image AI to access the image upscaling and enhancing feature. Drag your image(s) to the program from the computer.


2) Choose the AI model for enhancing image quality. Select 2X, 3X, or 4X upscaling depending on how much resolution you need. For example, a 1000 x 1000 image upscaled at 4X becomes a 4000×4000 image (16MP).
Tips:
- For most photos, Gen Detail v3 and Real Smooth v3 are two of the most recommended models.
- You can scroll your mouse wheel to zoom into the preview window and inspect the enhanced details more clearly.
3) Choose PNG as the target image format. Keep the Image Quality at 100%. Hit RUN. Once you have exported the high-resolution, artifact-free source file, you can safely apply web-centric resizing and compression techniques. The result is a highly compressed file that maintains its visual clarity.
Step 2. Save or Convert Images to Modern Web-Friendly Formats
Choosing the right file format is one of the most important steps in image optimization because it directly affects file size, loading speed, and visual quality.
Most professional design and editing tools such as Photoshop, Figma, Sketch, and Lightroom already support exporting images into modern web formats, including WebP and (in newer versions) AVIF. This means you usually do not need special tools to generate web-optimized files.
If you are working with older image assets or formats that are not ideal for the web (such as TIFF, BMP, or uncompressed PNG files), you can convert them into modern formats during export or using a conversion tool.
What Are Most Recommoneded Image Formats for Website
1. WebP: It's currently the safest modern format for most websites. It is supported by nearly all browsers and design tools, and provides significantly smaller file sizes compared to JPEG and PNG without noticeable quality loss. For most workflows, WebP is a good default choice when exporting images for the web.
2. AVIF: It's a newer format that provides even better compression than WebP. AVIF is especially useful for image-heavy websites or pages where performance is critical. However, because AVIF encoding is more resource-intensive and not supported in every workflow tool by default, it is often used as an advanced option rather than the primary export format.
| Format | Transparency | Animation | Target Compression | Best Use Case | Browser Support |
|---|---|---|---|---|---|
JPEG |
No |
No |
Baseline |
Complex, colorful photographs |
Universal (100%) |
PNG |
Yes |
No |
20% to 50% larger |
Simple graphics, logos, sharp text |
Universal (100%) |
WebP |
Yes |
Yes |
25% to 35% smaller |
Default for most web images |
Universal (~96%) |
AVIF |
Yes |
Yes |
45% to 55% smaller |
Hero banners, high-color photos |
High (~94%) |
SVG |
Yes |
No |
N/A (Vector) |
Icons, logos, flat illustrations |
Universal (100%) |
- If you are exporting from a design tool like Photoshop, Figma, or Sketch, choose WebP or AVIF directly in the export settings.
- If your workflow includes AI-based image enhancement tools, export the result as PNG or JPEG if modern formats are not supported, and convert it into WebP or AVIF in the next step.
- For images from cameras, smartphones, or files shared by others, formats like JPEG, PNG, or HEIC are common. If needed, you can convert them into WebP or AVIF before uploading.
Step 3. Optimize Image Size for the Web
Regardless of the source of your image, whether it comes from a camera, a design tool, a stock library, or has been enhanced in a previous step, you should always optimize its physical dimensions before uploading it to the web.
1) Resize the Physical Dimensions
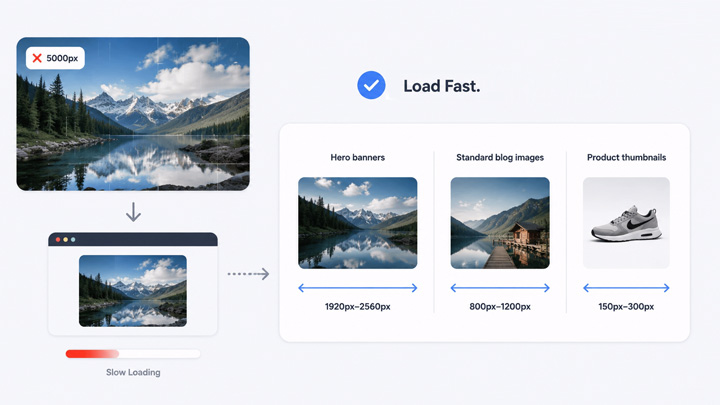
Do not upload full-size camera files or unnecessarily large images to your website. If your layout only displays images at 1200px width, uploading a 5000px image is inefficient. The browser will still need to download the full file and then scale it down, which increases load time and wastes bandwidth.
Recommended size guidelines:
- Hero banners: 1920px–2560px wide
- Standard blog images: 800px–1200px wide
- Product thumbnails: 150px–300px wide
2) Compress the Image File Size
Image compression means making the file smaller so it loads faster on websites. In most cases, you don't need to do anything complicated. If you export your image as WebP or AVIF, compression is already included automatically. If your image is still too large, you can reduce its file size by lowering the export quality (usually around 75%–80%).
For simple images like logos or text graphics, use lossless compression to keep everything sharp. For photos, lossy compression is usually fine. You can also use tools like Squoosh or ImageOptim if you need extra optimization.
Step 4. Implement Code-Level and On-Page Image SEO
Optimizing image files is not enough. You also need to make sure images are delivered and displayed correctly on your website.
Tip 1. Use Responsive Images
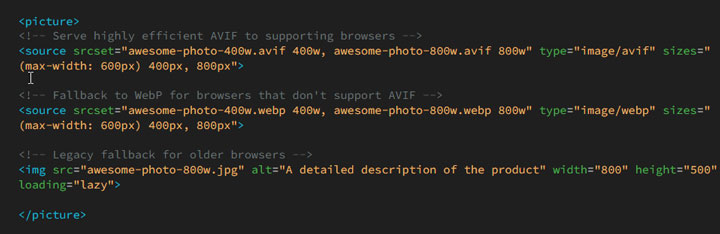
Because web users visit your site from devices of varying screen sizes, you should not serve a desktop-sized 1920px image to a mobile screen with a 390px width. Using the HTML5 <picture> element allows you to serve next-generation formats (like AVIF) to supporting browsers while automatically falling back to older formats (like WebP and JPEG) for legacy devices.
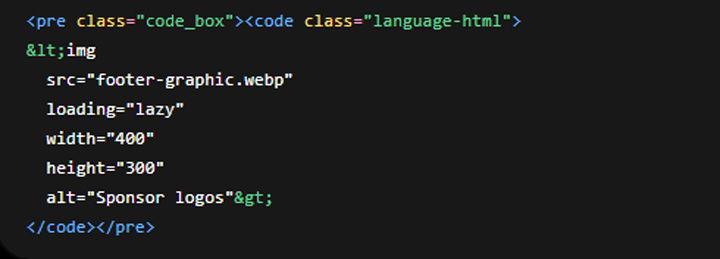
Tip 2. Define Image Dimensions (Eliminate CLS)
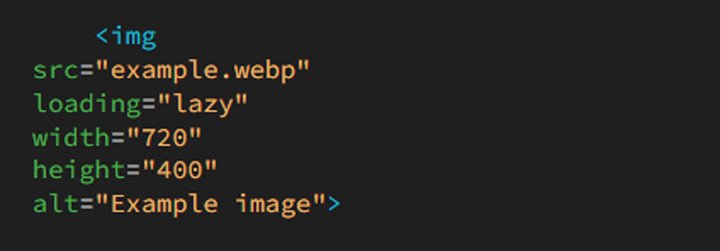
As a webpage loads, the browser parses the HTML and builds the page layout before it finishes downloading the images. If you do not specify the dimensions of your images, the browser assumes they take up 0 pixels of space. Once the images finish downloading, they will suddenly pop into view, shifting the surrounding text down. This layout shift can degrade your CLS score. To prevent this, always include width and height attributes on your tags:
Tip 3. Use Lazy Loading Correctly
Lazy loading instructs the browser to delay loading images that are "below the fold" until the user scrolls near them. This keeps the initial page load lightweight and fast. Web browsers support native lazy loading through the loading="lazy" attribute.
Tip 4. Write Clear Alt Text
Search engines do not "see" images the way humans do; instead, they rely on textual metadata to understand their context. Furthermore, modern AI search engines and search assistants analyze image alt text to build semantic understanding of your site's content.
Avoid keyword stuffing: do not write alt text like alt="best running shoes cheap shoes buy shoes". This is unnatural and not helpful for users or SEO. Instead, write simple and descriptive text that clearly explains what is in the image. For example,
❌ Bad: alt="shoes" (too vague, does not describe what kind of shoes or context).
✔️Good: alt="black running shoes on a track" (clear subject + basic context).
My Recommended Tools for Optimizing Images for Web
You don't need to handle every image optimization step manually. There are many tools that can help simplify and automate the process depending on your workflow.
1) For improving image quality before optimization, you can use AI-based photo enhancing and upscaling tools to enhance low-resolution images and reduce blur or noise.
2) For compression and format conversion, browser-based tools like Squoosh give you full control over quality settings and output formats.
3) If you are working with a CMS like WordPress, plugins such as Imagify can automatically convert images to WebP or AVIF and optimize them on upload, while tools like Smush help with bulk compression and basic lazy loading.
4) For more advanced setups, CDNs such as Cloudflare, Imgix, or Akamai can handle image optimization automatically on the server side. They adjust image size and format based on the user's device and browser, so the most efficient version is delivered without manual effort.
The Web Image Optimization Checklist
Before publishing your next webpage or blog post, use this quick checklist to make sure your images are properly optimized for performance, quality, and SEO.
- Quality Check: Did you start with a sharp, high-resolution source image? If the original image is blurry or low quality, did you enhance it before optimization?
- Dimensions: Have you resized the image so its width matches the maximum display size of your layout?
- Format: Have you exported the image in a modern format such as WebP or AVIF?
- Compression: Is the final file size optimized (typically under 150KB for standard images and under 300KB for large hero images)?
- Code Integration: Have you defined width and height attributes in your image tags to prevent layout shifts?
- Loading Behavior: Have you applied loading="lazy" to images below the fold, while keeping it disabled (and using fetchpriority="high") for important above-the-fold images?
- SEO Context: Have you added a clear, descriptive alt text and used meaningful file names instead of generic ones?
By following this checklist throughout the entire image workflow, from source preparation to final delivery, you can ensure faster load times, better visual quality, and improved search visibility.


