
Shotcut Video Editor Tutorial for Beginners
Shotcut, OpenShot, VSDC, VideoProc Vlogger and Microsoft Photos are five free and easy video editing software for beginners. Among those, in fact, Shotcut might be the most welcome video editor with nearly 90 thousand monthly searches. It is free and open source, compatible with Windows, macOS and Linux.
In this article, you would know where to safely download Shotcut and how to use Shotcut to fine tune your footage into a new personalized movie for YouTube, Facebook, Instagram, etc.
For more information of pros and cons on Shotcut, read our Test and Full Review of Shotcut >>
Where to download a safe Shotcut installer?
The following Shotcut download links are from its official website, which are 100% safe and clean.
- - For Windows: Shotcut 64-bit | Shotcut 32-bit
- - For macOS: macOS .dmg file
- - For Linux: Shotcut 64-bit portable tar | Shotcut 64-bit AppImage
How to Use Shotcut to Edit Your Video
Free get Shotcut through the download links above, double-click the installer file .exe or .dmg and follow the setup wizards to finish the installation. After that, open the software. Here we will show you a step-by-step guide on using Shotcut on Windows 11/10.
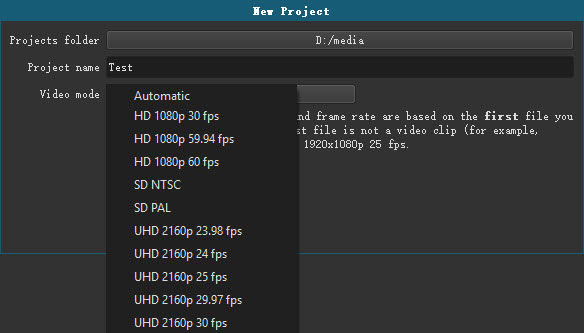
Step 1: Start a new project
Every time you run Shotcut, you are required to create a new project. Just set a project folder path > name it > select one of the video modes (SD, HD or UHD at different frame rate) > Start.
Here we name it as "Test" and choose "HD 1080p 30 fps".
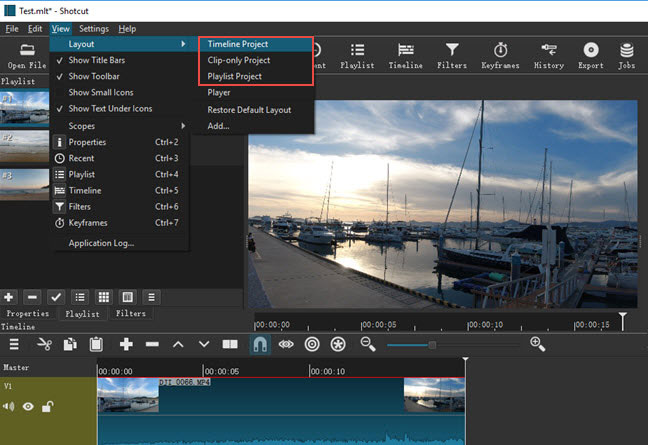
Step 2: Set Shotcut layout
There are four types of editing layouts inside Shotcut: Timeline Project, Clip-only Project, Playlist Project and Player. Each of them shows you different options in the interface. For video editing, choose Timeline Project.
• Timeline - preview window, Timeline, properties panel, audio and recent files.
• Clip-only - preview window, properties panel, and recent files.
• Playlist - preview window and recent files.
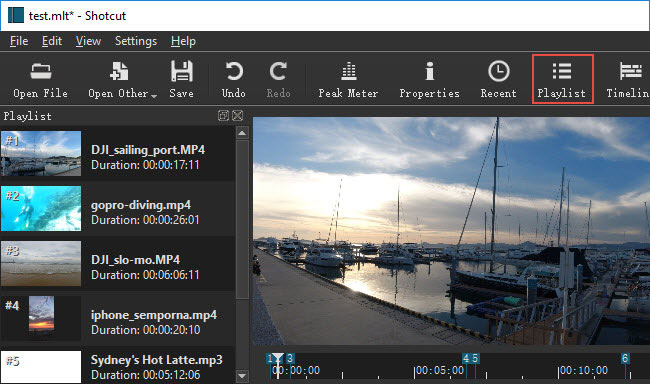
Step 3: Import media in Shotcut
Method 1. File > Open File > select one or several video clips > open.
Method 2. View > enable "Show toolbar" > click "Open File" in toolbar > select video files > open
Method 3. Click "Playlist" in toolbar > drag and drop your video files there.
Then drag the videos in the Playlist to Timeline area for editing. Better enable the "Toggle snapping" option and zoom in or out the timeline based on your need.
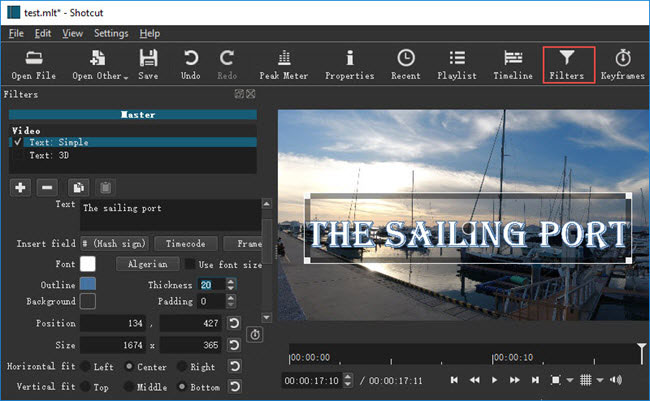
Step 4: How to add text in Shotcut
- Click "Filters" in the toolbar.
- Switch from 'Favorite' to 'Video' tab > scroll down to find 'Text' or search 'Text' directly.
- Choose 'Text: Simple' or 'Text: 3D'.
- Type in the Text box, choose a font, adjust the size and color.
More options: adjust outline color and thickness (30 maximally), choose background color, change the Text position, etc. Note that Shotcut doesn't allow you to make subtitles or upload subtitle file.
Step 5: How to crop video in Shotcut
- Click 'Filters' in the toolbar > Video > Crop (circle, rectangle or source).
- Adjust the value of Radius in circle mode.
- Change corner radius and padding color in Crop: rectanble.
- Or crop video from top, bottom, left or right in Crop: source.

Step 6: How to split video in Shotcut
- Move down to the Timeline area and slide the playhead to where you want to split.
- Click 'Split At Playhead' (right beside the 'Toggle snapping' button, or simply press S.
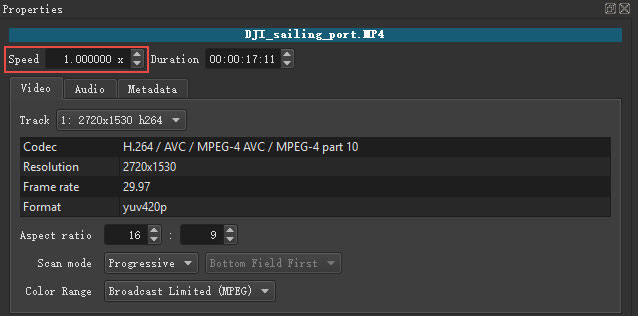
Step 7: How to speed up video in Shotcut
- Click 'Properties' in the toolbar to open video parameter panel.
- Find 'Speed' option under the comment box.
- To speed up video, change speed to any value higher than 1x (up to 50x).
- To make slow motion effect, set speed value lower than 1x, like 0.5x, 0.1x, etc.
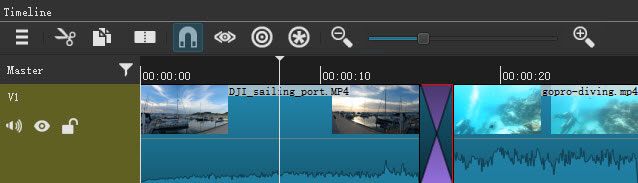
Step 8: How to add transitions in Shotcut
- Drag two or more video clips into the same video track. There shouldn't be any gap between the clips.
- Get two videos overlaped and then the transition zone appears.
- Choose a transition type in 'Properties', like Dissolve, Cut, Iris box, Clock top, etc.
- Set softness and then done.
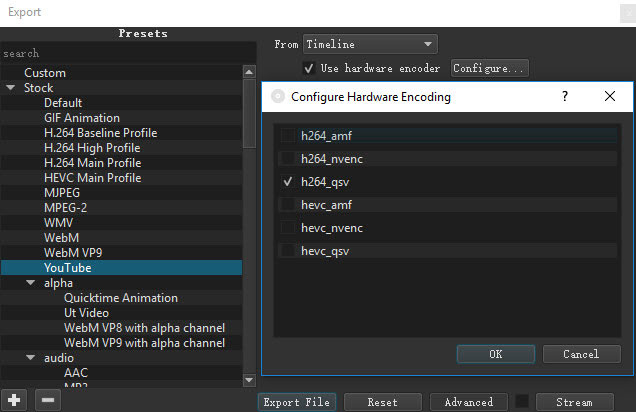
Step 9: Export videos for YouTube, Facebook, etc
- Go to 'File' and then 'Export video'.
- Choose YouTube for uploading online, H.264 Main Profile (most widely compatible codec) or HEVC (higher compression, smaller file size).
- Click into 'Advanced' if you need to change video resolution, frame rate or aspect ratio, and then press 'Export File'.
Check 'Use hardware encoder' if your computer has hardware accelerated CPU or GPU powered by Intel, Nvidia or AMD. That would speed up h.264/HEVC video encoding dramatically.
Disclaimer: This article is only providing tips on how to use Shotcut. It is not the official page of Shotcut. Digiarty Software Inc. is not owned by or affiliated with Shotcut.


