
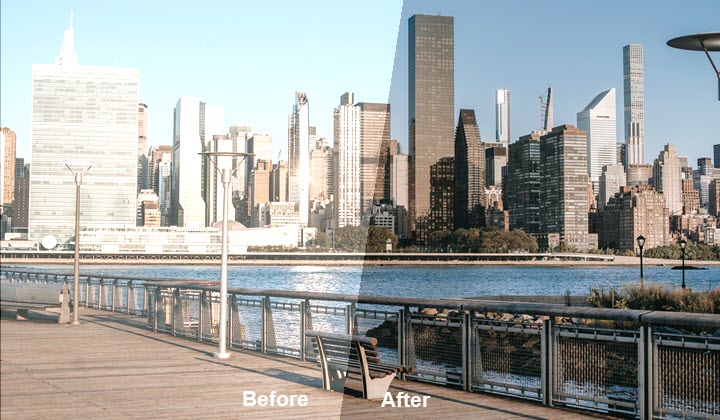
Color correction is the process of fixing some technical issues caused by the shooting environment and camera settings. For example, shooting in low light produced underexposed videos, and inaccurate while balance brought about unwanted color casts. Color correction basically balances and naturalizes the video so that the lighting is reasonable and the colors look like what they're supposed to be.
If you dive further into this topic, you'll find some differences between color correction and color grading. The former is salvaging the footage from production mistakes, while the latter is stylizing it by adding a creative touch. But both of them can be handled with color grading software and be performed in succession.
Today, we are focusing on color correction and how to color correct a video in VideoProc Vlogger.
How to Color Correct Video in VideoProc Vlogger
No matter you are an amateur or a pro in post-editing, VideoProc Vlogger would be the best movie editing software for you to do quick but professional color correction and color grading. It is designed with a full set of settings for color (temperature, tint, exposure, contrast, saturation, highlights, etc.), sharpen, HSL, vignetting, and 60+ aesthetic 3D LUTs.
So don't worry if you are not a colorist, just follow the guide of its color editor and drag some sliders simply, and then you can make up for some critical deficiencies on set. In addition to fixing colors issues, you can do more artistic edits to create cinematic videos like a pro.
Now download and install VideoProc Vlogger on your Windows or macOS computer, and get started to color correct a video.

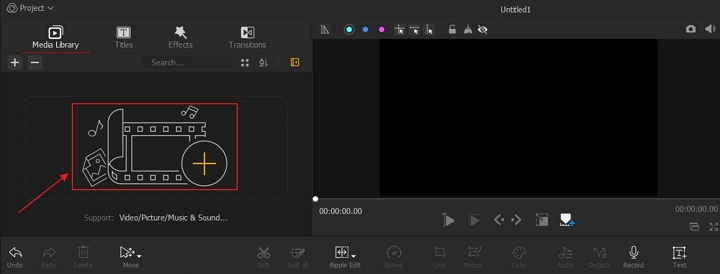
Step 1. Create a new project and import a video to Media Library.
Open VideoProc Vlogger and complete the project settings. Click the + icon to load your video to it.
Step 2. Open Color Editor in VideoProc Vlogger.
Drag and drop the video from Media Library to Video Track in the timeline. Click Color in the toolbar to open the color editing panel in VideoProc.

Step 3. Color correct the video by dragging sliders in the Color option.
You might have any or all of the problems as below, just choose the one according to your specific needs.
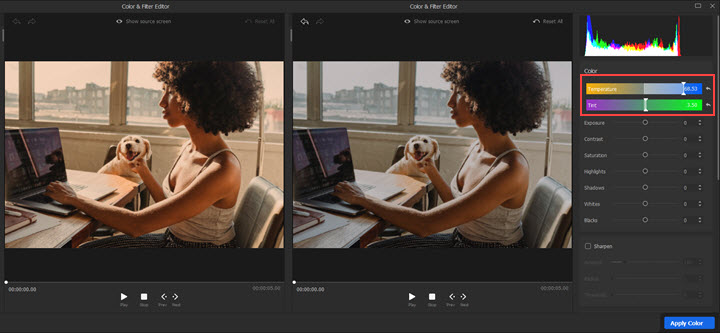
Correct white balance
Since color temperature changes in different light sources and conditions, we need white balance to give a white reference so that we can resemble the colors with reality instead of whites appearing orange or blue. In post-processing, white balance can be corrected by two options - color temperature and tint.
Take the footage below as an example. It looks yellowish maybe because of the warm lights from the sunset or camera WB settings. Now we can drag the Temperature slider to the right to add the blue color and drag the Tint slider to the right to fix the yellow color cast.
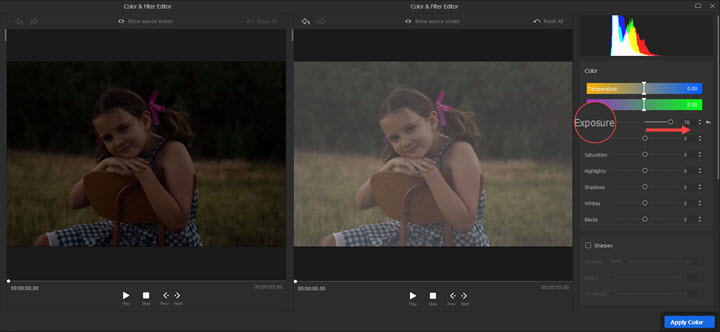
Fix overexposure/underexposure
Exposure refers to the amount of lights allowed to hit the camera sensor. It determines how many details in highlights and shadows can be seen in the shots. To get ideal results by adjusting exposure, you should use RAW videos which contain all needed data.
In an overexposed video, details in the light areas are blown out and no shadows to give contrast. Now you need to drag the slider in Exposure to the left to reduce exposure.

In an underexposed video, details in the shadow areas get lost and what you can see is just blackness. Now you need to drag the slider in Exposure towards the right to increase exposure.
Note: Exposure adjusts the brightness of the whole footage. So if you want to keep proper-exposed parts original, you are recommended to adjust Highlights or Shadows first.
Tweak contrast and saturation
Contrast refers to the difference between light and dark areas. With an increase in video contrast, the bright parts will be righter and the dark areas get darker.
Saturation controls the purity or intensity of colors. If you got over-saturated videos that look plastic and artificial, you can decrease it in post-processing.
In the VideoProc Vlogger color editor, you can tweak values of contrast and saturation by simply moving the sliders in these two options.

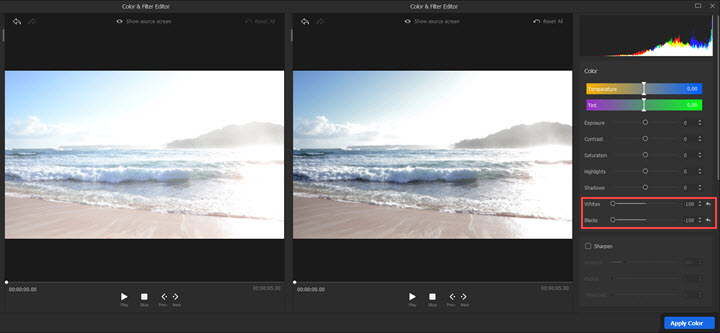
Balance whites and blacks values
Whites control the general brightness but have a greater impact on the bright parts in your video. Blacks change the shadows of every area but have a greater impact on the dark parts. Compared to Highlights and Shadows, these two influence the overall. You can balance whites and blacks by dragging the sliders in these two options.
Quick Fix - VideoProc Vlogger Preset 3D LUTs
- Vivid: Increase saturation
- Warm: Turn videos into orange tint
- Cool: Turn videos into overall blue
- Less Expo: Decrease exposure
- Bright: Increase brightness
- Dark: Decrease brightness
You can change customize the LUT by dragging the slider of LUT Intensity.
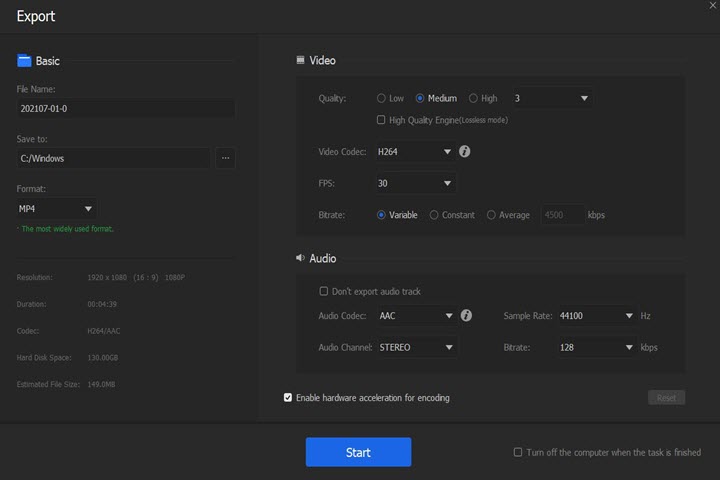
Step 4. Save and export the video with the correct color.
Click Apply Color to save the changes and get back to the main interface. You can continue editing or hit the Export button above the timeline to export the video to your computer.
4 Pro Tips for Color Correction
1. Understand Histogram
The histogram tool is a must for us to monitor the exposure in videography and post-editing because naked eyes might cheat us due to different perceiving conditions.
The horizontal axis shows the luminance level of the image from pure black on the left end of the graph to pure white on the right. Growth on the vertical axis indicates the relative pixels of light for the given luminance.
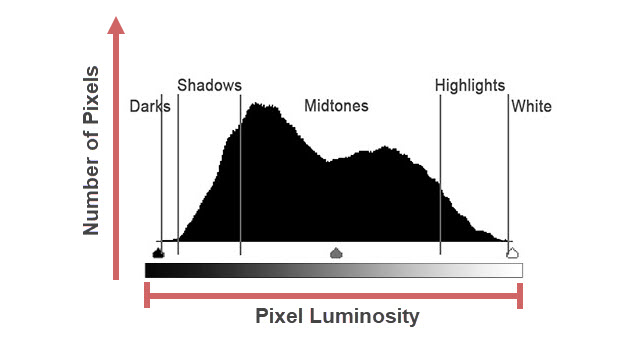
In VideoProc, you can use the histogram in the top right corner to figure out exposure problems and fix unintended overexposure or underexposure while keeping an eye on the real-time changes in the graphing tool.
Check the in-depth introduction to histogram>
2. Color Correct RAW Videos
RAW videos contain the light data as captured by the camera sensor before being converted to a standard video format. They give you more control over the white balance, exposure, highlights, and shadows so that you can recover underexposed shadows in post-editing. On the contrary, it is hard to fix exposure problems on videos in compression format because the details are completely gone.
3. Match Color between Different Shots
Every camera has a bias towards certain colors and different lighting makes different color temperatures. When you combine shots from different cameras and shooting environments, consistency is the key in color correction. It'll seem amateurish if they don't match.
But note that matching color doesn't mean the same values of color temperature, contrast, saturation, highlights, etc. You need to do color correction on one of them first, and adjust the rest in various ways to let them have the same colors throughout.
4. Do Not Overdo the Color Correction
Color correction is about making the footage look like what they are in reality. Just fix color issues if there is anything like we've discussed above. After all, color correction is just the primary step in color grading, and you don't need to make your video like iconic movies.


