We are privileged to live in an age of abundant choices of color grading software. There are dedicated programs such as DaVinci Resolve for professional color grading, and there are plug-ins to bring the entire panel into a video editing suite, and more commonly, hobbyists and beginners have already set their hands on color grading features built right within the video editing software.
You don't have to be a full-time colorist to benefit from the magic that colors do to a video project. With some background knowledge of color grading, and the difference between color grading and color correction, you can begin to create a fair base with natural colors to start off, and venture into a more creative filmic look.
Here are nine pieces of best color grading programs and plug-ins for beginners and advanced users at different skill levels.
VideoProc Vlogger
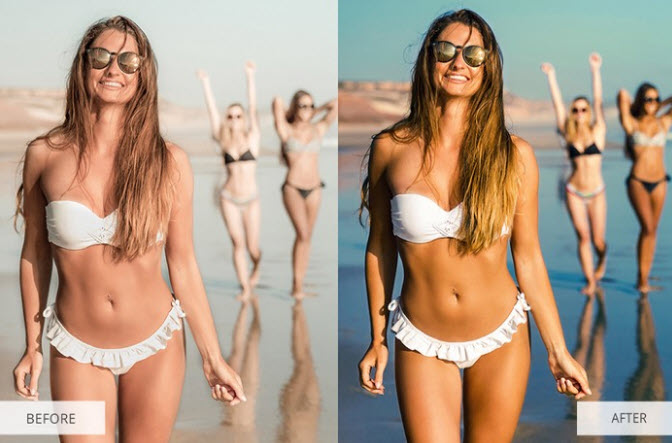
For beginners, vloggers, and social media sharers, color grading needs to be simple, effective, and aesthetic. The color grading feature in VideoProc Vlogger is designed in a way that simplifies the process, and at the same time provides advanced possibilities for Pros.
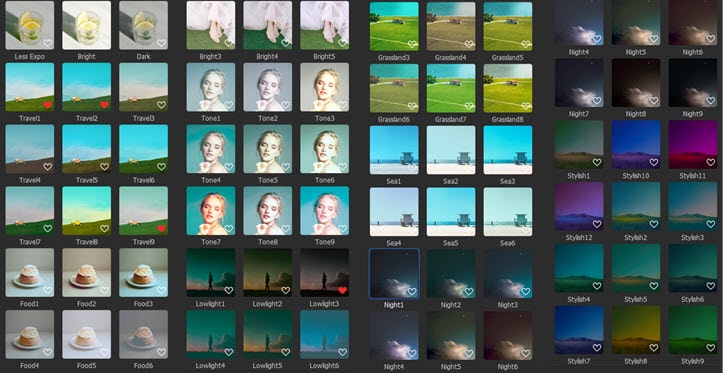
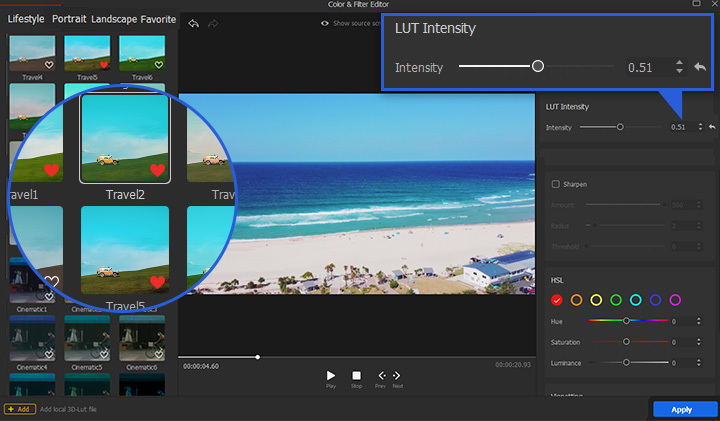
You can use the built-in filters, the LUTs, designed for portraits, food, landscape, night city, grass land, and various kinds of scenes, or you can batch import unlimited number of LUTs outside the application.
There are basic correction parameters such as contrast, exposure, and luminance, and there are HSL secondaries, vignettes, etc. Every adjustment is viewable in realtime, and you can compare the look to the original footage in a click.

Features:
- Easy to use, as intuitive as mobile photo editing applications.
- 90+ built-in LUTs, and the LUTs library keeps growing.
- Support batch import custom 3D LUTs
- Option to adjust the intensity of the filters.
- Auto Level tool to enhance the video image intelligently.
Adobe Premiere Pro CC – Lumetri Panel
For Adobe users, professional color grading used to take place in SpeedGrade, a standalone and dedicated color grading software. With the introduction of Lumetri panel in Adobe Premiere in 2015, it is much easier for non-colorists to set their hands on color correction and color grading. After assembling clips and applying edits, editors and amateur hobbyists can go ahead and adjust white balance, draw curves and push color wheels at ease. This in-app solution provides more possibilities if you are on budget and cannot hire a colorist to boost the footage.

Features:
- Basic correction such as white balance, exposure, contrast, highlights, shadows, etc.
- RGB curves and saturation curves to adjust the colors in a shot with different tonal values.
- Color wheels and brightness sliders to adjust the luma and chroma.
- HSL keyer to pick a hue and change it accordingly.
- Support correction LUT for color correction and creative LUT for color grading.
DaVinci Resolve 16
While Adobe Premiere is the NLE with color grading add-on, DaVinci Resolve is the opposite: industry-standard color grading software with add-on editing features, possibly a nice move from Blackmagic to embrace editors apart from colorists. Node-based workflow makes it easier to set up the structure of your grade. For instance, if your plan is to balance > exposure corrections > color corrections > overall look > final adjustment, you will find those tree nodes helpful in each operation.
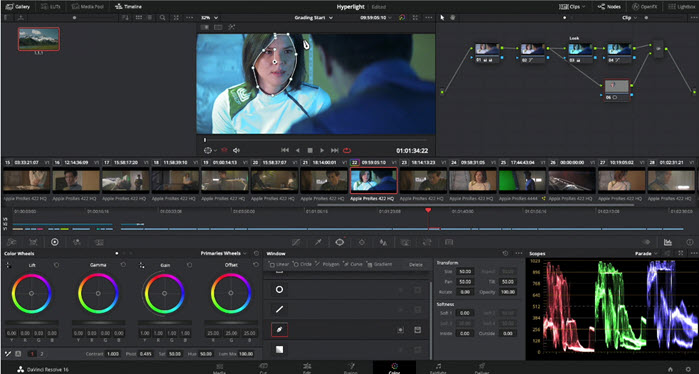
For total beginners, you can resort to color chart such as X-Rite color checker to correct color. DaVinci Resolve's color match tool will check the color chart you shot, and auto-adjust your footage accordingly. This color grading software also offers you more liberty with advanced options. For instance, the primaries color wheel allows you to grade color in terms of Lift (shadows), Gamma (midtones), Gain (highlight), and log color wheels controls shadows, midtones, and highlight. What is the difference? Well, lift will change the overall tonal values of the image, with the biggest influence on shadows, while shadows only change the value in shadow (dark) area. This might sound like a tongue twister, but once you drag the circles and observe the image, you would know the nuances.
Further reading: DaVinci Resolve 16 Review >>
Features:
- Basic tools for primary adjustment and normalizing video files.
- Curves palette for both primary and secondary color work.
- Qualifiers to key a selected hue and adjust saturation and luma values.
- Power window to mask and track a select area for color fine-tune.
- Grab still and apply its look to other shots, matching the overall color scheme.
Red Giant Magic Bullet Colorista
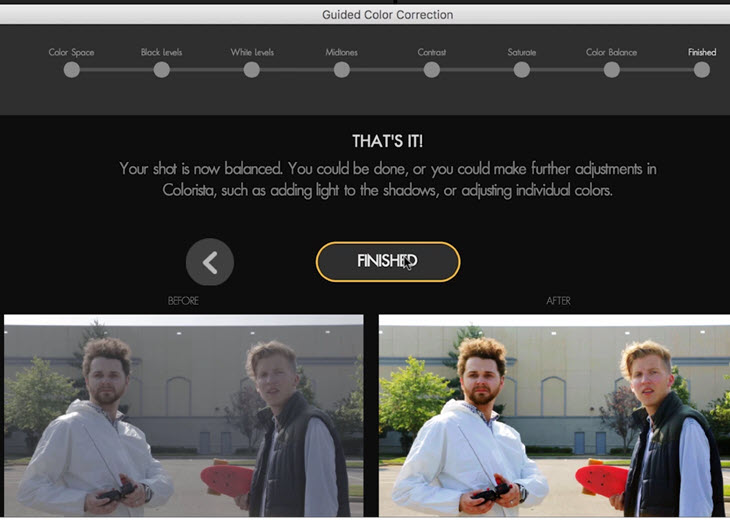
Colorista is a color correction plugin for host applications such as Adobe After Effects, Premiere Pro, Final Cut Pro and Apple Motion. If you are not accustomed to the Premiere to DaVinci Resolve Roundtrip, or the Lumetri panel in Premiere alone is not enough for your color grading requirements, then Colorista is a decent choice.
Colorista IV excels at integrating the professional color correction tools directly into the video editing software you are using, expanding the limited color grading features in Adobe apps and FCPX. The best part for novice users is the guided color correction feature. It encapsulates the industry-proven workflow in 7 easy steps, from color space converting, levels, contrast, to saturation, color balance and finished look.
Colorista is also fantastic plug-in to repair grainy videos. It can reduce digital noise and grains from DSLR, GoPro or camcorders videos and so on.
Features:
- Guided color correction to walk you through the industry texted workflow
- Realtime color correction thanks to a better integration with Adobe apps to support Mercury playback engine
- Color keyer to sample and adjust individual or ranges of colors
- Built-in LUTs to support Log footage from different cameras
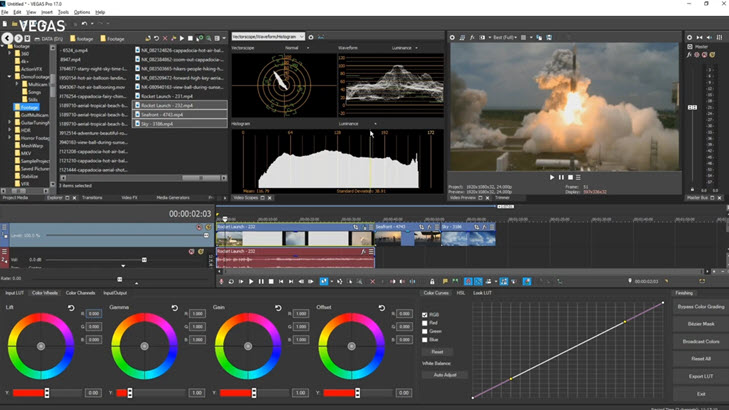
Sony VEGAS Pro 18
If you stick with VEGAS Pro for video editing, then you can enjoy the optimized color correction and color grading workflow in VEGAS Pro 18. With Sony's latest release, VEGAS PRO 18 strides forward into one of the best color grading software. There are logarithmic tools to have more control over exposure, and the dockable color grading panel streamlined the color grading process more than ever.
VEGAS Pro 18 also make it adjustable in terms of the skin tone line in vectorscope, so that the colorist can use different skin color reference in vectorscope, besides the dominated 55-75 IRE standard.
Every essential tool you use in DaVinci Resolve can be found in VEGAS Pro. If you happen to use VEGAS to cut video, then this program is also a nice choice for color grading on Windows computers.
Features:
Every essential tool you use in DaVinci Resolve can be found in VEGAS Pro. If you happen to use VEGAS to cut video, then this program is also a nice choice for color grading on Windows computers.
- Waveform, vectorscope and histogram to analyze color, make corresponding improvements and justify the changes
- Support adding Bézier mask to color grade selected section or object
- Import Camera LUT to get a natural baseline image to start off
- Import LUT to emulate a specific look of Hollywood-style productions
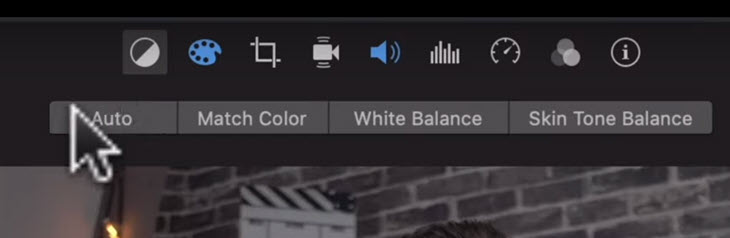
Final Cut Pro
Final Cut Pro is the go-to color grading software for Mac users. The tool that does the color grading in Final Cut Pro is called the Color Board, which have been around since the inception of FCPX. It is a flat field with color ribbons and pucks to adjust color. It could be a simple way to interact with colors, but senior colorists might find this simplicity foreign to traditional color grading paradigms.
FCPX v10.4 bring back the color wheels and curves that make you feel at home if you came from DaVinci Resolve, FCP 7 or other traditional NLEs. As other color grading software, you can bring up scopes such waveform, RGB parade, Y'CbCr Parade to use as evaluator and references.
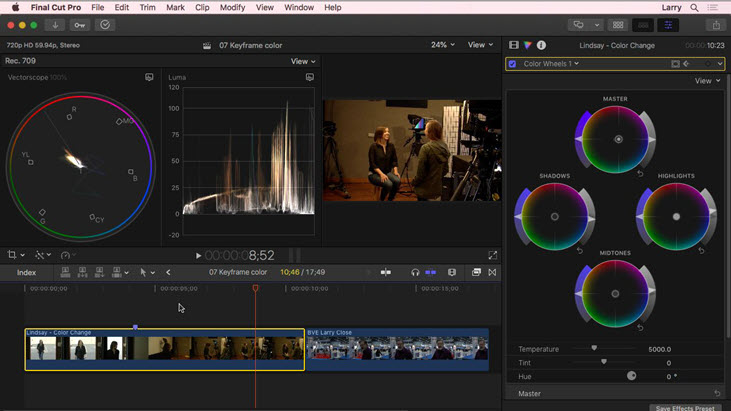
Besides adjusting white balance, contrast and exposure, you can increase or decrease a certain hue in the highlight, dark or the overall area. FCPX also integrates with the color wheel a pair of arrows, which allows you to adjust saturation.
FCPX offers a flexible way to apply color grading effects. Besides adding them from the browser, you can also add color wheels, board, curves etc. directly from the color inspector, thus accelerating the color correction process.
Features:
- Support adding custom LUTs to create a specific look.
- Ready-to-use broadcast safe effects to make sure your production complies with the rules.
- Click on a clip to review what color grading effects have been used.
- Sample the color with curves to remove unnatural color cast.
- Flexible luma curves to adjust exposure with the guidance of scopes.
Fxhome HitFilm Express
HitFilm Express is one of the best free video editing software for film-making and VFX. It offers both the video editing features and compositing panel in one program. Color grading as an essential part of film production is surely included in HitFilm.
There are curves, levels historgram, and wheels at your disposal, if you include the tool in your pack. In line with Fxhome's marketing strategy, you can always pay for what you want without paying more for what you don't need. It has a large stock of color grading effects for beginners to create a unique visual style in no time, and without much learning curve. If you find yourself go nuts at complex curves and scopes, HitFilm can save you with those film looks pack. You can choose from Hollywood-style look, vintage film look, color match, duo tone, or import .cube LUT freely.
For beginners, Fxhome's resourceful YouTube tutorial on color grading is the best place to start with. There is a dedicated list of tutorials for color correction and color grading, from basics such as how to use curves, wheels, lighting setup to projects walk-through. Watch it for yourself:
Read Our Full HitFilm Express Review >>
Features:
- Pro skin retouch tools to detect, adjust and add subtle glow to the skin area
- Standard color wheel to visually adjust shadows, midtones and highlights
- You can choose a frame as the source for automatic adjustment and apply to other frames.
- Handy property termed Preserve luminosity to keep the original brightness while altering the colors of the video image.
iMovie
iMovie doesn't have all those color wheels, scopes, and curves that professional color grading software boast of. Yet, for beginners and occasional users, the basic color correction tools, color filters and the fact that iMovie is totally free of charge make this app a good color grading application.

By clicking the color palette above the video monitor, you can adjust the contrast, temperatures, and brightness. For instance, you can drag the highlights slider to make bright area darker or brighter, altering the saturation to make the clip more colorful or diffuse, or change the temperature to give your footage a warmer or cooler feel. That is, add more orange-ish or blueness into the footage.
Features:
- Default video editing app for Mac users, free firmware and nice integration with iTunes and Garageband.
- Easy to understand color correction tools, enough for basic post-production
- Stock filters such as vintage look, duotone, Sci-Fi, Film grain, etc.
Lightworks
Lightworks was designed for editing, as well as Adobe Premiere, Avid Media Composer. Color grading is not at its core when it was designed. However, the line between color grading software and video editing suits is blurred in recent years. Just as Black Magic have expanded the editing features in DaVinci Resolve, Lightworks and other NLEs have undergone some renewal to go beyond the original design.
If you are a skilled hand in Lightworks editing, you may well dive into the color grading features offered in Lightworks. There are color correction tools and scopes to use, and you can start with basic adjustments such as levels, gamma curves and white balance. Then there are contrast and brightness to deal with. You can create custom gamma curve, pushing up the node to bring out more detail in black, and down to reduce flare in highlights.

Most color grading features you can think of in pricey NLEs are available in Lightworks, curves, LUTs, RGB parade, etc. And Lightworks is free to use. The only downside is probably the unusual workflow, that makes your editing knowledge in Lightworks non-transferable to other NLEs. Therefore, you are already a dedicated Lightworks user, you can start learning its color correction tools; and if you are new to Lightworks, it's more efficient to invest in DaVinci Resolve.
Features:
- Free video editing suite with expanded color grading tools
- Realtime GPU pipeline for primary and secondary color correction
- Over 100 inbuilt effect presets for HD/2K/4K videos


