Maybe you want to share highlights from your latest beach getaway or recapture the joy of your wedding day. Or perhaps you have a message or story to convey but lack video footage. Whatever your motivation, with some simple editing magic you can produce a professional-looking YouTube video using nothing more than the photos on your phone and a few licensed music tracks. Cutting clips to music, adding motion to static shots, color grading your images—these easy skills will make your YouTube videos with pictures and music grab much attention.
In this post, we'll show you how to make a YouTube video with pictures and music. No expensive software, confusing interfaces, or technical expertise required. We'll focus on straightforward tips to help first-time editors and casual creators get started with the best free video editor.
Best Software to Make a YouTube Video with Pictures and Music
Creating an engaging YouTube video requires much more than stringing together a few clips. To make a real impact, you need to whip your footage into shape using specialized editing tools. For YouTube videos that incorporate both pictures and music, one of the leading options is VideoProc Vlogger.
VideoProc Vlogger is an intuitive yet powerful video editing software designed specifically for YouTubers and vloggers. It offers a wide range of features to produce professional-quality videos for your channel. Once you import your pictures, video clips, and music tracks, the real fun begins.
It helps you sync your visuals to the beat of your chosen soundtrack with precise clip timing, enliven static images with pans, zooms, and fade effects, and curate a unified viewing experience across all your clips using color grading tools, filters, and look-up tables. It's suitable for making slideshows, video collages, time-lapse videos, music videos, traveling videos, and beyond.

VideoProc Vlogger – The Best Free YouTube Video Maker
- 60+ aesthetic filters, transitions, effects, text for all styles
- Support 999+ tracks for images, videos, music, effects, and subtitles.
- Crop, resize, cut, rotate & flip, add watermarks, add subtitles, etc.
- Creative features to add motion effects, color grading, beat detection.
- Make YouTube videos of all sorts: intros, Shorts, lyric videos, vlogs, long videos…
Download VideoProc Vlogger and Make Comprelling YouTube Videos with Pictures and Music with Ease!

How to Make a YouTube Video with Pictures and Music in 5 Steps
In the following part, we'll demonstrate how to make a YouTube Video with pictures and music with VideoProc Vlogger in 5 steps. It's a basic workflow to make videos from still images for beginners. After this, you can go on polishing up your YouTube video with advanced features in VideoProc Vlogger.
Step 1. Create a New Project in VideoProc Vlogger.
Launch VideoProc Vlogger and create a new project. Finish settings of the project name, location, resolution, and frame rate. It's also okay to keep default settings. Click "+ New Project" to enter the editing workspace.

Step 2. Add Pictures and Music.
Drag and drop pictures and music files to the media bin on the top left side. VideoProc Vlogger sorts these files by type and groups them by folder automatically. Then drag and drop files to the timeline. Pictures are placed in the main track and music is in the audio track.
Tips: According to YouTube copyright policies, to upload videos with music to YouTube without any issue, make sure you are using the music you made or you've got license permission from the owner in advance, or use royalty-free music.
Step 3. Edit the Music.
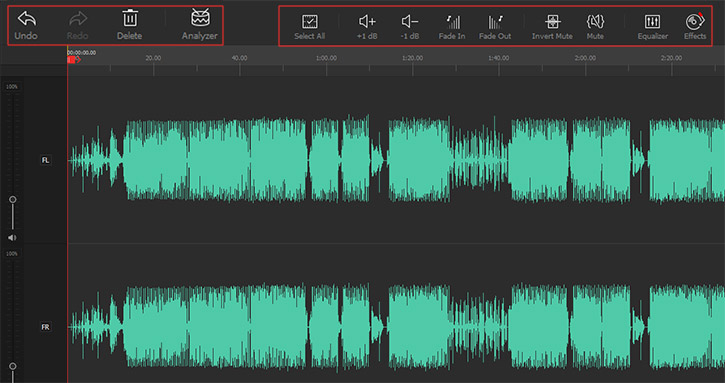
Click to select the music in the timeline. You can split and move the clip freely on the audio track. Move to the Inspector panel next to the preview window, and here you can adjust the volume, add fade-in and fade-out effects, or open Audio Editor to use audio equalizer and add filters and audio effects to your music.
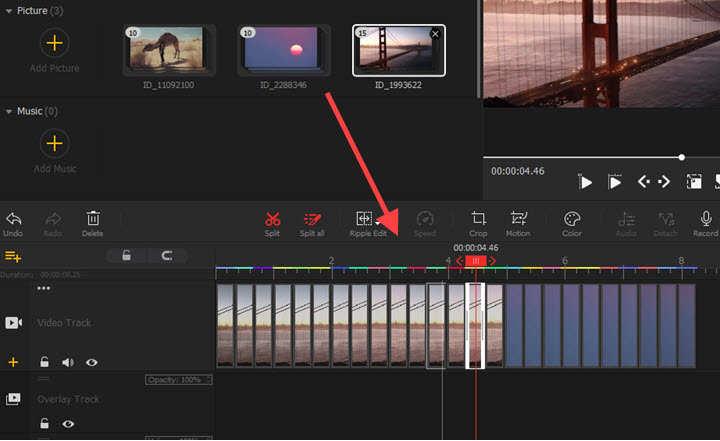
Step 4. Arrange Pictures.
Click to select a clip, and drag it to re-sequence pictures in the Main Track. It's also workable for moving multiple pictures at a time. Drag the edge of the clip inward to decrease its duration in the Ripple Edit mode. Or, switch it to Time Stretch, and now you can expand pictures by dragging edges outward.
Then move to the preview window, double-click on the picture, then you can change its position and scale intuitively.
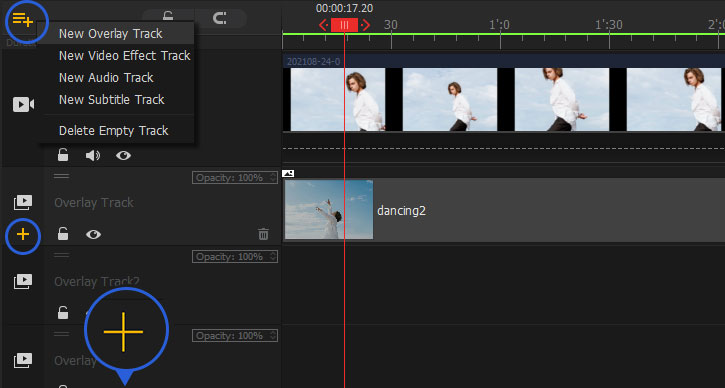
If you want multiple pictures to show up at the same time, just drag a picture to Overlay Track. You can go on adding overlay tracks and images by repeating the step.
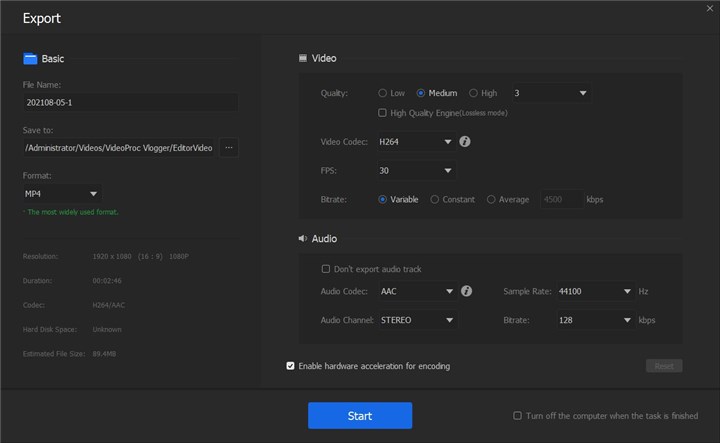
Step 5. Export.
Preview the whole video. If you are happy with the result, click "Export" above the timeline. Then give it a name, set the output folder, and choose an output format and quality. Hit "Start" to render and export the video with pictures and music.
Pro Tips for Spicing up YouTube Videos with Pictures and Music
Taking your YouTube videos to the next level requires some editing magic. With the right techniques, you can transform average footage into an engaging and dynamic viewing experience for your audience.
1. Edit to the Beat
Syncing visuals to an upbeat soundtrack is key to achieving a professional flow and feel. Carefully cutting clips to match the rhythm and tempo of a song can make a world of difference.
Open Audio Editor in VideoProc Vlogger. Click "Analyzer" > "Audio Beat" > "Analyze". Select the clip and click "Add Marker" and "Apply". If the result does not fit your needs, you can adjust the highlights interval and offset. Then you can see markers by music beats in the audio track. Just drag images to align with these clip markers. And this how it syncs pictures to music.

2. Add Motion Effects to Pictures
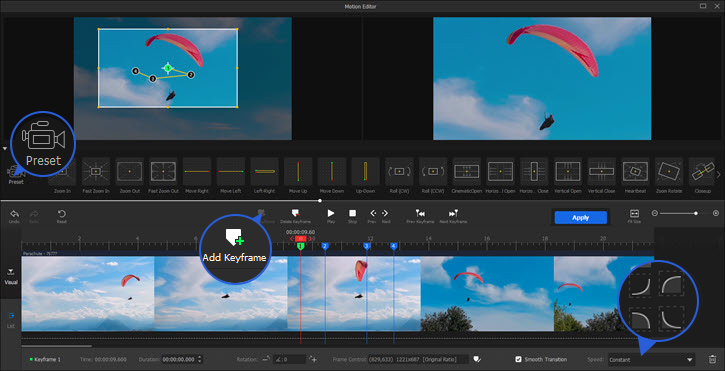
Still images come to life when you apply motion effects like zooming, panning, and rolling, especially vary along with the background music. It can be achieved by setting up the keyframe's path, scale, and amount. All of the features are included in the Motion Editor of VideoProc Vlogger.
Put the playhead where you want to add a motion effect, then click "Motion". Then you can choose a motion preset, such as Zoom In, Fast Zoom In, Heartbeat, Closeup, etc. Adjust duration, rotation, size, position, and speed.
3. Color Correction and Color Grading
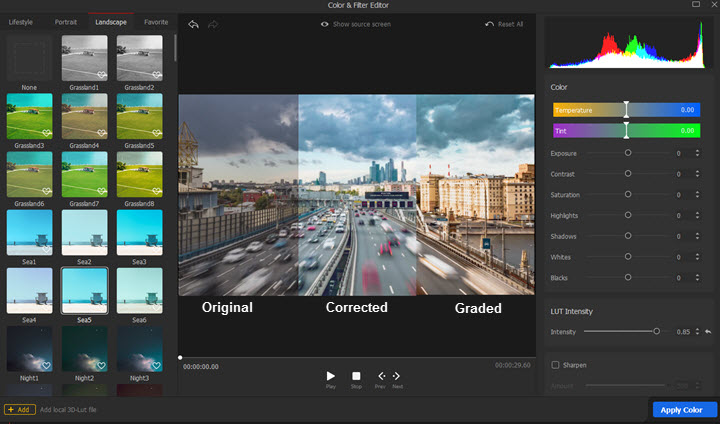
Pictures that you gathered from various sources may not look cohesive, due to different lights condition and shooting devices. Fortunately, you can adjust the brightness, contrast, and white balance to correct these problems, like uneven lighting, color balance problems, or dull colors. And color grading can help you set the right mood and tone for your story.
Open Color Editor, and you can choose preset filters or import 3D LUTs to the YouTube music video. If you are not satisfied with the presets, you can adjust precisely by tweaking temperature, tint, exposure, contrast, saturation, shadow, highlights, HLS, and so forth. Any change will be presented in real-time.
4. Add Transitions and Effects
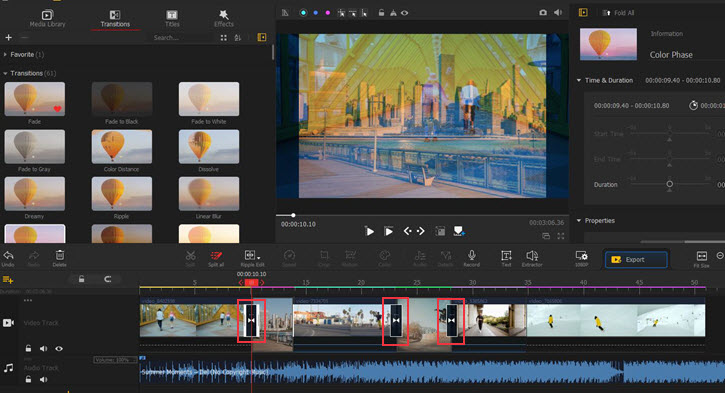
Don't neglect the power of visual effects to polish your video. Filters and transitions are valuable tools for highlighting important moments and maintaining continuity.
The transition and effects tabs are located on the right side of the Media Library. Double-click on a transition/effect, and you can preview it before applying. Place the transition in the middle of two images and the effect to the Effect Track. Drag the edges to determine how long it lasts. You can find more custom settings in the Inspector panel as well.
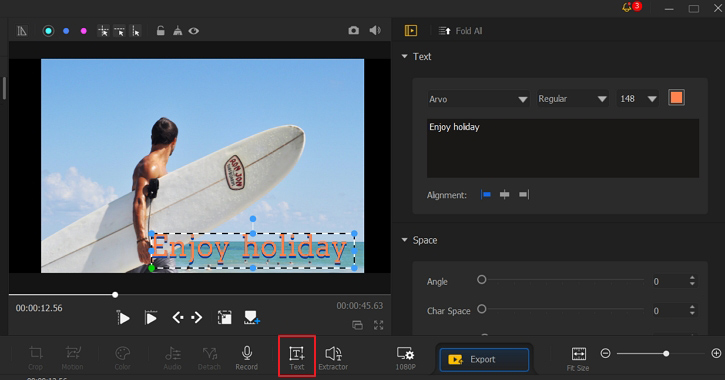
5. Add Texts
Pause the playhead where you want to add text and click the text in the toolbar above the timeline. Adjust its duration in Subtitle Track. Double-click texts on the preview area and customize their size and position by dragging. Then, go to the Inspector panel where you can adjust font, size, color, space, border, shadow, and animation of the texts for your YouTube Video with pictures and music.
Final Words
With a little time and patience, you'll be producing YouTube videos that pop. Combined with good lighting, clear audio, and compelling content, these pro editing techniques are your ticket to making a splash on YouTube. Keep your audience engaged by tying it all together into a cohesive and vibrant experience. Now get out there and make your masterpiece!


