Converting an image sequence to video is a versatile technique used for a range of purposes, from creating engaging slideshows and storytelling presentations to producing stunning Time-Lapse and inventive Stop-Motion films. By arranging a series of photos in the perfect sequence and controlling the frame duration, you can transform static images—whether they are family memories, process diagrams, or raw camera bursts—into dynamic, high-quality videos.
This comprehensive guide presents the 6 best free methods to turn image sequence to video quickly and easily on Windows and Mac. We provide detailed, step-by-step tutorials designed for all users, whether you're working with standard JPG/PNG sequences or advanced formats like RAW and TIFF. Start turning your images into MP4/MOV videos today.
Comparison of Image Sequence to Video Converters
6 Methods to Turn Image Sequences to Video
Comparison of Image Sequence to Video Converters
Choosing the right image sequence to video converter to turn your image sequence into a video depends on your budget, technical skill, and desired final quality. Here’s a quick comparison of some of the most popular methods:
| Method / Tool | Ease of Use | Key Features | Cost | Best For |
|---|---|---|---|---|
|
Transitions, color grading, motion effects, speed ramping... |
Free |
Beginners and enthusiasts. |
|
|
Simple web-based conversion, basic trimming, adding text or music. |
Freemium |
Works directly on your browser |
|
|
A multiple media player that also helps extract frames from a video. |
Free |
VLC users |
|
|
Professional video sequence editor, 3D modeling, advanced compositing, visual effects |
Free |
Technical users and professionals |
|
|
Photo Editing |
Paid |
Professional video editors and filmmakers |
|
|
Command-line media processing |
Free |
Developers and technical users |


6 Methods to Turn Image Sequences to Video
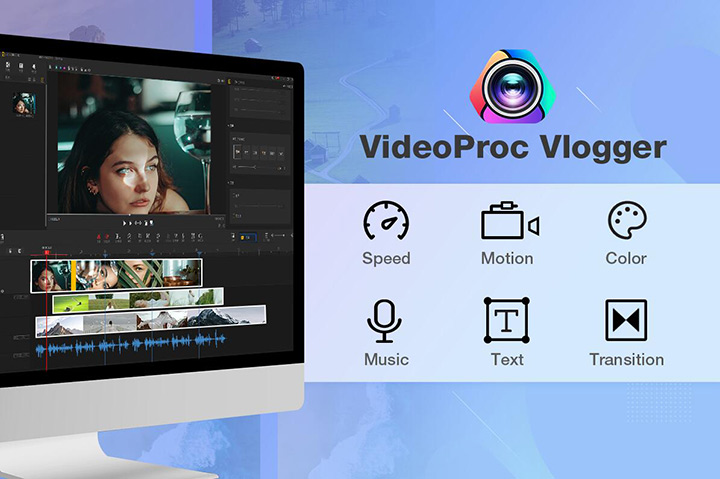
1. Convert Image Sequence to Video in VideoProc Vlogger
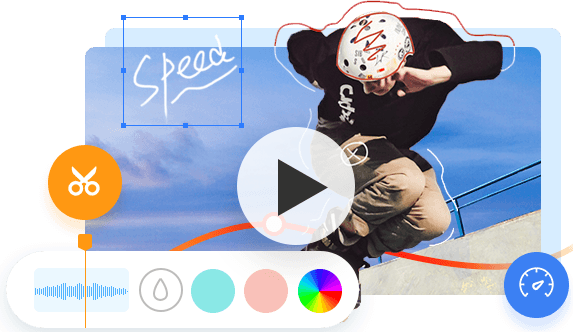
To easily turn large image sequences into high-quality videos, VideoProc Vlogger is an ideal choice. This free video editing software for both Windows and Mac is perfect for creators of all levels. It handles large image sets in formats like PNG, JPG, TIFF, RAW, Apple ProRes, and 10-bit HDR, allowing you to turn them into smooth videos without lag or quality loss. With a lot of fancy features like speed adjustments, cinematic transitions, music, text overlays, and split screens, it’s great for time-lapse, stop-motion, or even creating polished slideshows. Whether you're a beginner or a pro, this free video editor offers the tools to enhance your projects with ease.

VideoProc Vlogger - Free & Easy Image Sequence to Video Converter
- Convert image sequences (JPG, PNG, TIFF, RAW, etc.) to MP4/MOV videos.
- Non-linear editor with advanced features like color grading, motion effects, speed ramping, and audio editing.
- Supports 4K/8K, 10-bit HDR, Apple ProRes, and other professional formats.
- No watermarks, no file size limits, and no quality loss.
- Perfect for time-lapse, stop-motion, and polished slideshows.
- Intuitive interface suitable for both beginners and professionals.
![]() Excellent
Excellent ![]()

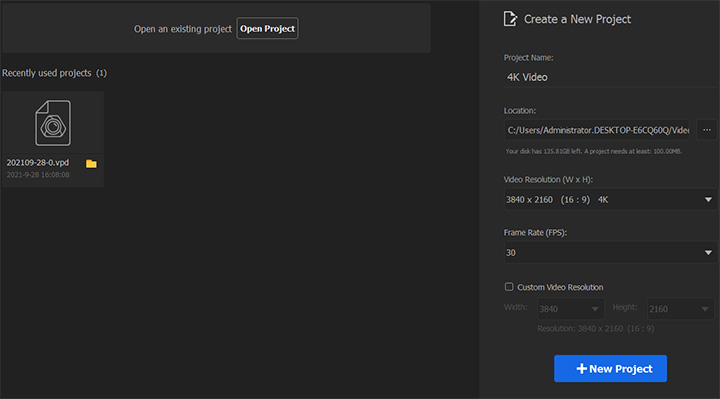
Step 1. Open VideoProc Vlogger and create a new project. You can keep the default project settings or customize the filename, path, resolution, and frame rate based on your specific needs.
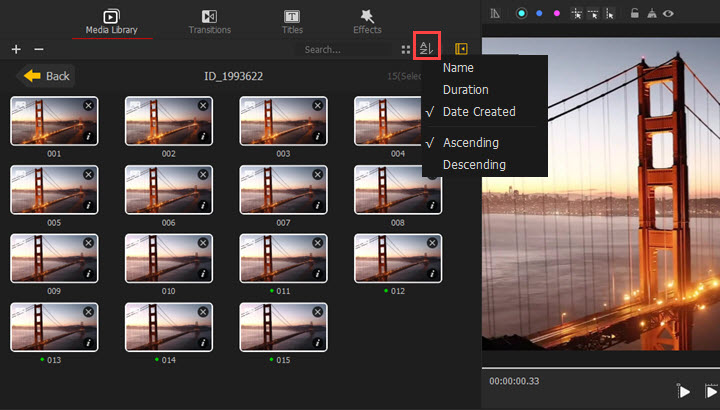
Step 2. Now you get to the editing panel. Click the big plus icon to import the image sequence from your computer to VideoProc Vlogger.
Tips: The whole sequence of images will be grouped automatically in the picture library. Double-click on the image folder, and you can sort them by name and date created.
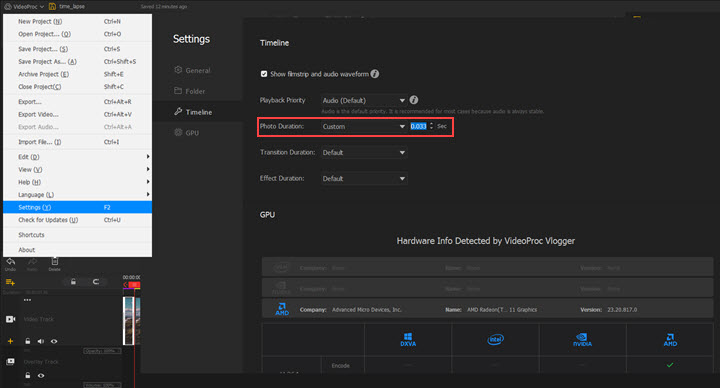
Step 3. Every image lasts for 5 seconds by default in VideoProc Vlogger. To change the duration, open the VideoProc menu at the top left corner, and click "Settings" > "Timeline" > "Photo Duration". Choose a preset duration or input a number.
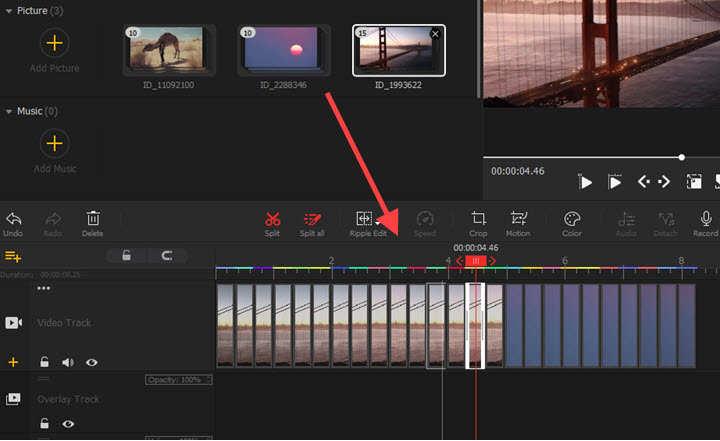
Step 4. Drag and drop the image sequence from the media bin to the timeline. Click the play button to preview the whole video.
Before exporting, you can add background music, texts, filters, transitions, and apply more edits to spice up your video.
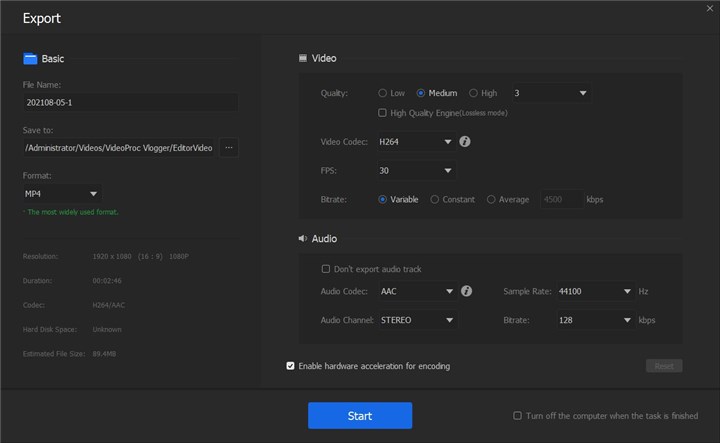
Step 5. If you're happy with the result, click Export above the timeline. Select MP4 or MOV as the output format. Click "Start" to turn the image sequence into a video.
2. Convert Image Sequence to Video Online
In addition to the tools we mentioned before, online image sequence to video converters is also a good option for Windows and Mac users. They work like an offline non-linear video editor, importing JPG/JPEG or PNG photos to the timeline and rendering them into a video file. Some versatile online editors also allow you to add music, resize the frame, and re-sequence these images.
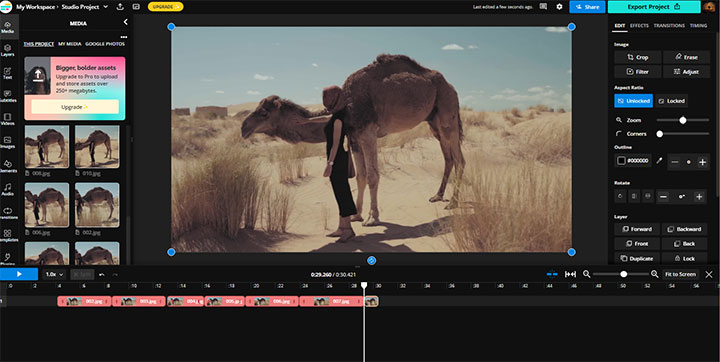
Here's how to convert an image sequence to an MP4 video online with Kapwing.
Step 1. Go to the official website of Kapwing. Register a valid account and open its video editor.
Step 2. Add any stock video to open its timeline. Click Add Media to import your JPG, JEPG, or PNG images.
Don't forget to turn the Crossfade button on to make the transitions smoother.
Step 3. Drag and drop these images to the timeline one by one and put them in the right order. Now you can drag the edges of each clip to change the duration.
Step 4. Preview the entire video. If it's okay, click the export button and let it convert the image sequence to MP4 in 720p. When it finishes the conversion, you can save the file to your computer or share it via the link generated by Kapwing.
Note: Kapwing adds watermarks in the final video and does not let you save videos in 1080p or 4K.
3. Convert Image Sequence to Video in VLC
VLC is often underestimated as a common media player. With a wide array of supported media formats, it also functions as a free video converter for Windows, Mac, and Linux. It cannot turn an image sequence to MP4 directly, but if you're a walking encyclopedia of command lines, you can easily assemble PNG and JPG image sequences to MP4 on Windows with VLC and Command Prompt.
Step 1. Open VLC media player. Click Media > Open Multiple Files. Click +Add. Change the input file type to All Files (*) to import a sequence of JPG or PNG files to VLC.
Step 2. Click Convert/Save at the bottom. Choose Video – H.264 + MP3 (MP4) in the output profile. Check Append ‘-converted' to filename. Hit Start to convert images to MP4 videos.
Step 3. Search and open VLC in Windows Start. Check VLC media player Properties. Copy its location in the Target option.
Step 4. Create a command line with the VLC location and individual video clips:
vlc_location videofilename1.mp4 videofilename2.mp4 --sout "#gather:std{access=file,dst=finalfilename.mp4}" --sout-keep
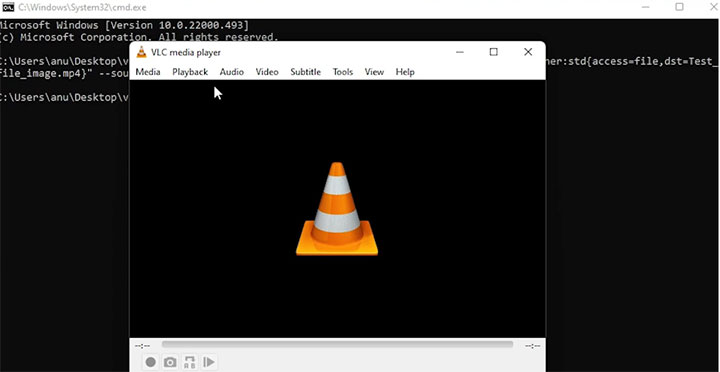
Step 5. Open Command Prompt app in Windows Start. Paste the command line to it and run. Then you'll view a video consisting of the JPG/PNG image sequence in VLC media player.
Note: By default, each image lasts for 10 seconds in VLC. If you are using VLC to convert image sequences to video files, you'll need a video editor to speed up the final video. Otherwise, a sequence of 100 images will be extremely lengthy and large.
4. Convert Image Sequence to Video in Blender
Blender is a free and open source video editor often used for VFX, 3D modeling, and 2D animations. With its Video Sequence Editor (VSE), you can take it as a professional video editor as well. It lets you convert image sequence to video, and vice versa. But we only recommend this method to power users because of its massive professional settings and steep learning curves.
Step 1. Launch Blender on your computer, and select Video Editing in its top menu.
Step 2. Click Add and Image/Sequence. Select the image sequence in JPG or PNG from the local directory to Blender VSE.
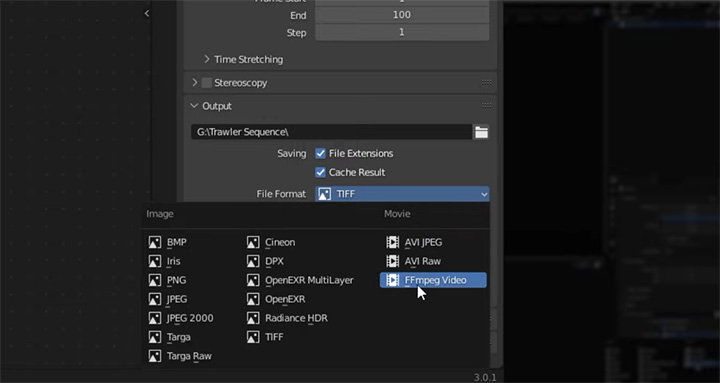
Step 3. Then go to the render options. Set the video resolution and aspect ratio according to the original image sequence stripe.
Step 4. Move to the right corner to tweak output settings. Choose FFmpeg Video in the File Format option. Expand the Encoding menu to set the format container, codec, output quality, encoding speed, and so on. Generally, you are recommended to convert an image sequence to MP4 H.264 with perceptually lossless quality in Blender.
Step 5. Open Render Properties > Color Management. Select Standard in View Transform and None in the Look option.
Step 6. Click Render in the top menu bar and Render Animation. Now Blender begins to convert the image sequence to an MP4 video file.
5. Convert Image Sequence to Video in Photoshop
Photoshop, the most popular and powerful photo editing software from Adobe, surprisingly features a basic video editor. So if you have purchased and installed Photoshop CC, you can render an image sequence to an MP4 video in 4K and 1080p. As for the input, it supports TIFF, WebP, BMP, PNG, and JPG image sequences without count limits.
Note: Once you import an image sequence to the video editor in Photoshop, you are dealing with numerous video frames instead of the original individual images, which will make simple accurate edits more complicated.
Step 1. Before using Photoshop, make sure all the pictures are sequentially numbered and saved in the same folder.
Step 2. Launch Photoshop. Click File > Open and select the first image in the sequence. Check the Image Sequence option. Then set the frame rate of your project.
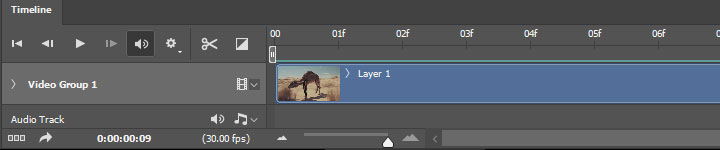
Step 3. Now you'll be landed in the editing workplace. In the timeline panel, you can cut, change resolution, add media files, and insert transitions.
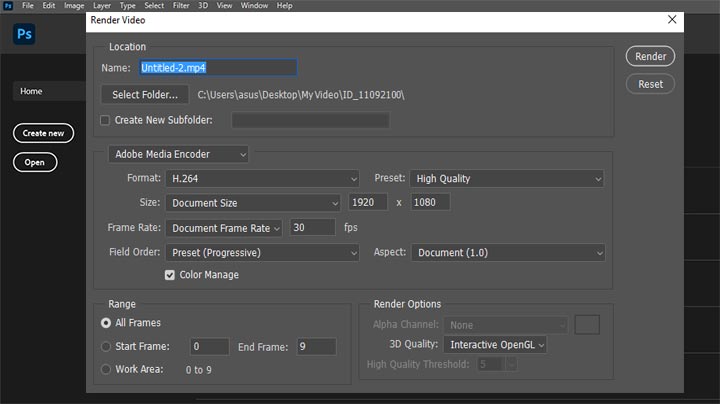
Step 4. Click File > Export > Render video. Finish all the settings about the file video. Click Render and wait for it to export.
6. Convert Image Sequence to Video with FFmpeg
For advanced users, developers, and those seeking the maximum level of customization, FFmpeg is the gold standard. This powerful, free, and open-source command-line tool provides unmatched flexibility for converting image sequences (JPG, PNG, TIFF, BMP, etc.) into any video format (MP4, MOV, WebM). FFmpeg is platform-independent (Windows, Mac, Linux) and renowned for its rapid processing speed, making it the top choice for bulk conversion or when working with high-resolution, uncompressed professional sequences.
Step 1. Before converting an image sequence to a video, you need to make sure FFmpeg is properly installed and accessible from your command line. FFmpeg is a command-line tool, so all operations will be done in a terminal window.
- On Windows, download FFmpeg from the official website, extract the files, and ensure the ffmpeg executable can be recognized by the system.
- On macOS, you can install FFmpeg quickly using Homebrew by running brew install ffmpeg.
- On Linux, FFmpeg can be installed via the package manager with sudo apt install ffmpeg.
Tips: Once the installation is complete, open a terminal or command prompt and run the following command: ffmpeg -version. If FFmpeg is installed correctly, the command will return version information instead of an error message. This confirms that FFmpeg is ready to use for converting image sequences into video files.
Step 2. All images must be placed in the same folder and follow a consistent, sequential naming pattern. FFmpeg reads image sequences based on numerical order, so filenames such as image_001.png, image_002.png, and image_003.png work correctly.
Note: Avoid irregular or descriptive names like image1.png, image_final.png, or image_last.png, as these will prevent FFmpeg from detecting the sequence properly.
Step 3. Enter the following command to convert an image sequence into a video:
ffmpeg -framerate 24 -i image_%03d.png output.mp4
Tips: The -framerate 24 option sets the playback speed to 24 frames per second. The input pattern image_%03d.png indicates a three-digit numbered sequence (001, 002, 003), and output.mp4 defines the output video file.
Step 4. To ensure better quality and broad device compatibility, specify the video codec and pixel format explicitly:
ffmpeg -framerate 24 -i image_%03d.png \-c:v libx264 -pix_fmt yuv420p output.mp4
Tips: The libx264 codec provides high-quality H.264 encoding, while yuv420p ensures the video plays correctly on most devices, especially on Apple platforms.
Step 5. The output resolution can be adjusted during conversion using a scaling filter. For example, the following command exports the video at 1920×1080:
ffmpeg -framerate 24 -i image_%03d.png \
-vf scale=1920:1080 output.mp4
To preserve the original aspect ratio, set one dimension to -1, such as scale=1920:-1.
If the image sequence does not start at 001, specify the starting frame number explicitly. For example, when the first image is image_0100.png, use the following command:
ffmpeg -framerate 24 -start_number 100 -i image_%04d.png output.mp4
Step 7. JPG image sequences follow the same rules as PNG sequences. As long as the filenames are numbered consistently, they can be converted using a similar command:
ffmpeg -framerate 30 -i frame_%05d.jpg output.mp4
Step 8. For maximum quality, adjust the CRF value during encoding:
ffmpeg -framerate 24 -i image_%03d.png \
-c:v libx264 -crf 0 -preset veryslow output.mp4
Note: Lower CRF values produce higher quality output. A value of 18 is commonly considered visually lossless, 23 is the default, and higher values such as 28 result in smaller file sizes.
Image Sequence to Video: 5 Pro Tips for a Polished Result
Turning a series of photos into a video is easy, but making it look professional requires a few extra steps. Use these expert tips to improve your next image sequence to video project.
1. Check Your File Naming
Before importing, ensure your image sequence is named correctly (e.g., image_001.jpg, image_002.jpg). A gap in the numbering is the most common reason an image sequence to video conversion fails.
2. Choose the Right Frame Rate (FPS)
The frame rate determines the final video's smoothness. When you create a video from an image sequence, use 24 or 30 FPS for a standard timelapse. For stop-motion animation, a lower rate like 15 FPS creates the classic, stylized look.
3. Animate the Whole Sequence
To add a Ken Burns (pan and zoom) effect, apply it to the entire image sequence clip on your timeline. Don't animate individual photos, or the motion will be jittery.
4. Batch Color Grade
To prevent flickering, apply color correction to the final video clip, not the source images. This ensures your video made from an image sequence has consistent color and brightness from start to finish.
5. Use a High-Quality Codec for Export
When you export the final video, use a high-quality format like H.264 or HEVC with a high bitrate to preserve the detail from your original photos.
FAQs
1. Why does my video created from an image sequence flicker?
Flickering is the most common problem when you convert an image sequence to video, especially with timelapses. It's caused by minor changes in light between shots. To fix this, use your camera's manual mode to lock the exposure or apply edits like color adjustments and crop using video editor like VideoProc Vlogger.
2. How many photos do I need to make a video from an image sequence?
This depends on your target frame rate (FPS) and video length. For a 10-second video at 30 FPS, you would need 300 images (10 seconds x 30 frames/second).
3. What is the best software to turn an image sequence into a video for free?
For most users, a free video editor like VideoProc Vlogger is the best choice. It offers more control than online converters and is easier to learn than complex tools like Blender or FFmpeg.
4. Can I also convert an image sequence to video online?
Yes, many websites can convert an image sequence to video online. These are good for very short, simple projects but often add watermarks, have file size limits, and offer fewer editing features than desktop software.


