Most important issue we need to answer and fix comes first. Can we upload 4K videos to YouTube?
Short answer is that YES, YouTube supports 4K video uploading. But the question is that do we have to upload videos to YouTube in 4K resolution? How to upload 4k video on YouTube?
Quick Navigation:
- Why Should You Upload 4K Video on YouTube
- Recommended Settings for YouTube 4K Video Uploading
- Quick Editing Before Uploading 4K Video to YouTube
- How to Upload 4K Videos to YouTube
- Troubleshoot Issues about Uploading 4K Videos to YouTube
Why Should You 4K Video on YouTube
Higher search ranking
If you have ever done any research on YouTube SEO, which helps your videos rank higher in YouTube, you will probably know that video quality is one of the crucial ranking factors and high-definition (HD) videos rank better than lower-quality ones. But with 75% of videos on YouTube already being in HD, now you have to upload in 4K Ultra HD to outrank your competitors. In fact, YouTube prominently highlights 4K videos in its search results.
4K for bigger screen
Some would argue that 4K would yields no distinct improvement over HD since most PC monitors are only in 1080p. But with the prevalence of smart 4K TVs and the fact that YouTube can be found on almost every streaming device available, 4K videos can now be enjoyed with its high frame rate for smooth motion and stunningly realistic viewing experience with striking visual details. 4K does make a lot of sense when it comes to a much bigger screen with a resolution 4 times higher than your normal 1080p PC monitor.
Video Tutorial: How to Upload a 4K video to YouTube in YouTube Studio
- [00:38] Recommended 4K Encoding Settings
- [01:00]
 Download VideoProc Converter AI to cut, merge, crop 4K video
 - [01:52] How to Upload 4K to YouTube
- [05:31] 4K Video Stuck in 360p or 240p
Now let's download VideoProc Converter AI that can help you upload 4K videos to YouTube successfully.

Recommended Settings for YouTube 4K Video Uploading
To ensure smooth uploading and processing of your elaborate 4K video and to present your audience with the best possible result, you have to follow the settings recommended by YouTube.
Be forewarned, there's an alphabet soup of acronyms and phraseology ahead. If you are not a video geek, tweaking these parameters can really be painful for you.
VideoProc Converter AI has prepared in its output profile a ready-made preset best optimized for uploading MP4 to YouTube, so you can save all the toiling on tackling with these intricate settings.
OK, below are YouTube's official recommended upload encoding settings for your 4K videos:
Container: MP4
- No Edit Lists (or the video might not get processed correctly)
- Move atom at the front of the file (Fast Start)
Audio codec: AAC-LC
- Channels: Stereo or Stereo + 5.1
- Sample rate 96khz or 48khz
Video codec: H.264
- Progressive scan (no interlacing)
- High Profile
- 2 consecutive B frames
- Closed GOP. GOP of half the frame rate
- CABAC
- Chroma subsampling: 4:2:0
If 4K video your plan to upload to YouTube is with the format of AVI, WMV, MKV, MXF, AVCHD, you can download VideoProc Converter AI to convert it to YouTube's favorite 4K H.264 High Profile video. Here is a detailed tutorial on How to Convert MXF to MP4 using VideoProc Converter AI.
Frame rate
- Content should be encoded and uploaded in the same frame rate it was recorded
- Common frame rates include: 24, 25, 30, 48, 50, 60 frames per second (other frame rates are also acceptable)
- Interlaced content should be deinterlaced before uploading. For example, 1080i60 content should be deinterlaced to 1080p30
Bitrate
The bitrates below are recommendations for uploads. Audio playback bitrate is not related to video resolution.
| Type | Video Bitrate, standard Frame Rate (24, 25, 30) | Video Bitrate, High Frame Rate (48, 50, 60) |
|---|---|---|
2160p (4k) SDR |
35-45 Mbps |
53-68 Mbps |
2160p (4k) HDR |
44-56 Mbps | 66-85 Mbps |
Recommended audio bitrates for uploads:
| Type | Audio Bitrate |
|---|---|
Mono |
128 kbps |
Stereo |
384 kbps |
5.1 |
512 kbps |
Some Quick Editing Before Uploading 4K Video to YouTube
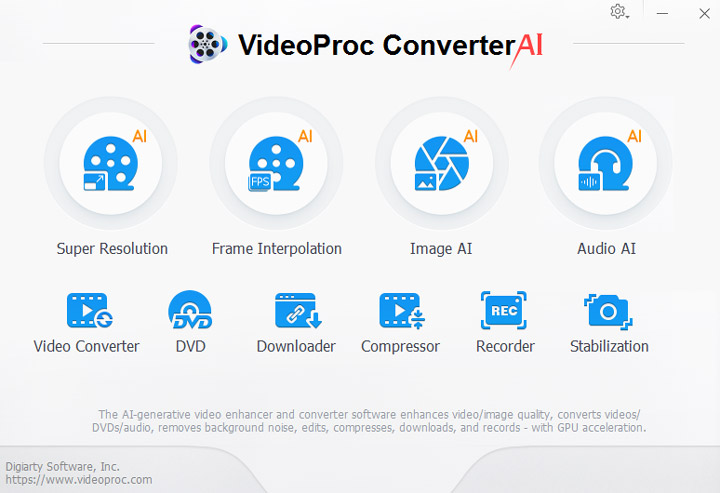
To make this job much easier, we would recommend VideoProc Converter AI as a great helper. It is the stripped back option for YouTubers who do not want the complexity, redundant features and extra cost of professional video editing software and features an interface that has been created for ease of use.

Step 1. Import your video file
Open VideoProc Converter AI > click "Video" to get into video processing center > "+ Video" > select your 4K video files > "Open", or, you can simply drag and drop your 4K files in.
4K footages usually have a file size substantially bigger than a normal HD video and can take some programs forever to upload, but VideoProc Converter AI, a professional 4K video editor, with its advanced level-3 hardware acceleration, guarantees a loading time within just a few seconds.
Step 2. Cut and trim your video
YouTube has a maximum video length of 12 hours, which should outlast most of your uploads. But don't even try to upload Do some research on videos about the topic you want to make a video for and figure out the video duration your typical audience would feel the most comfortable with.
Follow this video to learn how to use VideoProc Converter AI to cut the unwanted parts or join selected segments from your footage:
Step 3. Crop your video
Stick to that 16:9 aspect ratio when you edit a video for uploading to YouTube. You really want your videos to show up well when users are watching, whether they're watching on desktop or mobile. It's particularly important on mobile, especially with 70% of views coming from mobile, so that the video can scale properly to full screen, making it easier for users to see and engage with.
You can follow this guide for the detailed steps about how to crop your videos.
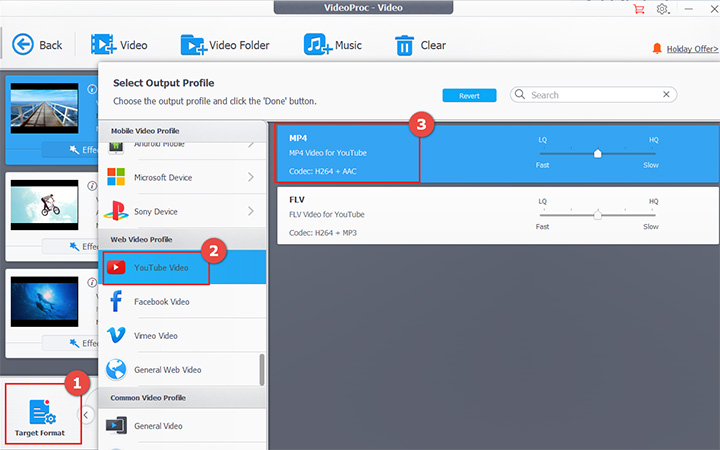
Step 4. Resize and convert your video to the best format for YouTube
When you see the size of a 15-minute raw 4K files from your filming device, you may recoil at any idea of uploading or sharing it online. VideoProc Converter AI's intelligent compression algorithm can automatically settle the encoding settings to bring down the file size while keeping the degradation of image quality to its minimum, and its Full Hardware Acceleration efficiently utilizes your hardware to make it possible to have a smooth 4K video editing experience on mid or lower-range computers.
And then click "Target Format" > find "YouTube Video" under "Web Video Profile" > choose "MP4 Video for YouTube" – "Done" > click "RUN" button on the main interface to start the conversion.
How to Edit 4K Videos like a Pro before Uploading to YouTube?
Can you upload 4k to YouTube? What we've discussed above is the basic 4K video editing process with VideoProc Converter AI. If you want to do more creative edits, VideoProc Vlogger, a superb non-linear 4K video editor, is a better assistant.
This software gives more power to users to edit 4K, HDR, and RAW videos from DSLRs, GoPro, DJI, iPhone, Android, etc. Features like speed ramping, dynamic cropping, color grading, and audio editing can make cinematic vlogs out of any plain footage.
Watch the quick workflow of 4K video editing in VideoProc Vlogger, download and try it for FREE now!
How to Upload 4K Videos to YouTube
After you have finished editing your 4K video and converted it to YouTube-ready MP4, sign in your YouTube account in the web browser to start the uploading. It is recommended to use the latest version of Chrome for uploading large-size 4K videos.
1. To get started, click the "upload video" icon at the top right corner on the YouTube page and a new window will appear where you can simply drag and drop the file you want to upload or click on the big grey arrow and select your video.

As this video is uploading you can edit both the basic and advanced settings of the video, click "Publish" to finish uploading a public video to YouTube
2. While the video is uploading you can fill out the other areas on the page.
The "Basic info" tab:
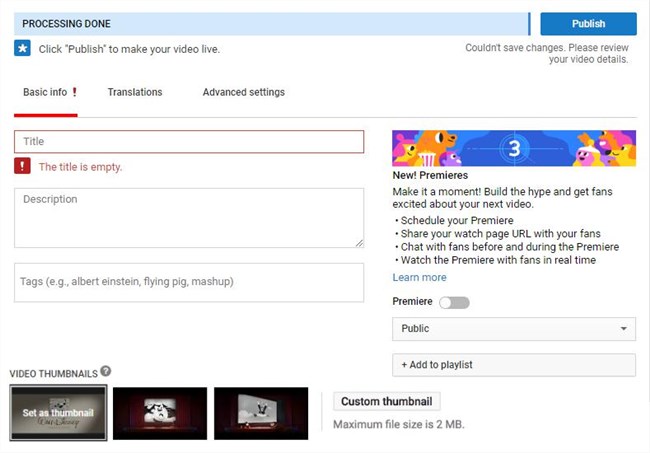
Title: to create a catching and creative title, you can type in some keywords in the Youtube search bar and see titles automatically suggested by YouTube for inspiration.
Description: put in as much information that best describes your video to help YouTube to rank it properly.
Tags: like the ingredients for your video, where you'll add all the searchable keywords that are related to your video.
Thumbnails: usually YouTube will give you three random to choose from, but it's better to upload your custom thumbnails that are representative and grabs the viewers' attention. The best thumbnails are the ones that stand out among the rest of the search by using popping colors, catchy tracks that further describe the video and highlight a person or object as the main focus.
3. Go to the drop-down menus on the right side the privacy settings allows you to limit the audience who can watch your video
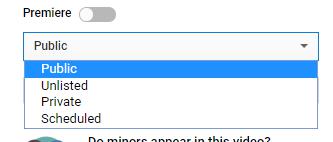
Public: your video is available to everyone in the world;
Unlisted: anyone with the video link can watch your video;
Private: you can share your video only through the specific email addresses you can;
Schedule: set a time in the future when your video will come live.
In the second drop-down menu, you can add your video to a specific playlist to help it get ranked by giving it a category.
In the Translation tab, you can add different languages to your titles and description so they can be accessed audience from different countries
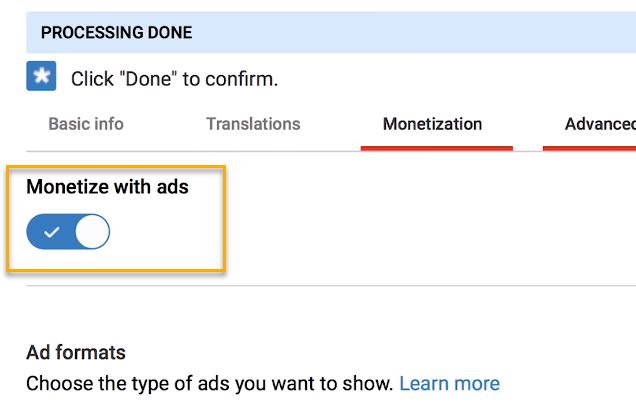
4. Next is monetization, YouTubers can monetize their video through Google Adsense when they reach a total watch time of 4,000 hours in the past 12 months and a minimum of 1,000 subscribers. If you haven't reached that point, then you will not be able to see the monetization tab when you upload your videos. But it's just a matter to activate it.
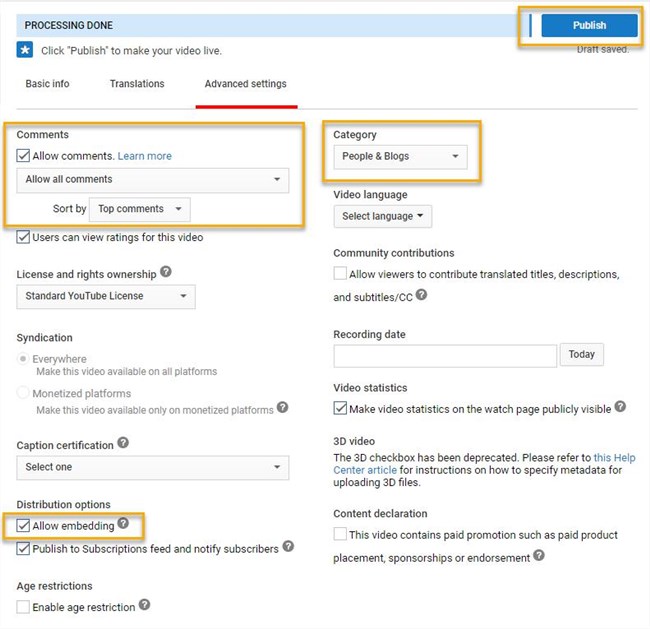
5. In the Advanced Settings tab, there are even more options you can customize, like you can select if allow users to comment, which comments will show in your video, and how these comments will be sorted, or if you want to allow people to embed your video on their site, or even just the category that your video belongs to.
Now that you finish putting your settings, check the bar at the top. When it's done, it'll say "processing done." You are now ready to publish your video.
Troubleshoot Issues about Uploading 4K Videos to YouTube
In some situations, users may encounter some issues when uploading 4K videos to YouTube. And this troubleshooter will walk you through some of the most common issues that you might see when upload video to YouTube, and how to fix them.
1. Format not supported
Oftentimes problems occur if you're uploading a file in the wrong format. Make sure you're using a supported file type. If you're not sure which format to save your video as or are getting an "invalid file format" error message when you're uploading, make sure that you're using one of the following formats:
MOV, MPEG4, MP4, AVI, WMV, MPEGPS, FLV, 3GPP, WebM, DNxHR, ProRes, CineForm, HEVC (h265)
YouTube accepts a number of different video formats, but they have recommendations for what can generate the best results and most high quality video on their platform. VideoProc Converter AI follows the official recommendation and has in its output profile a ready-made preset best optimised for upoading to YouTube, so you don't have to manually tackle with all the parameters.
2. File size or duration exceed limitation
This usually happens because YouTube by default only accepts uploads under 15 minutes. After verifying your Google Account and updating your browser to the latest version, the maximum file size that you can upload to YouTube is either 128GB or 12 hours, whichever is less. Some older videos may be longer than 12 hours, but that cut off has been reduced. (Although really, that's for the best; you're going to lose people like crazy if you're going more than 12 hours and it sounds like a nightmare to edit).
If your video file size or duration outstrip the limitation after your Google Account verified (though rather unlikely), please follow this guide on how to resize 4K videos.
3. 4K videos stuck in 360p after upload
A video uploaded to YouTube will initially be processed in low resolution to "help" users complete the upload process faster. When the upload flow is complete, the video will first be available to stream in lower resolutions, on a wide range of devices.
Higher resolutions like 4K can take much more time to process. While this processing completing in the background, the video uploaded may appear to be missing higher resolutions for several hours. Once high-resolution processing is finished, higher resolutions will be available on your video.
Factors like video format, video length, frame rate, and resolution all influence on the processing time. To make sure that YouTube can process your video as smooth and fast as possible and keep the highest quality for different resolution options, we recommend using VideoProc Converter AI to convert your video to the format best optimized for YouTube uploading.
Tip: You can upload your video as unlisted first and make it public once high-resolution processing is complete, so viewers will only ever see your video in high resolutions.
Over to You
These are pretty much all the information we have collected to help you with uploading 4K videos to YouTube. If this post does not cover all of you questions or issues related to this topic, please be free to tell us, and we will update them as soon as possibile. BTW, we have also prepared a similar topic for Instagram. If you feel intrested in it, please click here.


