In-page Navigation
Create Cinematic Camera Movements in VideoProc Vlogger
Camera movements matter a great deal in both industrial filmmaking and daily vlogging. If you don't get them perfect on set, some techniques in post-editing can save them as well. In VideoProc Vlogger, you can find 28 presets and infinite customizable movements for your video.
Let's download and install VideoProc Vlogger to create cinematic videos with camera movements in post-editing.
Introduction to Camera Movements
A camera movement refers to the way of how a camera shifts while shooting. The angel, route, and speed of a camera movement work together to create dynamic scenes, influence audiences' emotions and attention, and reveal or emphasize some special moments in your vlogs, such as a basketball going into the hoop, a big splash when you jumping into a pool.
VideoProc Vlogger Presets for Basic Camera Movements
Cameras movements can serve several purposes for your video production while coming in different types.
Below are basic camera movements that filmmakers perform for different kinds of shots and presets in the Motion Editor of VideoProc Vlogger that you can utilize to fake camera movements if you did not capture all the desired shots on set.
| Types | Movements | Presets | Typical Use |
|---|---|---|---|
| Zoom | Lens zooms in/out while the camera is fixed |
|
|
| Pan | Move left/right at a fixed postion |
|
|
| Tilt | Move upward/downward at a fixed position |
|
|
| Truck | Move horizontally along a fixed-line |
|
|
| Pedestal | Move vertically along a fixed-line |
|
|
| Push In | Get closer to a subject |
|
|
| Pull Out | Get further away from a subject |
|
|
| Roll | Rotate on the long axis |
|
|
| Shaky Cam | Shake |
|
|
| Random | Random movement |
|
|
| Dolly Zoom | Camera and lens dollies/zooms in the opposite direction | Zoom in/out on footage that features pull out/push in |
|
With a brief understanding of camera movements, Let's turn plain video clips into cinematic vlogs, traveling videos, and sports videos with the motion presets in VideoProc Vlogger.
How to Fake Camera Movements in VideoProc Vlogger
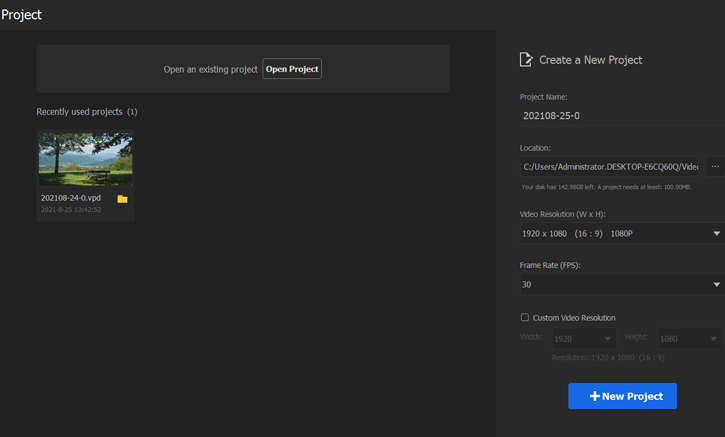
Step 1Load videos to VideoProc Vlogger
Create a new project or open an existing project in this editor. Add the footage to Media Library, then drag it to the timeline.
Step 2Open the Motion Editor in VideoProc Vlogger
Click to select the clip in the timeline to which you want to add camera movements. If necessary, split the part from the whole video in advance. Then click Motion in the toolbar to open a sub panel.

Step 3Choose a preset camera movement
Think about the narrative purpose of your shots and choose a way to re-design the camera movements in post-editing. Once you decided, drag the playhead at the potions where you want the motion to start, choose a preset above the timeline, and then you'll see the magic happen.
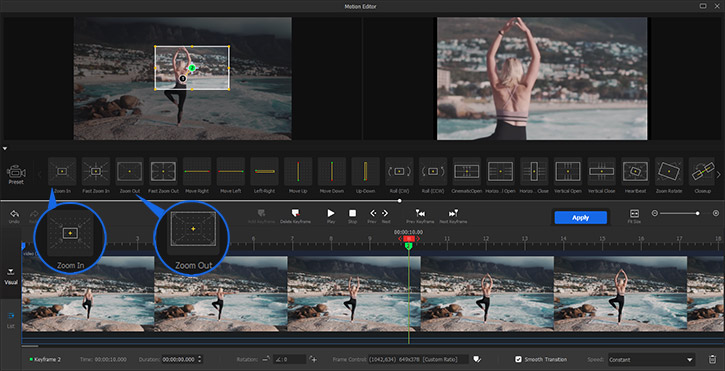
Option 1. Zoom – Zoom In, Zoom Out
Compared to static shots with a fixed shot size, the zooming effect shows the transition from a wide shot to a close-up, or changes of other shot sizes, thus giving a cinematographic degree of freedom. If you didn't get these shots on set, use Zoom In and Zoom Out in Motion Editor.
They insert two keyframes into the timeline automatically. The video starts to zoom in from the entire frame or zoom out from the center on the first keyframe and ends up at the second one.
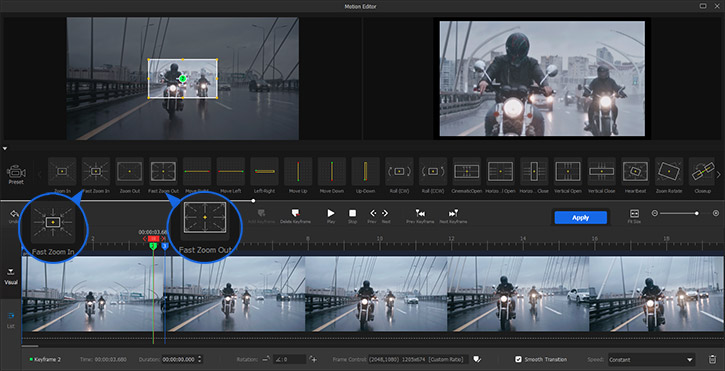
Option 2. Crash Zoom – Fast Zoom In, Fast Zoom Out [Creative Preset]
Crash zoom is a variant of zoom and is executed suddenly and rapidly. It is often used for dramatic or comedic effects, such as a quick close-up on an expression. Fast Zoom In and Fast Zoom Out in Presets were born for this purpose.
This effect adds three keyframes to the timeline. The video zooms in/out faster from the first keyframe to the second than the second to the last one.
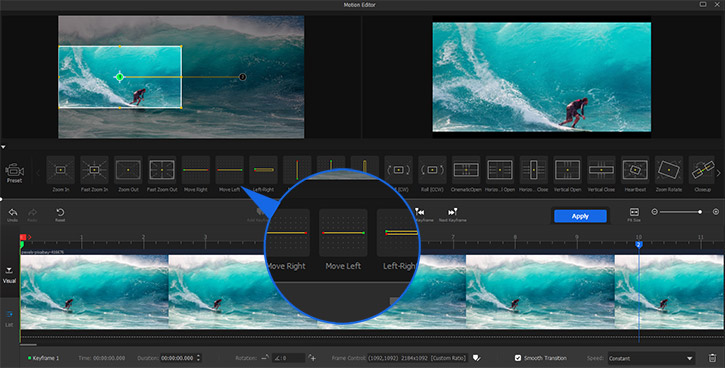
Option 3. Truck – Move Right, Move Left, Move Left-Right
Truck controls revealing of different parts of the scene in a horizontal path. In Motion Editor, you can use track moving subject with Move Right, Move Left, or Move Left-Right to truck rightward, leftward, or back and forth.
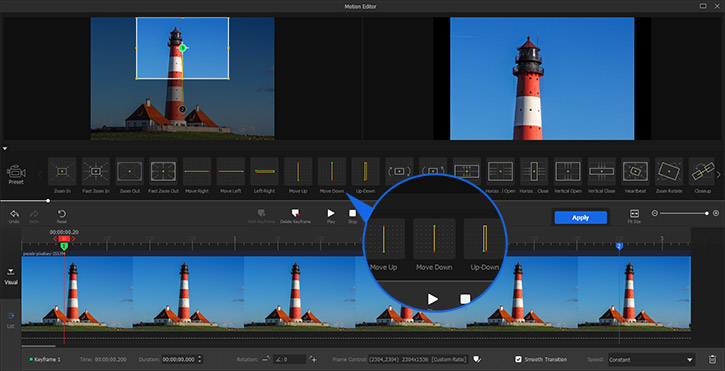
Option 4. Pedestal – Move Up, Move Down, Move Up-Down
Pedestal unveils the scene in a horizontal path. For instance, reveal a tall building from the bottom to the top like the camera was flying higher beside it. Move Up, Move Down, and Move Up-Down come to meet your needs for different pedestal directions.
Option 5. Pan – Move Left, Move Right, Move Left-Right (Panorama Videos)
Different from truck and pedestal, pan refers to record a video while turning the camera on a fixed head to capture the entire viewer. If you got a 360° panorama/VR video, you can move it left or right easily to fake a pan movement in post editing.
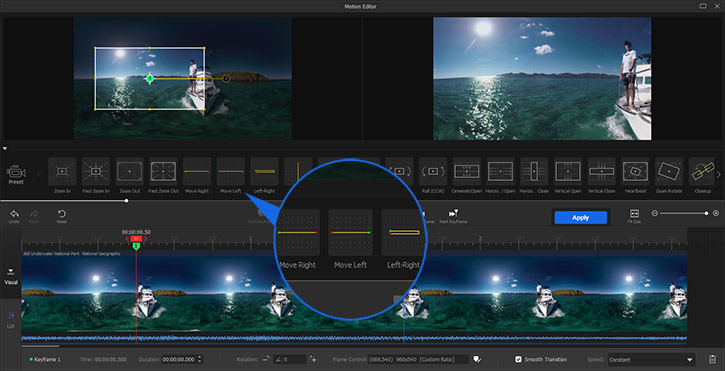
Tips: You can customize the duration of keyframes in Move Left, Move Right, Move Left-Right to make a rapid pan, slow pan, or whip pan.
Option 6. Tilt - Move Up, Move Down, Move Up-Down (Panorama Videos)
Similar to pan, imitating tilt in post editing is workable for panorama videos. Once load it to VideoProc Vlogger, you can use Move Up, Move Down, or Move Up-Down to change its tilting angle.

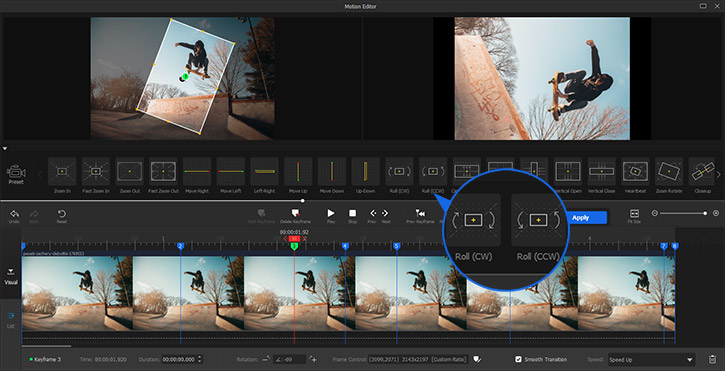
Option 7. Roll – Roll (CW), Roll (CCW)
In post-editing, simply rotation cannot restore this effect as it is dealing with the 2D footage. Whereas the Roll preset in VideoProc Vlogger imitates this movement successfully with its intelligent keyframe insertion and re-scaling.
You can roll clockwise or roll counterclockwise to highlight special moments in sports or add dynamics to aerial shots.
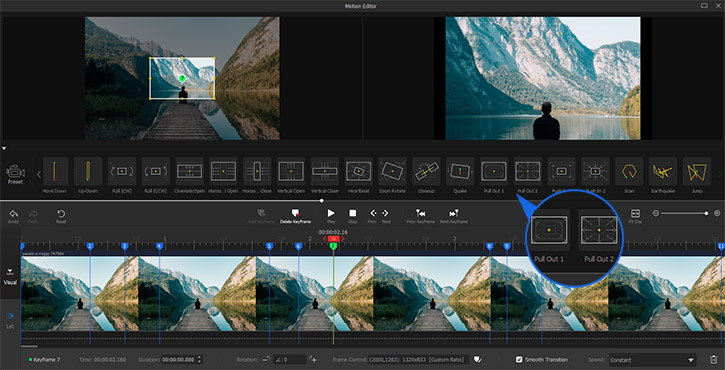
Option 8. Pull Out – Pull Out 1, Pull Out 2
Pull out is used to reveal more information, e.g. from a person to the surroundings.
- Pull Out 1 inserts 11 keyframes and pulls out four times and the movement stops between each change.
- Pull Out 2 inserts 6 keyframes and pulls out three times with obvious pauses.
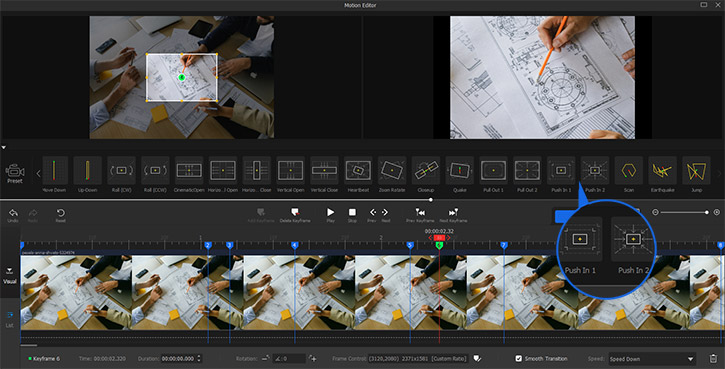
Option 9. Push In – Push In 1, Push In 2
Push In is to concentrate on a certain part of the footage thus showing details, for example, a facial expression, a note on a book, a move in dance, etc.
- Push In 1 adds 8 keyframes and moves closer to the center more slowly and smoothly.
- Push In 2 adds 7 keyframes and gets closer to the center faster with obvious stops when the dolly speed changes.
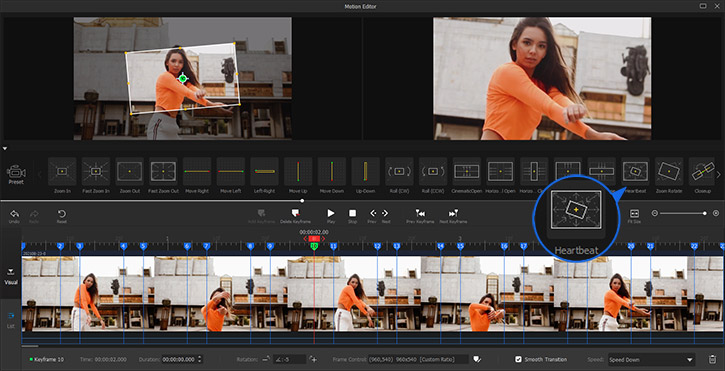
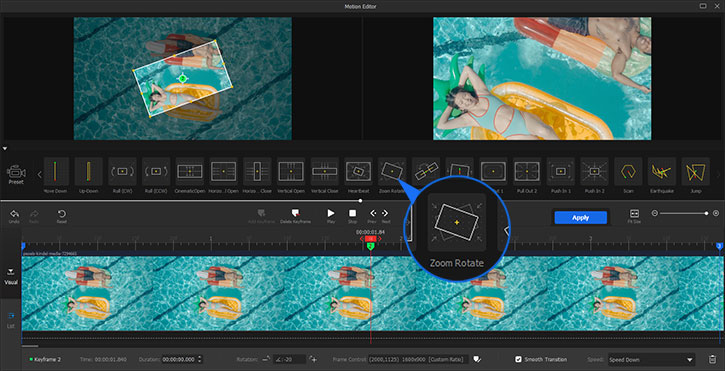
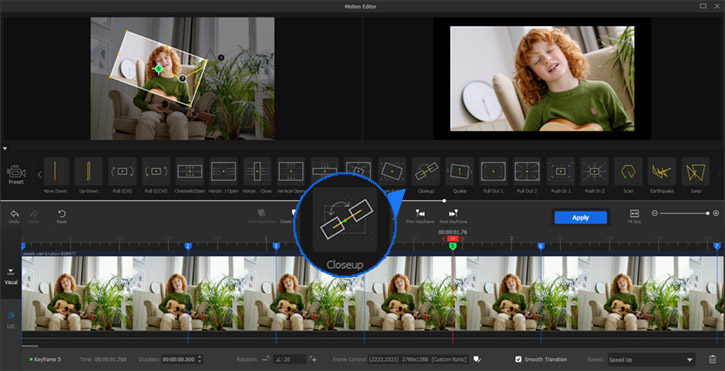
Option 10. Rotating Dolly Zoom – Heartbeat, Zoom Rotate, Closeup [Creative Preset]
A dolly shot uses a track or a motor to move the camera forward or backward. While combined with rotation, the footage becomes more energetic. There are three motion presets using dolly and rotating at the same time – Heartbeat, Zoom Rotate, and Closeup.
Heartbeat zooms in and out very fast multiple times while rotating the footage. This technique is often used for dance and music videos to make the footage look like hitting the rhythm of beats in music.
Zoom Rotate is a simple combination of zooming and rotating. It starts to zoom in and rotating and then zoom out to the original frame with rotating backward.
Closeup zooms in first. While concentrating on the center, it rotates rightward and leftward several times, then quickly gets back to the original frame.
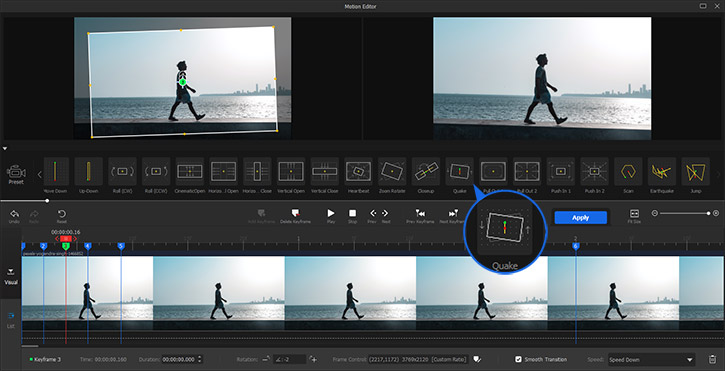
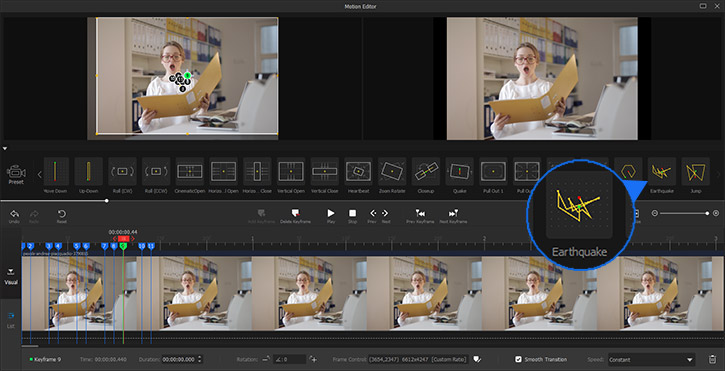
Option 11. Shaky Cam – Quake, Earthquake
To create a shaky cam in VideoProc Vlogger, you have two options.
Quake shakes the footage slightly and quickly. You can use it to fake movements of walking, floating, etc.
Earthquake, just as the name suggests, makes fierce shakes all of a sudden. You can use it to create astonishment, panic, or chaos of an action.
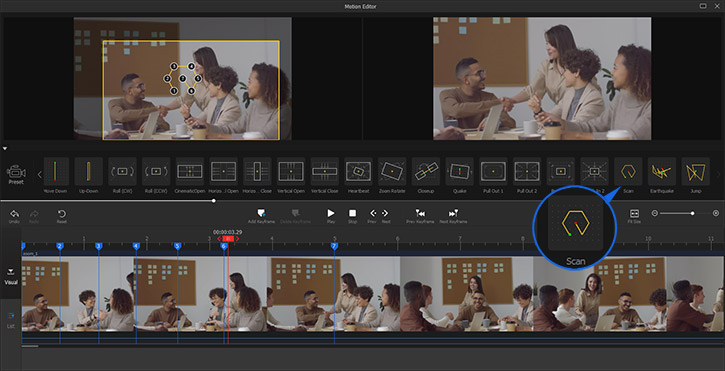
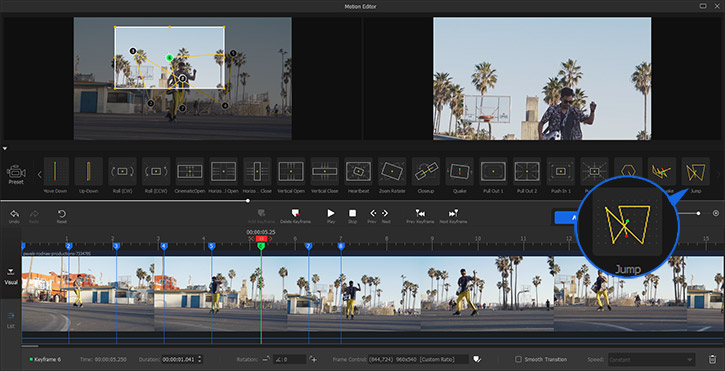
Option 12. Random – Scan, Jump [Creative Preset]
Random shots move and focus on random areas in the scene, thus creating a sense of disorientation. Besides shaky cam, Scan and Jump are also nice presets to fake random movements.
Scan hovers around the footage and ends up restoring the original frame size. It looks like being recorded with a handheld camera. Also, you can turn a photo collage into a video by scanning every pic in the collection.
Jump moves in a random path without smooth transitions. The quick cuts create energy and intensity, particularly in an action scene.
Step 4Save and export
Hit the playback button to check the final result. If it's OK, click Apply to get back to the main interface. Now you can go on editing or export the video from VideoProc Vlogger.
Now download VideoProc Vlogger and have a try. We are eager to see your cinematic work.
Related Guides:
- > Speed Ramp in VideoProc Vlogger
- > Using Motion Editor in VideoProc Vlogger
- > Using Chroma Key (Green Screen)
- > How to Add Keyframes
- > Compositing with Blend Mode
- > Split Screen Video
- > Create Picture in Picture Video
For more guides of VideoProc Vlogger, please visit this page >
If you have any question, please email us or visit ![]()
![]()
![]()
Is this page helpful?
