In-page Navigation
Create Split Screen Video in VideoProc Vlogger
Split screen effects, or the video collage, are quite effective to display the video content in an interesting way. For instance, if you are making a dancing tutorial, you can shoot the video from different angles, so that the viewer will know how to move their body and wave the arms.
To get started, free download VideoProc Vlogger to create split screen effects (video collages).
Watch video tutorial on how to create split screen effects in VideoProc Vlogger, or read text instructions below.
Create Split Screen Video
Suppose you have three pieces of vertical video clips, and you want them to display at the same time, follow the steps below.
Step 1 Create a new project in VideoProc Vlogger.
Enter the project name, select a video resolution and aspect ratio, for instance, you can go with 1920x1080 (16:9).
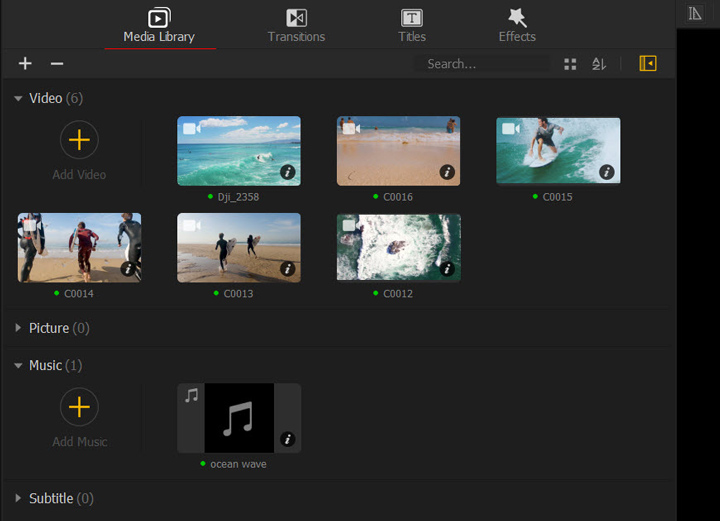
Step 2 Import video files and picture files into the media library.
Step 3 Drag clip 1 into the Video Track, and drag clip 2 into Overlay Track.
Step 4 Click + to add New Overlay Track, and drag clip 3 into this track.
Step 5 Arrange these 3 clips on the timeline. You can move a clip by clicking on it (don't release your mouse) and drag it on the timeline.
- If you want three clips to appear at the same time, make sure the beginning parts of each clip line up to the playhead.
- If you want them to appear one by one, drag clip 2 a few frames behind clip 1, and clip 3 a few frames behind clip 2.
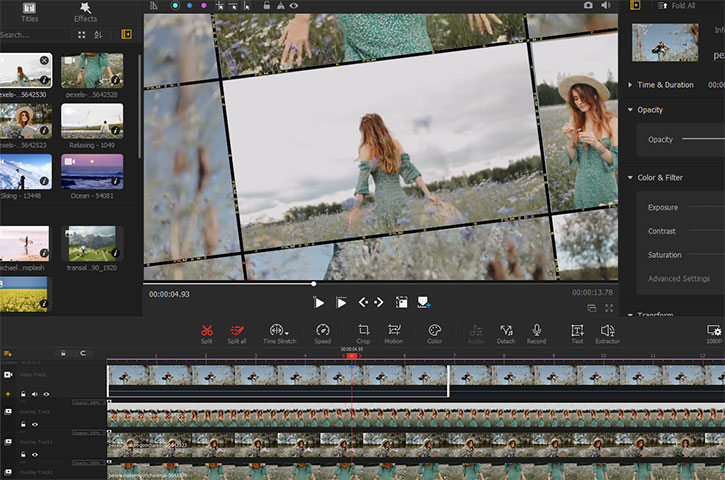
Step 6 Move the clips in the Preview Window.
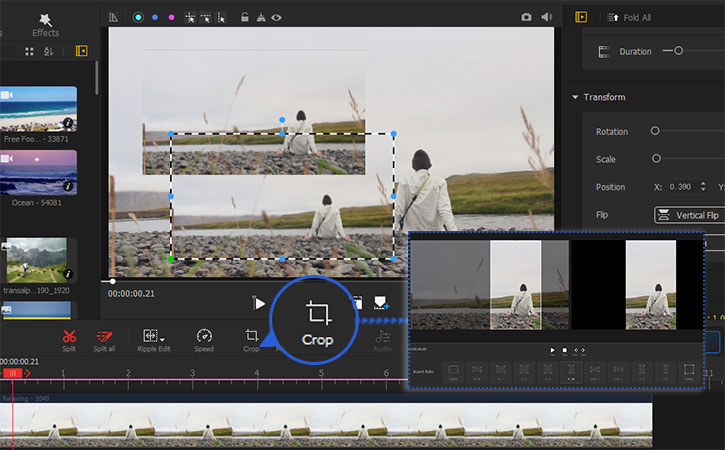
You can click the Crop icon on the toolbar to adjust the aspect ratio of the images and video clips.
Click on the clip in the preview window, and drag it to the left side of the screen, then click another clip and drag it to the right side of the screen. The third clip remains at the central part of the window.
 Editing Tips
If you want three clips on the screen to disappear at the same time, make sure the right edge of each clip ends at the same time. You can drag the edge of the longer clip, and move it to the left, so that its edge ends simultaneously with other clips.
Optional Method – Use Split-Screen Effect
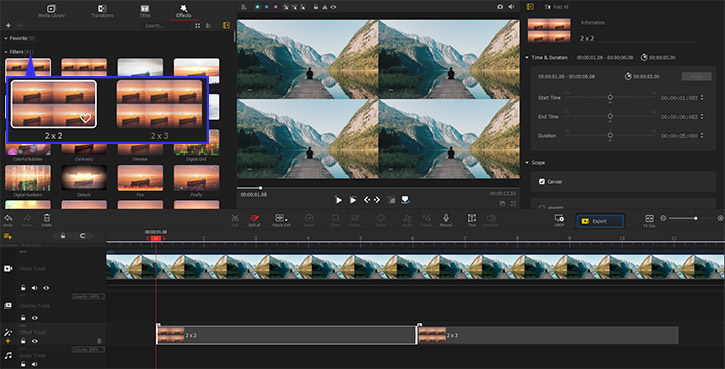
After adding your video to the timeline, open the Effects panel and choose the 2x2 grid or the 2x3 grid effect. Drag and place it to the Effect track, then you can see the screen was divided into 4 or 6 parts evenly. By dragging the edges of the effect clip, you can change its duration.
Create Split Screen Effects using Videos at Various Aspect Ratios
Besides creating split screen video of vertical video clips, you can arrange horizontal, vertical and square videos as you wish.
Let's say you have 1 piece of vertical video, and 2 pieces of horizontal videos. You can create a split screen video as the following.

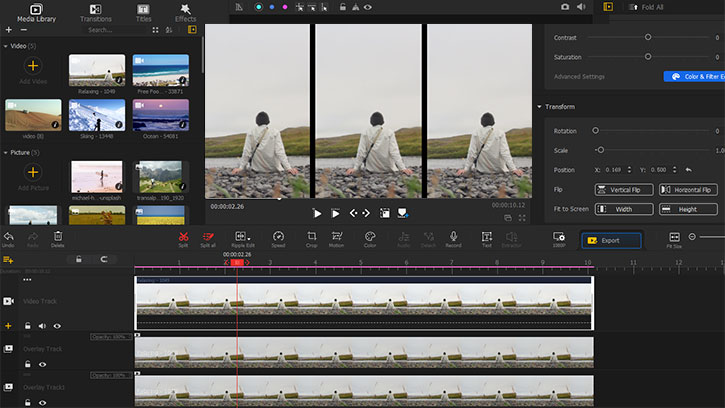
Step 1 Drag these 3 pieces of video to three video tracks (video track or overlay tracks), and align them.
Step 2 Select clip 1 (horizontal) on timeline, and click on it in the preview window, you shall see the frame for resizing.
Step 3 Drag the point on the corner to resize it, and place the clip on the top left side in the preview window.
Step 4 Drag clip 2 (horizontal) and move it below clip 1 in the preview window, crop it when needed.
Editing TipsIf you want to make sure clip 1 and clip 2 are perfectly aligned, you can use the colored reference lines. Simply click on a color you like, choose the vertical line, and place it in the preview window. Make sure each clip's edge sticks to the reference line.
The reference line will not stay on the image when you export it.
Step 5 Drag clip 3 to the right side of the preview window, resize it to fit the area.
Step 6 Click the playback button to preview your video, and decide whether you want a certain clip to starts or ends at a different time than other clips.
Create Full Screen to Split Screen Effects
You can use VideoProc Vlogger to create split screen video in the middle of the video, to make it fun when you are displaying the content to the audience.
For instance, your project can start with a full screen video, and then the split screen effects, and back to the full screen video.
Step 1 Drag clip 1 to the timeline, since it is 1920x1080, and the project resolution is set at 1920x1080, the video clip fills up the entire screen.
Step 2 Let's say you want the split screen effects to start at 00:02:00, and lasts for 2 minutes. Go drag the clips you needed to the overlay tracks, starting at 00:02:00. You can click the + icon to add new overlay tracks.
Step 3 Split clip 1 at 00:02:00 and split it again at 00:04:00.
Step 4 Click on clip 1 on the timeline (00:02:00 to 00:04:00), and hit the Crop icon.
Step 5 Select 9:16 aspect ratio (or other vertical aspect ratios), and hit Apply Crop.
Step 6 Arrange the three clips in the Preview window to create split screen effects.
Editing TipsIf you don't see clip 1, it is because it's hiding a layer under other clips. You can toggle off the eye icon on the overlay video, so as to temporarily hide the clips above. Then you shall see clip 1. Click on it and drag it to the left, then toggle on the eye icon again.
Step 7 After 00:04:00, you want clip 1 to be full screen again, and other two clips to disappear. Click on clip 1, and hit the Crop icon. Select 16:9 aspect ratio to revert it to the original aspect ratio.
Add Background Canvas to the Split Screen Video
Step 1 Find a background image you want to use. It can be a pure color background image, or any picture you want.
Step 2 Import it to the media library.
Step 3 Drag the image to the timeline on the main video track.
Step 4 Drag video clips to overlay tracks. Each video clip on one overlay track.
Step 5 Resize or crop each clip so that you fit perfectly on the screen.
Arrange the Layout of the Split Screen Video
Step 1 Make sure the video clip that you want to move is selected on the timeline.
Step 2 Click the video clip in the Preview Window and move it.
Step 3 Repeat the steps to move other video clips.
Add Slide-in Effects for the Split Screen Video
Step 1 Click on a video clip (on the overlay track), and scroll on the right panel to find the Fade and Move section.
Step 2 Add Fade in or Fade out effects.
Step 3 Click on the Move in Direction icons to add a slide-in effect (and a slide-out effect, too).
Free download VideoProc Vlogger to create split screen effects, with various layout styles and animations.
Related Guides:
- > 4 Creative Split Screen Ideas for You to Try - EP1 [Video Tutorial]
- > 4 Creative Split Screen Ideas for You to Try - EP2 [Video Tutorial]
- > Create Picture in Picture Video
- > Speed Ramp in VideoProc Vlogger
- > Using Motion Editor in VideoProc Vlogger
- > Using Chroma Key (Green Screen)
- > Compositing with Blend Mode
For more guides of VideoProc Vlogger, please visit this page >
If you have any question, please email us or visit ![]()
![]()
![]()
Is this page helpful?
