
Many actors have played their twins in movies and TV shows, for example, Tom Hardy in "Legend", Jesse Eisenberg in "The Double", and Lisa Kudrow in "Friends". And they all looked fun and natural. Want to know how? Simply put, they filmed two takes in which the actor appeared on different parts of the scene, and then stitched these clips together.
Fortunately, it is not a hard trick to learn. After reading our tutorials on how to clone yourself in a video, you can also interview with your clones, make one-man band videos, join TikTok clone video challenges, and so forth. Let's get started.
1. How to Clone Yourself in a Video with VideoProc Vlogger
VideoProc Vlogger is the next-generation video editor designed for pros and amateurs. It can make a clone of yourself in 2 ways - chroma key and overlay. In addition to dealing with the footage, it can combine separated soundtracks and record audio for your clone while editing as well. Let's download and install it to make clone videos with ease.

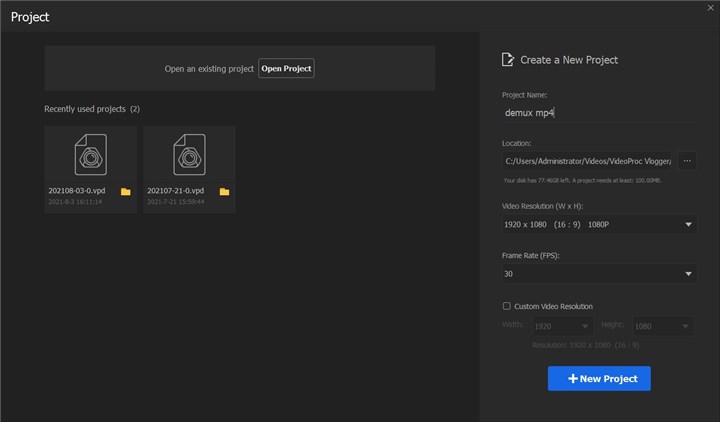
Preparation: Launch VideoProc Vlogger. Complete the project settings to create a new project. Then add videos to its media library.
Method 1. Use Green Screen
To use the Chroma key, you need to record a video as a background and two videos of yourself with a green or blue background in advance. The follow the steps below to duplicate yourself in post-editing.
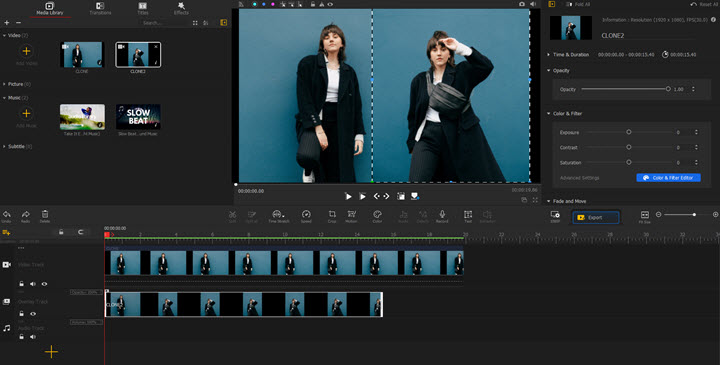
Step 1. Drag the background video to Video Track, green screen video to Overlay track. Then add one more Overlay track, and place another green screen video onto it.
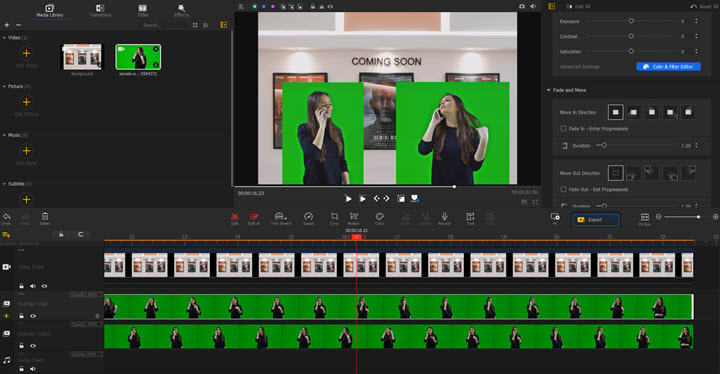
Step 2. Double-click the green screen videos on the preview window to change their positions and sizes. Make sure the gestures of each one are separated.
Step 3. Click to select an overlay track. Go to the Inspector panel and expand Chroma Key (Green Screen) option. Now you can see the green background disappear. To make it more natural, adjust Tolerance and Smoothness to remove edges.
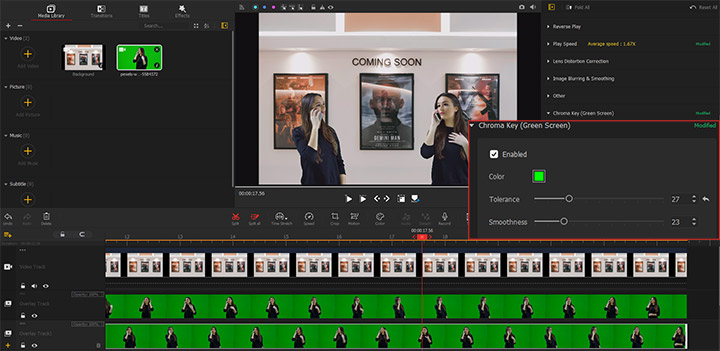
Step 4. Click to select another green screen video and repeat Step 3 to key the character out in the same way.
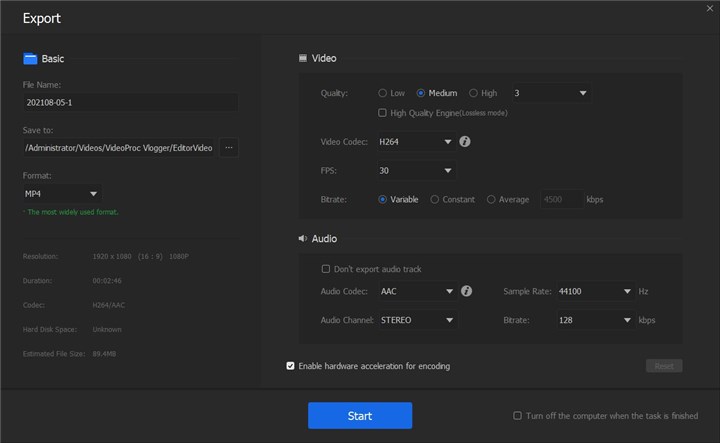
Step 5. Save and export the video.
Method 2. Use Overlay
If you don't have shots with green screen, here comes the second method.
Step 1. Import two videos shot in the same angle and lighting to VideoProc Vlogger.
Step 2. Load one video to Video Track and another one to Overly Track.

Step 3. Click to select the video on the main track and click Crop in the toolbar. Resize the video to a half in Custom mode. Click Apply Crop to close the panel.
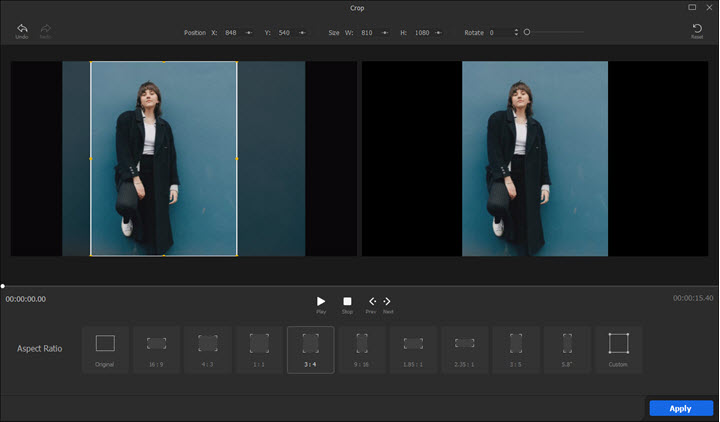
Step 4. Click to select the video on the overlay track, then crop it to another half.
Step 5. Double-click on videos in the preview window to adjust their positions.
Step 6. Export the video that contains clones to your computer.
2. How to Clone Yourself in a Video with iMovie
iMovie is a free video editing program on Mac. Although there's no preset clone effect or filter on iMovie to double or multiply yourself in a video, you can do it by applying green screen and overlaying videos. Check it now.
Step 1. Drag two videos into the timeline of iMovie. Put one video on top of another at the point where it starts.
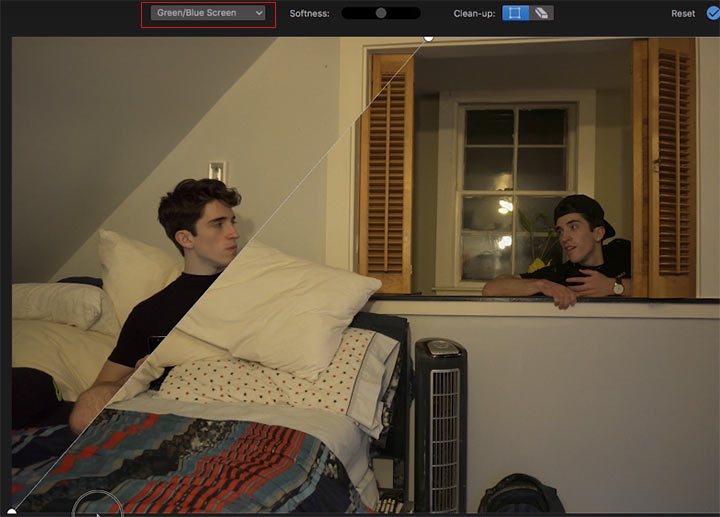
Step 2. Open "Video Overlay Settings" on the left side of the editing bar. Choose "Green/Blue Screen" in the drop-down menu.
Step 3. Then a square box shows up on your video. You need to drag the corners to uncover a part of the screen for another clip.
Step 4. Play the whole video and sync two videos to make the interaction look natural. Next, adjust the brightness and color of the whole video.
Note: It is better to record two clips without moving the camera. If you shot two videos with different angles, the final product might be tilted after you combined them.
Step 5. If both of your videos have background noises, mute one when another speaks. To do this, you need to select a video track. Click the speaker icon above the preview window and turn off the sound.
Step 6. When it is done, save and export the video from iMovie.
How to Clone Yourself in iMovie without Green Screen
Anything in blue or green in your video frame will be filtered out with the method above. So here comes how to do it without green screen.
1. Import a video into the timeline.
2. Select another video in the media bin and crop it into a smaller frame.
3. Load the cropped video into the timeline make it on the top of the other video.
4. Go to "Video Overlay Settings", and select "Picture in Picture". Now you can drag to adjust the position and the size of the cropped clip to match another video frame.
3. How to Clone Yourself in a Video with Premiere Pro
In Adobe Premiere Pro, the so-called clone effect is actually one of the creative uses of video masking. Compared with iMovie, Premiere Pro has more settings to adjust video position and scale, and blur the seam between two clips, thus makes the clones more natural.
Step 1. Add two clips to the timeline. Drag to make a gap in the timeline between the video and audio tracks of the first clip, then put another video clip right in the gap.
Step 2. Click on the top one. Move to the "Effect Controls" tab and hit the free draw Bezier icon. Draw a box on one side of the video frame, and then you can see the other side revealed.
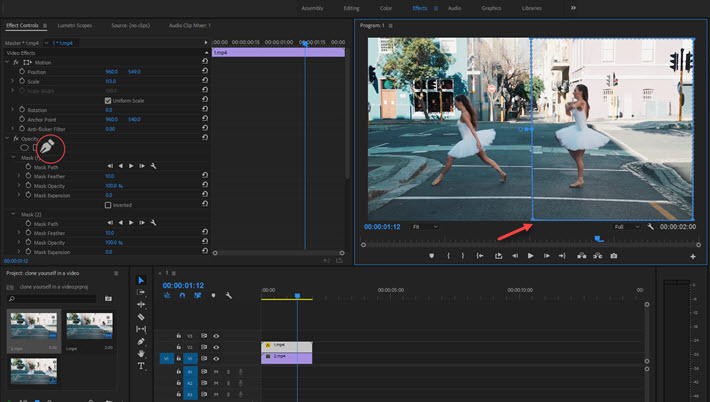
Step 3. Now you duplicated another person in the video, but a straight line comes up between the two characters even though you did not change the angles nor lights when recording them. To blur this line, select the first layer and expand the "Mask" tool. Change "Mask Feather" and you can see the line fade away, but do not let it erase the actual body.
Step 4. Adjust "Position" and "Scale" under the effect tab to change the angle if there is an obvious distortion in your video.
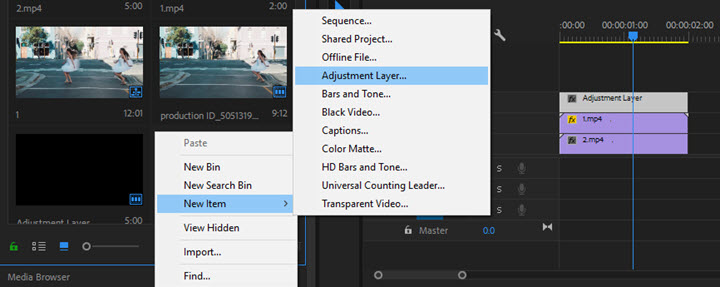
Step 5. Click on the project panel. Choose "New Item" > "Adjustment Layer" > "OK", and drag the layer on the top of all tracks. Drag to expand its duration. Select the adjustment layer, and you can edit two layers as a whole.
Step 6. To clone yourself multiple times in the video, you can add one more video track and mask out the figure. Repeat this step, and you can duplicate as many characters as you like.
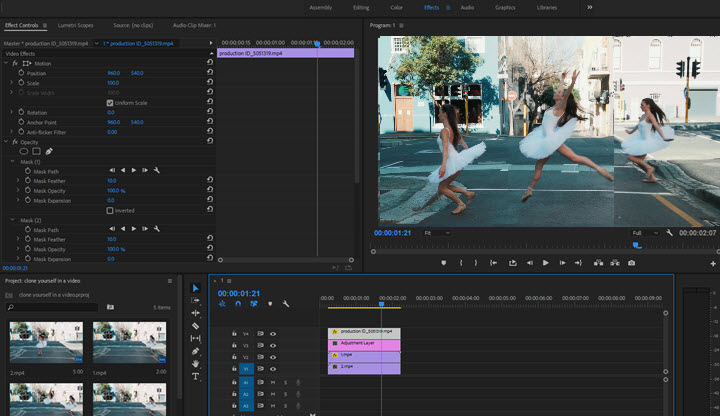
Step 7. Add another adjustment layer on the top of all tracks, and you can edit all layers as a whole, then, proceed to adjust color, and apply a lut or an effect to all of them.
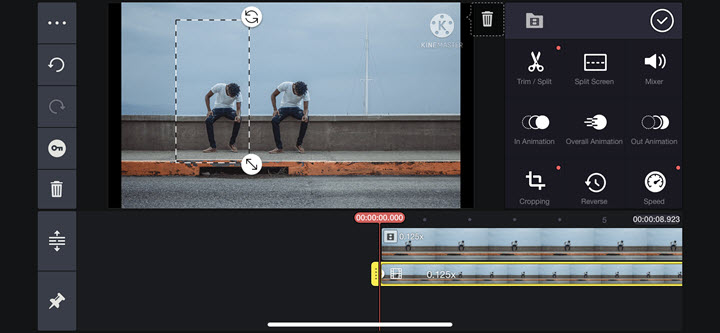
4. How to Clone Yourself in a Video on iPhone/Android
KineMaster is a great app to clone yourself in a video on your phone. It has an intuitive video layer editing UI and lets you drag the layer and crop the frame as you wish. Both pros and amateurs can handle this tool with the following guide. But one of its advantages is that you are only allowed to add 3 layers at most.
Step 1. Open KineMaster and select an aspect ratio to start.
Step 2. Click "Media" to import a video to the timeline.
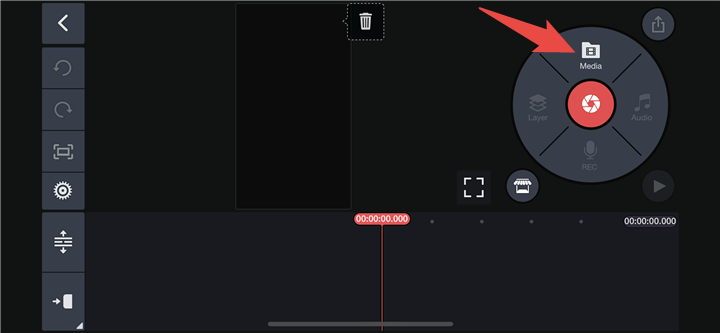
Step 3. Pause the video when you want to make a twin effect. Tap "Layer" > "Media" to load another video.
Step 4. Stretch the video to fit the size of the first video. Hit "Cropping" to crop out the figure. Then drag it next to the person in the first layer. If you want, repeat this step to make one more duplicate of yourself in the video.
Step 5. Save and export the video.
Bonus: How to Clone Yourself on TikTok
#1 Duet on TikTok with a saved video of your own.
#2 Use TikTok clone effect. It has varied effects for multiplying yourself – "Clone Photos", "Cloned", etc.
#3 Use TikTok green screen effect. (Recommended)
- Record a video of yourself and leave enough room for adding one or more clones later.
- Save the video to the local gallery.
- Open its built-in recorder again, and choose the green screen effect.
- Upload the pre-recorded clip as the background.
- Record another video and stand beside the person in the first video.
Pro Tips: How to Shoot Clones
Even though you have a powerful video editor and superb editing skills, you cannot throw everything into post-editing. The reason is that some mistakes made in the earlier shooting are irreparable. So please have a look at these things you should take care of.
1. Use the right gear.
For stationary scenes, you can place the camera on a tripod so to record videos with the same angle. While for moving shots, a 360 camera could save you from moving the camera again and again.
2. Separate the action.
If characters cross the middle of the frame, and they'll vanish in the scene when you stitch the left and right sides of each video together in post-editing. Meanwhile, avoid overlapping of your bodies while shooting, like say, hand over something to another clone.
3. Have consistent and even lighting.
If the light changes or shadows move in the screen, the edges of each clip will destroy the whole video. So finish capturing the footage before the source of light changing a lot if you are shooting outside or just beside a window.
If indoors, make the lights surrounding a character evenly. And once you've decided on an aperture, shutter speed, and exposure, keep them in the whole process.
4. Acting and dramatic techniques.
When it comes to a dialogue or any interaction between the clones, you should take care of timing to say your line or move in the right moment. For better results, a range of skills is required, for instance, good stage and vocal presence, the ability to engage with "other actors" and audiences, etc.


