"Is there a way to speed up Khan Academy videos by 1.2X, 1.5X, or 2X without sacrificing quality?"
Well, obviously the answer is a video speed changer. It not just helps people speed through a long clip full of fluff, but also enables us to review a series of scenes in slow motion. And in this list-guide, we prepared 5 such tools for you to change video speed easily. Check them now.
1. VideoProc Vlogger
Basically working as a non-linear video editor, VideoProc Vlogger provides you with dozens of solutions to video speed adjusting. You can simply change your video speed regularly by numbers, like 1/4 or 4. You can also adjust the video speed irregularly by its speed ramping tool.
Apart from its various speed changing options, VideoProc Vlogger provide you with more editing features to make your video look more cinematic. Within it, you can add texts to the video file, adjust the image color, insert filters and effects, polish the sound, and more. But most of all, all these editing features provided by VideoProc are free to access. It means you have no need to spend a single penny to have them all.
So why not download VideoProc Vlogger and then follow the steps below to change the video speed?
How to Change Video Speed Using VideoProc Vlogger
Step 1. Run VideoProc Vlogger on your computer. First, it will pop up a page which requires you create a new project. Name the project as you like.

Step 2. Import the video file into its library.
Step 3. Drag the video file into the timeline. Now scroll down the window on the right and find the Play Speed option. There you can choose the default speed number to change your video speed.
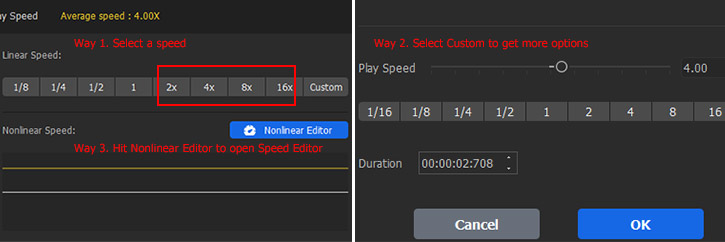
If none of them makes you happy, you can click on the Custom for more options. Or you can also click on the Nonlinear Editor for more funny options about its speed ramping.
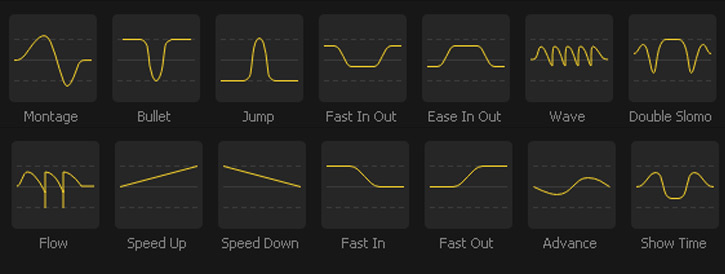
Step 4. After you choose the right speed for your video, now you can just click on the Export button to finish.
Speed ramp curves can be combined with other editing techniques to create impactful videos. For instance, you can align the speed change to the beat of the music, and achieve a style of velocity edit that's trending on social media.
2. Adobe Premiere Pro
As the first-class software in this industry of video editing, Adobe Premiere Pro can help you with a number of jobs, basic editing like trimming, adding transitions and effects, adjusting colors, customizing titles and text, editing audio file, and more. Surely, changing video speed must be included.
How to Change Video Speed in Adobe Premiere Pro
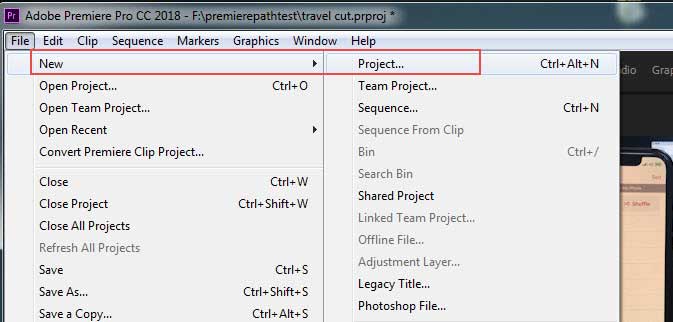
Step 1: Open Premiere Pro CC, and create a new project through "File > New > Project" in the menu bar. Also Premiere Pro allows you to import files of Premiere Elements and After Effects.
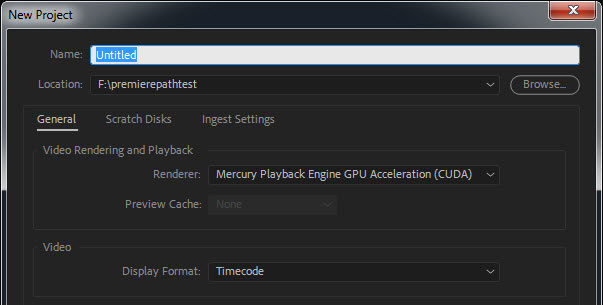
Step 2: Name the project, browse to specify the output location, and adjust settings like renderer, display format of video/audio, capture format, etc.
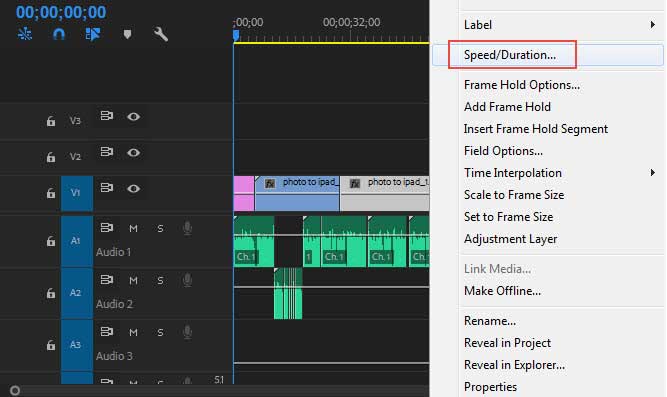
Step 3: Create a new sequence, drag your video to the Timeline panel, right-click the video clip and find "Speed/Duration" option.
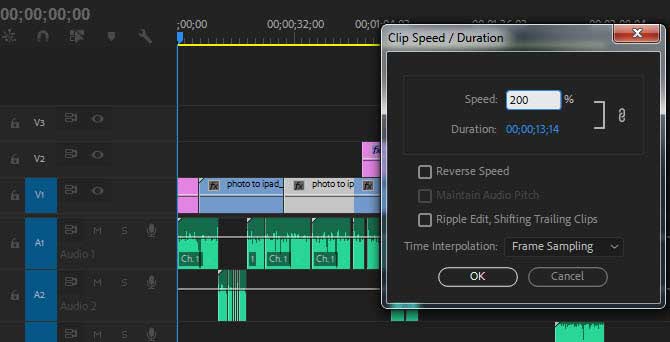
Step 4: Input a number to manually change video playback speed. If the number is less than 100%, the video will be slowed down, while higher than 100, your video will be sped up. For example, 200% means the speed is changed to twice normal speed. Besides, you can speed up a video without changing during by clicking the gang button.
3. Ezgif
Ezgif may be mostly known as a GIF editor. But it is an easy to use online platform with a bunch of tools for image and video files, not just editing animated GIF. On this platform, you can create, crop, resize, reverse, optimize and split animated GIFs, change video format, cut, resize, split, and speed up/slow down videos, and more. As for its changing video speed feature, base on our test, it would degrade video. You will see a some quality loss. And unfortunately, there are no settings to avoid that.

Anyway, here are the details of how its editing video speed.
Step 1: Go to ezgif.com, choose "Video to GIF", and then switch to "Video Speed".
Step 2: Click "Choose File" button to load a video from your local drive and press "Upload video!" Note that the max file size is limited to 100MB. Our test of uploading a 90 MB video keeps buffering but fails at last. So if you are trying to speed up a 4K video or a large file in 1080p, don't use online speed controller. For your information, a 38-second 4K clip is about 192 MB (In this situation, you may need a 4K video editor >).
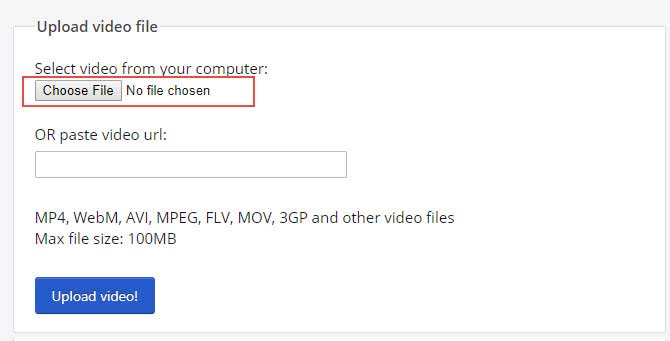
Step 3: Input your desired speed multiplier number. It seems that any number is OK there, like 200. There are also three options for audio speed, i.e., mute sound, keep original sound, and change speed for sound. Select the one that you prefer.
Step 4: Push the button "Change video speed!" and that's it.

4. Kapwing
Similar to Ezgif, Kapwing is also an online image, video, and GIF editing platform. Its tools include video maker, meme generator, subtitle editor, adding audio to video and GIF, video resizer, removing background from image, trimming video, adding image to video, adding progress bar to video, video speed changer, and many more. Under its video speed changer tool, you can customize your original video playback speed from 0.25x to 4x.
How to Change Video Speed in Kapwing Speed Changer
Step 1: Go to Kapwing Speed Changer and click "Upload" to import your video clip. Note that Kapwing only supports videos in .mp4, .mov, .webm, .ogg and .mpeg file formats.
Step 2: Choose one video speed option. There are seven video speed options ranging from 0.25x to 4x. Then click "CREATE!". It will take several minutes to finish the converting.
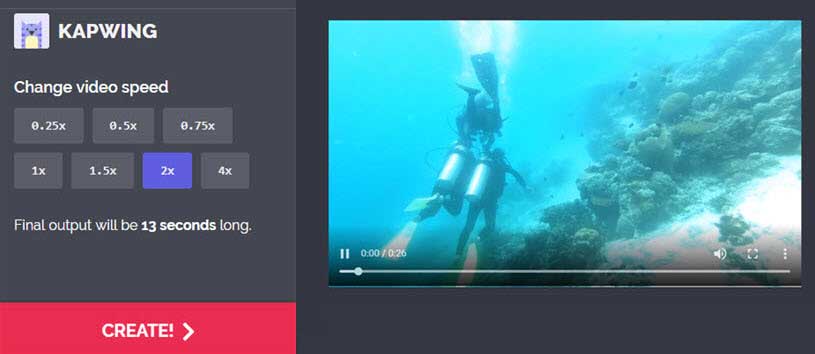
Step 3: Click "Download" button to save your video with speed settings. Note that there will be a watermark in all videos you processed in Kapwing. To remove watermark, $6 is required for one clip and $200 per year.

5. VLC Media Player
VLC is a powerful media player with a number of hidden features about video and audio file processing. Many of them have been covered in our other blogs, like video and audio formats conversion, changing video resolution, adding audio to a video, trimming a clip, etc. Here we will show you how to use it for changing video speed. Many of you may think what we are talking about is its playback speed setting feature. The playback speed setting tool may be known to any VLC users. However, it cannot make VLC render the speed setting. So it will not deserve our recommendation. And we will show you another way. Check it now.
How to Change Video Speed in VLC
Step 1. Launch VLC media player on your computer, and then choose Media > Convert / Save option.
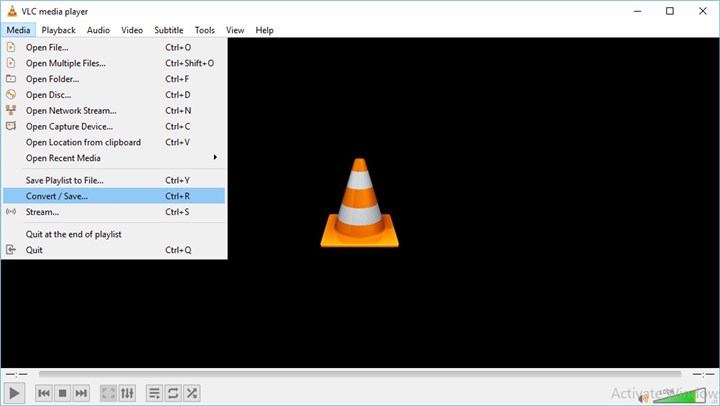
Step 2. In the new pop-up window, click Add button to import the video clip which you want to process. And then check the option of Show more options to bring up more features.
Step 3. In the Edit Options, please input the code :rate=2.0, which means allowing VLC to change the video speed 2 times faster than the original one. Surely, if you want another video speed option, just change the number, for example, :rate=0.5, 2 times slower than the original speed. Lastly, just click the Convert / Save button.
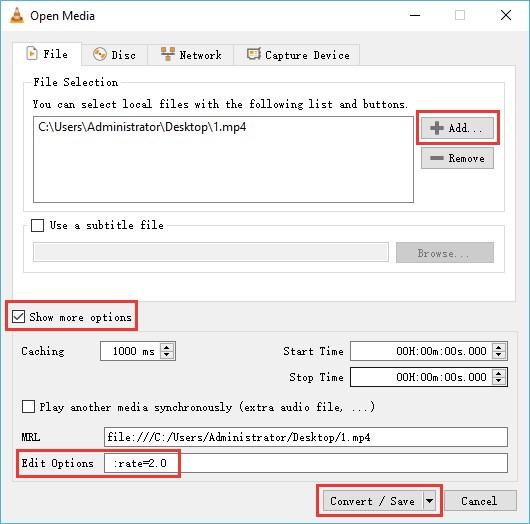
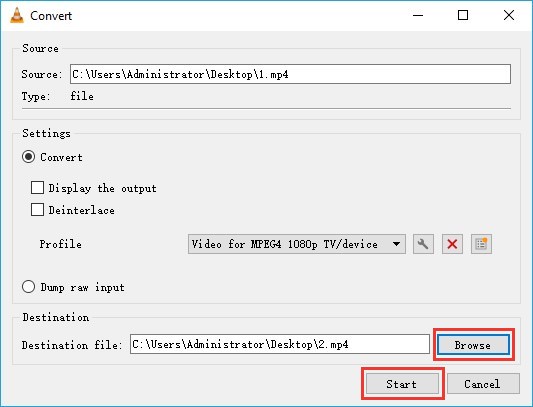
Step 4. Choose the Browse button locate the place where you would like to save your exported file and name it. Then choose the Start button to finish the work.
