
Want to make cinematic GoPro videos like those on YouTube and Instagram?
The GoPro company tells you to explore nature and record it with their latest product. The rugged device does help you capture more wow moments than other cameras, esp. when you are skydiving, skiing, surfing, and skating. But post-editing is also important.
So we come to walk you through how to edit GoPro videos step by step.
Introduction to GoPro Video Editing Software
First, invest in the right GoPro editing software.
The Quik app on mobile devices was designed for quick editing with its templates. If you want to elevate your GoPro footage, desktop software is better, especially for 5.3K 60fps, 4K 120fps, and 2.7K 240fps videos from the latest GoPro HERO 10. But GoPro Quik for desktop and GoPro Studio cannot handle these videos because they were discontinued several years ago.
Taking into account all the editing needs, VideoProc Vlogger would be the best software for GoPro users.
It's a capable 4K video editor while comes with a simple workflow. And it differs from others with its unique features for GoPro videos like lens correction, wind noise reduction, etc. The big plus: it's completely free for all GoPro video creators. It allows editing lengthy video clips, and won't put watermarks or impose any other restrictions upon exports.
Unique Features for GoPro Video Editing on PC
- Support 5.3K, 4K, 2.7K, high FPS, and RAW files from GoPro HERO 10, 9, 8…
- Fast and high-quality video rendering and 4K UHD output.
- 14 speed ramping presets and 28 motion cropping presets for GoPro highlights.
- Constantly updating trendy filters, effects, and transitions.
- Preset lens correction to fix fish eye from different GoPro models.
- Studio-level color grading and correction for flat and low light videos.

Now let's download and install VideoProc Vlogger and start the tutorial of how to edit GoPro videos with it.
How to Edit GoPro Videos on PC
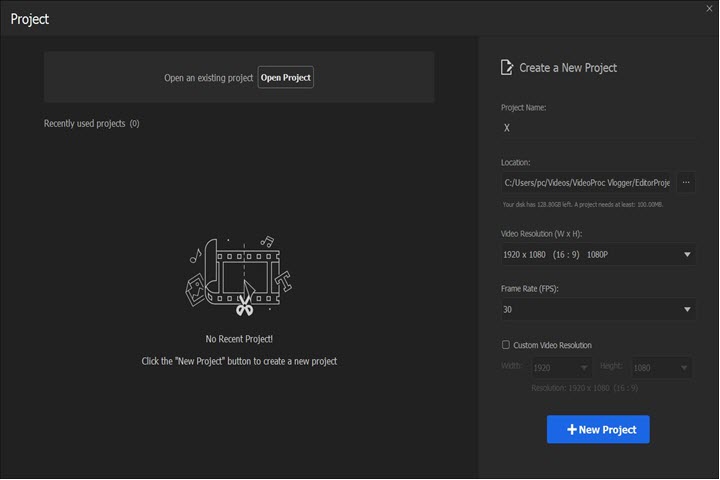
Step 1. Create a New Project
Import your GoPro footage from the camera's SD card to your computer.
Launch VideoProc Vlogger on your PC. Finish some simple settings (project name, location, resolution, and frame rate) and hit the New Project button to enter the main editing workspace. Also, you can keep the default settings to get a quick start.
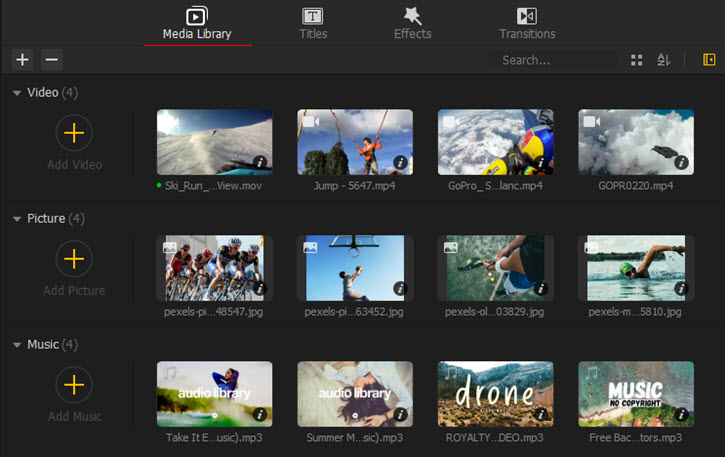
Step 2. Load GoPro Videos to VideoProc Vlogger
Click the big plus button in the Media Library panel to import GoPro files from your computer. Alternatively, you can simply drag and drop files here. Then your files will be sorted by file type (videos and photos) or file folder automatically.
Step 3. Cut and Reorganize GoPro Clips
Drag the videos from Media Library to the video track. Preview these clips and have a rough idea about the final video, then cut it accordingly.
- Cut and split: Put the playhead where you want to divide it into smaller parts and click Split above the timeline.
- Delete redundant footage: Click to select the clip and hit the delete button above the timeline to remove it.
- Reorganize: Drag and move clips on the timeline to re-sequence them.

Tips: After the rough cut, you can adjust the details of each clip in the Inspector panel on the right side of the preview window, such as transform (rotate, scale up/down, and flip), adjust the volume, change the play speed, etc.
Now you've finished the basic editing of a GoPro video, and it's okay to export. But if you want to learn some advanced techniques, go on reading.
Step 4. Fix GoPro Footage
When you record videos with a GoPro, you might not get the ideal outcome due to the weather, camera video settings, and many factors. For example, lens distortion when shooting in Wide/SuperWide mode, overexposure when shooting under straight sunlight, and image noise when recording in low light, etc. No matter how these troubles come up, you can fix them in the following instructions. If your video looks quite well, you can skip this step.
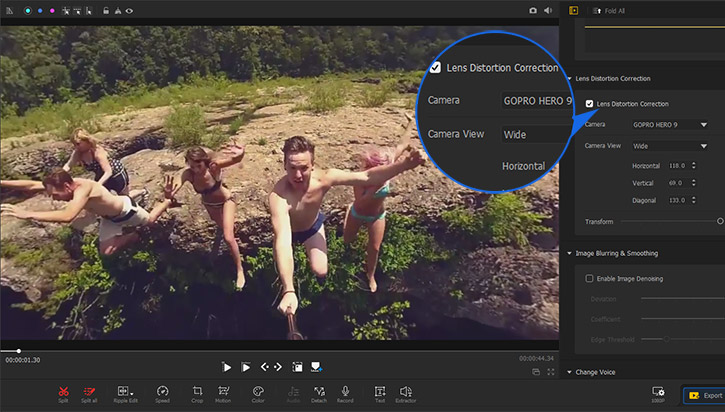
Correct lens distortion
Click the clip in the timeline. Scroll down the Inspector panel beside the preview window, and you'll find the Lens Distortion Correction option. Tick the box to enable the feature. Choose a camera model and Camera View and then adjust Transform to fix lens distortion, optionally.
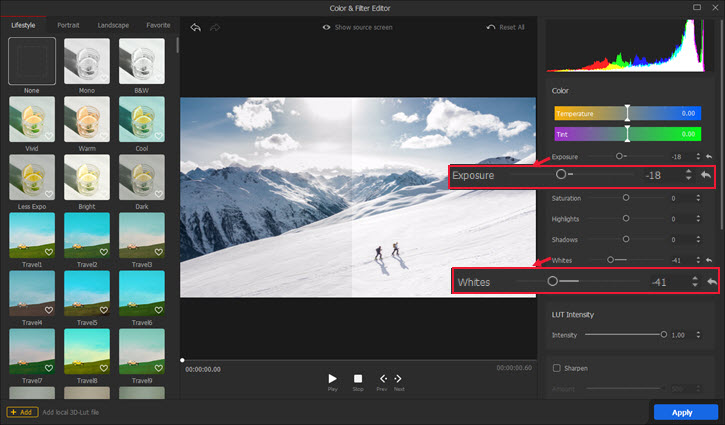
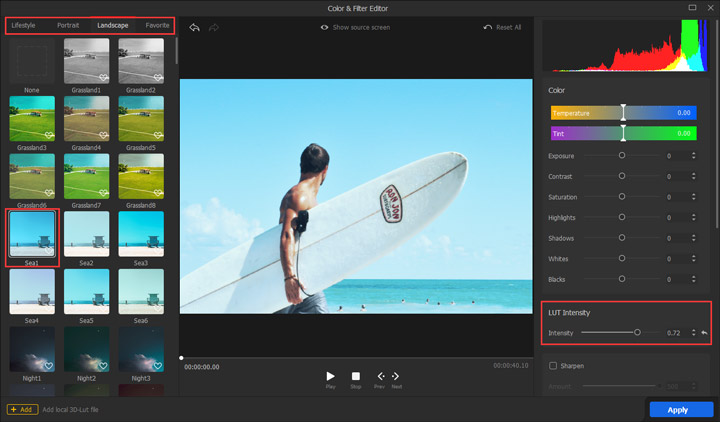
Modify overexposed and grainy videos
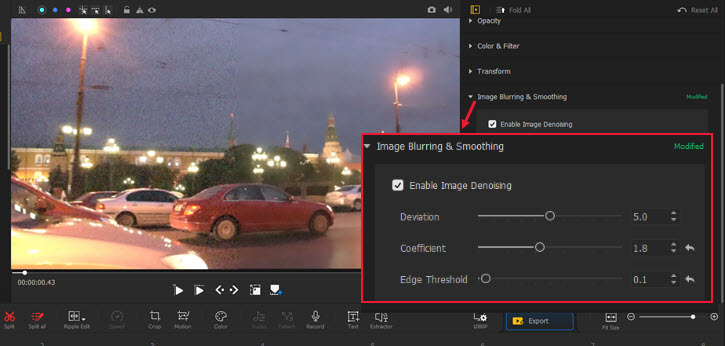
Open Color Editor in the toolbar. Drag the slider of Whites toward the left, then Exposure. You can monitor the results in the preview window and the histogram and reset the settings anytime you want. Click Apply to save the changes and get back to the main UI.
Expand the Image Blurring & Smoothing option in the Inspector, enable Image Denoising, and adjust the options below to reduce the image noise.
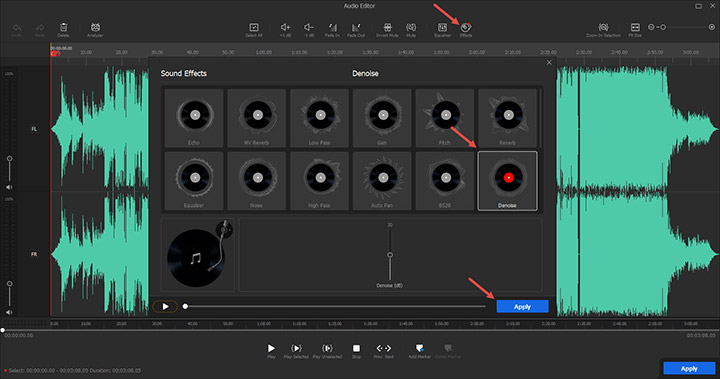
Remove background sound noise
Detach the audio from the footage. Click Audio > Effects > Denoise to reduce the background noise. Alternatively, you can mute the sound like the wind sound, and replace it with a piece of music.
Step 5. Highlight Key Moments
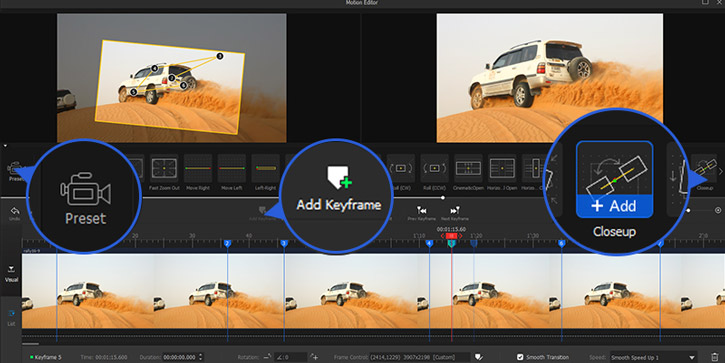
The unique function of GoPro is to capture moving objects conveniently. But you cannot always follow a fast-moving object closely. In the Motion Editor of VideoProc Vlogger, you can focus on it by reframing the footage together with its changes, meanwhile magnifying many breathtaking moments when you surf under a wave and so forth.
Click Motion in the toolbar. Preview the preset motion effects and add one to your video. Then you can fine-tune the cropping area, motion path, and speed in the keyframe toolbar at the bottom. For instance, if you add Closeup to the footage, it'll look like the camera is moving closer and show everything in detail.
Step 6. Rock Your GoPro Video with Speed Ramping Effects
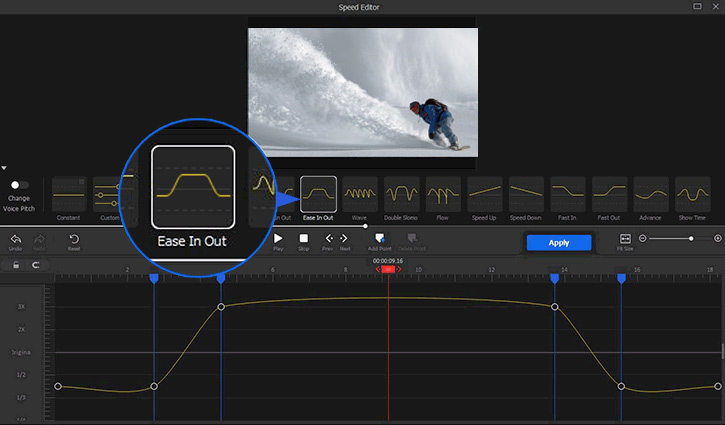
The latest GoPro Hero 10 features 8x slow-mo while recording 2.7K 240fps, but it's not enough sometimes to show many short-lived moments and not dramatic as it's changing at a constant rate. VideoProc Vlogger changes video speed from 1/32x to 32x and has 14 presets to create butter-smooth speed ramping effects in no time, such as Montage, Bullet, Jump, Double Slomo, etc.
Click to select the clip that you want to change speed in the timeline. Open Motion Editor in the toolbar and select a preset Bezier curve under the preview window, e.g. Ease In Out to slow down the beginning and the end of the video and speed up the middle part slightly.
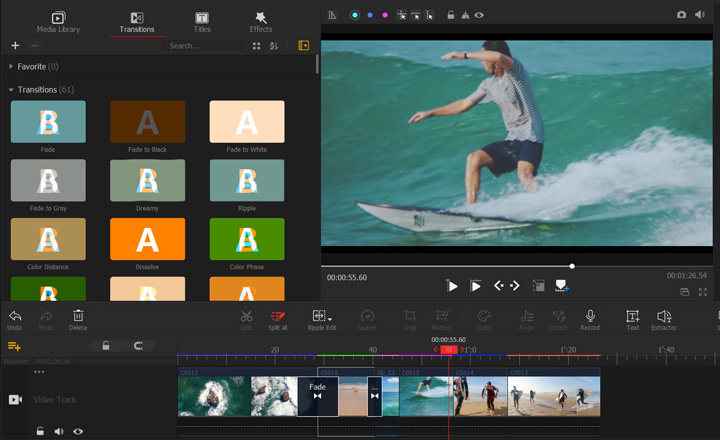
Step 7. Add Transitions, Effects, Texts, and Filters
Browse the preset Transitions, Titles, and Effects next to the Media Library, and drag the desired preset to the timeline. Next, you can customize these presets in the Inspector panel.
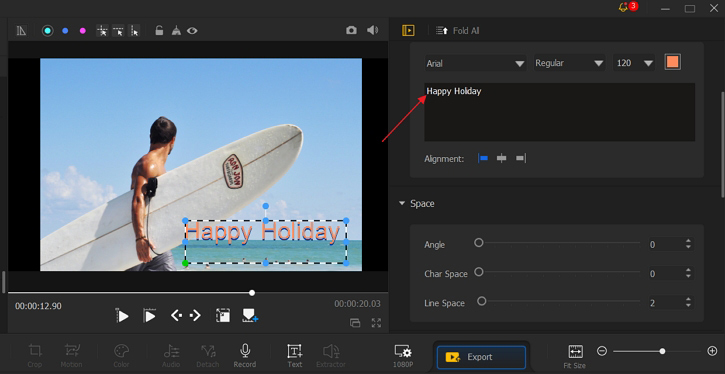
Click the Text option above the timeline and type in texts in any font, color, size, and position that you want.
For more aesthetic filters, you can open the Color Editor to add built-in 3D LUTs or download some from stock websites.
Step 8. Add Background Music and Sound Effects
Drag a song or the files of sound effects from your computer to the media library and move it to the audio track. Now you can move it in the timeline, cut, and delete as you did in the video track.
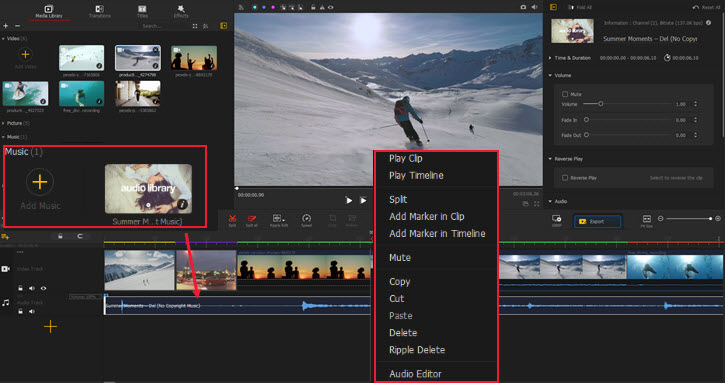
For more advanced features, go to the Inspector panel or open its built-in audio editor.
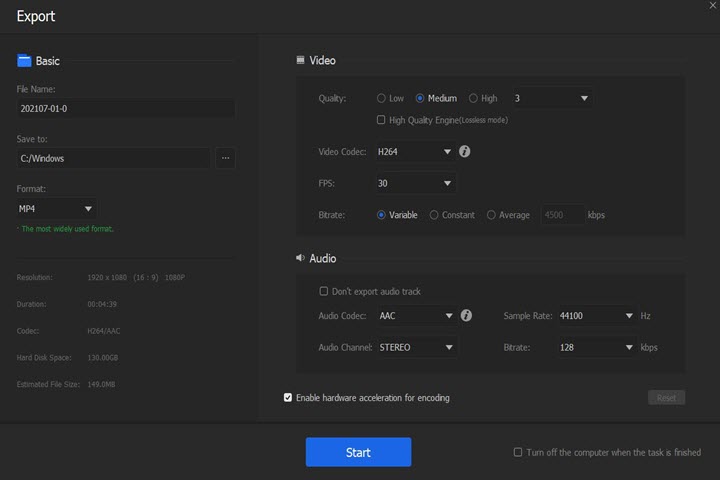
Step 9. Save and Export
You can save the project and go on editing next time. Or click Export above the timeline, complete settings about video location, file name, format, and quality, then enable Hardware acceleration. And hit Start to render and output the video.
The Bottom Line
That's all for how to edit GoPro videos on PC. In addition to the basic edits above, there are more creative features for pros, like say, color grade, split-screen effects, composite with Blend mode, mix background music, edit to the beat… For more tutorials, please visit our YouTube channel – VideoProc Vlogger Official, and stay fresh.


