
Leonardo AI is a powerful AI-driven image generation platform named after Leonardo da Vinci. It leverages Stable Diffusion technology and offers a beginner-friendly web interface to create stunning art from text prompts.
Leonardo AI gives you fine-grained control over how images are generated, including image size, realism level, style, and even the ability to train your own custom model.
Below, we'll walk through how to use Leonardo AI to create images step-by-step, then cover some advanced tips and best practices to get the most out of this tool.
How to Use Leonardo AI for Image Generation
1. Sign Up for an Account
Go to the Leonardo.ai website and create a free account if you haven't already. Once logged in, you'll have access to the Leonardo AI dashboard.
2. Open the Image Generator
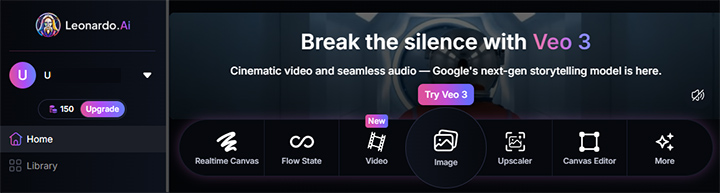
Find and click AI Tools > Image on your Leonardo dashboard. You can also click on the big Image icon. This will open the main interface and take you to the AI image generator.
3. Choose a Model and Style
Leonardo lets you switch the AI model for different types of images or details. You can click the Model dropdown and select a model that suits your desired style.
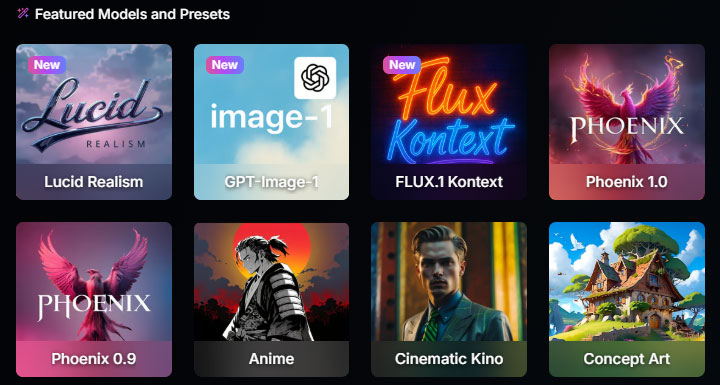
There's also a Style preset toggle. This is a built-in stylistic filter. "None" will rely purely on the model and your prompt.
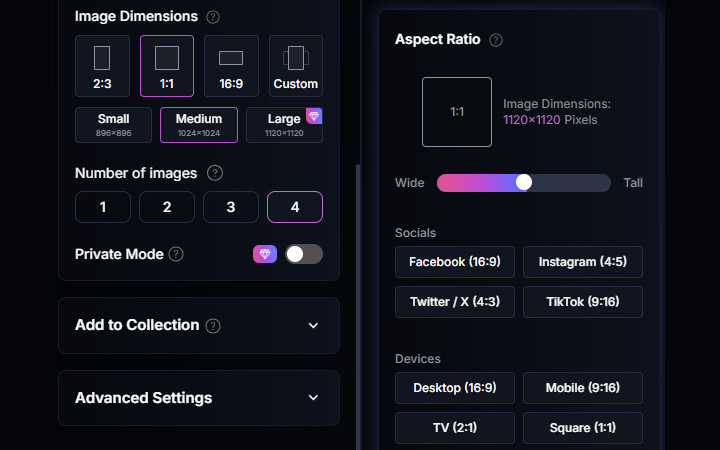
4. Set Image Dimensions (Aspect Ratio)
By default, Leonardo will pick an output size or aspect ratio that the chosen model works best with. However, you can make a quick choice like 2:3, 1:1, or 16:9. Alternatively, you can choose a preset or manually adjust the width and height values by clicking on the Custom option.
A good practice is to stay close to the model's default aspect ratio to avoid issues like weirdly stretched features.
5. Adjust the Number of Images
By default Leonardo generates 4 images per prompt, but you can control this. On the left-side panel, you can choose how many variations you want.
6. Toggle Advanced Settings
Leonardo has some advanced settings that allow for finer control and customization. These settings vary depending on the model you choose, but generally include PhotoReal, Negative Prompt, Transparency, Tiling, Use Fixed Seed, etc.

Feel free to experiment with these switches. Just remember that more advanced settings might consume extra tokens or have limits on the free tier.
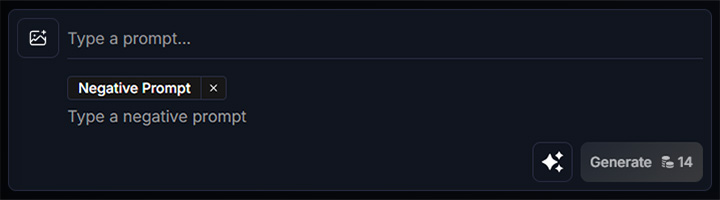
7. Enter a Prompt
Type a text description of the image you want in the prompt input box at the top.
To write an effective prompt, begin with clear instruction and focus on what you want to see in the image. Try to provide the most clear and specific description of the image as you can, and avoid ambiguity or vague language that may lead to unpredictable or undesired outputs.
If there is something you don't want to appear in the image, you can specify a negative prompt (compatible with some models).
You can also upload an image to use as a starting point for a new generation or a reference, such as Style Reference, Character Reference, Content Reference, etc.
8. View the Results
After writing your prompt, click the "Generate" button to submit it. After a short processing time, Leonardo will return a set of four generated images by default. You can click on any of the variations to see it larger or examine details.
9. Select and Refine the Image If Needed
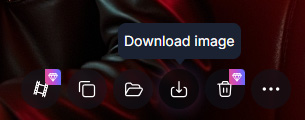
By clicking on the output image, Leonardo will open a detailed view for that image. You'll see several post-processing tools here to enhance the selected image.
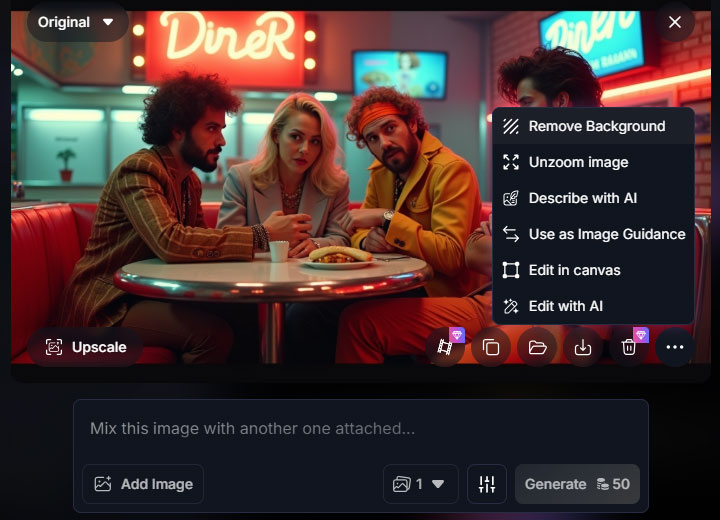
For example, you will see options to Upscale the image, to Remove Background, to Unzoom image, to Use as Image Guidance, to Edit in canvas, or Edit with AI. Please note that some of these edits require a Premium plan or extra tokens.
10. Save or Download the Image
After refining your final image, you can easily use the "Download Image" button to save the picture to your computer. Once saved, you can now incorporate the AI-generated artwork into your projects or share it.
By default, Leonardo will save images in JPG format. If you removed the background, the downloaded image would preserve transparency (PNG format).
By following the steps above, you can iteratively refine your prompt and settings to get the image just right. Leonardo's interface encourages this trial-and-error process with its history panel and the ability to quickly regenerate variations.
Best Practices to Use Leonardo AI
Using Leonardo AI effectively doesn't stop here. The tool offers many features and settings to fine-tune your results. Here are some tips and advanced techniques for getting the most out of Leonardo.
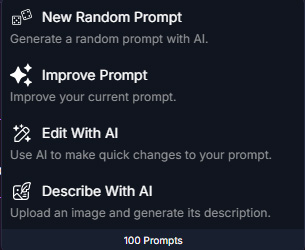
Leverage Prompt Enhance
There's a Prompt Enhance option in the lower right corner of the prompt input box. It's a special pipeline that improves how the AI interprets your prompt, making the output more coherent and closer to what you described. So it's ok if you are not very good at writing prompts at first.
Experiment with Different Models
Leonardo regularly updates its available models. Aside from the default models, there are models optimized for photorealism, for fantasy art, architectural designs, etc. If one model isn't giving you the style you want, try another.
Tip: Each model was trained at certain dimensions, so recall the earlier advice: stick near those for best results.
Take Advantage of the Community Feed
Leonardo features a community gallery of images generated by other users. These are not just for show. You can actually click on a community image and copy its settings or prompt as a starting point for your own creation. For instance, if you see a style you love, Leonardo allows you to use that image's prompt or parameters as inspiration.
This can save you time in crafting prompts and let you achieve complex styles by building on proven examples. It's a great way to learn advanced prompt techniques as well. Study how top creators phrase their prompts or which model they used.
Custom Model Training (Elements)
One standout feature of Leonardo AI is the ability to train your own custom model (LoRA), which they call Elements. If you have a set of images, you can feed them into Leonardo to create a personalized model that reproduces that character or style consistently. Once trained, your custom model will appear as an available model to generate images, giving you very consistent aesthetics on demand.
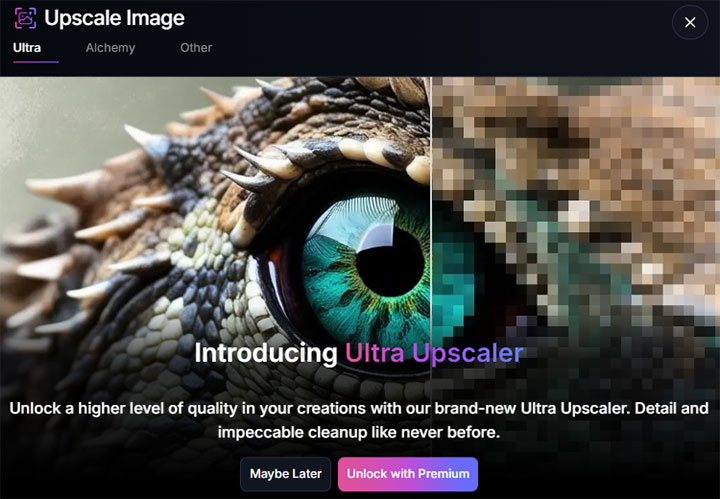
Utilize Upscaling and Editing Smartly
Leonardo offers built-in options to upscale images. The Ultra Upscaler and the Alchemy upscaler can drastically improve image quality, which are only accessible with Premium plans. If you plan to print an image or use it in a high-resolution project, try upscale it before downloading.
Enhance and Upscale Leonardo AI Images
While Leonardo AI does a great job creating eye-catching images from your prompts, sometimes the resolution or clarity might not be quite enough, especially if you are planning to print your art, use it in a professional project, or need crisp details for social media. That's where VideoProc Converter AI comes in as the perfect companion tool.
This desktop software includes an AI Super Resolution module. It features several AI models for enhancing different types of images, including one specially optimized for AI-generated art. The model can increase image resolution by 2x, 3x, or 4x to up to 10K quality, without introducing noise or artifacts.
VideoProc Converter AI - Upscale Leonardo AI Results without Extra Credits
![]()
![]()

- AI Super Resolution: Upscale videos up to 4K and images up to 10K
- Frame Interpolation: Increase the frame rate of your videos up to 480fps
- Video Stabilization: Correct shaky footage for smooth and steady playback
- Batch Processing: Efficiently process multiple Leonardo AI results at once
- All-in-one toolkit: Format converter, compressor, downloader, basic edits, etc.

What makes it stand out is its ease of use. You don't need to mess with layers, masks, or complicated settings like in Photoshop. Just drop in your image, choose the upscale level, and let the AI handle the rest. It even supports batch processing, so you can upscale an entire collection of Leonardo creations in one go, saving time without sacrificing quality.
If you are using Leonardo AI to create posters, product mockups, prints, or even digital collectibles, consider running them through VideoProc Converter AI before sharing or publishing. It's a simple step that can make your artwork pop and feel more polished, especially when high-resolution quality matters.
Conclusion
That's all about how to use Leonardo AI for image generation. Leonardo AI is an impressive and user-friendly AI image generation tool. With just a text prompt, you can produce high-quality artwork in various styles, and the platform gives you extensive control to refine those results. Its rich feature set means that both newcomers and experienced AI artists can find value in it.
If you want a higher resolution version of your image, try an AI image upscaling tool, such as VideoProc Converter AI.


