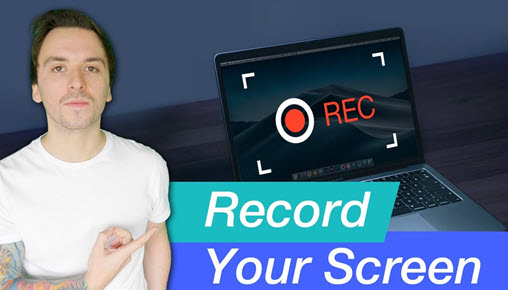
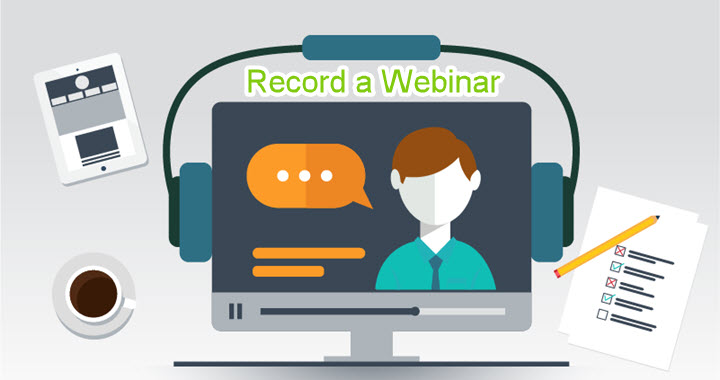
The Internet has made it easier than ever to learn something online or have a video conference. No matter where you are, you can attend a webinar or online courses with a computer, for example, the Skype lesson. But as you know, once the webinar is finished, you cannot watch it again. Also, many online course videos are not able to be downloaded. What are you supposed to do if you miss the live course, or when you want to watch again or share the content of the Webinar? Luckily, you can record it for a future review or share it with others with great recording software, no matter you are a listener or a speaker. This tutorial will show you how to record a webinar on Windows 7/8/10/11 PC or Mac.
How to Record a Webinar on Windows 10, Windows 8, Windows 7
Here we take VideoProc Converter AI seriously for recommendation, which is a powerful webinar screen recorder and capable of recording the screen on Windows 11/10/8/7 or macOS with audio. It supports recording your screen and facecam at the same time at 1080p HD resolution. It has the advanced features like green-screen recording, PiP mode, and real-time drawing. The supported output formats include MP4, MOV, FLV, MKV, and TS. It is an all-in-one video software program that also allows you to convert and edit the webinar recording, download online videos, compress video file size, and so on.
Emphasize Traits of VideoProc Converter AI to Record a Webinar
- Running OS: Windows, Mac
- Live webinar recording in full sync.
- Free live webinar recording with no time limit.
- Webinar recording with audio attached.
- Webinar video editing after recording.
- Record in full screen mode or customize the webinar recording region.

Step 1. Download Webinar Recording Software
You can click the button above to download and install VideoProc Converter AI on your computer and have a try by steps.
If you want more options for such tools, you can refer to this guide of ours, where we have rounded up dozens of powerful software.
Step 2. Set up Recording
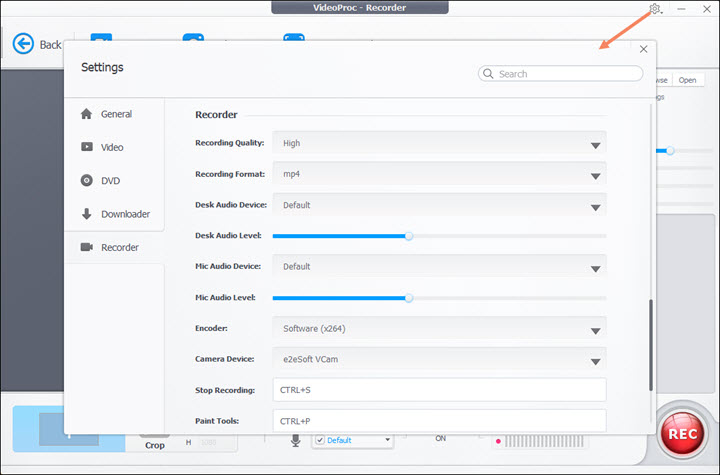
Launch VideoProc Converter AI and Choose "Recorder". Then click the gear icon in the top right corner to change the settings, such as recording quality, recording format, audio device, audio level, encoder, camera device, shortcut keys, etc.. After the settings are done, go back to the Recorder interface.
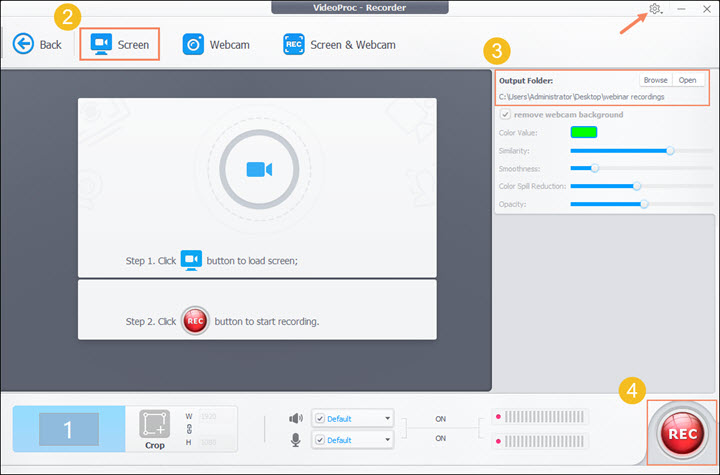
At the recording homepage, you will find three different recording modes, namely, "Screen", "Webcam", and "Screen & Webcam". You need to choose a suitable one to record your webinar. If you are an audience, you just need to record the screen activities, so choose "Screen" to continue.
While if you want to record a webinar as a speaker, the other two modes can fit your needs better. "Webcam" is able to record video with your face and voice; while "Screen & Webcam" can record screen, your voice, and face at the same time. Besides, there are two options under "Screen & Webcam", say, "Record screen while showing facecam" and "Record webcam while showing screen". The former means the screen is the main video and it is bigger; while the latter one is contrary. Once you choose a mode, the screen will be loaded.
Tips:
1. Click "Crop" at the bottom and then click and drag while holding the left mouse button to select the recording regions.
2. When you record a webinar, please remember to turn your sound device and microphone on if you are a speaker.
Step 3. Set a Directory Path for Your Webinar Recordings
Before recording, you can browse the output folder on the right sidebar to name a file folder as webinar recordings, and set the destination route in VideoProc Converter AI.
Step 4. Start Recording the Webinar
Hit the REC button in the bottom right area of the interface to initiate your webinar recording. Stop the recording by using the [Ctrl+S] hotkeys.
Bonus Tip: Use the Painting Tool While Recording
The built-in painting tool in VideoProc Converter AI is designed to mark out the important staff happening on the screen. (*The keyboard hotkeys to evoke the painting tool by default are [Ctrl+P], and you are allowed to change that in settings.) During recording the webinar, you can add texts, arrows, or circle/mark where you want to highlight.
How to use? First, we classify the 10 icons into 3 categories: the highlight markers, the highlight boxes, and the text creator. During the recording, when you want to mark some lines on your screen, you can use the marker, the line and the arrow. When you need to mark out several lines or an object on your screen, you can use the three boxes in the middle. When you want to add some texts for a reference, you can click the text icon and customize font color in the adjacent box. You can return to the last operation by clicking the green undo key, and close the tool by clicking the cancel key.
Sidenote:
The Crop box is designed to revamp the recording region of screen. If it is the whole screen that you want to capture, you can skip this. Otherwise, you can click on the Crop box (in the bottom left area of the interface) to crop out the fine area of your webinar recording. When you are satisfied with the screen size, click the green check mark in the center of the screen.
This time, you won't have a problem in recalling important information in that web conference as all details have been recorded and you can go back to it anytime.
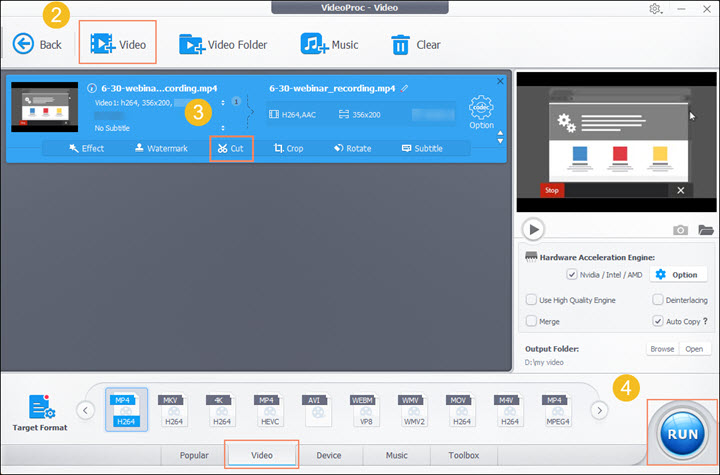
Step 5. Edit the Webinar Recording for Better Sharing
After you've finished recording the webinar, you can cut out some clips and share it to others. Here's how-to:
1). Choose the Video tool in the launching interface.
2). Import the webinar recording into it.
3). Click on Cut and cut out the desired clip(s).
4). Export the video.
How to Record a Webinar on Mac
VideoProc Converter AI is also available on macOS. If you want to record a Webinar on a Macbook or iMac, you can follow the on-Windows instruction as above.
But rather than the third-party method, you actually can use the built-in screen recording feature in your macOS Mojave and later.
Step 1. Open the webinar platform or website where the webinar is hosted.
Step 2. Press Command + Shift + 5 on your keyboard to open the screen recording tool. Alternatively, you can search for "Screenshot" or "Screen Recording" in Spotlight (press Command + Space to open Spotlight).
Step 3. The screen recording toolbar will appear at the bottom of the screen. Click on the "Options" button to choose your settings, such as the save location for the recording.
Step 4. Click on the "Record Selected Portion" button or the "Record Entire Screen" button, depending on whether you want to record the entire screen or a specific portion.
Step 5. If you chose to record a specific portion, click and drag to select the area of the screen you want to record.
Step 6. Start playing the webinar and click the "Record" button on the screen recording toolbar.
Step 7. After the webinar is finished, click the "Stop" button in the menu bar at the top of the screen or press Command + Control + Esc (Escape) on your keyboard to stop the recording.
Step 8. The recorded webinar will be saved as a video file on your desktop by default. You can locate and access it from there.
Final Words
Here, we offer you detailed steps to record a webinar on Windows 10/11. Besides that, you can use VideoProc Converter AI for Mac versions to record and edit the webinar recording as well. After the recording, you can cut the whole video into your desired length for other uses, or add text/watermark/effects to it. No matter you are a webinar listener or a speaker, with VideoProc Converter AI, you are able to record the online webinar in the most undemanding way. Free download VideoProc Converter AI now and record a webinar by yourself.


