
Summary: To make a video montage, you might search online and get hundreds of montage maker software recommendations. But don't forget the built-in video editors in your computers, Windows Movie Maker on Windows, and iMovie on Mac. In this article, you'll learn how to make a video montage with the two video editing software easily.
You might not recognize, but you have already seen montage clips in films, TV serious, and ads for thousands of times. It is a common technique in video editing. Gradually, it is employed to more short videos creating on YouTube, like a yearly vlog in which thousands of video clips of the year are mashed up. If you want to make a fantastic video montage, you come to the right place. This article will disclose what montage is and how to make a video montage with free video editors on Windows and Mac.
What Is a Video Montage?
You can see montage videos in almost every Hollywood movie, but do you know what a video montage is? Montage is a film editing technique, however, when a video is with the montage, it is something beyond a feature to just sequence short shots to condense space, time, and information. It is a system that can support the directors and editors of a film to advance the story rapidly and successfully.
How to Make a Video Montage with VideoProc Vlogger
Developed as a professional yet easy-to-use video editor, VideoProc Vlogger is able to help you make a montage video within simple steps. It supports uploading video clips, music, sound tracks, images, GIFs and more to its media library, and you can merge them together to create a montage video within several steps.
VideoProc Vlogger is equipped with a bunch of video editing features like cutting, trimming, merging, splitting, adding music, adding subtitle, adding filter, adding transition, recording voice, changing speed, adjusting color, and more.
Let's free download VideoProc Vlogger to your computer and follow the steps below to make a montage video quickly.

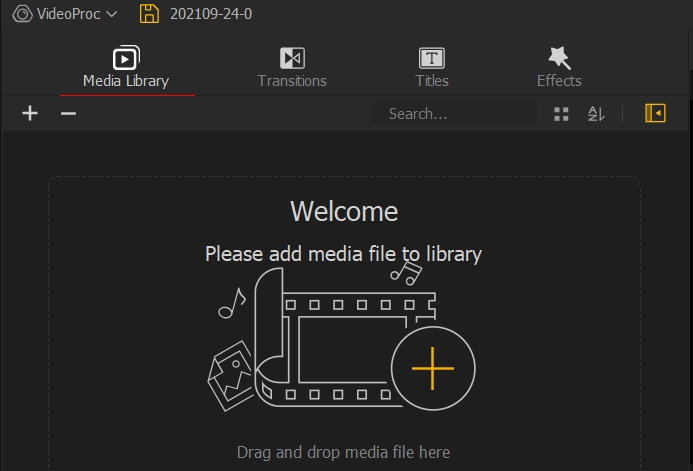
Step 1. Upload media files.
Go to Media Library and click + icon to upload your video clips, music, and images here.
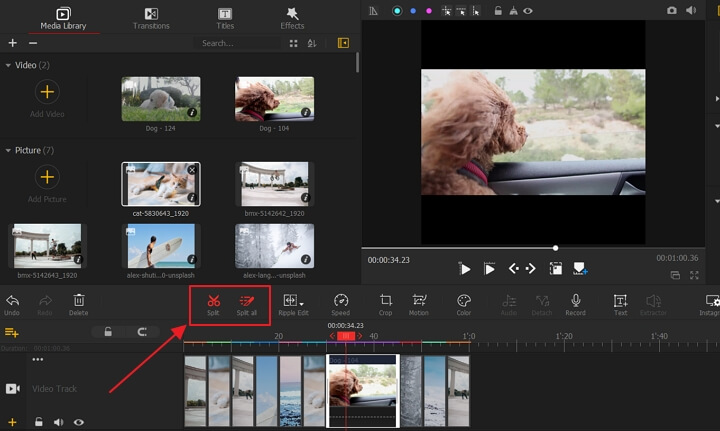
Step 2. Split and trim video clips.
Drag the video to the Video Track. Select the video on the timeline and click on Split icon to remove unwanted parts.
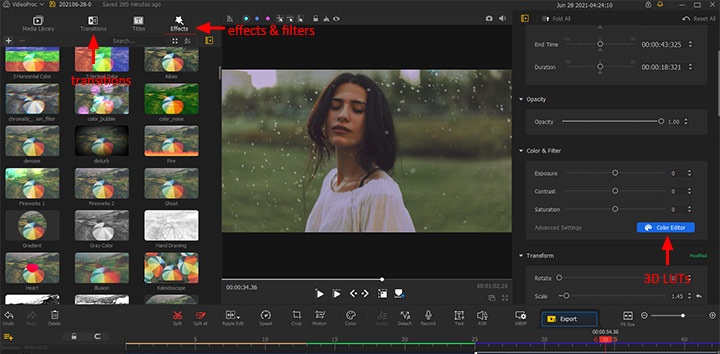
Step 3. Add filters.
Go to Effects and choose a filter. Drag it to the Effect Track and put it below the video clip you want to add a filter.
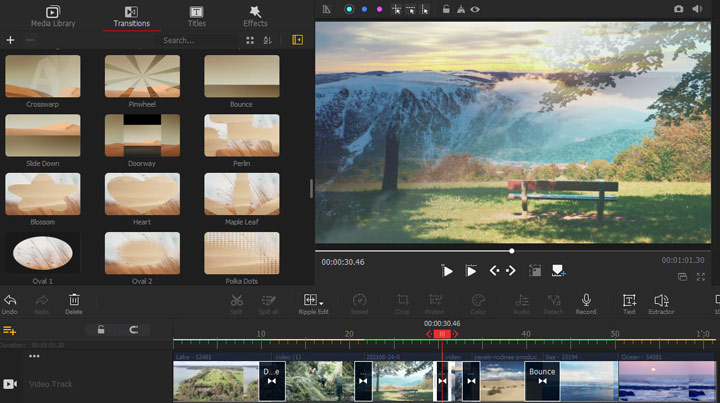
Step 4. Add transitions.
Go to Transitions and drag a transition style between two video clips.
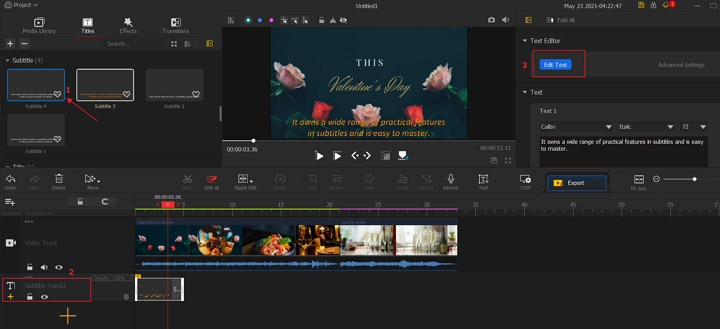
Step 5. Add titles.
Go to Titles and choose a subtitle style, a credit title style or title style. Drag it to the Subtitle Track or Overlay Track.
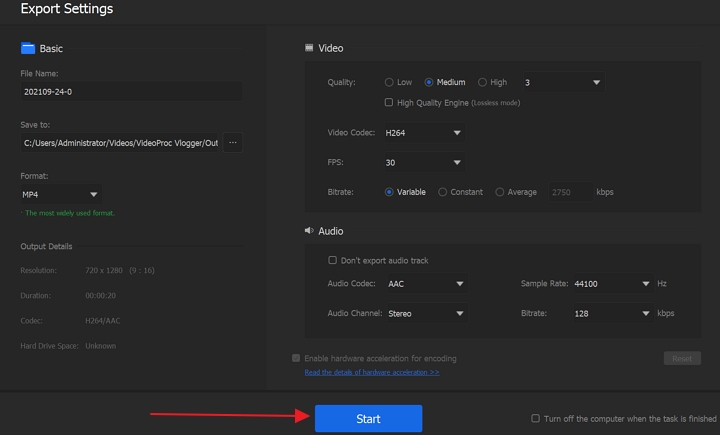
Step 6. Export.
Click the Export icon and set the file name, file format, and more.
How to Make a Video Montage with Windows Movie Maker?
The secret way to succeed in any great filming is its editing procedures. Windows Movie Maker can change your arrangements of clippings into an ideal masterpiece, add up some enhanced soundtrack, and awesome technicalities. Before getting started, we need to first download the software to make a free video montage with Windows Movie Maker.
Preparation 1: Check whether you have installed Windows Movie Maker on your PC.
Windows Movie Maker is one of the utilities included in Windows Essentials, the free software package from Microsoft. It is available in Windows Vista and XP, however, it needs to get downloaded for Windows 7 and 8. Microsoft includes some other windows utilities along with this as well. Next you need to simply search for a movie maker from your desktop and click on the results. Also, you can directly find it from the Start menu of your system.
Preparation 2: Explore the entire software.
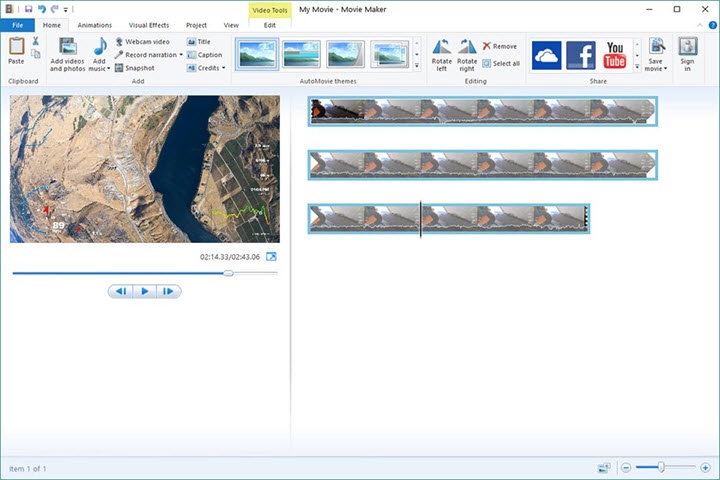
Windows Movie Maker is well sorted as of Microsoft Office. You can explore through the different options by choosing the tabs at the header section.
- Home – This is the principle tab for Movie Maker. You can utilize this tab to insert videos, pictures, sound, customized themes to your video clips. You can also upload the videos to different social media sites like, Facebook, YouTube, and Vimeo.
- Animation tab – This tab allows you to include a variety of transitions within the clips.
- Visual Effects – This tab helps you to change the shading and tone of the picture. You can change the contrast as per your choice.
- Project – You can adjust the aspect ratio of the video and control your audio track.
- View – This tab lets you zoom in and out your tasks, allows you to change the format of the grid and thumbnail sizes.
- Edit – This option gets displayed once you insert your first video clip. You can trim the clip, make a new beginning point or endpoint, blur in and out, and balance out the video, etc.
- Options – Alike Edit, this tab also appears after you insert the first audio clip. Similarly, you can set a new beginning and endpoint for the music, blur it in and out, and split the file.
Now it is time to get started.
Step 1. Load videos to Windows Movie Maker.
Click on the "add videos and photos" button. You can even drag and drop the files. Also, it supports recording a video directly by clicking on the "Webcam video" option.
If you add multiple clips you can shuffle and rearrange them as per your desire. This feature generally helps when you need to insert a short clip in the middle of the video. You can even add pictures or make a slide share within your clip.
Step 2. Trim the duration of each clip.
Clicking on the "Options" tab will help to trim the video clip. It can help to trim the duration of each clip by setting a start or endpoint.
Step 3. Add transitions.
Windows Movie Maker adds animations effortlessly in between the video clips. You can select from the available transitions or can customize accordingly.
Step 4. Add music.
There is an option to both add music or record new audio clips, and then insert them to the clips.
Step 5. Add titles.
Adding the titles to each of the clips are eventually useful while preparing presentations. You can also add multiple cards to avail the different credit screens from the "add credit" button.
6. Export the montage video.
Before you can directly upload into various social media platforms, you can check the preview of the video. Clicking on the "Save movie" option would successfully save the file in your local system.
However, Windows Movie Maker is discontinued by Microsoft in 2017. So, in case you didn't have the same pre-installed in your system, you can try using VideoProc. It is user-friendly and helps to trim multiple short clips and merge to make montage videos. Another good news is that our free non-linear video editing software is under developing. It totally deserves a try to make a montage video. Please stay tuned.
How to Make a Video Montage with iMovie?
Not only Windows, for Mac users it is also much easier to shot and edit different films via iMovie. It is a free program used for video montage and can be easily downloaded from the App store. iMovie is best for the beginners and movie freaks individuals. The steps below will also show you how to make a free video montage on Mac.
Step 1. Import video materials to iMovie.
Open the application and when it starts running, click on the File option and click on New Project. Simply rename the new project and click on "Create" to proceed. Click on the "Import" button to transfer the videos.
You can add multiple video clips as in Windows. Also, you can drag-drop the videos and delete them from the added list. However, you will not get back the removed clip once deleted until you import back again.
Step 2. Cut out and merge videos clips to make a montage.
At the play head section, clicking on the Edit button, will help to trim the video clips. The unwanted sections can be cropped out if you don't require that anymore.
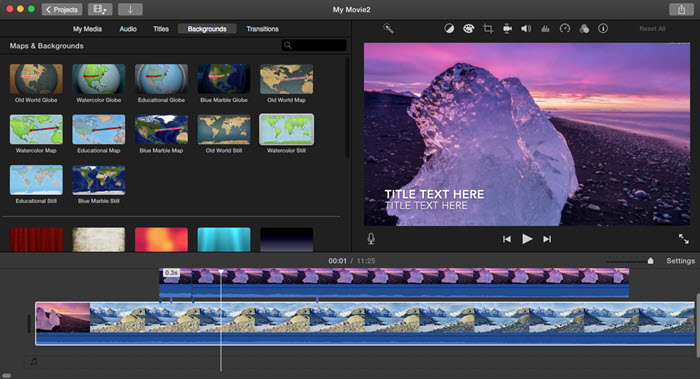
Step 3. Add transitions.
You can add different transitions of your choice and look for the results in the preview window. Any kind of images, any soundtracks can be inserted too. Click on the "Apply" button and wait till it finishes.
Step 4. Export the montage video from iMovie.
There is a red progress bar displayed after the effects are successfully applied. Now click "File" from the main window and select the "Save Project" option.
Tips: iMovie is well compatible with the Apple ecosystem, so you can make a montage video on your iPhone and iPad as well.


