
A music photo video is definitely a sweet present to surprise our near and dears ones on a special day because it carries beautiful memories and expresses deep love for us. And I know most of you are stuck in the first step since there are so many slideshow makers in the market that you have the faintest idea of what to choose. Actually, you need none of them. This post rounded up 4 methods to make a video with pictures and music for free across platforms. Now get ready to dive into the detailed instructions.
How to Make a Video with Pictures and Music for Free
VideoProc Vlogger is an easy and free video editor for Windows and Mac users. Its non-linear and frame-by-frame editing features can turn any still pictures into nice videos. Moreover, it has preset a vast amount of transitions, effects, filters, and text styles for you to make videos of all genres.
Now download and install VideoProc Vlogger and use it to make a video with pictures in 5 steps.

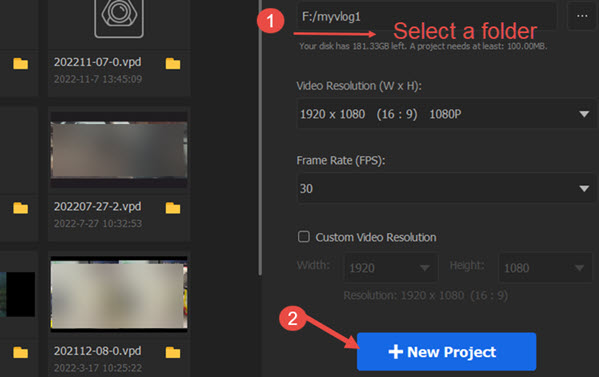
Step 1. Create a new project in VideoProc Vlogger.
Launch VideoProc and create a project in it after several simple settings including project name, location, resolution, and frame rate.
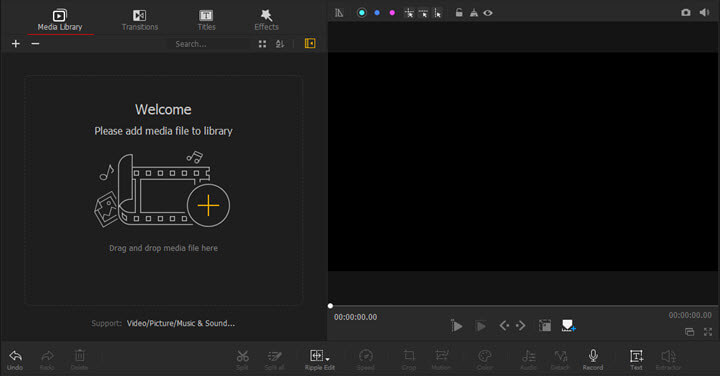
Step 2. Add pictures and music files to VideoProc Vlogger.
Then hit the big plus icon in Media Library to add pictures and songs from your device to it. Drag these pictures to Video Track and music to Audio Track.
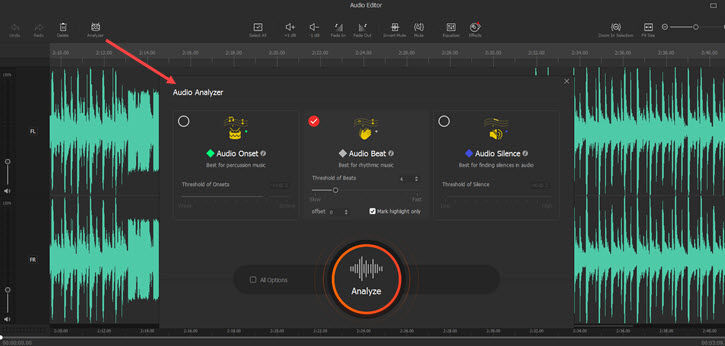
Step 3. Edit background music.
Now you can trim, move, or expand the music in the audio track. For more features, click the "Audio" option above the timeline to open the audio editor where you can add music beat markers to the song.

Tips: To avoid any problems when uploading videos with music to YouTube, Instagram, and other platforms, ensure that you are using music that you have created yourself, obtained permission from the owner in advance, or using royalty-free music.
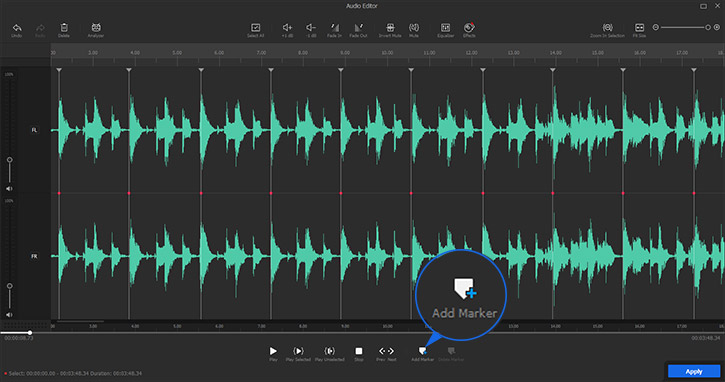
Step 4. Polish the video with effects, transitions, filters, and texts.
Now you can drag the edges of each clip to sync pictures to the music beat. Then to make these pictures look more artistic, go to Transition, Titles, and Effects tabs to select cool templates, and drag to apply them to the timeline in align with the beat marker as well.

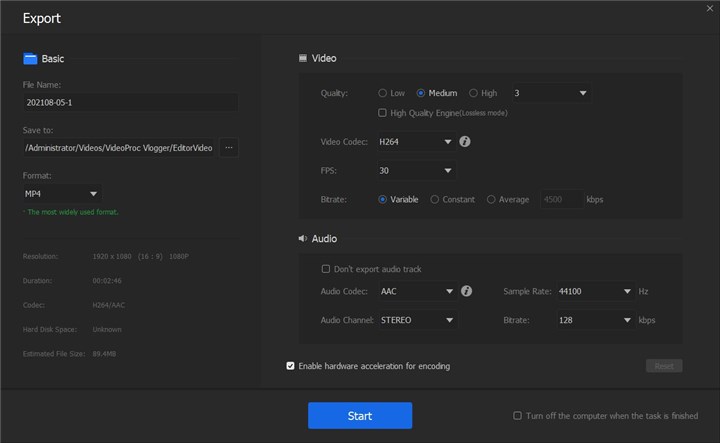
Step 5. Save and export the video.
When the editing is done, click the Export button and finish settings (filename, destination folder, video format, and codec) to start exporting it to your computer.
How to Make a Video with Pictures and Music on iPhone
On iPhone, you can use its free and built-in video editor, iMovie, to make a video with pictures and music for free. It is a powerful video editing app available on iOS devices. It allows you to create professional-looking videos easily with features like adding photos, videos, songs, text, and more.
Step 1. Open iMovie on your iPhone. Tap on the "+" icon to start a new project. Choose "Movie" to start creating a new video project.
Step 2. Tap on the "Add Media" button and select "Photos" to import the pictures you want to use in your video.
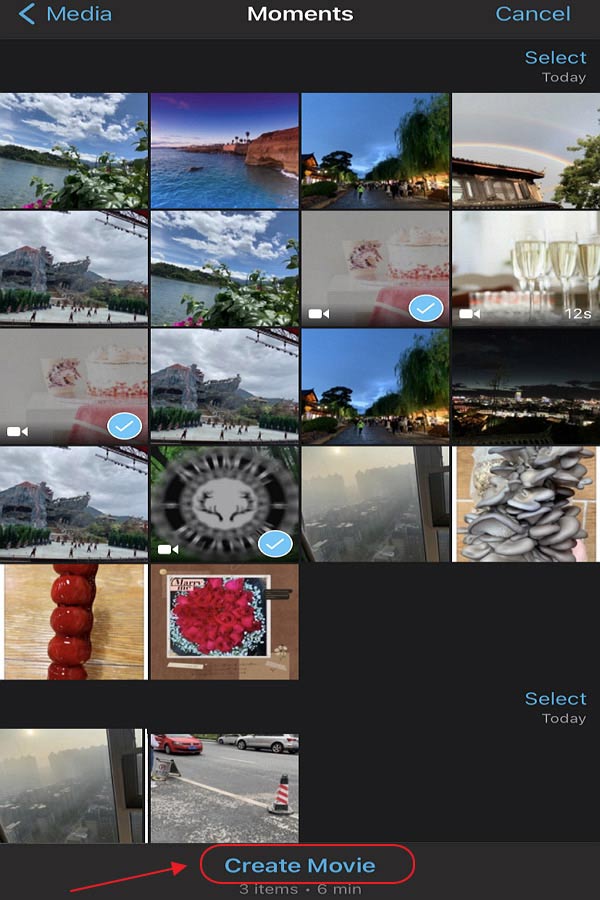
Step 3. Drag and drop the photos onto the timeline in the order you want them to appear.
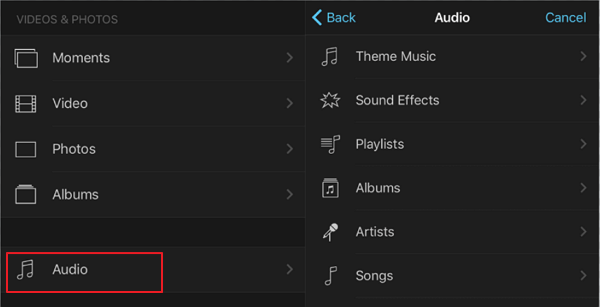
Step 4. Tap on the "+" icon again and select "Audio". Choose the music you want to add from your library or use the built-in soundtracks.
Step 5. Drag the music track to the timeline below the photos. You can trim the music by tapping on it and selecting "Split" to remove any unwanted parts.
Step 6. You can add transitions between photos by tapping on the transition icon between two clips.
Step 7. Tap on the "T" icon to add titles or text to your video.
Step 8. Once you're done editing, preview your video by tapping the play button. Finally, tap on the share button to save your video to your iPhone or share it directly on social media platforms like Instagram, Twitter, Facebook, and TikTok.
How to Make a Video with Pictures and Music on Android
Google Photos is a user-friendly app that provides a comprehensive solution for managing and sharing your photos and videos across devices. It does not only automatically organize media files easily but also makes music slideshows. You can use this feature online, on iPhone, as well as Android.
The main drawback is that it offers no stickers, filters, or text editing features. So if you only want a simple music slideshow without extra effects, this is a good option. Follow the steps below to see how to make a video with pictures and music with Google Photos on Android.
Step 1. Go to Download and install the Google Photos app on your Android.
Step 2. Open this app and tap "Utilities" on the main interface.
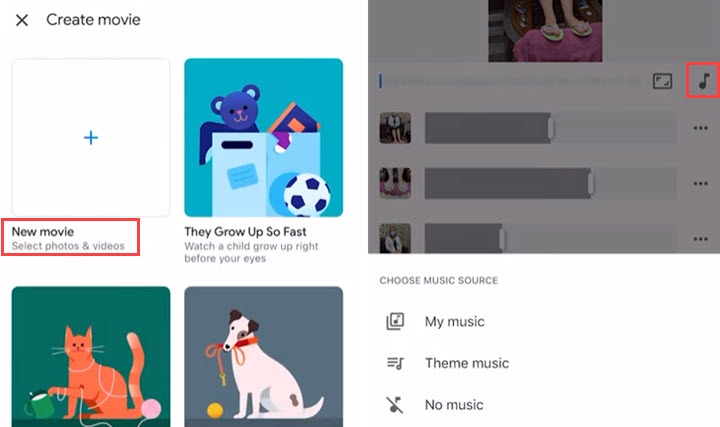
Step 3. Tap "Movie" > "New Movie". Then select the pictures you want to include in your video.

Step 4. Now you get to the editing tab. Tap the music icon to choose the music source. You can use your own soundtrack uploaded to Google Photos in the "My music" option, or use preset background music in the "Theme music" option.
Step 5. Now you can preview the video and drag the edges of each picture in the timeline to change its duration.
Step 6. Tap "Save" to finish editing. Finally, you can download the music photo slideshow to your Android phone or share it online.
How to Make a Video with Pictures and Music Online
Apart from using the default methods provided by the OS platforms, there are numerous online tools can help you to make a video from pictures or create movies from photos e.g. Smilebox. It is an online service that helps you to create collages, greeting cards, slideshows, videos, invitations, etc. Personally, it is my favorite go-to online service for creating my stories through pictures. It comes with designs for all occasions. You just need to select the one theme, and you're all set to go.
Step 1. Sign in on the Smilebox official platform.
Go to the site of Smilebox and register an account to get started.
Step 2. Create a slideshow project.
Select the slideshows option from the multiple presets available, and select the desired category like college days, school days, weddings, etc. Click on Personalize option to start editing.
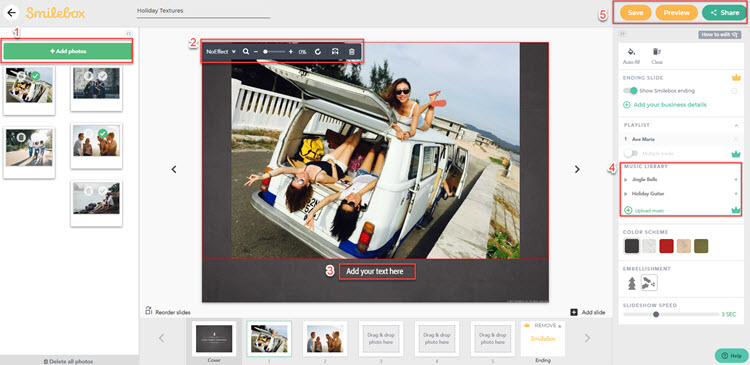
Step 3. Add pictures.
Load photos by clicking Add photo. For adding photos in a specific order, drag and drop the photos sequentially in the slides.
Step 4. Add text and music.
The text can be added by clicking on the textbox. Click on Choose music option and select the required music file.
Step 5. Save the slideshow.
When you finish all the edits, click on Preview, Save or Share.
Final Words
The above-listed methods are simple and easy-to-use. You can choose any one of them according to your device OS and your personal editing preferences. Hope this guide on how to make a video from pictures works for you, and look forward to your photo videos.


