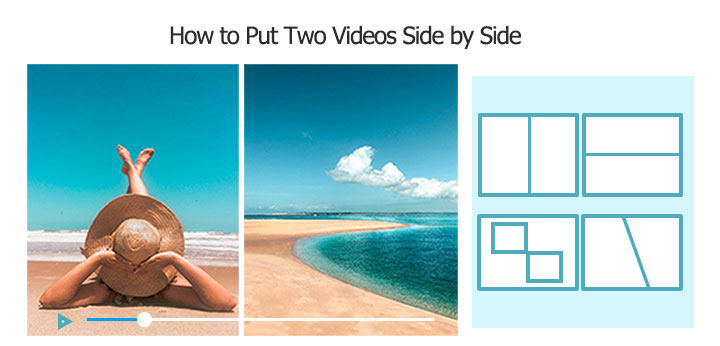
Putting two videos side by side can be an incredibly useful technique for various purposes. It allows you to create engaging visual comparisons, showcasing different perspectives or highlighting contrasts between two clips. This effect can also be used for educational purposes, enabling you to analyze and break down complex movements or processes by presenting them concurrently. Additionally, it can add a creative flair to your video projects, making them more dynamic and visually appealing. Whether you're a content creator, educator, or simply looking to enhance your video editing skills, learning how to put two videos side by side is a valuable asset.
The best part is that placing two videos side by side can be incredibly easy as long as you're using a good side-by-side video editor. In this post, let’s explore the 6 easiest ways to put 2 videos side by side quickly.
Best Way to Put Two Videos Side by Side
VideoProc Vlogger stands out as our top pick for putting two videos side by side as well as creating split screen videos. With support for over 999 timeline tracks, this capable piece of video editing software allows you to showcase multiple video and picture clips simultaneously or with staggered start and end times for a more dynamic visual effect. You can go beyond simply placing two videos side-by-side in a horizontal row or vertical column. For example, you can overlay one video onto another, and arrange them in a grid or tiled pattern, and the possibilities are endless. It comes with the Rulers and Guides feature which can help you position each clip where you want it, with pixel-perfect accuracy.
While being a free video editor, VideoProc Vlogger offers an impressive array of features rivaling premium tools, including a rich library of creative assets and robust video/audio editing tools, enabling beginners to create captivating content effortlessly. Check the highlight features of this best side-by-side video editor.
- Put multiple videos on one screen in your preferred positioning and layout
- Level up the outcome with text, effects, transitions, music, background, etc
- A rich library of assets: transitions, titles, speed ramp/motion effects, and Luts
- Support for all common aspect ratios, resolutions, and video/image formats
- Smooth and blazing-fast performance, even when working with 4K UHD videos
Free install, download, and run VideoProc Vlogger, and put two videos side by side now!

Step 0. Create a New Project
Download, install, and run VideoProc Vlogger on Windows or Mac. Launch it up. Complete the project settings on the start-up panel. Click +New Project to open the main editing panel.

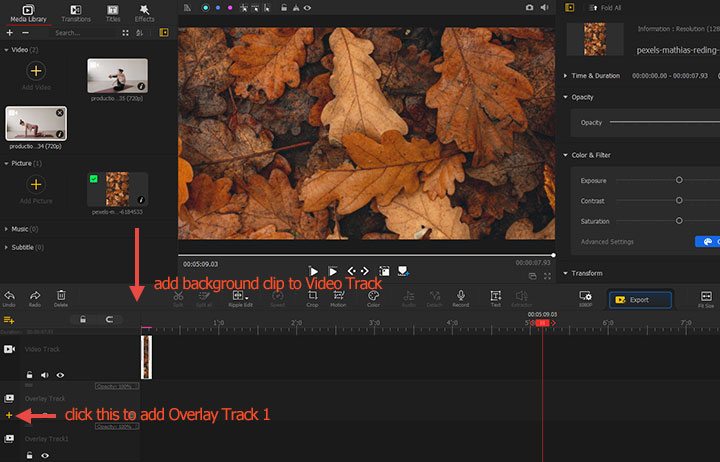
Step 1. Import the Original Clips
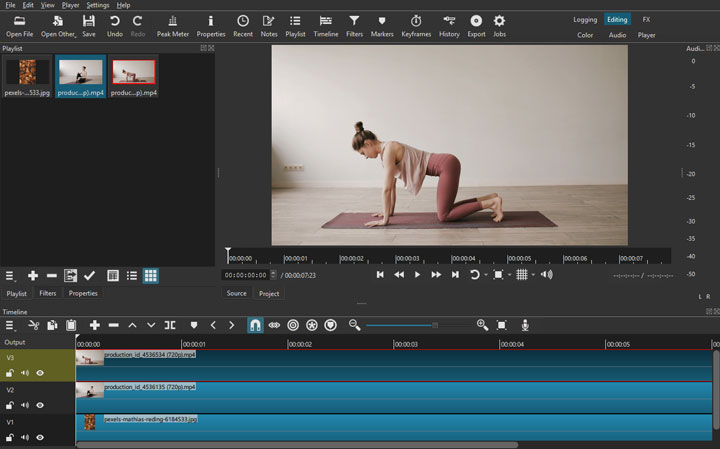
Add original videos to the Media Library by dragging and dropping. Drag the background video or image to the Video Track. Select the Overlay Track and click the plus button above it to add a new overlay track (Overlay Track 1).
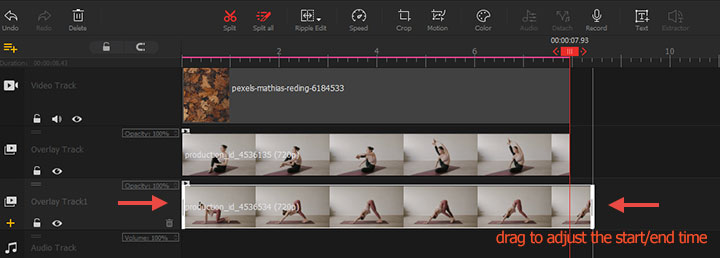
Step 2. Add Video Clips to the Timeline
Drag the videos you want to put them side by side to the overlay track: one to Overlay Track, the other to Overlay Track 1. Adjust the start/end time of each clip by dragging the ends.Use the Split or Ripple Edit feature to remove unwanted segments.
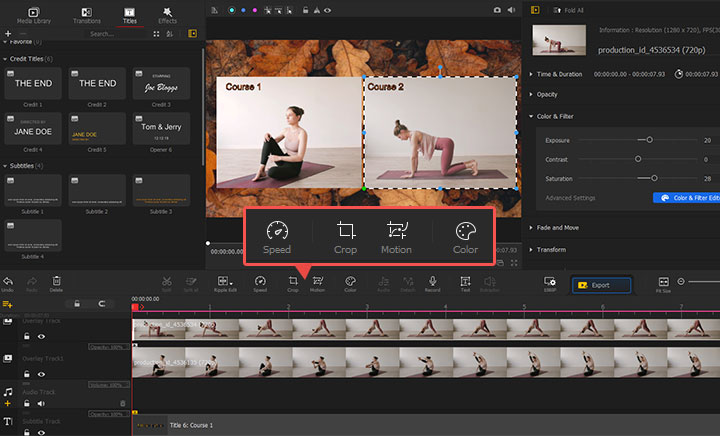
Step 3. Edit Individual Clips
Select the target clip on the timeline. As said, VideoProc Vlogger provides you with a plenty of basic and fancy editing features to refine your side-by-side video, for example, you can,
- Double-click the clip in the preview window and use on-screen handles to reposition, resize, or rotate it.
- Click Crop and drag the cropping box to crop out unwanted frames.
- Click Color Editor to correct the blacks and whites, color grade the footage, etc.
- Add Text using the Titles preset or by clicking Text on the toolbar.
Step 4. Export the Side-by-Side Video
Click Export and enter the output file name, format, and properties. Click Start to begin exporting the side-by-side video.
Other Side-by-Side Video Editors to Put Two Videos Side by Sides
2. How to Put Two Videos Side by Sides via iMovie
iMovie is a free video editing tool available on Mac, iPhone, and iPad. It allows you to work with up to two video tracks, making it suitable for placing two videos side by side on the screen. However, if you need to display three or more videos simultaneously, iMovie may disappoint you. Its editing capabilities are limited, lacking basic features like cropping unwanted pixels and rotating to a specific degree, as well as advanced options such as speed ramping and keyframing. Additionally, iMovie does not offer many advanced options for customizing frame rates, bitrates, audio codecs, or other properties, limiting control over output file quality.
Step 1. Open iMovie on Mac. Click Create New on the Projects view. Hit Movie to proceed.
Step 2. Click File > Import Media, and then choose the source video files for adding to iMovie.
Step 3. Drag the first video clip into the timeline. Drag the second video clip above the first one. When you see the green Add icon, release the mouse button until.
Step 4. Click the Overlay button. In the drop-down on the left, select Split Screen. Now, you can find your videos are shown in a side-by-side view.
Step 5. If you need to change the layout, click the Position dropdown menu in the Overlay settings of the Viewer window. Pick from Left, Right, Top, or Bottom to rearrange the position of your video clips.
Step 6. Once you're satisfied with the side-by-side layout, click the Share button in the top-right corner to export your final side-by-side video.
3. How to Put Two Videos Side by Sides via Premiere Pro
If you are looking to merge two videos side by side and require advanced editing features like motion track and auto reframe, I would highly recommend using Premiere Pro, which comes at a cost of $20.99 per month. With support for an unlimited number of video tracks, it not only allows you to put two videos side by side but also enables you to create stunning picture-in-picture or split-screen effects without any problems. Just keep in mind that this industry-level side-by-side video editor has a steeper learning curve for beginners and requires a computer with sufficient hardware capabilities to ensure smooth performance. If your primary goal is simply to put two videos side by side without the need for advanced editing capabilities, there are more user-friendly and cost-effective options available, such as VideoProc Vlogger (it’s completely free of charge) and some online video editors.
Step 1. Go to the official Adobe Premiere Pro website, download and install the latest version of the software for installation on your computer. Be sure to check the minimum system requirements for Premiere Pro to ensure compatibility with your computer.
Caution: Premiere Pro is a resource-intensive application, and running it on a system that does not meet the minimum requirements may result in performance issues, crashes, or other problems.
Step 2. Sign in with your Adobe account and follow the prompts to complete the purchase process. Alternatively, you can sign up for the 30-day free trial.
Step 3. Launch Premiere Pro and press Alt + Ctrl + New to open the New Project panel. Herein, enter the name of this project and assign the output folder. Press OK to continue.
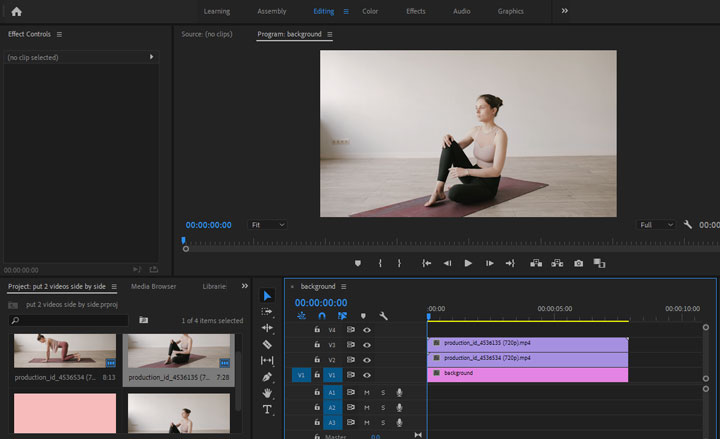
Step 4. Drag two videos you want to place side by side. You can do this by going to File > Import or by dragging and dropping the video files into the Project panel.
Step 5. Drag the background clip to the Project panel. Alternatively, create a background clip within Premiere Pro. Right-click the blank space in the Project panel, choose New Item > Color Matte, finish the settings on the pop-up Video Settings panel, pick the target color, hit OK, and then enter the name for this background clip.
Step 6. Drag the background clip to the first video track. Drag 2 video clips you want side-by-side onto separate video tracks above the background track.
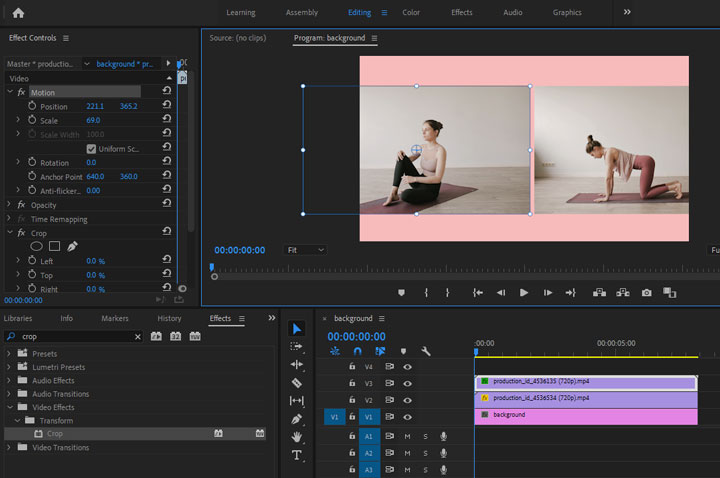
Step 7. You can use the Motion effect controls to resize and reposition the clips as needed. Fine-tune the alignment and positioning of the videos until you are satisfied with the side-by-side arrangement. Suppose you want to chop off unwanted pixels, go to the Effect panel, search for the Crop option, drag that onto the video clip on the timeline, and then you can drag the cropping box to remove off unwanted pixels.
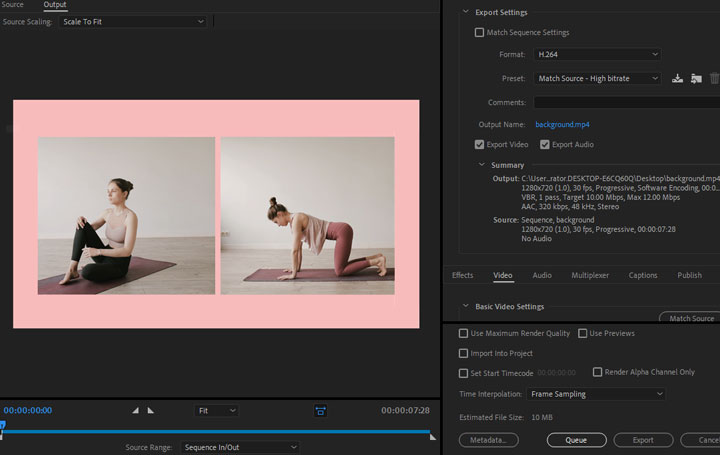
Step 8. Preview the video to ensure that the two clips are displaying side by side correctly. Once you are happy with the layout, press Ctrl and M and then finish the export settings to export the side-by-side video to your computer.
4. How to Put Two Videos Side by Sides via Shotcut
Shotcut is a free, open-source, and cross-platform video editor that allows you to place two videos side by side on the same frame using a multi-track timeline and compositing modes like Side by Side. While it offers a decent set of features for basic to intermediate editing tasks, its interface may seem outdated and cluttered because it prioritizes functionality over design. Some users find it more complex to get started with compared to Premiere Pro. Additionally, it's resource-intensive, requiring a powerful machine to create split-screen effects for high-resolution videos without lagging or choppy playback.
Step 1. Go to the official site of Shotcut, click DOWNLOAD, and then select the target version of Shotcut for downloading and installing on your computer.
Step 2. Launch up Shotcut. Enter the name and folder for the project and hit Start to proceed.Import all source footage into Shotcut by clicking on the Open File button and selecting the videos you want to use.
Step 3. Drag the background clip to the timeline. Press Ctrl + I two times to create 2 more new video tracks. Drag two videos to these two newly created tracks separately.
Step 4. Adjust the start and end points of the videos on the timeline by dragging their ends.
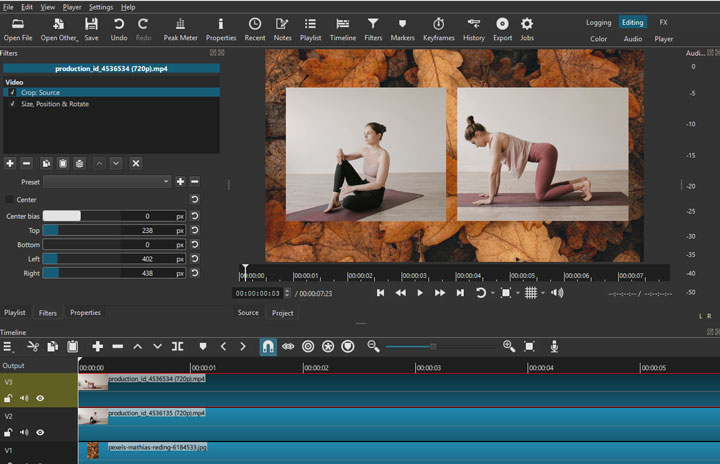
Step 5. Select the background clip, go to the Filters panel, click the plus icon, and choose Size, Position & Rotate. Adjust the Zoom slider to fit the background clip to the screen size.
Step 6. Select a video clip, find and select Crop: Source in the filter panel, and use the Top, Bottom, Right, and Left sliders to crop the video. Then, locate Size, Position & Rotate to resize and reposition the video.
Step 7. When editing is complete, export the side-by-side video by clicking Export and setting the export preferences.
5. How to Put Two Videos Side by Sides via Capcut
CapCut, a popular video editing app developed by ByteDance, the company behind TikTok, is available on mobile, browser, and desktop, all featuring a well-designed interface that simplifies tasks like adding clips to the timeline, trimming and editing footage, making basic edits, applying stunning effects, animations, stickers, titles, and transitions. Users can also easily place two videos side by side in a flexible manner. Combing two videos side by side can also be done with CapCut as well, easily and flexibly. We have covered various methods for placing two videos side by side on a computer. Thus, let's now explore how to achieve this effect using the mobile version of CapCut.
Step 1. Open the CapCut app on your iPhone or Android and tap the New Project option.
Step 2. Select the videos you want to place side by side from your photo library and hit OK.
Step 3. The two videos will be added to the timeline as separate clips. Tap and hold on one of the clips to drag and position it above or below the other clip on a different track.
Step 4. Make sure the two clips overlap in the timeline for the duration you want them side by side.
Step 5. Tap on the overlapping area of the two clips to select them both.
Step 6. Tap the "Layout" icon (two overlapping rectangles) at the top toolbar. This will open various layout options. Select the Side by Side layout. You can further customize the side-by-side layout by tapping the Edit option below.
Step 7. Adjust the positioning, spacing, sizing, and orientation of the two videos as desired using the available options. Tap OK to apply the side-by-side layout. You'll now see the two videos placed side by side in the preview window.
6. How to Put Two Videos Side by Sides via Kapwing
Kapwing is an online video editor that is great for quickly creating short side-by-side videos for sharing on platforms like Instagram, YouTube, and TikTok. It allows you to easily add multiple video clips and position them in various ways such as side by side or on top of each other. Additionally, Kapwing provides access to stock videos, photos, and background music. However, it's important to note that Kapwing doesn't come with fancy features like motion chroma keying, motion tracking, and variable speed changes. Its free version comes with limitations, such as a watermark on the output, a maximum video length of 7 minutes, and a resolution cap of 720p.
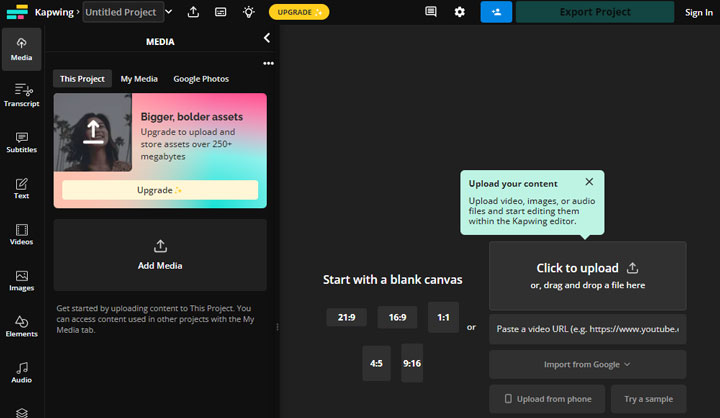
Step 1. Open the split screen page of Kapwing in your browser. Click Upload Video to access the workspace for putting two videos side by side.
Step 2. Select the desired aspect ratio for your project. Click Add Media and drag your source video files to upload them to the app.
Step 3. Press the blue plus icon on each video clip to add them to the timeline track.
Step 4. Select a video clip. In the preview window, drag the clip to reposition it or drag its corner handles to resize it. If needed, click the Crop button and adjust the cropping box to remove unwanted frames.
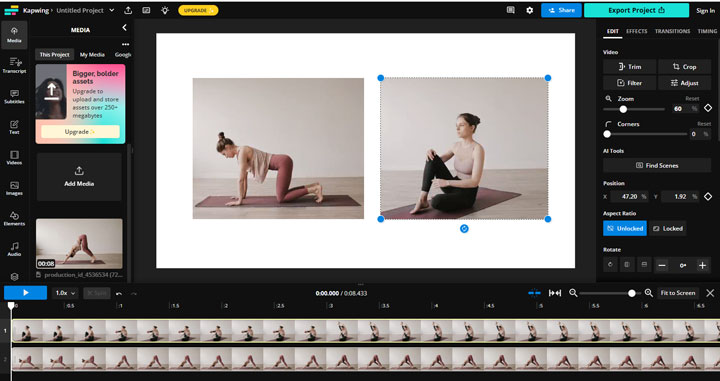
Step 5. Once you've combine two video clips side by side in your preferred layout, click Export Project to export the side-by-side video.


