
How can I blur out part of a video? No matter to blur a face for censoring purpose, or to blur parts of your body, blur a video background, a brand logo, a password, a license plate, blur an account detail, or just blur any specific moving objects. Here I round up several simple methods to help you blur anything on Mac, iPhone, Android, and online free, with or without blur effect…
Method 1: How to Blur a Face Using iMovie
Platforms: on Mac, iPhone, iPad.
Since there's no motion blur feature nor authentic blur effect in iMovie, you have to manually create a "blurred mask" over the video to help achieve blur effect in iMovie tediously.
Workflow explained: You need to prepare and input a blurred pic as mask and use "picture in picture" feature to lay the mask over the moving object in the video. By adjusting the position of the mask a frame by frame, or just selecting several key frames to adjust, you can manually cover the moving object with the blurred mask.
Step 1: Snip and save the area that you want to blur as an image.
Step 2: Blur the image in an image processing tool.
For instant image blur, you can check out some online blur sites or use simple snip & blur tools at hand.
Step 3: Download the blurred image to local and drag it to iMovie time line.
Step 4: Drag the image time line to the exact duration you want it to exist.
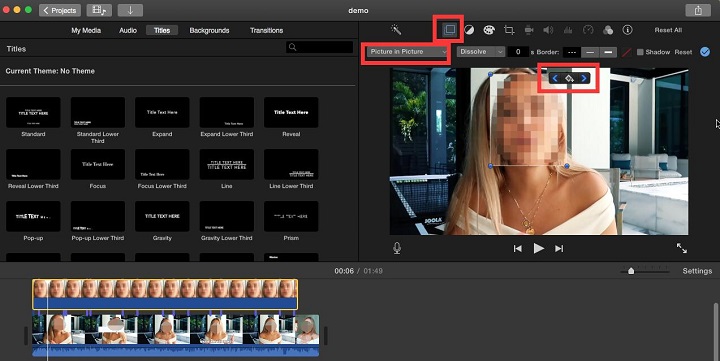
Step 5: Select the picture-in-picture clip and position the play head on the image layer.
Step 6: Click the Add Keyframe button to enable adding keyframes to the play head.
Step 7: Use the right arrow key to move the play head a frame by a frame, during which, hover your cursor over to the blurred image in the preview window and reposition the image to make it always cover the object as the play head moves on.
Note that: you need to click Crop button and select Fit to avoid the picture being cropped out of shape.
Additional Tips on How to Blur a Video in iMovie
Since the "pull focus" title blur effect only exists on iMovie for mac, iPad and iPhone users can skip this part.
Step 1: after importing your video, click on Title tab and select the Pull Focus effect.
Step 2: delete all the text in the Title area and your whole video is blurred.
Step 3: drag the time line of this title effect to cover the video.
If the amount of blur is not enough, simply export the vid and import it in iMovie and repeat the above two steps to reach your expectation.
Method 2: How to Blur Faces in YouTube Video Online Using YouTube Blur Tool
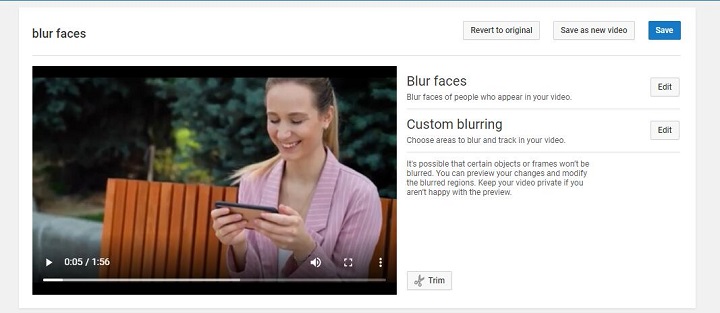
YouTube offers a very thoughtful feature - YouTube Blur Tool, which can efficiently help blur faces via two options – Face blurring and custom blurring. Blurring face is auto-done on YouTube. It can auto-detect almost all people's faces in the video, and all you need to do is simply select one or multiple faces to add blur effect through several clicks. You don't need to bother with keyframes and motion tracking in this case.
To custom blur part of a video, YouTube editor lets you select an area and set the timeline it should appear.
Step 1: Sign in YouTube Studio and upload your video.
This can take a while if your network speed falls short.
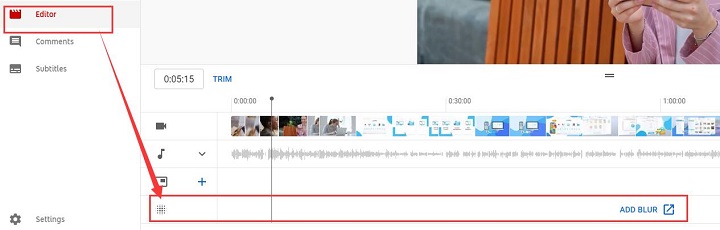
Step 2: Click on the video or click the Details and choose Editor on the left sidebar and click "Get Started".
Step 3: Click the "Add Blur" to open a new tab.
There, you will see two options:
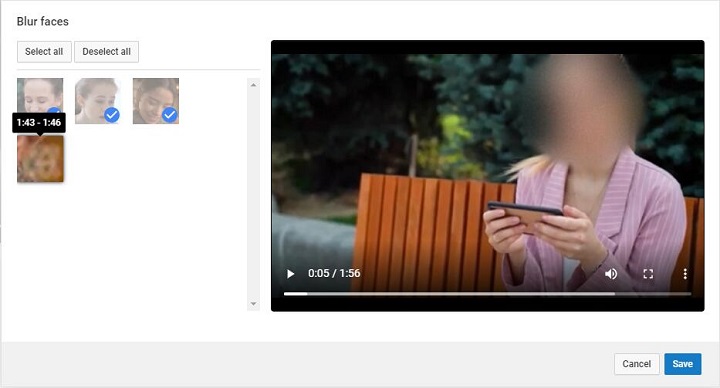
Step 4: Click Blur faces and select the auto-detected human faces.
Here you can choose multiple faces to blur or just a single one. The blur effect will track and be applied to the selected moving faces.
Method 3: How to Blur Faces in a Video Using Premiere Pro
Platforms: on Mac/Windows
This can be a bit into-details since Premiere allows for much more than blurring part of a video. It also helps you add shadows on the edges of the blurring area and the likes to your blurred video to lead viewers' eyes.
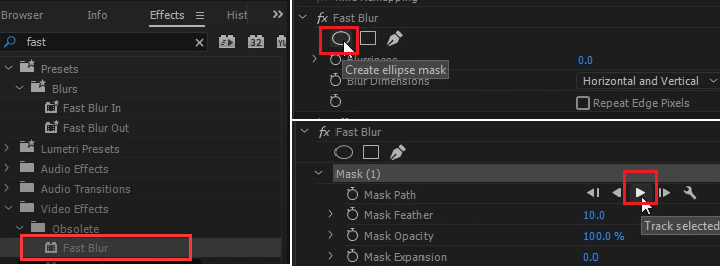
Step 1: In the Effects tab, search for Fast Blur.
Step 2: Drag the fast blur effect to the video track.
Step 3: In the effect control panel, under Fast Blur, click the Circle icon to create Elipse mask and adjust the position of this mask area to cover the target face.
Step 4: Drag the keyframe head to the start and click the play button to "track selected mask forward"
Premiere will auto track the moving face and reposition the mask. You can also manually adjust the position of the blur area when auto-tracking runs into minor issues.
Method 4: How to Blur Faces in a Video Using Final Cut Pro
Step 1: Select the video clip and right lick to choose "Show Video Animation" from the menu.
Step 2: Hover your cursor to the "Effect Browser" icon on the right upper bar of the time line to call out the Effect Browser window.
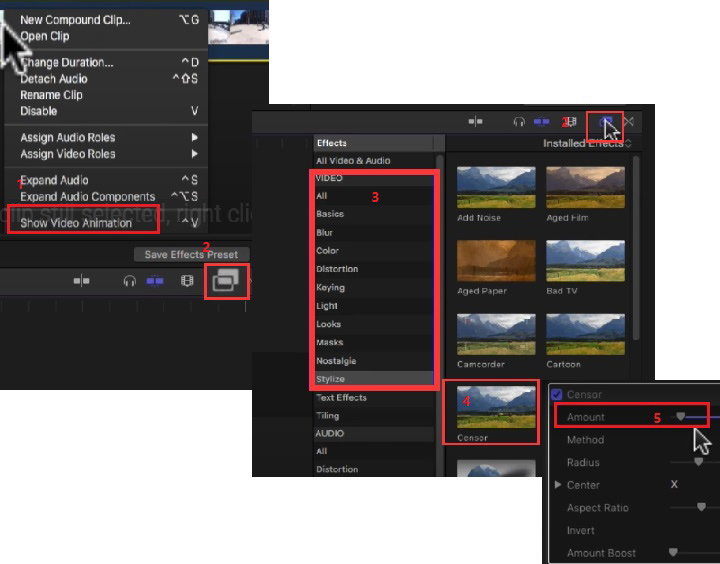
Step 3: Navigate to the Video > Stylize category > double-click the Censor Effect.
You will see the effect controller in the preview window
Step 4: Then in the inspector window, you can choose blur or pixelate (mosaic).
There you can adjust the amount of blur, radius, center, or invert the blur.
Method 5: How to Blur a Moving Face in Video Using Motion 5
Step 1: Drag a clip onto Motion 5 timeline.
Step 2: Copy the clip and name the tunnel as "blur mask"
Step 3: Select the rectangular "Mask" tool and drag an area you want to hide.
Step 4: Then you apply blur to this area by visiting library > filters > blur.
There are many blur choices radius blur, Gaussian blur etc.
Step 5: Drag the specific blur effect to your mask tunnel and then click on the heads-up display to adjust the amount of blur.
Step 6: When the face moves, you will need to add keyframes by clicking on the Red Record button.
Step 7: Move the keyframes using right arrow key and adjust the blur area along the moves.


