Now we can easily capture videos at 60fps and even 120fps with newer devices. Take a video at 120fps as an example, if we slow it down by five times in post-editing, the final clip we get will be at 24fps, the standard frame rate for film, and look very smooth. But the point is that you need a frame-by-frame video editor. It shows you all the frames and lets you move one frame at a time, so that you can cut, split, and make changes precisely.
You may get tons of results when searching for the best video frame editor, but still, feel at sea. So, we come to do a comprehensive review and round up the top 9 tools including frame by frame video editing software, apps, and online editors, as well as how to use them. Let's get started.
1. VideoProc Vlogger
Best for: users of all levels who want to edit video frame by frame
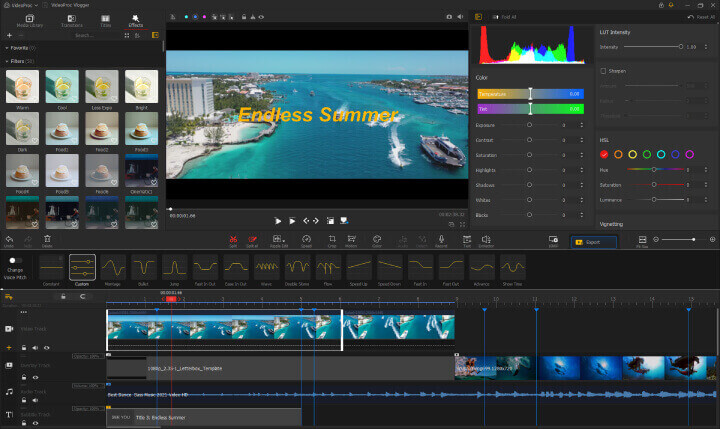
VideoProc Vlogger an intuitive and powerful video editor for users of all levels. In its zoomable timeline, you can see every frame in the clip clearly and move forward/backward one by one. And in this way, you can quickly navigate to the desired footage to split, re-sequence, crop, add subtitles and transitions, etc., and monitor the edited results precisely.

Highlighted Features
- Supported frame rate reaches up to 120fps.
- 4 flexible ways to view video frame by frame.
- Add markers to frames for quick and precise edits.
- All-round features: split, crop, speed ramping, color, audio editing, text, filters, etc.
- Fast and smooth performance while editing 4K 60fps videos.
- Better support for video/audio formats and codecs - HEVC, H.264, AAC, FLAC, MOV, MP4, MKV...
How to Edit a Video Frame by Frame in VideoProc Vlogger
Step 1. Launch this software on your PC or Mac. Create a project and get into its editing panel.
Step 2. Click the + icon to load media files to VideoProc. Then drag the file from Media Library to the timeline.
Step 3. Hover your mouse on the time ruler above the video track, then press and drag towards the right to enlarge the timeline. Now you can view every frame clearly.
Step 4. Put the playhead at any potion you want to make a cut, and click Split in the toolbar. You can also click Add Marker under the preview window to insert markers.
Step 5. You can proceed to crop, rotate, or add watermark, filter, and subtitle to your video in the same toolbar.
Step 6. When edits are done, save the project or export the video to your computer.
2. Windows Movie Maker
Best for: beginners who are using Windows computer
Microsoft launched a new app called Video Editor. But whatever you do will be applied to the whole video instead of certain footage. And that's why Windows Movie Maker, a free video editor officially discontinued in 2017, is still popular as a frame by frame video editor on Windows 10, 11, and you can get it here.
In Windows Movie Maker, you can see two kinds of timelines, one to show the playback process of the whole video, and the other to show the thumbnail of video frames. After cutting a video into several parts, drag them on the timeline to rearrange and add transitions, visual effects, texts, and background music to selected ones.
Pros:
- It is built-in and free.
- Easy for beginners to edit videos frame by frame.
- Suitable to make slideshows, mini vlogs, and music videos.
Cons:
- It only presents the first frame of a clip in the timeline.
- Lack of advanced video editing features.
- Does not support MOV HEVC video shot by iPhone.
- Crashes on Windows 11/10/8 sometimes.
How to Edit a Video Frame by Frame in Windows Movie Maker
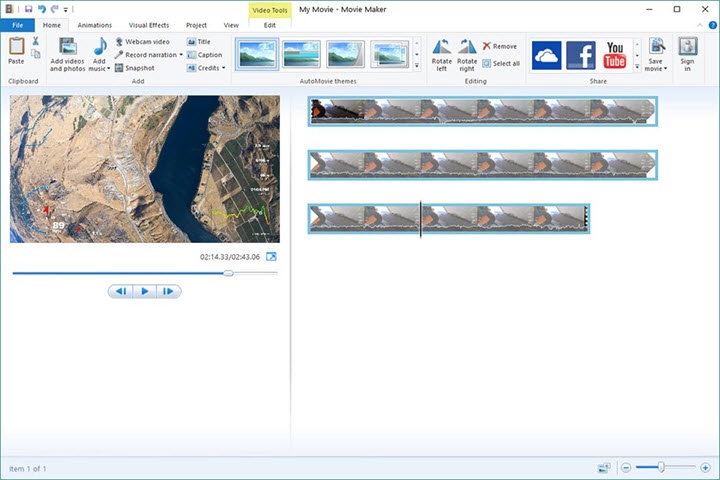
Step 1. Check if you've got this program on your Windows computer. If not, download Windows Essentials and select Photo Gallery and Movie Maker in its installation option.
Step 2. After the installation, open Windows Movie Maker and add videos or photos to it.
Step 3. All the files will be placed on the thumbnail preview timeline. Drag the playhead and right-click on a frame, then you can split it into 2 parts. Go on to divide the video into more clips if necessary.
Step 4. Open the Animation panel, drag a transition and drop it to a certain clip. Then open Visual effects to apply a filter to some or the whole video. Open the Home option and add captions to some frames.
Step 5. Save the movie and choose an output option to export it to your computer.
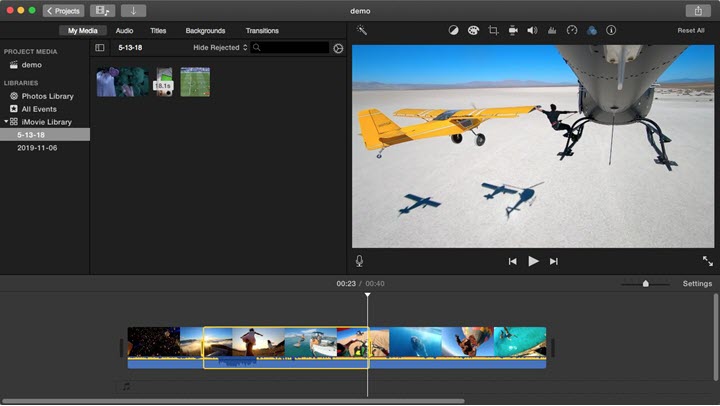
3. iMovie
Best for: Mac users who are on a budget
iMovie is the best video editor on Mac. Like Movie Maker on Windows, it is built-in but features more editing tools and has been updated all the time. Without paying a penny, Mac users can make a professional-looking video in this software.
In iMovie, you are enabled to browse every frame by dragging the playhead and cut exactly between two frames. Notably, it contains multiple tracks in the timeline, thus you can edit audio and use effects like green-screen and overlay to every individual frame.
Besides editing video frame by frame, you can also resort to iMovie 3.0 and onwards with the Magic Movie feature. It will create videos based on the designated albums and groups of clips, and add transitions, filters, and music automatically to speed up the process.
Pros:
- Free yet fully-featured.
- Both timeline and storyboard editing modes.
- Transfer iMovie projects between Mac, iPhone, and iPad.
Cons:
- Only available on Apple devices.
- Edit videos at a fixed aspect ratio, 16:9.
- Does not support GIF and MKV files.
How to Edit a Video Frame by Frame in iMovie
Step 1. Create a new project in iMovie. Import files to the media bin, and drag them into the timeline
Step 2. Zoom in on the timeline to check every single frame. Stop the skimmer where you want to separate the video. Right-click on it and choose Cut to split two frames into individual parts.
Step 3. Follow the step above to cut the video into multiple parts. And then add transitions, filters, texts, and other effects to each clip.
Step 4. When the editing is finished, hit the output icon on the upper corner, and click File to save it to your Mac. Or you can share it via Email, YouTube, or Facebook in the output option.
4. Adobe Premiere Pro
Best for: Pros and semi-pros who have high-end PC builds
Adobe Premiere Pro has been leading in the industry since its birth. And its users range from film editors to YouTubers and video enthusiasts. To be sure, it is the most professional program to edit videos frame by frame.
In addition to cutting video frame by frame, it lets you apply effects, remap and crop videos with keyframes. This is widely used while making sports, pets, and kids videos. In these videos, objects are moving fast so that you have to browse each frame and split or add effects at the exact position.
Pros:
- Powerful to meet all your editing needs.
- Capabilities can be further enhanced by plugins.
- Seamless integration with other Adobe products to make videos of all genres.
- Compatible with both Windows and Mac.
Cons:
- Steep learning curve.
- Crash or quit on low-end computers.
- Extra fees for some plugins.
How to Edit a Video Frame by Frame in Premiere Pro [Video Tutorial]
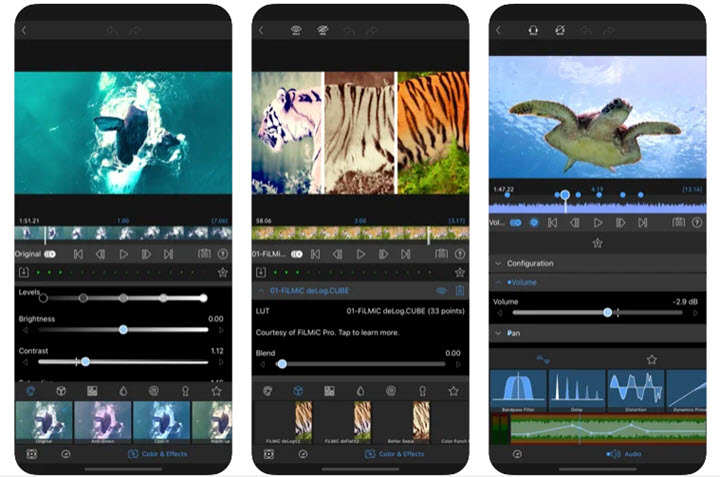
5. LumaFusion
Best for: skillful editors who are using iPhone or iPad
Lumafusion is the most professional frame by frame video editor on iPhone in recent years. It has powerful features and an elegant UI. Video editing pros will find all the features they need just like working with a piece of desktop software.
Its timeline gives you an intuitive head start and guides you to the accurate place where you want to add transition and texts. Lumafusion also performs well in multiple track editing including videos, audio, photos, graphics, and titles. You can also use it to do color grading and create a slow-mo effect with videos @120fps.
Pros:
- Accurate timeline preview.
- 6 tracks for video editing.
- Ready-to-use background music, sound FX, and loops.
- Work with videos @18fps - 240fps.
Cons:
- Not friendly to users on a budget.
- High CPU usage and space-consuming.
How to Edit a Video Frame by Frame on iPhone with LumaFusion [Video Tutorial]
6. KineMaster
Best for: Android users
KineMaster is a video editing application that brings a full suite of editing tools to mobile devices. Designed for productivity on the go, it can create both daily vlogs and marketing videos.
It is also regarded as the best video editor for Android as it lets you have the utmost control over your video clip. By swiping the timeline horizontally, you can locate the exact frame to which you want to add layers, audio, and voice-over.
Pros:
- Powerful and easy to use.
- Multiple layers of videos, images, texts, effects, and stickers.
- Add and edit videos shot within this app.
Cons:
- Only videos at 60 fps or lower are supported.
- You need to pay for premium assets and watermark removal.
How to Edit a Video Frame by Frame on Android with KineMaster

Step 1. Open KineMaster on your smartphone, and create a project.
Step 2. Load a video from your local gallery. You can also capture a new clip by pressing the aperture icon on its UI.
Step 3. Press on the timeline and swipe to browse video frames. Select a frame and split the video. Then delete redundant footage. You can also drag a clip on the timeline to change the order.
Step 4. Select a clip. Tap the Layer option to add an image, a sticker, texts, or hand writings. If you made a mistake, press the undo icon to get back to the last step.
Step 5. Hit the export icon in the upper right corner to save the video frame on your phone.
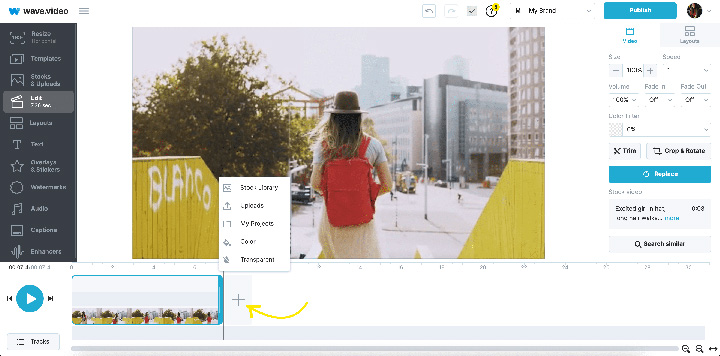
7. Wave.video
Best for: online video editing
For those of you searching for an ideal cloud-based online video editor, we strongly recommend checking out the Wave.video app. It is an intuitive editor that provides both basic editing features (add text, combine videos online, add audio, etc.) and some profound stuff like a text-to-video converter or automatic translation of captions to other languages.

Pros:
- Access to an extensive library of stock images and videos.
- With a Wave.video account, you get not only a video editor but also a thumbnail maker and live streaming studio with a multistreaming option.
- No limit on the number of videos you can edit.
- Collaborative mode: invite others to help you with editing
- A unique collection of templates
Cons:
- A limited number of features for a Free plan.
- No mobile app.
- Limited access to premium royalty-free videos and music.
How to Edit a Video Frame by Wave.video
Step 1. Enter your account to start a new project, click on the +Create button, and choose Blank video.
Step 2. Choose your video format: horizontal, square, story, or vertical.
Step 3. Now you can either upload your media files or use something from the stock library.
Step 4. Once you have added one file, you can add as much as you need by clicking on the + button (you can also choose from the stock, upload from your computer, or use some of the existing Wave.video projects)
Step 5. Be creative. Add different layouts, text, captions, etc.
Step 6. The project is automatically saved in the My projects folder. If you want to download the final video, click on the Publish button, choose the resolution, format, and quality, click on Render, and download the file.
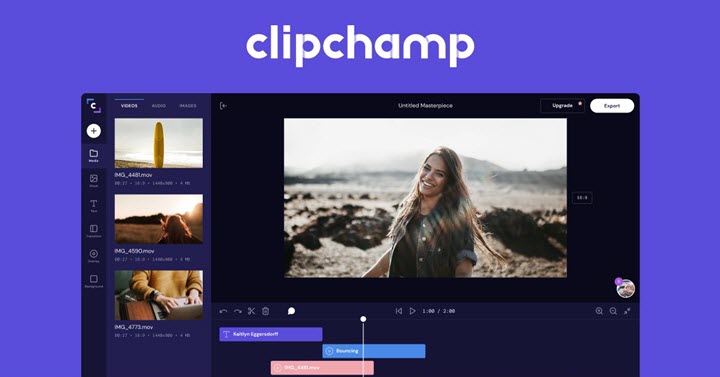
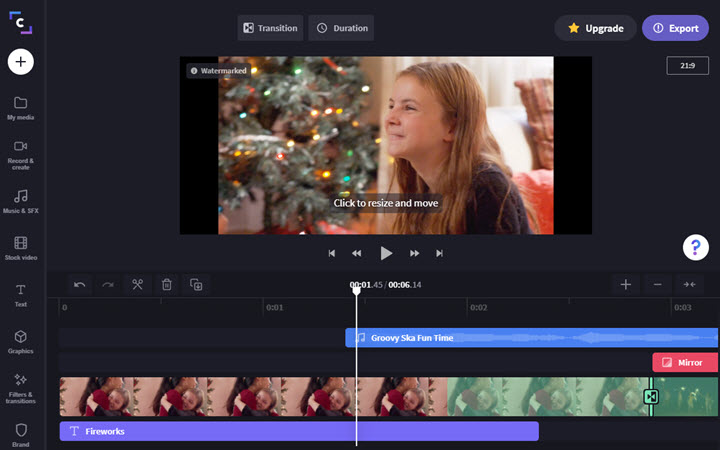
8. Clipchamp
Best for: newbies and semi-pros who want to edit video frame online
Many online video editors tend to simplify the process of video editing by storyboards. But Clipchamp is not the same. With this online tool, you can bring all your ideas to life by editing every frame in your video.
You can load sorts of media content like video, audio, and images to Clipchamp. So even if you want to make stop-motion videos frame by frame, Clipchamp still works for you.
Pros:
- Non-linear video editor online.
- No watermark on the free version.
- Rich-feature toolkits and stylish stock videos, music, and SFX.
Cons:
- Can't export 4K videos.
- Limited compatible video formats.
- Slow to load and render multiple videos.
How to Edit a Video Frame by Frame Online with Clipchamp
Step 1. Open Clipchamp online video editor. Import a video from your computer, Dropbox, Good Drive, or OneDrive.
Step 2. Drag videos from the media bin to the video track on the timeline.
Step 3. Hit the plus icon above the timeline to magnify the timeline. Now you can place the playhead in a certain position. Hit the scissor icon to cut the video.
Step 4. Click the track above to add text with its preset title. Type in your texts and choose a font. Drag the text bar to put it on a certain clip. Then add other elements like music, graphics, and filters in the same way.
Step 5. Hit the Export icon. Name your video file and select the video resolution to continue. Ultimately, it will export and download the edited video to your browser downloads file.
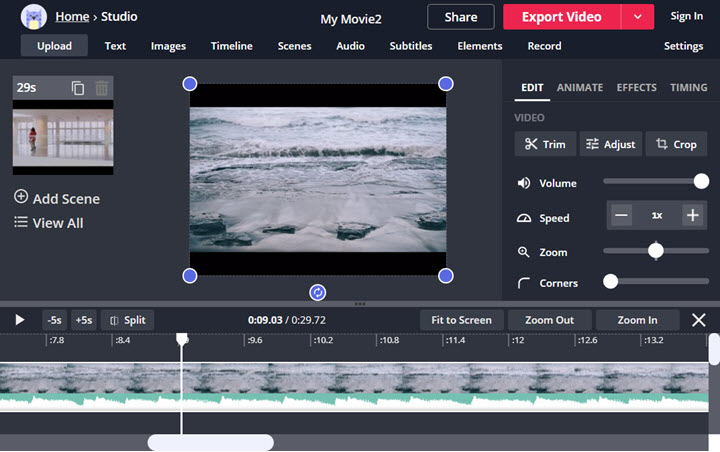
9. Kapwing
Best for: Beginners who don't want to install any 3rd-party software
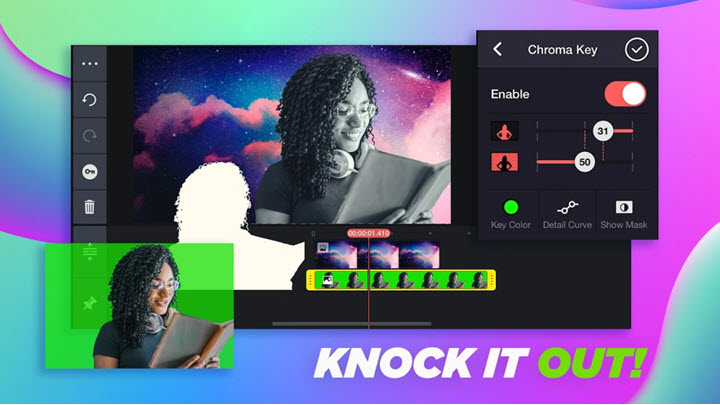
Kapwing is also a video editor showing you all the video frames. In this online editor, you can zoom in on the video timeline and audio waveform multiple times. After splitting video frames precisely, you can adjust volume, speed, and color, add background, subtitles, and chroma key separately.
Pros:
- Simple, free, and beginner-friendly.
- Edit each frame individually.
- Easy to share and co-edit with others.
Cons:
- File size limits and watermarks.
- Only save videos in MP4 format.
- Cannot edit videos in multiple tracks.
How to Edit a Video Frame by Frame Online with Kapwing
Step 1. Go to the official website of Kapwing. Upload a video from your computer or paste the URL of an online video.
Step 2. Zoom in the timeline until you can see every frame clearly. Drag the playhead to locate a frame, and hit the Split icon to dive the video into several parts.
Step 3. Hit to select a clip, and go to the panel on the sight side. Now you can edit, and add animation or effects to it. If you want to add elements to the whole video, choose options on the upper side toolbar.
Step 4. Hit the Export Video option to save your video as an MP4 file. After it finishes rendering, you can download the video to your computer or share it via a link.
Quick Comparison
Editor Name |
Platform |
Best For |
Price |
Frame Accuracy |
|---|---|---|---|---|
VideoProc Vlogger |
Windows, Mac |
All-level users & 120fps editing |
Free |
High (120fps support) |
Windows Movie Maker |
Windows |
Beginners using older PCs |
Free |
Low (Legacy tool) |
iMovie |
Mac, iOS |
Mac users on a budget |
Free |
Medium |
Adobe Premiere Pro |
Windows, Mac |
Professional film/video editors |
Paid (Subscription) |
Professional Grade |
LumaFusion |
iOS, iPadOS, Android |
Professional mobile editing |
Paid |
High (Up to 240fps) |
KineMaster |
Android, iOS |
Social media influencers |
Freemium |
Medium (60fps support) |
Wave.video |
Online (Browser) |
Content marketers & stock usage |
Freemium |
Medium |
Clipchamp |
Online, Windows |
Quick social media & browser edits |
Free / Paid |
Medium |
Kapwing |
Online (Browser) |
Quick collaborative edits |
Freemium |
Medium |
FAQs
What is frame-by-frame video editing?
Frame-by-frame video editing refers to viewing a video frame by frame, navigating to the right footage, and applying edits to the exact frame such as cut, split, re-sequence, crop, and adding texts and transitions accurately.
Is it possible to edit video frame in Photoshop?
Yes. But you have to have Photoshop CS6 Extended or any version of Photoshop CC. Other versions will not work with video.
Open File and load a video into Photoshop, and the video and a timeline will appear on the interface just like on a decent video editor. If you don't see the timeline, extend the Windows in the menu bar and tick the Timeline option.
How do I view frame by frame of a video?
Open a video file in VLC media player. Next, go to Tools > Preferences > Hotkeys and search "frame". Then you'll see that the shortcut key E is for playing the next frame. Now get back to the playback window and press the E key. Your video will be paused frame by frame.
Does editing frame by frame reduce video quality?
No. Frame-by-frame editing only changes the timing and placement of cuts. Quality loss only occurs if you export with low-bitrate settings. Most video editors ensure lossless-quality processing during frame-accurate splits.


