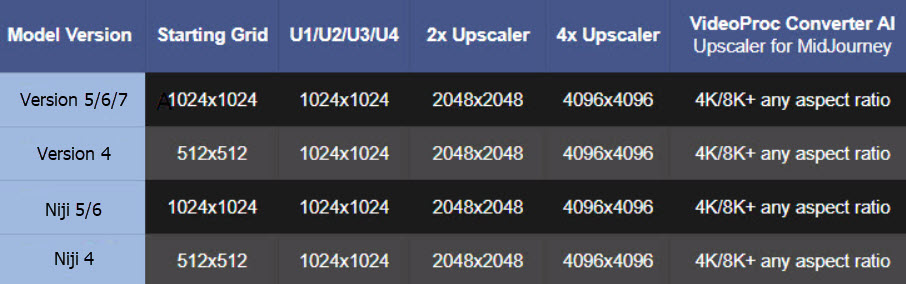
The default resolution of Midjourney generated image is 1024x1024 (model v7/v6/v5 and Niji5). Version 4 and Niji 4 produce a base image at 512x512, and you can click the U button to upscale it to 1024x1024. Either way, the low resolution is not enough for a high-quality display and printing. So how to upscale Midjourney images?
With the launch of Midjourney V7, you might wonder if upscaling needs have changed. Based on initial explorations, the base resolution for V7 grids remains 1024x1024 pixels. While V7 brings incredible improvements in prompt understanding, coherence, and more textures at that base resolution, you'll still need to upscale for larger formats.
No matter you are planning to share a crystal clear high-res image with the clients, print out the art as posters and large wall art, or display it on UHD 4K and 8K TVs, you can follow our step-by-step guidance below to upscale Midjourney images.
How to Batch Upscale Midjourney Images to Max Resolution
After you have prepared the AI-generated art from Midjourney, you can save it to the local drive on your computer and use a dedicated AI Image Upscaler to increase the resolution.
Considering the ease of use, batch upscaling option, result image quality and feature set, we will use VideoProc Converter AI as a demonstration here to upscale Midjourney AI art.
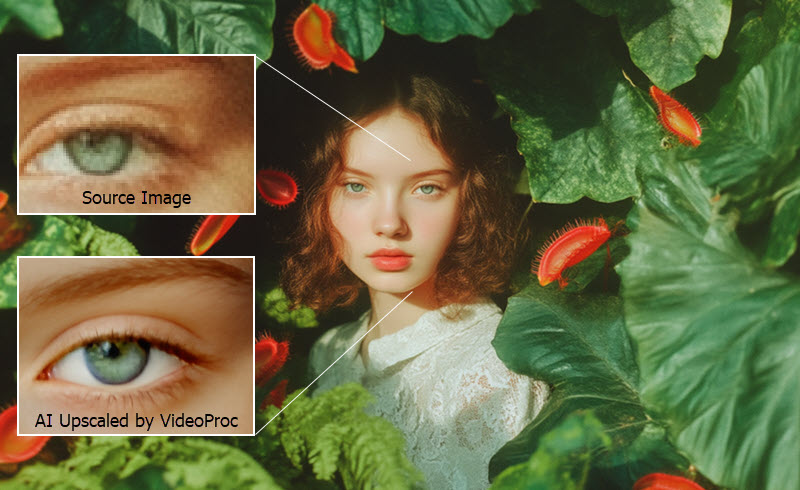
VideoProc Converter AI's new "Gen Detail v3" model lets you significantly enlarge images without sacrificing quality. It creates realistic details (for skin, fabric, hair, fur, and textures), resulting in stunning, high-resolution pictures that look sharp even on very high-definition screens.
There are also Real Smooth v3 model, Anime model and more for different occasions.
Step 1. Download and install VideoProc Converter AI on your computer.

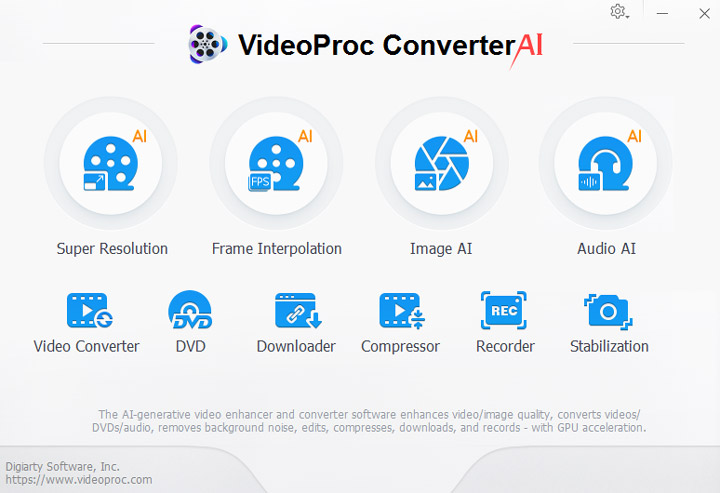
Step 2. Go to the Image AI feature from the main UI.
Inside the Image AI module, you can enhance, upscale, denoise and deblur images, restore faces with AI, and colorize black and white images.
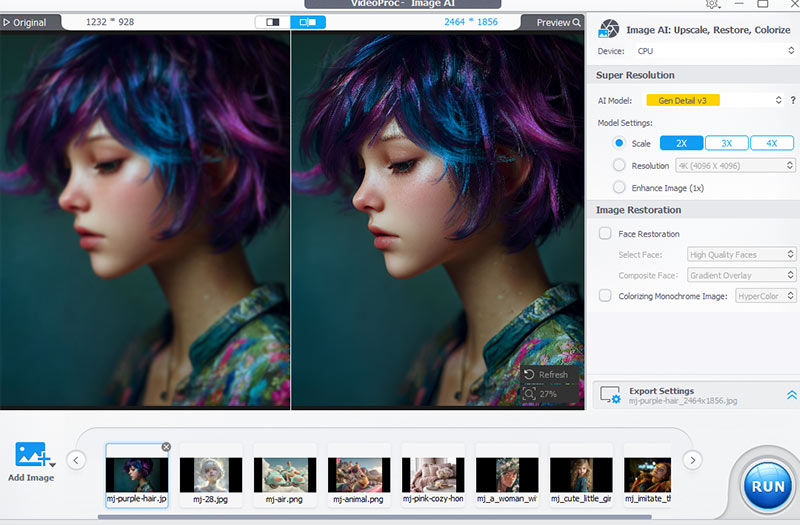
Step 3. Choose an AI model suitable for your image type.
- Gen Detail v3 model: This model focuses on preserving and creating realistic details, such as for skin, hair, and the texture of material surfaces. It aims to make your images look more lifelike and visually appealing.
- Real Smooth v3 model: This model is designed to fix imperfections and flaws in your images. It improves clarity and creates a smoother overall look, making your videos or photos appear more polished and high-quality.
- Anime model: This specialized model is trained specifically for enhancing anime content. It upscales anime visuals while maintaining the unique style and natural appearance of animation, ensuring the final results stay true to the source image.
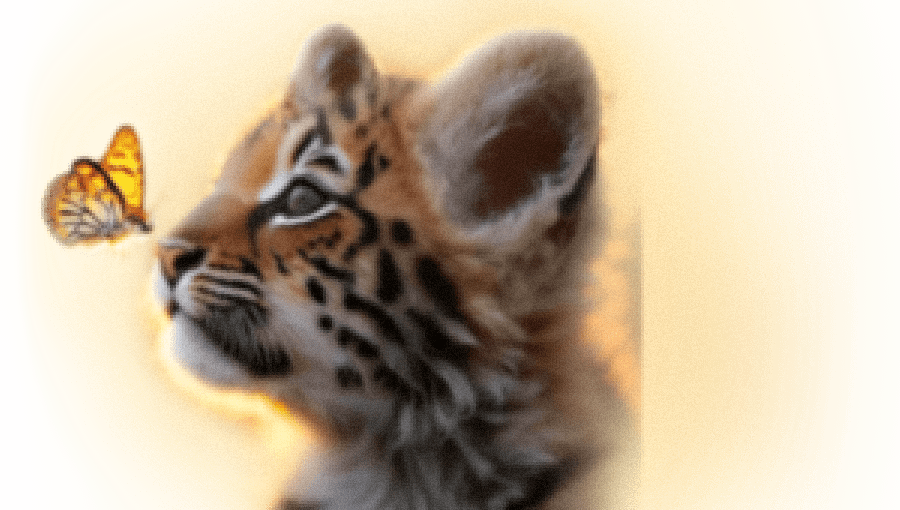
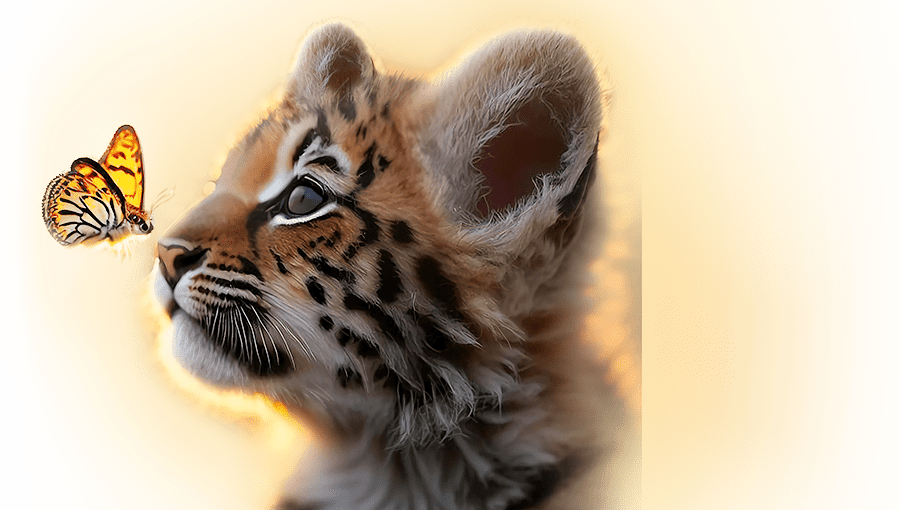
I've found its Gen-Detail AI model is particularly adept at intelligently adding detail without the typical blurriness or artifacting you might see elsewhere, letting me push resolutions to 4K or even higher while maintaining clarity. You can check the comparison images below.

If you are not sure which model to choose, you can experiment with it, and check the realtime preview to decide which one performs better. You can also switch the previewing modes for side-by-side comparison or before/after slider.
Step 4. Choose 2X, 3X or 4X upscaling, depending on your specific needs. Or choose custom resolutions.
If your source image is 896x1344, 4X parameter will upscale your image to 3584x5376. That's about 20 megapixels, which is more than enough for you to print high-quality wall arts and posters, or share on 4K displays.
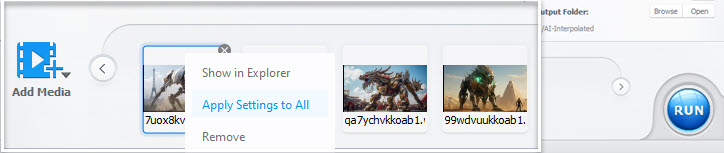
Note: VideoProc Converter AI makes it efficient for you to batch upscaling images and videos. You can drag and drop the files, tweak the settings, and right-click on that image to "Apply Settings to All".
This image upscaler supports both PNG and JPEG format. For the best quality, keep the Image Quality at 100% upon exporting. Once you are satisfied with the settings, hit Run to finish upscaling the Midjourney image.
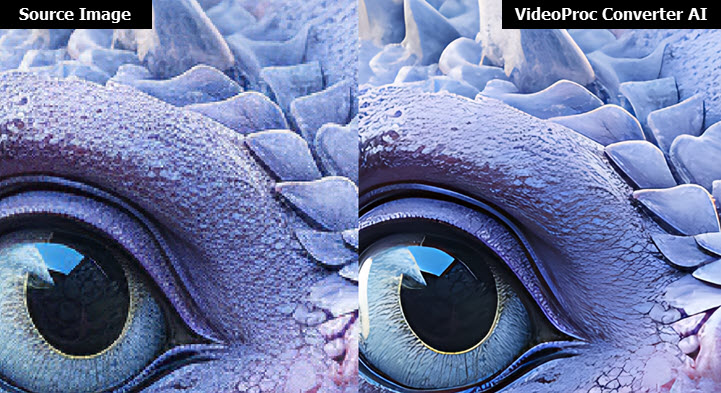
Below is the demonstration of the source AI art vs upscaled images.

VideoProc Converter AI - Best Video & Image Enhancer
- Upscale videos and images and by 2X, 3X, 4X to achieve 4K/8K sharp and vivid quality
- Super resolution model for AICG images, footage, old videos, DVDs, blurry recordings
- All-in-one enhancer: AI FPS converter, AI deshake, denoise, restore image and videos
- Handy tools to convert incompatible format, quick edit, download videos, record screens
- Easy to use, beginner friend UI, no learning curve. Batch tasks to enhance productivity
![]() Excellent
Excellent ![]()
How to Upscale Midjourney Image with 2X and 4X Upscaler
Previously, after using the imagine command, you will have a grid of 4 Midjourney images. Then you can press U1/U2/U3/U4 to separate the selected image from the grid. The separated image will be 1024x1024 (or other resolution of different aspect ratio around the 1MP size).
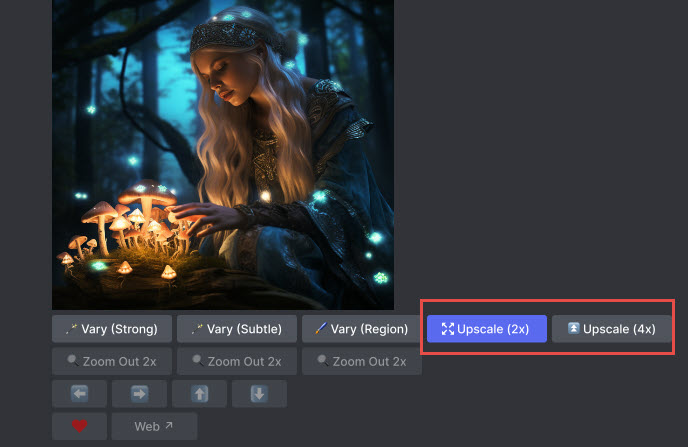
Now Midjourney introduced the 2X and 4X upscaler immediately after you picking 1 out of the 4 initial images. If your base image is in 1:1 aspect ratio, then:
- For the Upscale (2x) button: it delivers a 2048x2048 image
- For the Upscale (4x) button: it delivers a 4096x4096 image
In my experience using V6 extensively, the native 2x upscale is decent for quick previews, but the 4x upscale can sometimes soften details or introduce minor artifacts, especially in complex textures like fur or fabric.
- Using the 2X and 4X upscaler will count against your GPU time.
- Both upscalers are only available for the Fast Mode. If you run out of the Fast Mode quota, you won't be able to upscale Midjourney Images natively inside its Discord service.
- If you are using the pan tool or the tile parameter (-- tile) to create a seamless pattern, you cannot use the 2X and 4X upscaler.
If you are new to Midjourney, follow the steps bellow to generate AI images and upscale Midjourney images to the desired resolution.
Step 1. Click the official invitation link to join Midjourney on Discord.
https://discord.com/invite/midjourney
Step 2. Choose a plan that suits your needs.
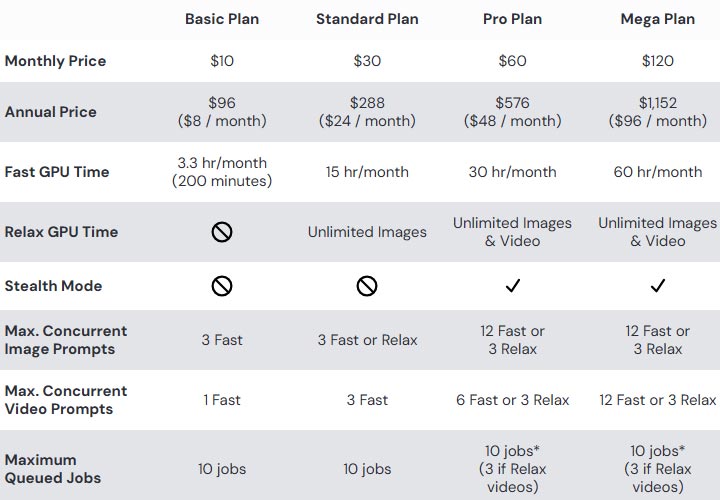
As mentioned before, Fast GPU time directly decides whether you can use the 2X and the 4X upscaler. If the 3.3 hour per month quota for the Basic Plan isn't enough for you, you may need to consider upgrading the plan.
Step 3. Type /imagine and write the prompts.
- You can join the Midjourney channel to send or prompts.
- Or you can click the Midjourney bot to send the prompts directly.
- Or more preferably you can create your own server, and invite the Midjourney Bot to your server.
If you have no idea what prompt to write, you can type /describe and paste a link of the image that you want to imitate. Then use the description offered by the bot with the /imagine command.
Step 4. Choose 1 out of the 4 AI-generated images by clicking U1 or U2/U3/U4.
Step 5. Click the Upscale 2X or Upscale 4X button to increase the resolution of Midjourney image.
Once you are happy with the results, right-click to save the image to the local drive.
If you run out of the Fast GPU time, the upscaler inside Midjourney will stop working. Then you can consider using the dedicated AI Image Upscaler introduced in Method 1 above, as it won't impose the GPU time limitation on you.
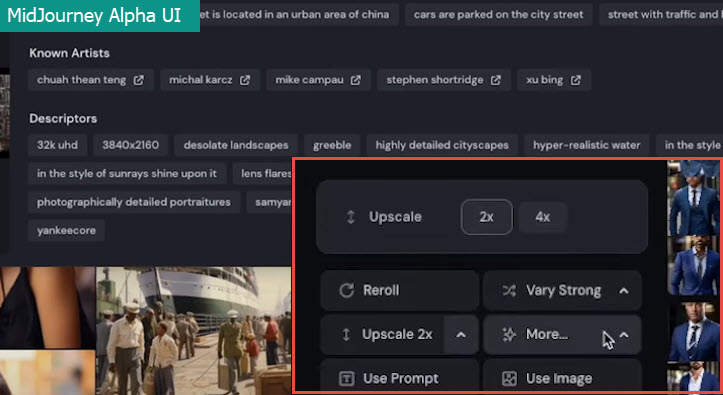
Note: Besiding using Midjourney within Discord, you can also visit its websites version: Midjourney Alpha, available at alpha.midjourney.com. The upscaler in Midjourney Alpha is 2X and 4X, the same as the Discord version.

Bonus Tips: here are some great resources on Twitter, featuring best Midjourney prompts to inspire you.
Tips: Upscale Midjourney Image to High-Quality Print Size
For users searching for Image Upscaler for Midjourney, their ultimate goal is to print out Midjourney arts with high quality. For your convenience, below is a list of recommended print size for images, with corresponding megapixel value (MP) and resolution.
| Max Print Size | Minimum MP | Resolution |
|---|---|---|
4x6'' |
2 megapixels |
1600x1200 |
5x7'' |
3 megapixels |
2048x1536 |
8x10'' |
5 megapixels |
2560x1920 |
11x14'' |
6 megapixels |
2816x2112 |
16x20'' |
8 megapixels |
3264x2468 |
Depending on the different printing services that you may be using, the recommended dimensions can differ from one another. Still, as you can see from the following chart, the default 1024x1024 resolution from Midjourney fails short of delivering ideal results for most occasions.
| Print Size | Good Res (150dpi) | Better Res (180dpi) | Best Res (300dpi) |
|---|---|---|---|
12 x 18 |
1800 x 2700 |
2160 x 3240 |
3600 x 5400 |
16 x 20 |
2400 x 3000 |
2880 x 3600 |
4800 x 6000 |
16 x 24 |
2400 x 3600 |
2880 x 4320 |
4000 x 6000 |
18 x 24 |
2700 x 3600 |
3240 x 4320 |
4500 x 6000 |
20 x 20 |
3000 x 3000 |
3600 x 3600 |
6000 x 6000 |
20 x 24 |
3000 x 3600 |
3600 x 4320 |
5000 x 6000 |
20 x 30 |
3000 x 4500 |
3200 x 4800 |
4000 x 6000 |
24 x 36 |
3200 x 4800 |
3200 x 4800 |
4000 x 6000 |
30 x 40 |
3600 x 4800 |
3600 x 4800 |
4500 x 6000 |
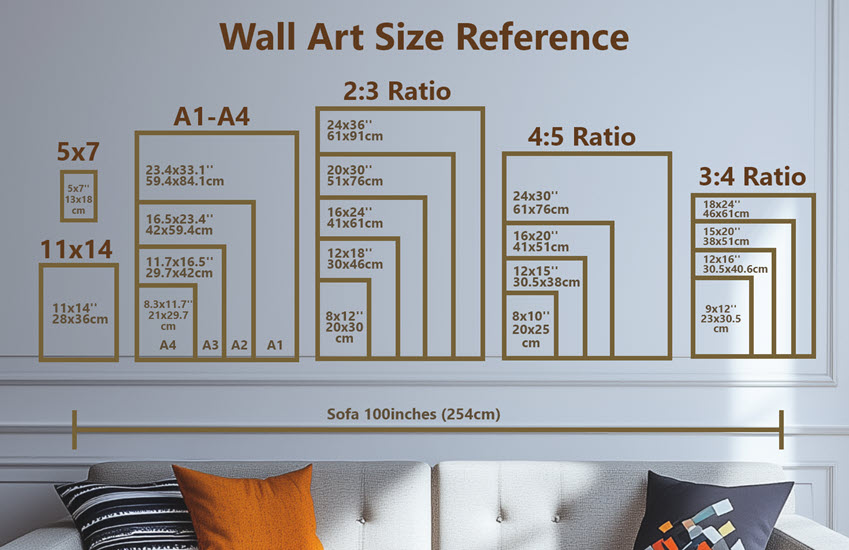
Here is a handy Wall Art Size guide, showcasing commonly used wall deco frame sizes and aspect ratio. You can use that on-set sofa as a visual reference to see how large the frames are in reality. To get the best quality print, don't forget to use VideoProc Converter AI to upscale images to higher resolutions.
Midjourney Official Recommendation for Image Print Size
The official image size document from Midjourney also noted that, since the default resolution is 1024x1024 pixels, and a quality print requires 300DPI, thus the recommended print size for a 1024x1024 image would be 3.4x3.4 inches.
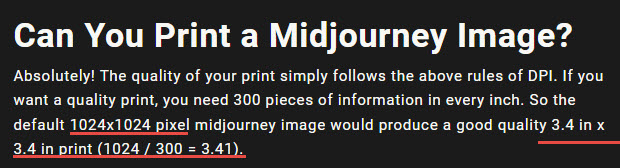
That is far from ideal given the time and effort we put into generating a delicate Midjourney Art. Now with the AI image upscaler method demonstrated above, you can easily upscale Midjourney to higher resolutions for printing.
Common Midjourney Aspect Ratios
--ar 1:1 Default aspect ratio.
--ar 5:4 Common frame and print ratio.
--ar 3:2 Common in print photography.
--ar 7:4 Close to HD TV screens and smartphone screens.
and their vertical versions: 4:5, 2:3, 4:7
For AI hobbyists interested creating photo realistic images in Midjourney, check out the round up of the best Midjourney prompts for realistic photos.


