
Stable Diffusion is a free AI art model developed by Stability AI, in collaboration with various academic researchers and nonprofit organizations. The project was made open-source on August 22, 2022.
Stable Diffusion aims to generate realistic images by simulating the diffusion process in physics in the real world. Unlike traditional Generative Adversarial Networks (GANs), Stable Diffusion uses a latent diffusion model to denoise and generate the image.
As the source code and models of SD have already been open-sourced, it allows for deployment on Mac, PC, and even mobile devices (with relatively high hardware requirements). There are tons of customizable models and extensions.
Pro Tips:
Besides the basic tutorial, you can also resort to this wiki page on Civitai: 30+ best extensions for Stable Diffusion.
In this blog, we will demystify the basics, providing you with a step-by-step walkthrough to use Stable Diffusion.
System Requirement to Use Stable Diffusion
Before installing Stable Diffusion locally, make sure your computer meets the system requirement for a smooth usage.
- RAM: 8GB for general usage, 16GB for effective usage
- Discrete GPU from NVIDIA or AMD
- At least 6GB of VRAM, 8GB or more is recommended
- At least 10 GB of free space on your hard disk, ideally SSD
How to check if you have a discrete GPU:
- Press Control+Shift+Esc to open up the Windows Task Manager.
- Click on Performance on the left side panel.
- If you see NVIDIA or AMD, it means you have a discrete GPU (graphics card).
- On the right side, you can also also check the dedicated GPU memory.
You can also click Memory on the left panel to check its information.
How to Install Stable Diffusion (Automatic1111 WebUI)
Stable Diffusion is a generative modeling technique that tells computer what to do to generate images and videos, and we can use a graphic UI to harness the power of Stable Diffusion, instead of using command line tools.
Automatic1111 and ComfyUI are two popular UI for Stable Diffusion. ComfyUI is node-based and offers flexible control if you understand the process behind the image generation. Automatic1111, also known as A1111 or stable-diffusion-webui, is easier for the novices to quickly make their first AI image.
Personally, I would suggest newbies to start with Automatic1111, and once you get the hang of it, want to learn more about AnimateDiff, noise scheduling, IPAdapters and more, you can go on with ComfyUI.
In this beginner guide, we will demonstrate the detailed steps to install Stable Diffusion Automatic1111. It is optimized to work on consumer-grade hardware.
Step 1: Install Git and Python
Install Git
The repository of Automatic1111 is hosted on Github. We need to install Git to clone the repository to our computer. Git is for source control management, and it can download Stable Diffusion A1111 and keep it up to date, every time when the author of A1111 updates the repository.
1) Visit the Git downloading page: https://git-scm.com/download/win
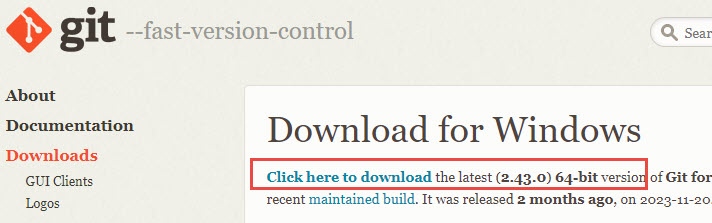
2) Find the Git version suitable for your computer, such as 64-bit, download and install it.
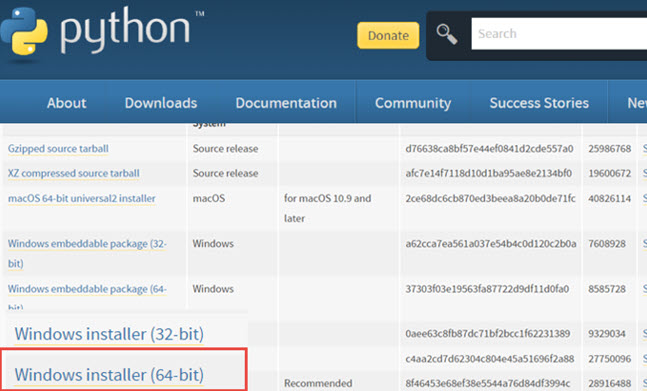
Install Python
Stable Diffusion is written in Python, a programming language. The recommended Python version that works with Stable Diffusion is Python 3.10.6.
Download it here: https://www.python.org/downloads/release/python-3106/
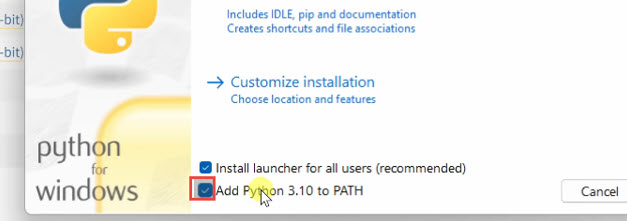
Initiate the installation process, and be sure to check the box labeled "Add Python 3.10 to Path." This step make it more compatible to execute various Python scripts.
Step 2. Create a new folder on your drive.
For example, I can go to D drive, and create a folder named stable diffusion.
Note: If you're committed to exploring Stable Diffusion extensively, it's advisable to allocate a dedicated drive for this purpose. As you advance in your skills and experiment with various models, the associated folder will accumulate a variety of files. It will be more convenient when transitioning between computers to have everything saved on a dedicated drive.
Step 3. Pull Automatic1111 to your computer
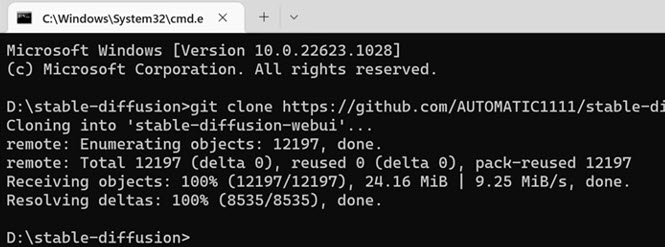
Type in cmd.exe in the Windows Explorer path to open up the command prompt.
C:\Windows\System32\cmd.exe
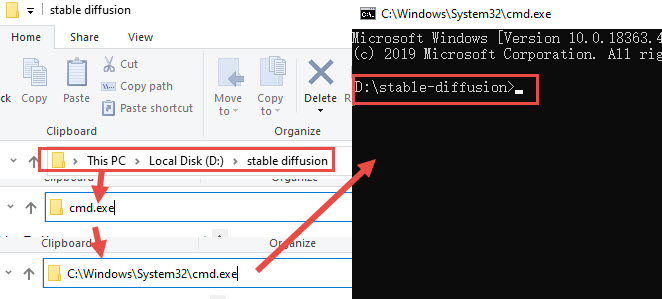
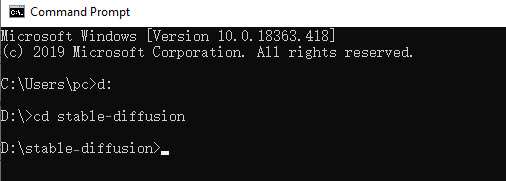
Note: If you open up the command prompt from Windows Start > cmd, or run>cmd, you need to manually enter the path of the intended folder for Stable Diffusion.
Type in d: and press enter to go inside the D drive.
Type in cd stable diffusion and press enter to go to the D:\stable-diffusion>
See screenshots below:
The Stable Diffusion Automatic1111 fork is hosted here: https://github.com/AUTOMATIC1111/stable-diffusion-webui
We need to use the use the Git prompt to create a clone (a copy) of that Automatic1111 WebUI repository, i.e., to pull all the Stable Diffusion files from Github to the local drive.
Run the command below:
git clone https://github.com/AUTOMATIC1111/stable-diffusion-webui
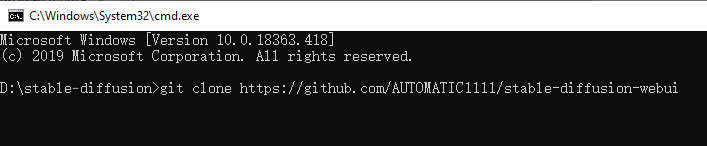
Wait for Git to clone the entire repository. When it's done, it will look like the screenshot below.
Step 4. Download the base model for Stable Diffusion.
Sable Diffusion models, or the checkpoint files are pre-trained weights that capture the underlying distribution of the training data and then generate novel samples that share similar characteristics.
We will be installing the base model for Stable Diffusion here. For more styles and specific scenarios, we can download and install various checkpoint models. There are models that work the best for anime, for photo realistic images, for fantasy arts, etc.
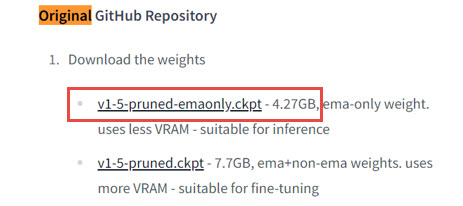
- Download Stable Diffusion base model: https://huggingface.co/runwayml/stable-diffusion-v1-5
- On that page, scroll download (or press Ctrl+F to search for Download the weights):
- Click v1-5-pruned-emaonly.ckpt
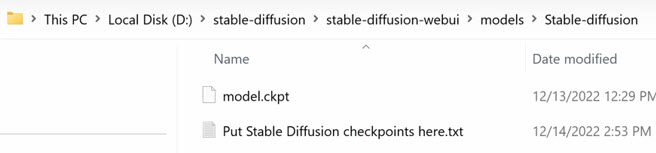
- Move the downloaded file to Drive [x]: > [folder name]>stable-diffusion-webui>models
In our case, it is: D:\stable-diffusion\stable-diffusion-webui\models
Click Stable Diffusion folder inside the Models folder, and paste that base model we just downloaded.
You can rename the base model if you want. For instance, you can rename v1-5-pruned-emaonly.ckpt to model.ckpt as long as you remember what it is.
Tips: You will be downloading more models as you play around in Stable Diffusion. You can create a spreadsheet to note down the URL (where you downloaded that model), model name, its main usage, does it need to be used with VAE, and other information.
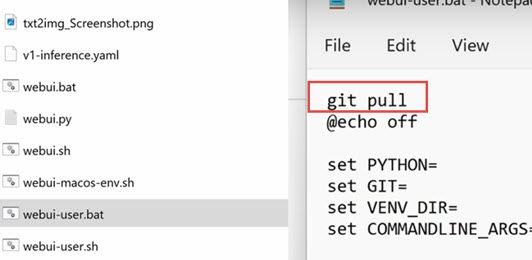
Step 5. Edit the webui-user.bat for future updates.
We can edit the webui-user.bat so that it automatically fetches the most recent release of Stable Diffusion A1111 whenever it becomes available.
- Right-click on the file, hit Edit (on Windows 11, click show more options to find the Edit feature).
- Open up the bat file with any text editor, such as the default Notepad app.
- Type in git pull, and save the file.
Step 6. Launch Stable Diffusion A1111 webui.
Double-click on the webui-user.bat file.
Wait for it to install various dependencies to work. It may take some time.
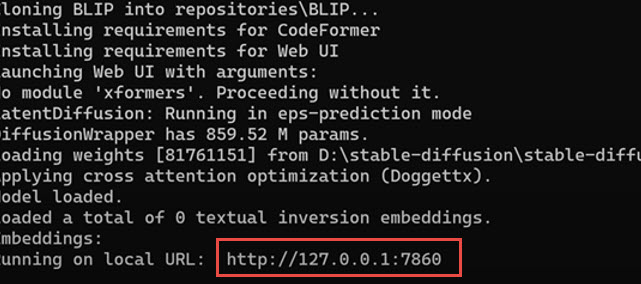
Once it's done, copy and paste the URL into the browser: http://127.0.0.1:7860

How to Create Your First AI Generated Image
Undoubtedly, for those unfamiliar with the Stable Diffusion A1111 WebUI, its interface may seem overwhelming. The crowded layout is filled with parameters, numerous tabs, and menus.
Don't worry, in this part, we will walk you through a simplified way to quickly generate the first AI image, bypassing the intricacies of more advanced features. You will be encouraged once you output the first AI image.
Stable Diffusion checkpoint:
Remember previously we pasted the base model (v1-5-pruned-emaonly.ckpt) in D:\stable-diffusion\stable-diffusion-webui\models folder? Now you can select it here.
Prompt:
1 girl, astronaut helmet, visor, frontal, closed eyes, chic face, space background, hologram, gradient, oversized jacket, fantasy clothes, Vray tracing, cinematic lightning, realistic detail, realistic figures
Negative Prompt:
lowres,bad anatomy,bad hands,text,error,missing fingers,extra digit,fewer digits,cropped,worst quality,low quality,normal quality,jpeg artifacts,signature,watermark,username,blurry
Steps: 20
Sampling Method: DPM++2M Karras
Width: 700
Height: 400
CFG Scale: 7
Seed: -1
Leave other settings to the default value, and click Generate.
If you see AI image in the preview window, congratulation, you have correctly installed Stable Diffusion Automatic1111.
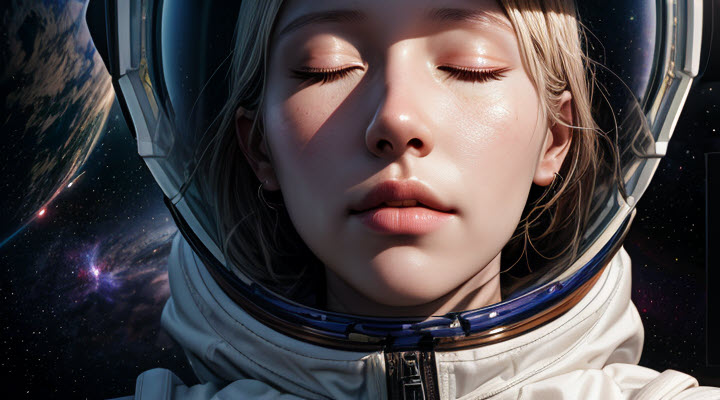
Above is the image I generated using the settings above. If you use the same values and models, you still won't get the same result. That's because the seed is set to -1, meaning the system will automatically generate a random seed value for each image. This randomness can introduce variability in the generated content, making each image unique.
If you want to keep the character consistent, you can check the seed value of the generated image, and use that seed when you are modifying the prompts.
Now that you have created the first image, let's learn more about those parameters and settings.
How to Use the Text to Image Feature
Prompt: Input textual instructions or descriptions of what you want to see in the generated images.
Try to be more specific and detailed in your prompt. If you want to emphasize certain words or phrases, you can adopt the prompt weighting syntax to emphasis certain parts.
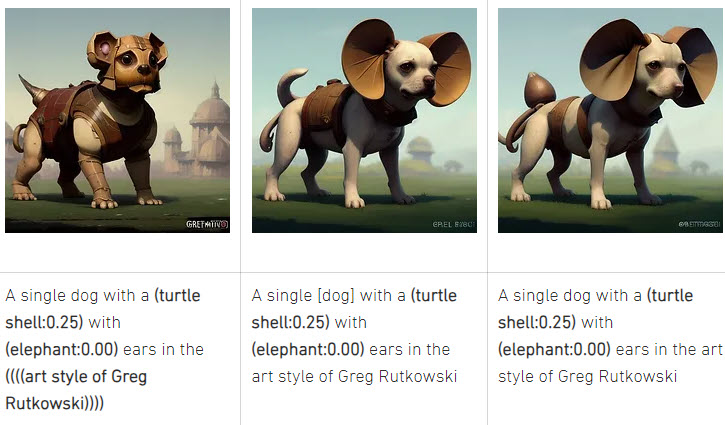
Prompt Weighting Cheat Sheet for Stable Diffusion
- a (word) - Increase attention to "word" by a factor of 1.1.
- a ((word)) - Increase attention to "word" by a factor of 1.21 (= 1.1 * 1.1).
- a (word:1.5) - Increase attention to "word" by a factor of 1.5.
- a (word:0.25) - Decrease attention to "word" by a factor of 4 (= 1 / 0.25).
- a [word] - Decrease attention to "word" by a factor of 1.1.
- [word | word] - Blend multiple prompts; add: number to decrease weight.
- (word | word) - Blend multiple prompts; add: number to increase weight.
- word AND word - Blend multiple prompts using AND; weights can be used.
- [word:to:word] - Blend "word" and "word" equally.
- [word:word:step] - Switch to the second part of the prompt ("word") after a specified number of steps (e.g., dog:mecha:20 means after 20 steps stop drawing dog and start drawing "mecha").
- [word:word:percentage] - Switch to the second part of the prompt after a specified percentage of steps (e.g., dog:mecha:0.2 means switch to "mecha" after 20% of steps).
Note: If you intend to include specific characters like ()[] in the prompt, employ the backslash to escape them. For example: anime_\(character\)
Learn More in the Stable Diffusion WebUI Wiki.
Negative prompt: It is self-explanatory. It controls what you don't want the image to be. Initially, you can enter some generally used negative prompt, such as the one listed below.
lowres, bad anatomy, bad hands, text, error, missing fingers, extra digit, fewer digits, cropped, worst quality, low quality, normal quality, jpeg artifacts, signature, watermark, username, blurry, bad feet.
Later when you run the model and preview the image, you can then modifying the negative prompt.
Sampling steps: Sampling steps denote the quantity of iterations executed by the Stable Diffusion model to convert noise into a recognizable image. The more steps it takes, the clearer and more recognizable the final image becomes. It's like refining a blurry picture by working on it several times.
Generally, you can try with 18-25 steps, and then refining the value after you Run and preview the generated image.
CFG Scale: A higher CFG scale enhances adherence to the prompt, producing more controlled and precise results. In other words, a low CFG scale will make the model pay less attention to the prompt. 7-10 are common values to set your hands on.
Below is an example of different CFG values when using the image to image feature in Stable Diffusion. The source image is created in MidJourney.

Image size: Image size refers to the dimensions of the resulting image. The typical size is 512×512 pixels. Altering it to a portrait or landscape orientation can significantly influence the appearance of the image.
It is not recommended to set the value way above the default value, unless you have a super powerful computer. Plus, once the canvas becomes larger, you need to be more detailed in the prompts. Even if you did so, Stable Diffusion can go wrong, because some of the models are trained with low-res images.
For instance, even if I specified 1girl in the prompts, there are two girls generated, because the canvas is too large (1K+ pixels wide in parameter settings. I scaled it down when post the image in this article).

Instead, a better practice is to set the image size at lower resolution under 1K, and use the high-res fix feature in Stable Diffusion or resort to dedicated AI image upscaler to increase the resolution.
Batch count: It controls how many images to produce each time you Run Stable Diffusion. If you don't have a powerful GPU, it is recommended to leave it as 1.
Batch size: It controls how many images are run simultaneously in one forward pass through the processor. For beginners, you can leave it to these default settings.
Seed value: -1 generates a random image. You can check the seed number of generated images, and use it the next time to keep consistency in characters.
How to Upscale Stable Diffusion Image for Large Prints
Stable Diffusion defaults resolution to 512x512. Although you can manually change the number, it is not recommend to set the value too high. There are three main reasons: 1. It takes more GPU power to generate the large image, which can be too demanding for your computer; 2. There could be duplicated subjects on a larger canvas. 3. There could be more artifacts in high resolution images.
You can use the Hires Fix utility in Stable Diffusion to upscale image. Choose ESRGAN_4x from the upscaling algorithms, and set how large you prefer the final output to be.
But note that, the utility very high requirements for both VRAM and computing power. If you use it for high resolutions, the VRAM is easily exhausted, showing 'CUDA out of Memory,' and the computation time can become extremely slow.

Besides the built-in utility, you can also use standalone AI image upscaler to boost the resolution. For 10K high resolution upscaling, you can try on VideoProc Converter AI. It is an AI powered video and image enhancer, with productive toolkits (downloader, converter, editor, recorder and compressor) to enhance the media workflow.
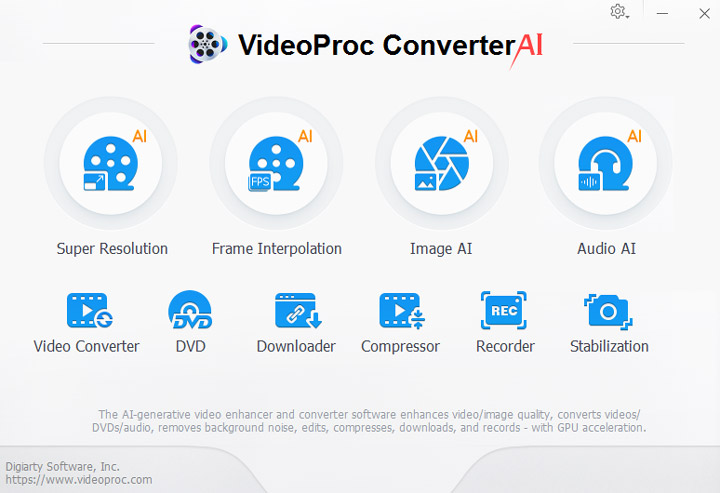
Here is a quick demonstration on how to upscale Stable Diffusion images:
Step 1. Launch VideoProc Converter AI and Go to the Super Resolution tool.

Step 2. Import AI images, and select Anime or Reality type.
If your AI image features photo realistic styles, go with the Reality type. Anime type is self-explanatory.
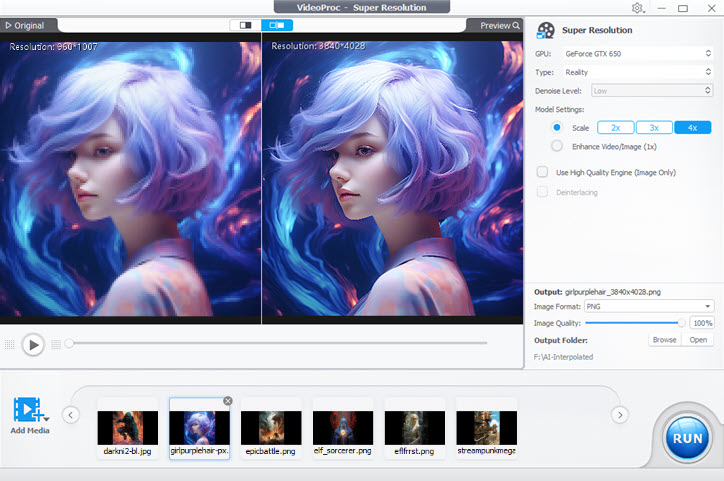
Step 3. Choose the multiples to upscale the file.
You can go with 2x upscale, and repeat the process.
Step 4. Click Run to start upscaling Stable Diffusion Images.


