In-page Navigation
Edit Video Frame by Frame in VideoProc Vlogger
Accurate edits can largely level up a video as every transition, effect, music beat, movement in the shot show up and match other elements perfectly. To help you apply edits exactly where you want with minimal effort, VideoProc Vlogger comes with 4 intuitive and easy features to assist you in frame-by-frame video editing.
Let's download and install VideoProc Vlogger to perform frame-by-frame editing without mistakes.
Watch the tutorial on frame-by-frame editing in VideoProc Vlogger, or read text instructions below.
What Is Frame-by-Frame Video Editing
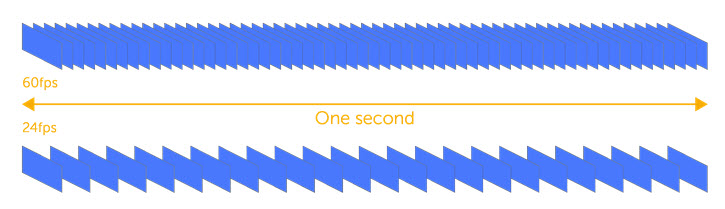
A video is composed of a sequence of still images which are frames in this context. When it is played, each frame flashes on the screen and then is replaced by the following frame at a certain rate. And the duration of each frame is extremely short so that movements seem continuous and fluid. For example, a frame in a video at 25fps only lasts for 0.04s.
Frame-by-frame video editing refers to break a video down into individual frames and apply edits to the exact frame. In this way, you can navigate to the right footage to split, re-sequence, crop, and add texts and transitions accurately.
We need to edit a video frame by frame under many circumstances, like say, editing to the beat, deleting bloopers, making lyric videos, stop motion videos, auto-tuned videos, and slow-mo videos, etc. If you cannot define an edit point on the timeline precisely, you'll get changes several seconds away from the desired position.
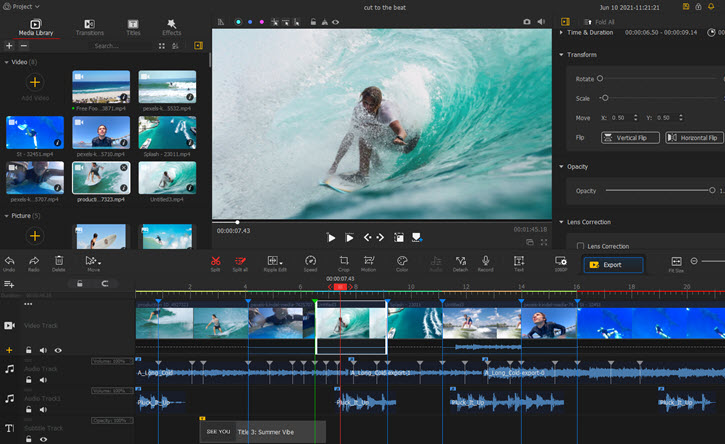
How to Edit Video Frame by Frame in VideoProc Vlogger
In VideoProc Vlogger, you can quickly navigate to the frame you want to edit. Because it shows you all the frames and lets you move one frame at a time. Based on precise results on the timeline, you can do more creative edits with your imagination.
Now take a look at 4 methods of frame-by-frame navigation for precise editing in VideoProc Vlogger.
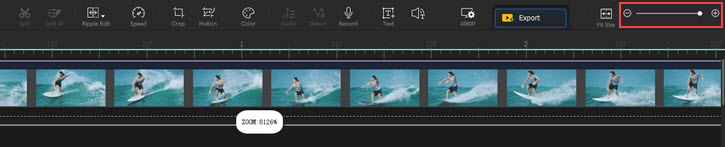
1. Enlarge the Timeline
Zoom in on the timeline to the maximum, and you'll see every single frame in a video clip and move one of them at a time.
2 ways to zoom in on the timeline in VideoProc Vlogger:
- Click the + icon or drag the slider towards the right on the right corner above the timeline.
- Hover your mouse on the time ruler above the video track, then press and drag towards the right to enlarge the timeline. The cursor will turn into a double-headed arrow when you are dragging on the time ruler.
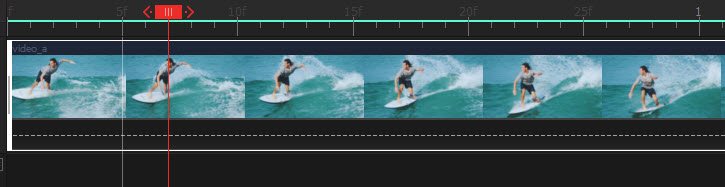
2. Move the Playhead with Assistance of the Time Ruler
When you drag a video to the timeline, you can see the time ruler above it shows the time and frame of the current video clip. The number followed by the letter "f" indicates the frame within a second. For instance, 5f means the fifth frame in the current second.
When you play the video, the red playhead moves frame by frame at the same time so that you can easily locate the current frame.
Pause the playback or drag the playhead at a certain frame according to the hash mark in the time rule, then you can split, add texts, apply an effect, add overlay or background music here.
 Editing Tips
The snapshots on the timeline also give you a rough hint to locate a frame in a clip.
If you only see the cover image of the video on the timeline, go to Settings > Timeline > Show filmstrip and audio waveform.
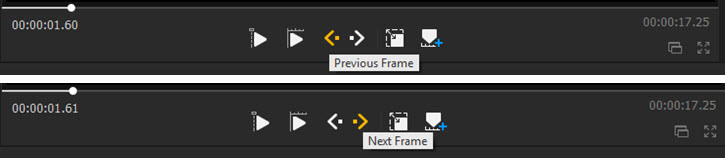
3. View a Video Frame by Frame
If you think a video frame skips too fast to pause at the exact position, you can play the video and let it pause frame by frame.
Move to the preview panel. Click the rightwards arrow to view the next frame or click the leftwards arrow to view the previous arrow. And you are also allowed to browse video frames one by one with arrows on the playhead.
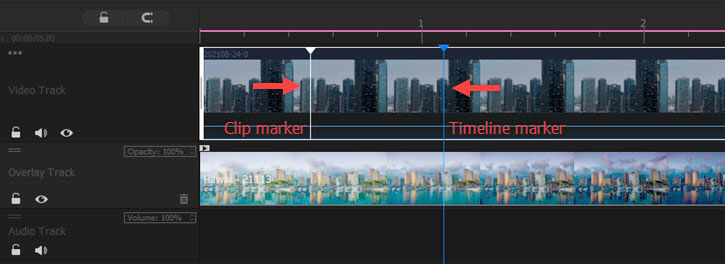
4. Add Markers to Frames
To prevent from viewing the video clip again and again, you can mark up some keyframes on the timeline for further edits including cutting, deleting, swapping, creating visual effects, inserting transitions, and so on.
Find the footage by frame-by-frame navigation, then place the playhead on it. Click the mark icon under the preview window to mark this frame on the timeline.
Repeat this step to add more markers. You can double-click on the maker to turn it into green and distinguish it from others.
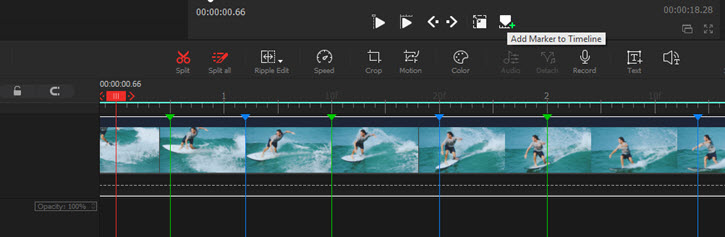
If you right-click on the frame, you can add markers to the clip only.
Now download and install VideoProc Vlogger to edit a video frame by frame.
Related Guides:
- > What Makes VideoProc Vlogger Superb
- > Create a Video Quickly with VideoProc Vlogger
- > Add Keyframes
- > Video Quality, Size, and Rendering Speed in VideoPro
For more guides of VideoProc Vlogger, please visit this page >
If you have any question, please email us or visit ![]()
![]()
![]()
Is this page helpful?
