In today's digital age, video recording yourself has become an essential skill for various purposes - whether it's for online meetings, presentations, interviews, or creating content for social media. However, many people struggle with the challenges of achieving professional-looking videos when recording themselves. From poor lighting and sound quality to camera angles and backgrounds, there are several factors that can make or break your video recording.
But fear not! In this article, we'll provide you with some practical and easy tips to help you record yourself like a pro. So let's dive in and make your videos stand out from the crowd!

Tip 1: Choose a Suitable Location
When you are planning to create high-quality videos, the location you choose plays a crucial role in the overall impression and success of your content. Whether you're recording yourself in a vlog, tutorial, or promotional video, the right location can make all the difference.
In the following words, we'll explore the factors to consider when choosing a location and provide examples of good and bad locations for video recording yourself.
The Background: Clean, Simple, and Relevant
One of the first things to consider when selecting a location for your video recording is the background. The background sets the stage for your video and can greatly impact the viewer's perception of your content. Here are some key points to keep in mind:
- Cleanliness: Make sure the background is free from clutter and distractions. A messy or disorganized background can take away from the focus of your video and leave a negative impression on your audience.
- Simplicity: Keep the background simple and uncluttered. A plain wall or a neatly arranged bookshelf can provide a clean and professional backdrop for your video.
- Relevance: Choose a background that is relevant to your topic or purpose. For example, if you're recording a cooking tutorial, a well-stocked kitchen with cooking utensils in the background would be appropriate.
The Lighting: Natural, Even, and Flattering
Lighting is another crucial factor to consider when selecting a location for video recording. Good lighting can enhance the visual quality of your video and make you look more professional. Here are some tips for getting the lighting right:
- Natural Light: Whenever possible, choose a location with ample natural light. Natural light is generally the most flattering and provides a more vibrant and true-to-life image.
- Even Lighting: Avoid harsh shadows or uneven lighting. Position yourself in a way that ensures even lighting across your face and body. This may require adjusting the position of your camera or using additional lighting equipment such as a ring light.
- Flattering Light: Soft, diffused light is generally more flattering than direct, harsh light. Position yourself in a way that minimizes unflattering shadows on your face.
The Noise Level: Minimal or Microphone Usage
Noise can be a major distraction in your videos, so it's important to consider the noise level of your chosen location. Here are some tips for minimizing background noise:
- Minimal Noise: Choose a location with minimal background noise. Avoid areas with heavy foot traffic, loud appliances, or construction noise.
- Microphone Usage: If you cannot avoid a noisy location, consider using a microphone to reduce background noise. A lapel microphone or a shotgun microphone can help capture clear audio while minimizing unwanted noise.
Examples of Good and Bad Locations
To illustrate the impact of location on video quality, let's consider a few examples:
Good Location: A quiet, well-lit room with a clean and simple background, such as a home office or a dedicated filming space. This provides a professional and distraction-free environment for your video.
Bad Location: A crowded coffee shop with noisy customers and a cluttered background. This can result in poor audio quality and distract viewers from your message.
Good Location: A park with natural lighting and a scenic background that complements your topic, such as a fitness video or an outdoor cooking demonstration. This adds visual interest and a sense of authenticity to your content.
GBad Location: A dimly lit basement with a messy background. This can make your video appear unprofessional and unappealing to viewers.
Tip 2: Set Up Your Camera and Tripod
Taking the time to ensure that your camera and tripod are properly set up will greatly enhance the overall look and feel of your recording video. And in this part, what we'll do is list some important factors to consider when setting up your camera and tripod, and provide examples of both good and bad setups for video recording yourself.
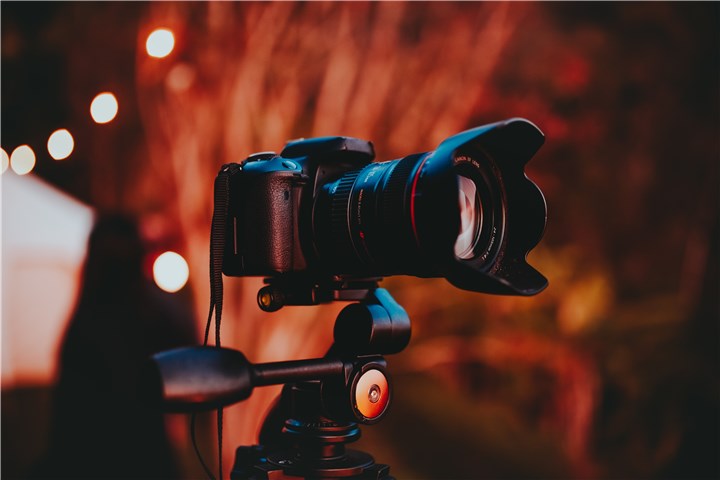
Choosing the Right Camera
The first step in setting up your camera is choosing the right one for your needs. Look for a camera that is high-quality, stable, and compatible with your device or software. A camera with a good sensor and image stabilization will help ensure that your video is clear and steady, while compatibility with your device or software will make the editing process easier.
Investing in a Sturdy Tripod
Next, you'll want to invest in a sturdy tripod that will provide stability and support for your camera. Look for a tripod that is adjustable, easy to use, and can securely hold your camera in place. A tripod with adjustable legs and a ball head will allow you to easily position your camera at the desired angle and height.
Getting the Camera Angle Right
The camera angle is an important factor to consider when setting up your camera. Aim to position your camera at eye-level, straight, and centered. This will create a natural and flattering perspective for your video. Avoid placing the camera too high or too low, as this can distort your features and detract from the overall quality of your video.
Finding the Right Distance
Finding the right distance between yourself and the camera is crucial for a clear and professional-looking video. You want to be close enough to the camera so that your face and upper body are clearly visible, but not too close that it distorts your features or cuts off the top of your head. Experiment with different distances until you find the sweet spot that works best for you.
Examples of Good and Bad Setups
To give you a better idea of what a good camera and tripod setup looks like, let's take a look at some examples:
Good Setup: The camera is positioned at eye-level, straight, and centered. The tripod is sturdy and adjustable, allowing for easy positioning. The distance between the camera and the subject is just right, capturing the face and upper body clearly.
Bad Setup: The camera is positioned too low, resulting in an unflattering angle. The tripod is unstable and difficult to adjust, making it challenging to find the right position. The distance between the camera and the subject is too far, making it hard to see facial expressions and details.
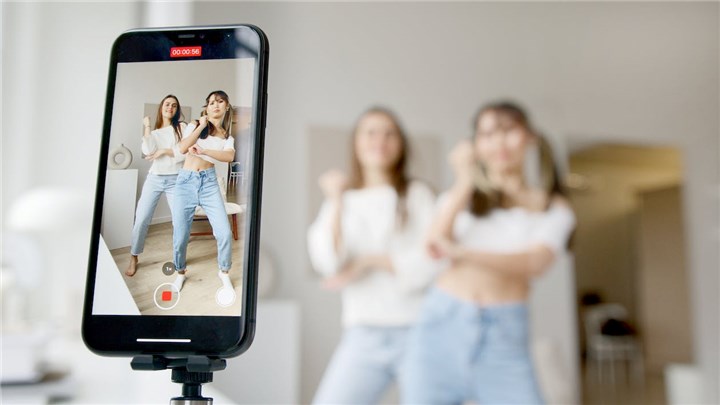
Tip 3: Use Your Smartphone as a Camera
If a camera is way beyond your budget, did you know that your smartphone can also serve as a convenient and effective camera for video recording yourself? Whether you want to vlog, create content for social media, or simply capture memories, your smartphone can be a powerful tool in your arsenal.
But how? No worries. Keep reading and find how to make the most of your smartphone's camera capabilities and provide some handy tips for using it to record high-quality videos of yourself.
Choosing the Right Smartphone Model
Not all smartphones are created equal when it comes to camera quality. If you're serious about video recording yourself, it's important to choose a phone with a good rear camera that offers high resolution and autofocus capabilities. The latest models from popular brands like Apple, Samsung, Google, and Huawei are known for their impressive camera performance. Do some research, read reviews, and choose a phone that fits your budget and camera requirements.
Optimizing Phone Settings for Video Recording
Once you have the right smartphone, it's time to optimize its settings for video recording. Here are some key settings to consider:
- Turn on the Grid: Enabling the grid in your camera settings helps you compose better shots. It follows the rule of thirds, which divides the screen into nine equal parts and helps you place yourself in the frame more effectively.
- Lock Exposure and Focus: To prevent your camera from constantly adjusting exposure and focus while recording, lock these settings. Simply tap and hold on the screen until you see a yellow focus box and a small sun icon. This ensures that your video remains well-lit and focused throughout.
- Choose the Right Frame Rate and Aspect Ratio: The frame rate determines how smooth your video appears, while the aspect ratio affects its dimensions. For most scenarios, shooting at 30 frames per second (fps) with a 16:9 aspect ratio is a safe bet. However, if you're filming action-packed scenes or slow-motion shots, consider adjusting these settings accordingly.
Investing in a Phone Holder
To ensure stability and free up your hands while recording, investing in a phone holder is a wise decision. A phone holder keeps your device secure, stable, and at the perfect angle. Look for one that is adjustable and easy to set up. You can find a variety of options, including tripod mounts, selfie sticks, and tabletop stands. Choose the one that suits your needs and shooting style.
Practical Examples of Smartphone Video Recording
Now that you have your smartphone ready, let's explore some practical examples of how you can use it to record videos of yourself:
Vlogging: Whether you're sharing your thoughts, experiences, or travel adventures, vlogging is a popular way to connect with an audience. Set up your smartphone on a tripod or selfie stick, frame yourself in the shot, and start recording. Don't forget to engage with your viewers and be yourself.
Tutorials and How-To Videos: If you have a skill or expertise you want to share, record tutorials or how-to videos using your smartphone. Make sure your surroundings are well-lit and minimize background noise. Use the front-facing camera to monitor your framing and ensure you're in focus.
Product Reviews: If you love trying out new products or services, record honest and informative reviews using your smartphone. Show the product up close, highlight its features, and provide your genuine opinion. Remember to speak clearly and concisely to keep your viewers engaged.
Tip 4: Film Yourself with Your Phone and Apps
In the above part, we have already shown you how to use and set up your mobile phone to record yourself in a video. But do you know that with the help of some handy apps, you can easily film yourself and enhance your video recording experience to a new level?
In this part, you will learn about recommending some apps that can take your videos to new heights.
Camera Apps: Perfect Your Shot
One of the most important aspects of filming yourself is getting the right camera settings. Fortunately, there are several camera apps available that can help you control exposure, focus, white balance, and more. Here are a few popular ones:
- FiLMiC Pro: This app offers advanced manual controls for your smartphone camera, giving you the ability to adjust settings like ISO, shutter speed, and focus. It even supports shooting in different aspect ratios and frame rates, allowing you to achieve professional-looking videos.
- ProCam: ProCam is another great camera app that offers a wide range of manual controls. It also has features like burst mode, time-lapse, and slow motion, giving you plenty of creative options for your videos.
Teleprompter Apps: Never Miss a Line
If you're shooting a video where you need to deliver lines or a script, a teleprompter app can be a game-changer. These apps display your script on your phone's screen, allowing you to read it while looking directly at the camera lens. Here are a couple of teleprompter apps worth checking out:
- PromptSmart: This app uses voice recognition technology to automatically scroll your script as you speak. It's a great tool for keeping your delivery smooth and natural, without the need to manually scroll through your script.
- Teleprompter Pro: Teleprompter Pro is a simple yet effective app that lets you import your scripts from various file formats. You can control the scrolling speed and customize the text size and color to suit your preferences.

Timer Apps: Perfect Timing, Every Time
Timing is everything when it comes to filming yourself. To ensure you capture the perfect moment, timer apps can be a lifesaver. These apps allow you to set a countdown or interval for starting and stopping the recording. Here are a couple of timer apps to consider:
- TimerCam: TimerCam lets you set a timer for your camera, allowing you to position yourself before it starts recording. You can also choose the number of shots you want to take in a row, which is perfect for capturing multiple takes.
- Pro Timer: Pro Timer is a versatile app that offers a range of timer options, including countdown timers, interval timers, and more. You can even set up multiple timers for different shots or scenes, giving you full control over your recording sessions.
Tip 5: Prepare Your Script and Practice Your Delivery
Have you ever watched a video and been immediately turned off by the quality of the script or the delivery? It's not uncommon for poorly written scripts and lackluster deliveries to leave a negative impression on viewers. To ensure your video leaves a positive impact, it's important to prepare a well-crafted script and practice your delivery.
And here is how to prepare your script and practice your delivery effectively.
Crafting a Clear and Concise Script
When it comes to video recording, the script serves as the foundation for your content. A well-written script can help you communicate your message effectively and engage your audience. Here are some factors to consider when preparing your script:
- Clarity and Structure: Your script should be clear and easy to understand. Use simple language and avoid jargon or complex terms that may confuse your audience. Additionally, structure your script in a logical and organized manner, with a clear introduction, body, and conclusion.
- Concision: Keep your script concise and to the point. Avoid rambling or going off on tangents. Instead, focus on delivering your message succinctly, ensuring that every word contributes to the overall purpose of the video.
- Tone: Consider your audience and the purpose of your video when determining the tone of your script. Are you aiming for a casual and conversational tone, or a more formal and professional one? Aligning your tone with your audience's expectations can help create a connection and enhance engagement.
- Visual Cues: Remember that videos are a visual medium, so incorporate visual cues into your script. Use descriptive language to paint a picture in the viewer's mind and enhance their understanding of the content.
Mastering Your Delivery
Once you have your script in hand, it's time to focus on your delivery. Even the best-written script can fall flat if it's not delivered effectively. Here are some tips for practicing your delivery:
- Naturalness: Aim for a natural delivery that feels authentic and genuine. Avoid sounding scripted or robotic. Practice speaking in a conversational manner and let your personality shine through.
- Confidence: Confidence is key when it comes to delivering your message effectively. Practice your script until you feel comfortable and confident in your delivery. Stand tall, maintain eye contact with the camera, and speak with conviction.
- Expressiveness: Add emotion and expression to your delivery to captivate your audience. Vary your tone, pitch, and volume to emphasize important points and maintain interest throughout the video.
- Pace: Find the right pace for your delivery. Speaking too quickly can make it difficult for viewers to follow along, while speaking too slowly can lead to boredom. Aim for a moderate pace that allows for clear articulation and comprehension.
Examples of Good and Bad Scripts and Deliveries
To give you a better understanding, let's take a look at some examples of good and bad scripts and deliveries:
Example 1 - Good Script (How-to Video):
"Hey there! Today, I'm going to show you how to create stunning time-lapse videos using your smartphone. First, let's talk about the equipment you'll need..."
Example 2 - Bad Script (Product Demo):
"Welcome to our product demo video. Our product is really amazing and it can do so many things. Let me show you how it works..."
Example 3 - Good Delivery:
"Hey everyone, thanks for tuning in! Today, I'm super excited to share with you my top tips for creating professional-looking videos. So, let's dive right in..."
Example 4 - Bad Delivery:
"Um, hi. Today, I'm going to, um, talk about, um, video recording tips. So, um, let's get started, I guess..."
By analyzing these examples, you can see how a well-written script and confident delivery can greatly enhance the quality and impression of your video.
Tip 6: Dress Appropriately and Check Your Appearance
Believe it or not, the way you dress and present yourself can significantly impact the quality and impression of your video. This is because dressing appropriately and paying attention to your appearance can help create a positive impression and enhance the overall quality of your video.
But how?
There are just a lot of things related to dressing to be considered, such as dress code, colors, patterns, accessories, hair, and makeup. Later in the following, I'll explain them one by one. Please keep reading.
Dress code: Match your audience and purpose
When choosing your outfit, consider your audience and the purpose of your video. If you're addressing a professional audience, opt for business attire to convey a sense of credibility and authority. On the other hand, if your video is more casual or creative, you can be more relaxed with your dress code. Ultimately, the key is to match your attire with your audience and the purpose of your video.
Colors: Contrast well with your background and skin tone
The colors you wear can make a significant difference in how you appear on camera. Choose colors that contrast well with your background and skin tone. For example, if you have a light background, avoid wearing light-colored clothes that blend in. Instead, opt for darker shades to create a clear distinction. Additionally, consider your skin tone and choose colors that complement it. Experiment with different colors to find what looks best on camera.
Patterns: Keep it simple
When it comes to patterns, simplicity is key. Avoid wearing clothes with busy or distracting patterns, as they can draw attention away from your message. Stick to solid colors or subtle patterns that won't overpower your video. Remember, the focus should be on you and your content, not your outfit.
Accessories: Less is more
While accessories can add flair to your outfit, it's important to keep them minimal during video recording. Avoid wearing shiny or noisy accessories that can create distractions. Simple and understated accessories, such as a watch or stud earrings, can enhance your overall appearance without stealing the spotlight.
Hair: Neat and out of the way
Your hair plays a crucial role in your appearance on camera. Make sure your hair is neatly styled and not covering your face or eyes. If you have long hair, consider tying it back or using hair clips to keep it away from your face. This will help ensure that your viewers can clearly see your facial expressions and focus on your message.
Makeup: Keep it light and natural
For those who choose to wear makeup, it's important to apply it in a way that looks natural on camera. Keep your makeup light and avoid heavy or unnatural-looking applications. Opt for a natural foundation that matches your skin tone, and enhance your features with subtle eye makeup and a touch of lip color. Remember, the goal is to enhance your appearance, not to overpower it.
Now, let's look at some examples of good and bad dress codes and appearances for video recording yourself:
Good example:
- Dress code: A professional wearing a tailored suit for a business presentation.
- Colors: A person with fair skin wearing a navy blue suit against a white backdrop.
- Patterns: A person wearing a solid-colored dress shirt without any distracting patterns.
- Accessories: Minimal accessories like a classic watch and simple stud earrings.
- Hair: Neatly styled and pulled back to reveal the face.
- Makeup: Light and natural, enhancing the person's features without being overpowering.
Bad example:
- Dress code: A person wearing a casual t-shirt and jeans for a professional presentation.
- Colors: A person with dark skin wearing a black shirt against a black background, making it hard to distinguish their features.
- Patterns: A person wearing a shirt with bold stripes that create a distracting visual effect on camera.
- Accessories: Excessive and noisy jewelry that draws attention away from the person's message.
- Hair: Unkempt and covering part of the face, making it difficult for viewers to connect.
- Makeup: Heavy and unnatural, making the person's features appear distorted on camera.
So, before hitting that record button, take a moment to check your appearance and dress to impress!
Tip 7: Adjust Your Posture and Body Language
Your posture and body language also play a crucial role in the overall impression and impact of your recording video. Here are some tips to help you adjust your posture and body language for a more engaging and effective video.

Stand Tall and Relaxed
Maintaining an upright posture is essential for projecting confidence and professionalism on camera. Stand tall with your back straight, shoulders relaxed, and feet shoulder-width apart. Avoid slouching or leaning too much as it can make you appear uninterested or unprepared. Remember to find a balance between being relaxed and maintaining good posture.
Align Your Head with Your Spine
Your head position can greatly affect how you come across on camera. Make sure your head is aligned with your spine, neither tilted nor turned too much. This alignment not only looks more natural but also helps you maintain eye contact with your viewers. Keeping your head straight and centered will convey a sense of attentiveness and engagement.
Open Up Your Shoulders
Your shoulders play a significant role in body language. Keep them down, back, and open to create a confident and approachable presence on camera. This posture helps you appear more relaxed and in control. Avoid hunching your shoulders forward, as it can make you seem closed off or nervous.
Position Your Arms Naturally
When it comes to arm placement, aim for a natural and relaxed position. Keep your arms at your sides, slightly away from your body. Avoid crossing your arms, as it can create a defensive or closed-off impression. By allowing your arms to hang loosely, you'll appear more open and approachable to your viewers.
Mind Your Hands
Your hands can either enhance or distract from your message. Keep them visible but avoid excessive fidgeting or gesturing. If you tend to fidget, try resting your hands on a table or holding a prop to provide a sense of purpose. Controlled and purposeful hand movements can help emphasize key points, but be mindful of not overdoing it.
Uncross Your Legs and Find Balance
Just like your upper body, your lower body should appear relaxed and balanced. Uncross your legs and position them slightly apart, parallel to each other. This stance creates a stable and grounded presence on camera. Avoid excessive movements or swaying, as it can be distracting to your viewers.
Examples of Good and Bad Postures and Body Languages for Video Recording Yourself
Good Posture:
- Standing tall with an upright back, relaxed shoulders, and open arms.
- Head aligned with the spine, maintaining eye contact with the camera.
- Legs uncrossed and slightly apart, providing balance and stability.
Bad Posture:
- Slouching or leaning too much, appearing disinterested or unprepared.
- Tilting or turning the head excessively, lacking attentiveness and engagement.
- Crossing arms or hunching shoulders forward, conveying a closed-off or nervous impression.
- Excessive fidgeting or gesturing with the hands, distracting from the message.
- Crossing legs or excessive movements, appearing unstable or unprofessional.
Tip 8: Use Editing Tools to Enhance Your Video
Why Use Editing Tools
Editing tools are essential for any aspiring videographer or content creator. They allow you to refine and polish your videos, turning raw footage into a professional-looking final product. With the right editing tools, you can:
1. Trim, Crop, and Rotate: Editing software allows you to remove any unnecessary parts of your video, ensuring that it flows smoothly from start to finish. You can also crop your footage to eliminate any distractions and rotate it to the desired orientation.
2. Add Transitions and Effects: Transitions and effects can add visual interest and help create a seamless viewing experience. Whether you want to fade between scenes or add a dramatic effect, editing tools have you covered.
3. Include Titles and Text: Want to add some context or captions to your video? Editing software allows you to easily insert titles and text overlays, making your content more engaging and informative.
4. Adjust Audio: Great videos aren't just about visuals - audio quality is equally important. With audio editing software, you can adjust the volume levels, remove background noise, and even add music or voice overs to enhance the overall audio experience.
5. Enhance Images: Sometimes, videos require more than just footage. You may need to include images to support your story or provide additional information. Image editing software can help you adjust the brightness, contrast, saturation, and other parameters of your images, ensuring they seamlessly blend with your video.
Top Editing Tools to Consider
Now that you understand the importance of editing tools, let's dive into some top recommendations:
- VideoProc Converter AI: VideoProc Converter AI is a comprehensive video editing software that offers a wide range of features. It allows you to trim, crop, rotate, stabilize, add effects, and do more advanced and funny editing skills, to your videos. With its user-friendly interface and powerful editing capabilities, VideoProc Converter AI is perfect for beginners and intermediate users alike.
- Adobe Premiere Pro: If you're looking for professional-grade editing software, Adobe Premiere Pro is a top choice. It offers advanced features such as multi-camera editing, color grading, and motion graphics. With its extensive capabilities, Premiere Pro is favored by many industry professionals.
- Audacity: When it comes to audio editing, Audacity is a popular choice. It's a free, open-source software that allows you to manipulate audio tracks, remove noise, apply effects, and more. Audacity is a great option for those on a budget or just starting out with audio editing.
- Adobe Audition: For more advanced audio editing needs, Adobe Audition is a fantastic option. It offers a range of powerful features, including noise reduction, audio restoration, and multi-track editing. With its intuitive interface and seamless integration with other Adobe products, Audition is a go-to choice for professionals.


Examples of Editing Tool Enhancements
To give you a better idea of how editing tools can enhance your videos, let's look at a few examples:
- Color Correction: Using video editing software, you can adjust the color balance, saturation, and contrast of your footage. This allows you to create a consistent look throughout your video and make it more visually appealing.
- Smooth Transitions: With the help of editing tools, you can add smooth transitions between scenes, creating a seamless flow. This enhances the viewer's experience and makes your video appear more professional.
- Background Music: Adding background music can greatly enhance the mood and atmosphere of your videos. Audio editing software allows you to adjust the volume levels and add music tracks that complement your content.
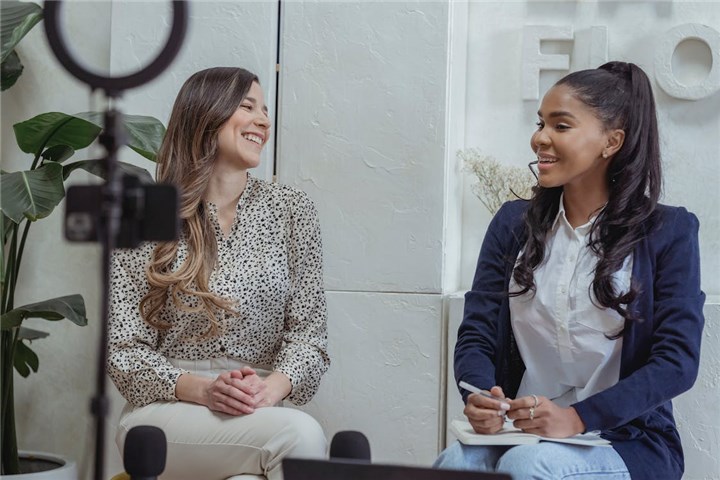
Tip 9: Get Feedback and Improve Your Video Recording Skills
Have you ever watched a video of yourself and cringed at what you saw? Maybe the lighting was off, your voice sounded strange, or you were too fidgety on camera. Don't worry, we've all been there. The good news is that with feedback, you can learn from your mistakes and improve your video recording skills over time. In this part, we'll explore the importance of feedback and provide you with some practical ways to get it.
Watch and Critique Yourself
One of the best ways to get feedback on your video recording skills is to watch your own videos and critique yourself objectively. It may feel uncomfortable at first, but it's a valuable exercise that allows you to identify areas for improvement.
Start by watching your video with a critical eye. Pay attention to your body language, facial expressions, and overall presentation. Take note of any distracting habits or mannerisms that you can work on. Are you speaking clearly and confidently? Is the lighting and audio quality up to par? Be honest with yourself and take note of areas that need improvement.
Ask for Honest Feedback
Another way to get feedback on your video recording skills is to ask a friend, colleague, or family member to watch your video and give you honest feedback. Choose someone who will provide constructive criticism and won't sugarcoat their opinions.
Before sharing your video, let them know what specific aspects you would like feedback on. For example, ask them to focus on your delivery, camera angles, or editing techniques. Encourage them to be specific and provide examples of what worked and what didn't.
Utilize Online Platforms and Communities
The internet is a treasure trove of feedback opportunities. There are various online platforms and communities where you can share your videos and receive feedback from fellow creators and enthusiasts.
Consider joining video-related forums, social media groups, or online communities dedicated to video production. These platforms often have designated sections for sharing your work and receiving feedback. Engage with others by providing feedback on their videos as well, creating a mutually beneficial environment.
Examples of How Feedback Can Help
Feedback can make a world of difference in improving your video recording skills. Here are a few examples of how feedback can lead to growth:
- Lighting: You may receive feedback that your videos are too dark or have harsh shadows. With this information, you can invest in better lighting equipment or adjust your shooting setup to enhance the visual quality of your videos.
- Audio Quality: If feedback reveals that your audio is muffled or inconsistent, you can invest in a quality microphone or make adjustments to your recording environment to improve sound clarity.
- Delivery: Feedback on your delivery, such as speaking too fast or lacking enthusiasm, can help you refine your on-camera presence. You can practice speaking at a slower pace, incorporating gestures, or using vocal inflections to enhance engagement.
- Editing Techniques: Feedback on your editing skills can help you refine your storytelling abilities. You may receive suggestions on pacing, transitions, or visual effects that can elevate the overall impact of your videos.
Remember, feedback is not meant to discourage you but to guide you towards improvement. Embrace it as an opportunity for growth, and don't be afraid to experiment and try new techniques based on the feedback you receive.
Tip 10: Avoid Common Mistakes When Video Recording Yourself
In this part, we'll explore some common mistakes that can ruin the overall impact of your video and provide tips on how to avoid them, so you can record yourself like a pro.
1. Looking at the wrong place
When recording yourself, it's crucial to maintain eye contact with your audience. This means looking directly at the camera lens, rather than the screen or yourself. By doing so, you create a sense of connection and engagement with your viewers. Avoid the temptation to constantly check your appearance or monitor the recording. Instead, focus on delivering your message while maintaining uninterrupted eye contact with the camera.
2. Moving too much
Excessive movement can be distracting and take away from the content of your video. While it's natural to make gestures and express yourself, it's important to strike a balance. Avoid swaying, nodding excessively, or shaking your head too much. Instead, try to maintain a steady and composed posture throughout the recording. This will help your audience focus on what you're saying, rather than being distracted by unnecessary movements.
3. Using filler words
Filler words such as "um", "uh", "like", and "you know" can diminish the impact and professionalism of your video. They disrupt the flow of your speech and make you appear less confident and prepared. To avoid using filler words, practice your script or outline beforehand. Take your time to think about what you want to say and choose your words carefully. If you do find yourself using filler words, take a brief pause instead to collect your thoughts before continuing.
4. Repeating yourself
Repeating the same information multiple times can make your video feel repetitive and lose its effectiveness. It's important to be concise and get straight to the point. Before recording, plan out your key messages and make sure to deliver them clearly and succinctly. Avoid unnecessary repetition and focus on providing valuable content that keeps your viewers engaged.
5. Interrupting yourself
Stopping mid-sentence or changing your mind about what to say can make your video seem unprofessional and disjointed. It's important to maintain a clear and coherent narrative throughout your recording. Before hitting the record button, take a moment to organize your thoughts and outline the main points you want to cover. This will help you stay on track and deliver a smooth and well-structured video.
Avoiding these common mistakes will significantly improve the quality and impact of your self-recorded videos. By looking at the right place, minimizing excessive movement, eliminating filler words, avoiding repetition, and maintaining a coherent narrative, you'll create videos that captivate your audience and leave a lasting impression.


