
Verdict: The free version of Lightworks is a good option if you are looking for professional yet free video editing software.
A bunch of Hollywood movies such as The Wolf of Wall Street, LA Confidential, Pulp Fiction, Heat, Road to Perdition, Hugo, The King's Speech, and many more, use Lightworks for post-production, which shows that the functions of Lightworks have reached the industry level. But, Lightworks is not perfect. And it is not as powerful as its paid version. There are some features and services that can get improved. In this Lightworks review, we are going to show you everything related to its good and bad, help you have full knowledge of it.
Lightworks Review: Pros and Cons in Brief
Pros
- Loads of video and audio editing features, basic to advanced ones.
- Good at managing large-scale and long files.
Cons
- Lack of support of video masking and motion tracking.
- The working platform is quite different from some common ones from other similar applications.
- Steep learning curve.
- The export format only includes MPEG4/H.264 and maximum resolution with 1280x720p pixels;
Lightworks Review: Getting Started
Lightworks is divided into four parts, LOG, EDIT, VFX, and AUDIO. The LOG tab is for importing and organizing the source media files. The basic edits like cut and trim are applied on the EDIT tab. On the VFX tab, you can apply visual effects to your video, adding your videos a little fun. The AUDIO, just like what you can guess, is for editing the soundtrack of your videos. In the following part, let's dive deep into some of the most important features of Lightworks by taking a close look at these 4 tabs.
Lightworks Review: LOG
Lightworks allows us to import pictures, sound, and videos. The range of supported import formats is also huge, including RED R3D, DPX 8 bit, 10 bit, 16 bit, MPEG-2 Long GOP, AVC-Intra 100, AVCHD (M2T, M2TS, MPEG4, H.264, Cinema DNG, and Image Sequences, etc. The experience of importing media files to Lightworks is cumbersome-free. We can browse the folders on the computer through Local Files and then click on the files that are needed for the project. If we need to preview it or checkup its metadata information, double-click the target file. Under the preview window, we have options to set the intro and outro points manually for importing only the segment in-between to the project. This can greatly improve the efficiency of the later-on edits, especially when we have to cope with a number of clips. If you preview a video before importing it to the program, Lightworks will automatically select the segment from the first frame to the last watched frame. This could be annoying because sometimes we need to use the entire clip.
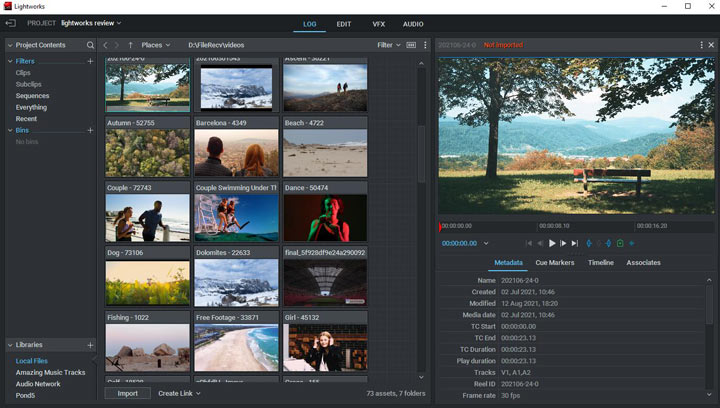
Note: We can import HD and 4K videos to Lightworks. However, it's not possible to export the video with the original resolution because Lightworks only let us export 720P videos.
Lightworks Review: Edit
Lightworks will lead us to the EDIT tab as soon as we import the media file to it. Herein, we have the timeline tracks, a preview window, and several editing toolkits. By default, Lightworks display one video track and four audio tracks on the timeline. Unlike most other NLE editing software that lets you drag the video on the top of the existing tracks to add a new one, Lightworks requires you to right-click on the timeline to choose the related options to add new audio or video track. However, that's not a biggie since we are allowed to add unlimited video and audio tracks.
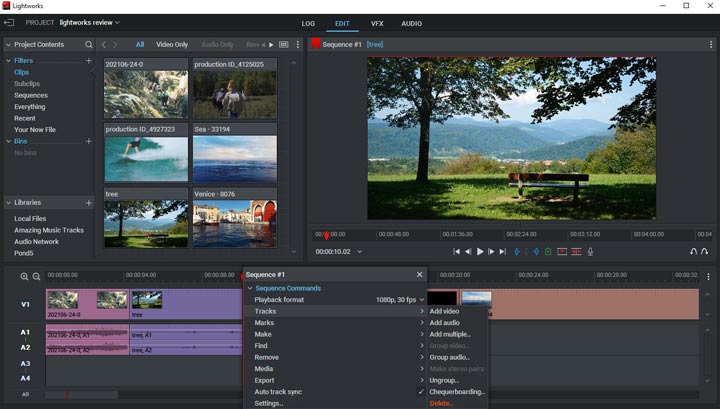
We can adjust the position of the timeline clips to edit the sequence of the video playback. If we need to apply basic edits, such as trim, click on the end or front end of the clip and then drag and drop the ends of the clip. Below the preview window, we have options like Last Frame and Next Frame to preview and edit the video frame by frame. You can also hover over the mouse between two clips and then choose Wipe, Dissolve, or any other option to add the relevant transition effect.
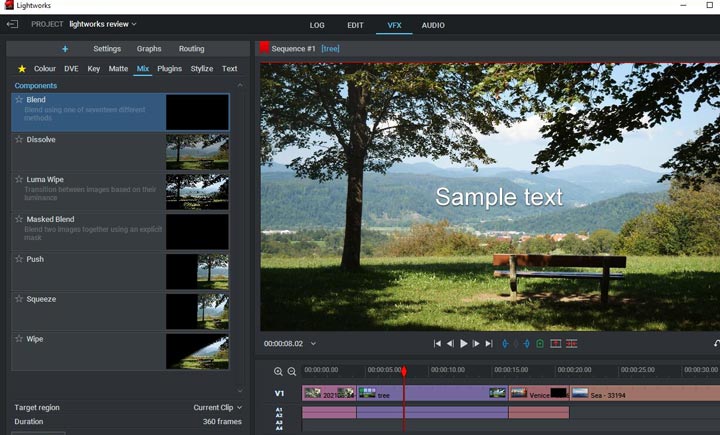
Lightworks Review: VFX
On the VFX panel, you can find dozens of premade visual effects as well as a number of dizzying options to adjust the existing effects or create new ones. They are what can really separate it from competing products like Kdenlive or Shotcut.
Under the Color Correction tab, we can adjust the red, green, and blue channels in the picture individually by tweaking the RGB settings, change the emotional impact of our video by adjusting the HSV settings and set keyframes for color profiles by dragging the Curve. Need to fast change one to four colors in our video simultaneously? The robust Color Selective tool can help us easily get there. Moreover, Lightworks supports 3D Luts and allows you to import the 3D LUTS file downloaded from the website. Even a newbie can make the mid-level color grading work with Lightworks.
Tips:
Not sure what decisions to make in color correction? When should you push up the RGB value? When do you need to drag down the slider to decrease some parameters? If there is too much red tone in the highlighted area, what is the next move? Read our in-depth article on Color Grading to acquaint yourself with systematic knowledge and practices in color grading.
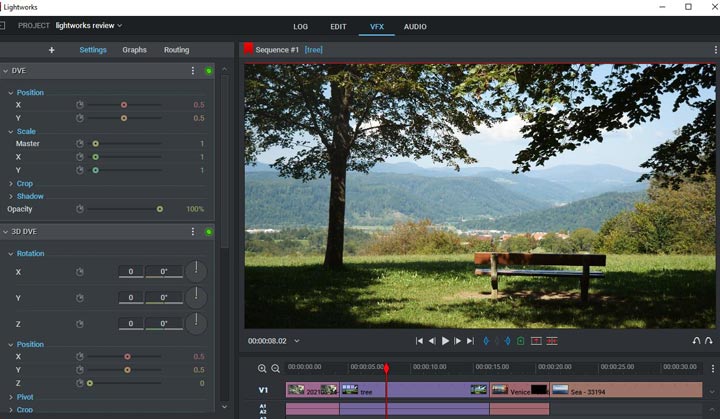
The feature of the DVE (Digital Visual Effects) tool is similar to the composite of motion and keyframe effect in Premiere. By changing the parameters of the Position, Scale, Crop, Shadow, and Rotation settings, we are able to make a still picture move. This can help a lot when we make picture slideshows and the intros for videos. Suppose there are two or more video tracks on the timeline, we are able to make some stunning picture in picture effects with the Scale and Position toolkits… The lack of trendy text effect templates makes the text tool of Lightworks is far cry from the perfect. Fortunately, you can definitely get the basic things like changing the text font/style and adding shadowing/ outlines done without hassle. Did you notice the Video Routing panel? It's a node-based system that connects a variety of video processing toolkits together. With it, you can quickly manage the sophisticated effects been applied to the video.
Lightworks Review: Audio
The Audio tab offers a relatively complete suite of audio editing and mixing toolkits. It premade dozens of EQ (Equalizer Effects) presets to help you get rid of the noise, simulate a small speaker, reduce the vocal audio, and more. To speak of the effect that I use most, it is Crossfade. It lets us smooth the transition from the previous audio track to the next one. A little pity thing is, we cannot customize the crossfade settings.
Lightworks Review: Is Lightworks Free
Lightworks provides four versions, Lightworks Free, Lightworks Pro: Month, Lightworks Pro: Year, and Lightworks Pro: Outright. Obviously, the Lightworks Free version, mostly briefly naming Lightworks, is definitely free, which is also the version reviewed in this article. But compared to the other three paid versions, there would be some limits on features. For the specific difference between the free one and the other three versions, you can refer to this official page for more details.
Installation of Lightworks
Step 1. Download the installation package from the Lightworks official page.
Step 2. Run the downloaded file, and choose the language.
Step 3. Choose Next.
Step 4. Check I accept the terms of the License Agreement, and click Next.
Step 5. In the Choose Components page, hit Next.
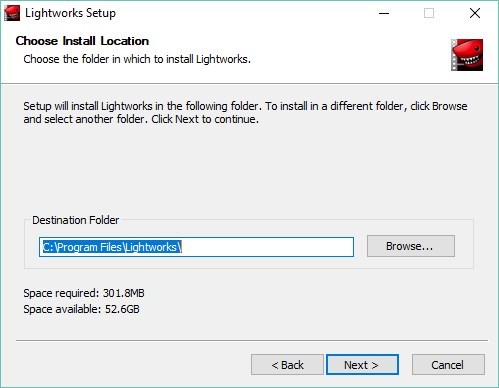
Step 6. Choose the installation location, and click Next.
Step 7. Click the Next button, and it will automatically start installing Lightworks on your computer.
Lightworks Alternatives
VideoProc Vlogger
If you are searching for a video editor like Lightworks, but with more options of exporting, quite short learning curve, and detailed guides, then, VideoProc Vlogger should be put into your pocket.
VideoProc Vlogger can do all the stuff about video editing, from most basic features like cutting and cropping, to adding transition and other effects, to more advanced features like color and audio adjusting. It can totally do what Lightworks enables you to do.
For more details about how VideoProc Vlogger change the way you edit your video files, please refer to here for more details.

Adobe Premiere Pro
What Premiere Pro has gone over Lightworks is its interactivity with other Adobe products. But that won't mean a hill of beans until you can learn the other Adobe products. And that means you may spend more energy learning all the products. Besides, Adobe Premiere Pro is not free.
Lightworks is a bit more Avid-like in how you control it, which is different enough from Premiere, and you'll keep asking why does it work this way if you are pretty familiar with Premiere.
Lightworks is much more of a film editor's application. You can tackle different lengths of media in several Rooms and then piece parts together as needed. You have to be alert and track things well. Nonetheless, I prefer it because it feels like a cutting environment. You can have 20 takes of one line of script and organize them side by side for best performance.
On the other hand, if you're shooting video and your end product is more symmetrical and even similar in structure, Adobe Premiere Pro might be a better choice. In it, you have everything in front of you on your screen. You can jump between scenes easily and things are rarely lost unless you are totally incompetent of keeping track of your clips.
DaVinci Resolve
In the earlier days, Lightworks was more focusing on editing, or we can call it an editing suite, while DaVinci Resolve was much more powerful in color grading, a color grading system. But even now, the grading ability of DaVinci Resolve is far superior to anything possible in Final Cut Pro, Adobe Premiere Pro, Avid Media Composer, Lightworks, etc.
And recently the things are becoming murky: the conception of both products keep undergoing some renewals. They have expanded beyond their original design. Lightworks has been rescued from oblivion and gained much more functionality making it more like its mainstream edit suite competitors. And DaVinci Resolve has also been heavily developed by Blackmagic. Since it added a timeline tool, which helps it evolve into a very capable sequencer. DaVinci Resolve is really a full finishing suite now.
DaVinci Resolve is most definitely a well-established and highly regarded tool, for all stages of editing, not just grading and online editing. There may not be as much work available for jobbing editors to use DaVinci Resolve as an offline edit suite in a broadcast production environment, but that does not mean that it is fully capable of filling this role.
For more details about Davinci Resolve, you can refer to this full-review guide on Davinci Resolve >>


