
MakeMKV is a popular one-click tool for converting your DVD and Blu-ray collection into high-quality digital MKV files without losing any content or quality.
Building a well-organized digital library is pleasing. You'll have the peace of mind that your favorite films and shows are backed up from disc damage, and the flexibility to enjoy them whenever and wherever you like.
This guide will show you how to use MakeMKV to back up DVDs and blu-rays, from installation to troubleshooting. I'll also share some of my own practices and experiences with managing my backed-up files and digital media library.
Installation and Setup
MakeMKV is available for Windows, macOS, and Linux. It's safe to use as long as you download it from its official site. The steps don't differ significantly among operating systems. Just download the installer and follow the on-screen instructions.
Windows:
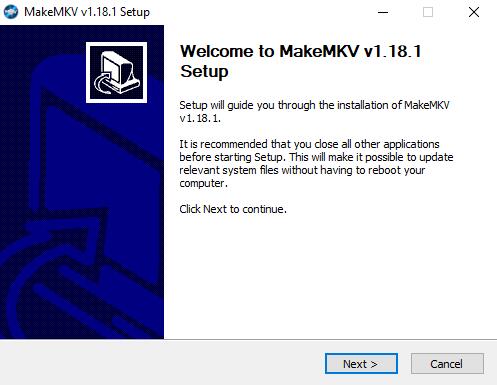
- Download the installer from the official MakeMKV website and run it.
- Follow the setup wizard to install.
- Once installed, you can launch MakeMKV.
Note: On Windows, MakeMKV's beta version may require administrator privileges to access the optical drive due to OS restrictions.
Mac:
- Download the Mac .dmg package from the MakeMKV site and open it.
- Drag MakeMKV to your Applications folder.
- Go to System Preferences > Security & Privacy > Open Anyway if you see a warning on launch.
Linux:
There is no pre-built universal installer, but you can install MakeMKV on Linux via Official PPA, Flatpak, Snap, etc. Ensure you have the required libraries.
Registration & Beta Keys
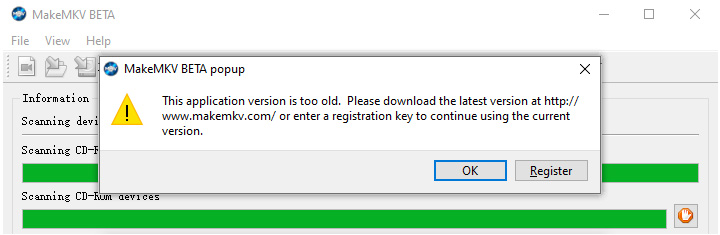
MakeMKV is free to use while it remains in beta. The DVD-ripping functionality is always free, and all features work during the beta period. However, the software periodically requires a valid beta activation key or a purchased license. Upon first launch, if you see a message that your version is too old or the trial has expired, simply update to the latest version or enter the current beta key. Learn more about the MakeMKV license key here.
Ripping DVDs and Blu-rays with MakeMKV
Backing up a disc with MakeMKV is straightforward. The software reads the disc, decrypts it, and saves the content into one or more MKV files without altering video or audio quality. Here's how to use MakeMKV to rip your DVD or Blu-ray.
Note: Before ripping, ensure you have a drive connected to your computer and ample hard drive space. A typical DVD movie rip can consume ~4–8 GB, while a Blu-ray rip takes ~20–30 GB or more.
Step 1. Launch MakeMKV and Insert the Disc
Insert your DVD or Blu-ray into your optical drive. Open the MakeMKV application. MakeMKV will detect the disc automatically. After a moment, you should see disc information appear in the window.
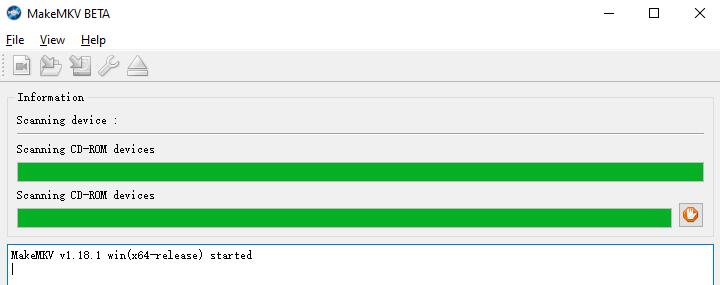
If it doesn't auto-load, or if multiple optical drives are present, click the "Open disc" button to scan the disc. MakeMKV will then examine the disc's contents. This may take a minute, especially for Blu-rays.
Step 2. Load and Select Titles
Once scanning is complete, a list of titles will be displayed, each with a runtime and size.
- For movies: The main feature is typically the largest file or the longest duration with the most chapters. Other titles might be bonus features, trailers, or menus.
- For TV series: Each episode is often a separate file. Select the episodes you want to rip individually.
You can expand each title to view its contents and select the content you want to rip.
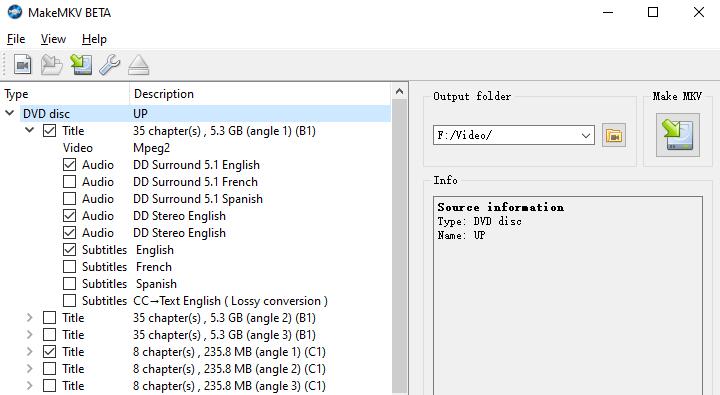
By default, MakeMKV selects all titles and all their sub-components, such as audio tracks, subtitles, etc. It's common to check only the main movie title for a film, deselecting extras if you don't need them. This can save space.
Step 3. Specify Output Folder
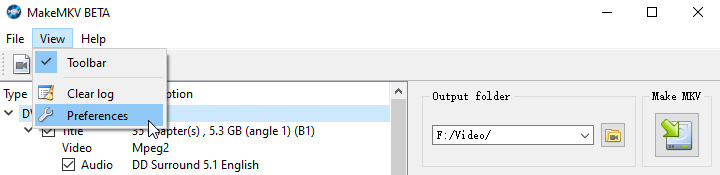
On the right-hand panel, choose the folder where the MKV files will be saved. To set a default storage location, go to View > Preferences > Video > Default destination.
By default, MakeMKV might use a folder like your Videos directory or a folder named after the disc. You can change it as desired. If the folder doesn't exist, MakeMKV will prompt you to create it when you start ripping.
Step 4. Start Ripping
Click the "Make MKV" button to start the ripping process for the selected titles. A progress bar will show the status.
During ripping, you may hear your drive spin up. The process might take ~15–45 minutes, depending on the disc type, length, and drive speed.
Step 5. Completion
When MakeMKV finishes, it will display a message like "Copy complete. N titles saved." You will find the MKV file(s) in the output folder you set.
At this point, you can already watch the MKV using media players or media center software. However, MKV files from Blu-rays can be very large, so many people choose to convert or compress them for easier storage and playback.
Converting the Ripped MKV Files
After ripping, you have an exact digital copy of your DVD or Blu-ray content. Keeping the MKV as-is ensures maximum quality, but the file size will be large, especially for Blu-rays or UHD Blu-rays. If you need a smaller file or a different format for compatibility with certain devices, you can transcode the video using a video converter.
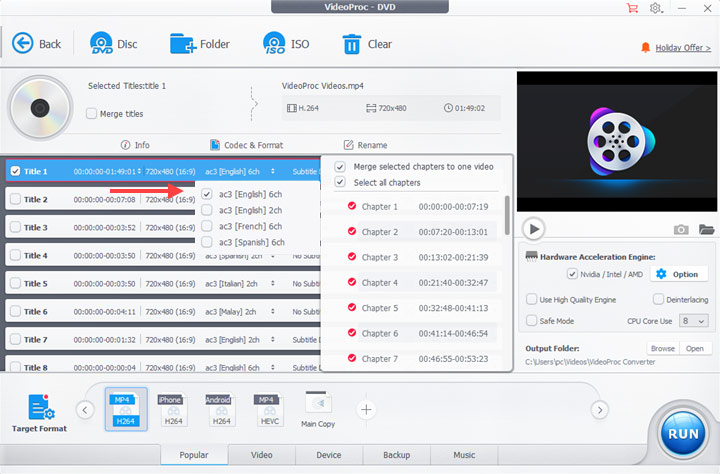
VideoProc Converter AI features a video transcoder, allowing you to further compress large MKV files into smaller files for easier playback and better compatibility. It supports a wide range of output formats, including MP4, MOV, AVI, HEVC, AV1, and more.
Even better, VideoProc Converter AI is one of the best MakeMKV alternatives for DVD ripping. It can complete the workflow from DVD to digital file within a single app. This makes it highly versatile to get a ready-to-play file in one pass.
Why use VideoProc Converter AI
![]()
![]()

- More output formats: MP4, MKV, MOV, AVI, WMV, HEVC, H.264, AV1, etc.
- Easier to use: 1-click device presets, intuitive interface, optional codec settings.
- Multi-track aware: Keep multiple audio/subtitle tracks or transcode selectively.
- Hardware boost: unique level-3 hardware acceleration for big speed-ups.
- One-stop flow: Read disc > decrypt > pick format > edit/enhance > export.
- All-in-one: AI tools for enhancement, compressor, downloader, quick edits…

How to use VideoProc Converter AI for post-rip conversion
- Download VideoProc Converter AI and open it.
- Go to the Video Converter module from the main interface.
- Drag and drop your MKV files into the program.
- Pick your desired output format in the Target Format section.
- (Optional) Use the Codec Option button to further customize video settings.
- Check to enable the hardware acceleration on the right.
- Click RUN to start converting.
Common Troubleshooting Tips
Despite its generally straightforward operation, you might run into some issues using MakeMKV. Here are some common problems and their solutions.
MakeMKV version is too old
This means your beta period expired. Simply download the latest version from the official site or enter the current beta key from the MakeMKV forum. MakeMKV's beta key is updated regularly. Updating the software also ensures compatibility with new disc protections.
Optical drive not detected by MakeMKV
First, ensure the drive is properly connected and recognized by the OS. Then, update MakeMKV to the latest version and reboot. In some cases on Windows, reinstalling the drive's drivers via Device Manager can help.
Also, MakeMKV on Windows requires administrator rights for the drive. If you accidentally denied a prompt, run it as admin. On Linux, make sure your user has permission to access the optical drive.
In other cases with 4K UHD Blu-rays, you may get errors if the drive is not UHD-friendly. Not all Blu-ray drives can read Ultra HD 4K Blu-rays. In that case, you may need a drive known to work with UHDs or to flash your drive's firmware to a compatible version.
Region code mismatch
MakeMKV will ignore region codes on Blu-rays and can brute-force CSS decryption on DVDs. However, some DVD drives enforce region locks.
If you encounter a region code error in the log, it means your DVD drive is set to a different region than the disc, and won't allow reading. Usually, you can set your drive's region to match the disc's region. However, please note that you only have limited changes.
Playback issues after ripping
If your MKV playback lacks audio or subtitles, it may be due to format compatibility issues during setup. Please check that your ripped file includes the corresponding tracks in a format your player supports. For example, some TVs won't decode DTS-HD MA, or an older device may not play high H.265 level. To solve this, you may need a video converter to transcode the ripped file into a more compatible format, like MP4.
Related: How to Play DVD on Windows 11 without Errors
Best Practices to Set Up Your Digital Media Library
Using MakeMKV is just the first step in getting your digital media library set up. Once you've backed up your DVDs and Blu-rays, you'll likely accumulate many large video files. Here are some of my personal practices to organize, store, and preserve them. Hope it helps.
- Organize Your Library with Clear Naming: Use a consistent naming convention for your files and folders. This will make it easier to navigate and will help if you use media server software that fetches metadata. Also, storing movies and TV series in separate top-level folders can help keep things tidy.
- Keep Master & Delivery Files: Store a full-quality MKV from MakeMKV as your archive, and create smaller, device-friendly versions with VideoProc Converter AI for everyday use.
- Balance Quality & Size: Blu-rays can be compressed with HEVC or AV1 for big space savings while retaining quality. When deciding how to compress, consider how much quality you're willing to lose and how you'll watch the content.
- Audio and Subtitles Considerations: Preserve original audio tracks in your masters; create AAC or AC3 tracks for compatibility. Keep soft subtitles for flexibility, but burn in forced subs for guaranteed playback.
- Use a Reliable Storage Solution: Invest in good storage, be it external hard drives, a NAS, or servers. Ironically, once you digitize your collection, you should back up your backups if you can. Consider maintaining a secondary copy of your library to guard against drive failure.
- Leverage Media Server Software: To get the most out of your files, consider using a media library system, such as Plex, Emby, Jellyfin, or Kodi. These applications will organize your collection with artwork and metadata, giving you a Netflix-like interface for your personal collection.
- Store Physical Discs: Don't forget to keep your physical discs properly. They are your ultimate backup if files get lost or corrupted, and legally they are the proof of ownership. Keep them in their cases or binders in a cool, dry place to prevent degradation.
Conclusion
MakeMKV remains one of the simplest and most reliable tools for backing up DVDs and Blu-rays into high-quality MKV files. On Windows, macOS, and Linux, how to use MakeMKV is essentially the same: open the disc, select your titles, and save.
For those who need more than just raw MKV files, pairing MakeMKV with a transcoder such as VideoProc Converter AI adds flexibility. You can compress large rips and choose from a wide range of output formats. Even better, you can rip discs directly within VideoProc Converter AI if you prefer an all-in-one solution.
As with all disc ripping, it is important to be aware of the legal context. Know what is allowed in your jurisdiction and do so at your own risk.


