In-page Navigation
Project Preview
In VideoProc Vlogger, you can play the original 4K video or preview the clips in the sequence without lag. It also lets you preview the timeline from the beginning or a certain point, so that you can navigate your projects and edits quickly and easily.
Free download VideoProc Vlogger to create videos, and fast preview the clip or the timeline during the edits.
Watch video tutorial on how to preview the project in VideoProc Vlogger, or read text instructions below.
Preview a Clip
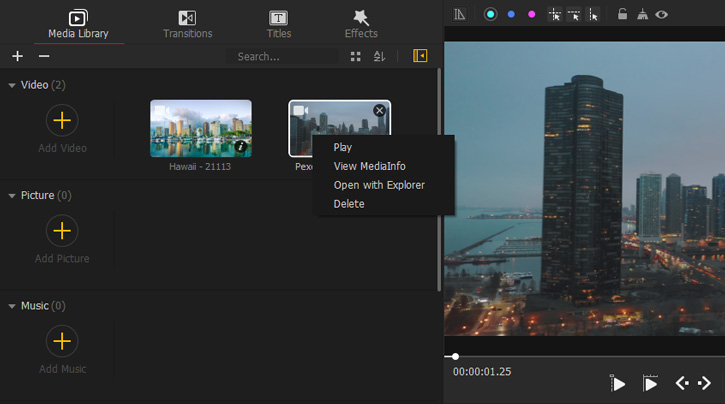
You can preview the media that you've imported to Media Library in three ways.
• Double click the thumbnail of the target clip in Meida Library.
• Right click the thumbnail of the target clip in Meida Library. Hit Play.
• Right click the target clip on the timeline and hit Play Clip.
 Tips
TipsTo pause the playback, press Pause or the space key on the keyboard.
To continue the playback, press the space key on the keyboard again.
Preview the Timeline
Everytime you apply a change (add a transition, apply a filter, revamp the speed, or whatever) in the timeline, you can preview the timeline to see the result of the change.
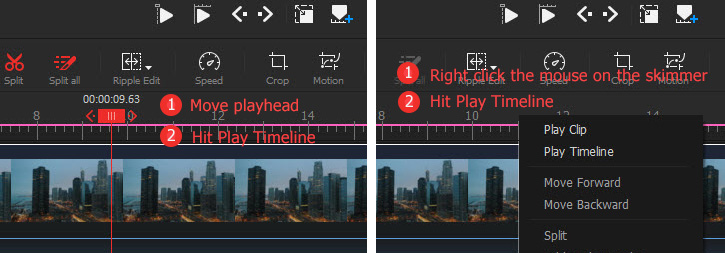
Play the Timeline from a Certain Position
Step 1Move the playhead or the skimmer to the position where you want to start to preview the timeline.
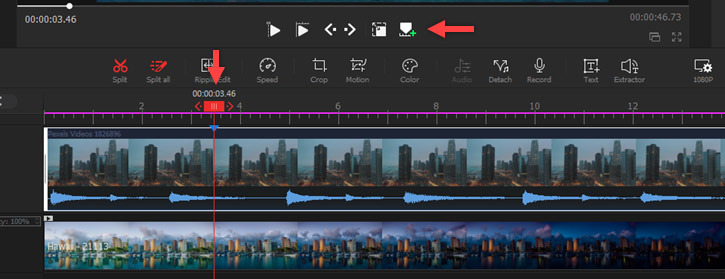
Step 2If you are using the playhead to preview the timeline, hit the space key on the keyboard or press the Play button (it's the first triangle icon underneath the preview window). If you are using the skimmer to preview the timeline, right click on the skimmer and choose Play Timeline.
 Tips
TipsDuring the playback, you can drag the Playhead to any certain place for previewing video from there.
To loop the preview of the clip, press the Play button again.
To pause the preview, hit the space key. To continue the preview, press the space key again.
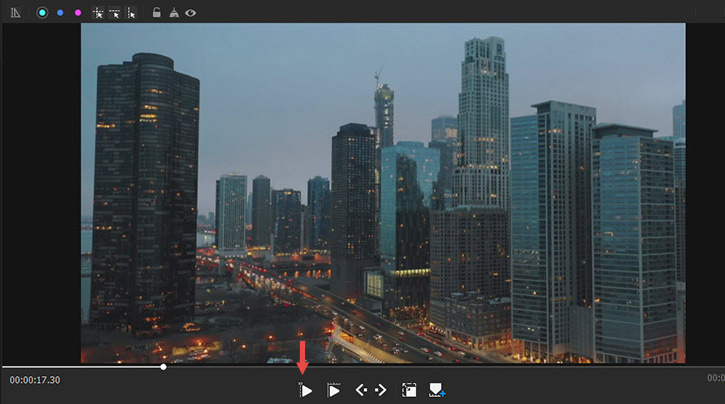
Preview the Timeline from the Beginning
Hit the Play Timeline button (it's the second triangle icon underneath the preview window).
 Tips for Fast Moving Around the Timeline
Click the Previous/Forward Frame button to go backward/forward one frame.
Hit the + or – button on the top right of the timeline to zoom your timeline in or out.
To loop the preview of the video from the beginning, hit the Play Timeline button again.
Full Screen Preview
To view full screen preview, press the Full Screen icon located on the bottom right of Preview Window.
To exit the full screen mode, press the expand icon which represents Exit Full Screen.
TipsHit the Detach Player Area button underneath Preview Window to detach the preview Windows for playing the movie on any place of the current or another monitor. Hit this icon again to exit the Detach Player Area mode.
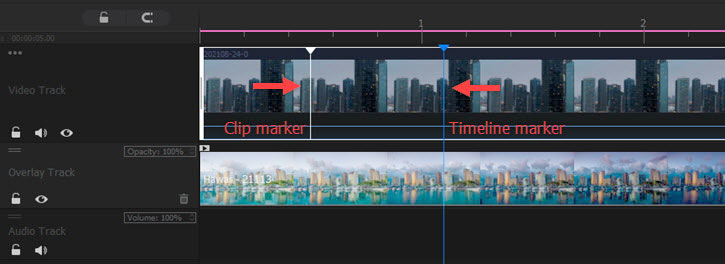
Preview with Markers
By labeling the clip or timeline with markers, you can fast identity the important points during the edits. Markers are for improving the editing efficiency. They are invisible in the outcome. In VideoProc Vlogger, you can add markers in the timeline and an individual clip.
Add Markers to Timeline
There are two ways to add timeline markers.
• Move the Playhead over the position where you want to add the marker, hit Add Marker to Timeline.
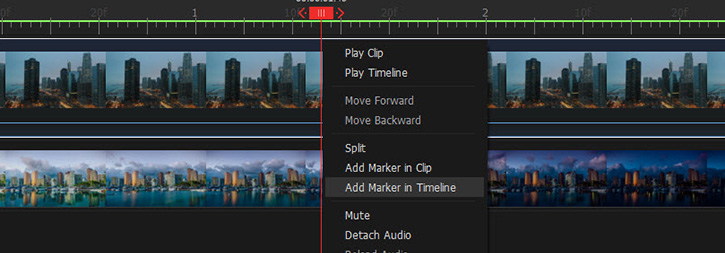
• Move the Playhead to the position where you want to add a marker. Press the right button on the mouse. Next, select Add Marker in Timeline.
Add Markers to an Individual Clip
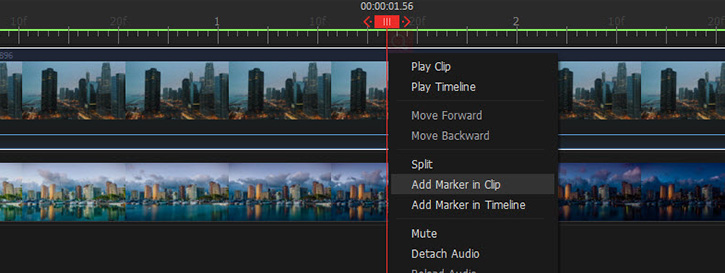
On the timeline, select the target clip. Move the Playhead to the position where you want to add a marker. Right click your mouse and choose Add Marker in Clip.
 Tips
TipsRight click on the clip marker, you can:
- Choose Move to Timeline to change the clip marker to the timeline marker.
- Choose Split from Marker to split the video from the marker.
- Choose Delete Marker to delete the selected marker.
- Choose Delete Markers in Clip to delete all the clip markers.
Right click on the timeline marker, you can:
- Choose Play from Marker to play the timeline from the marker.
- Choose Snap Playhead to Marker to move the playhead to the marker.
- Choose Delete Marker to delete the timeline marker.
- Choose Delete Markers in Timeline to delete all the timeline markers.
You can also double click a timeline marker to adjust it's color.
Additional Tools
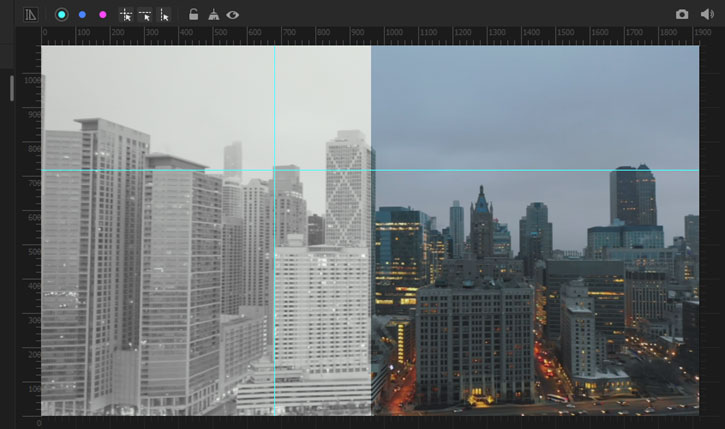
1. Rules
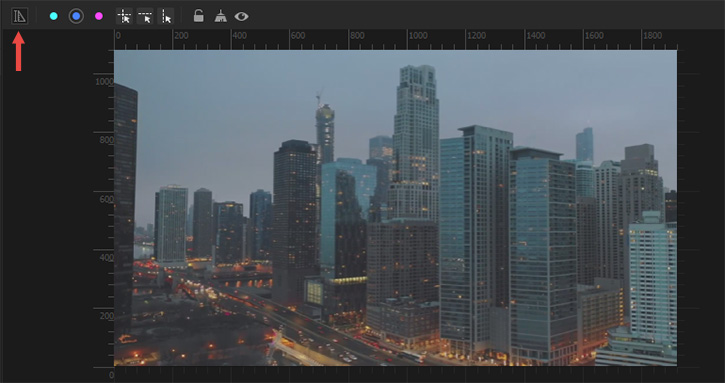
Press the Show Rulers button on the top left corner of the preview window. When Show Rulers is on, you will notice the pixel height and width show up along the left and top side of the canvas.
2. Guides
Add a Horizontal or Vertical Guide
• Hit the Add Horizontal Guide or the Add Vertical Guide icon on to top menu bar of the preview window. A guide will appear when you move the cursor over the canvas. Click your mouse to add the guide.
• Click in the gray area of the ruler, drag it into the canvas. Release the mouse button when the guide shows up in the wanted location.
Add a Crisscross Guide
Hit the Add Crisscross Guide button on the top menu bar of the preview Windows. A guide will appear when you move the cursor over the canvas. Click to add the guide.
Move a Guide
Hover the cursor over a horizontal or vertical guide, click your mouse and drag the horizontal guide up or down or drag the vertical guide left or right to move the guide to a different position. Release the mouse button when the guide shows up in the wanted location.
Remove Guides
To remove a single guide, drag the guide outside the image window; To remove all guides, press the Clear Guide icon.
Hide Guides
Hit the eye icon on the top of the preview window to hide all guides.
Lock Guides
Hit the Lock Guides button on the top menu bar of the preview windows to lock the guides on the canvas.
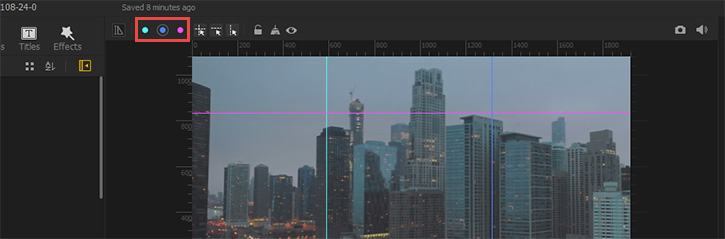
Use Different Colors
There are three small round buttons with different colors (cyan, blue, and purple) on the top left of the preview window. Just select one of them as the color for the guide. You can add guides in a canvas with 3 different colors.
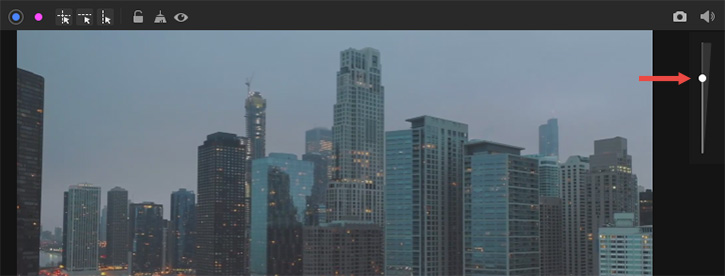
3. Change the Preview Volume
Hit the volume icon on the top right of the preview window and then move the slider upper or lower to turn the volume up or down for adjusting the volume when playing the video.
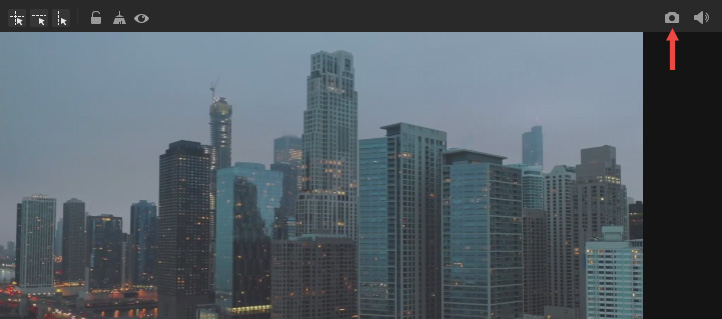
4. Take Snapshot
Hit the Snapshot button to save a specific frame as a picture. It looks like a camera and is located on the top right of the preview window.
Free download VideoProc Vlogger to edit the video, and preview any part of the project during the edits.
Related Guides:
- > Create a Video Quickly with VideoProc Vlogger
- > Create Slideshow Video
- > Cut and Split Video
- > Copy, Paste, and Delete Video
For more guides of VideoProc Vlogger, please visit this page >
If you have any question, please email us or visit ![]()
![]()
![]()
Is this page helpful?
