In-page Navigation
Edit to the Beat in VideoProc Vlogger
Editing to the beat is a fundamental method to spice up videos in post-editing. Generally, you need to count beats by clapping or air-drumming first and mark them one by one. But in VideoProc Vlogger, the automatic beat detector takes over the task and generates markers to edit with in a few clicks.
Let's download VideoProc Vlogger and follow the steps below to edit videos to the beat quickly and accurately.
Watch video to learn how to edit to the beat in VideoProc Vlogger, or read text instructions below.
What Is a Beat Sync Video
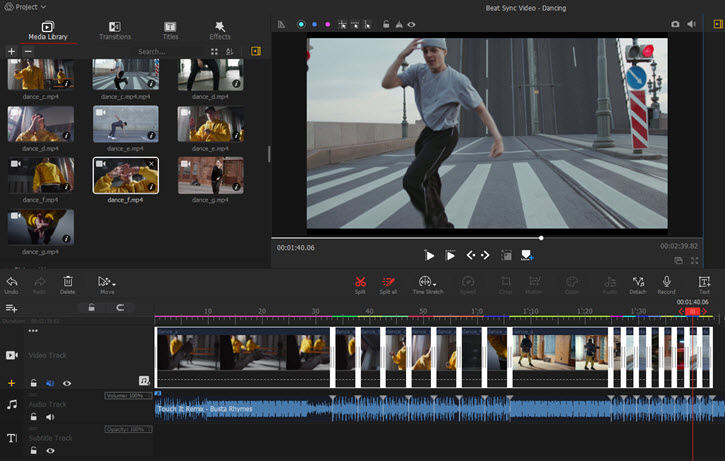
No matter whether you've perceived it or not, many videos are edited in sync with the music beat. Some are synced to the strong beats in a fast tempo like game montages, dancing videos, and sports videos, while some synced to variable beats to make transitions more natural like vlogs and travel videos.
In a beat sync video, visuals (video clips, transitions, texts, graphics, and effects) are strengthened by stressed and rhythmic beats of drum kits or other percussion instruments. And editing on different beats creates different atmospheres.
But syncing a video to the beat is carried out manually in most video editing programs. And before editing, you need to get familiar with the music structure and beats so that you can mark them up at the right position.
To make it easier to switch shots, add texts, and apply fancy effects on perfect timing, VideoProc Vlogger auto-generates beat markers to save you much time and effort. Now check tutorials of how to make a video go with beats using the intelligent beat detector in VideoProc Vlogger.
How to Make a Beat Sync Video
VideoProc Vlogger has a powerful Audio Analyzer preset with 3 analysis modes - Audio Onset, Audio Beat, and Audio Silence. The former two options are designed to analyze the music of all genres including upbeat, energetic, relaxing, soothing, remixed, electronic dance music, hip-hop, classic, etc. And here's how to use it effeciently.
Step 0Create a new project in VideoProc Vlogger
Open VideoProc Vlogger. Complete the general settings in the Project panel to create a new project for your beat sync video.
Step 1Import a video/videos and background music
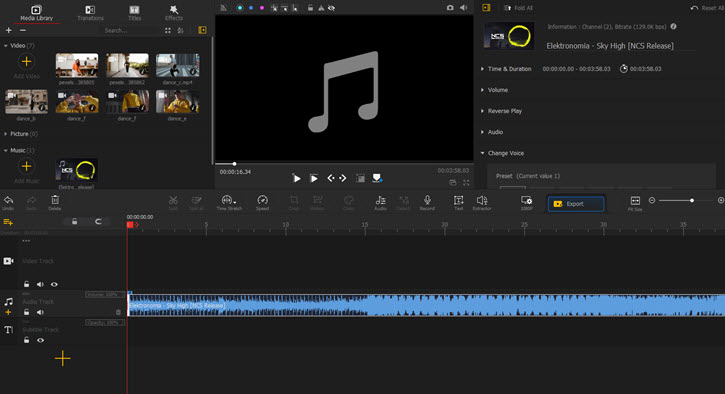
Navigate to Media Library, and click the plus icon to add your video and music to VideoProc Vlogger. Next, drag the music to the audio track in the timeline.
Step 2Detect the beat of the music
Click the Audio option right above the timeline to open the audio editor panel. Choose a detection mode in Audio Analyzer.

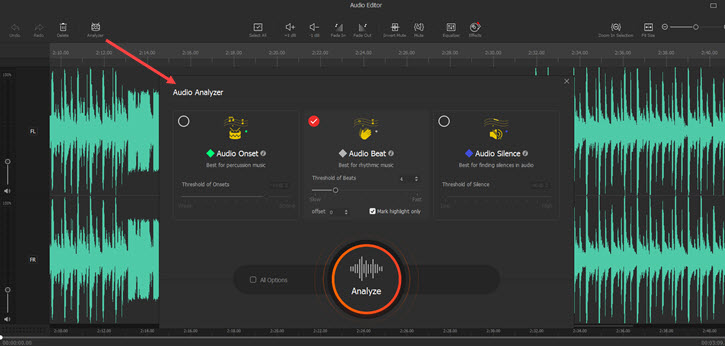
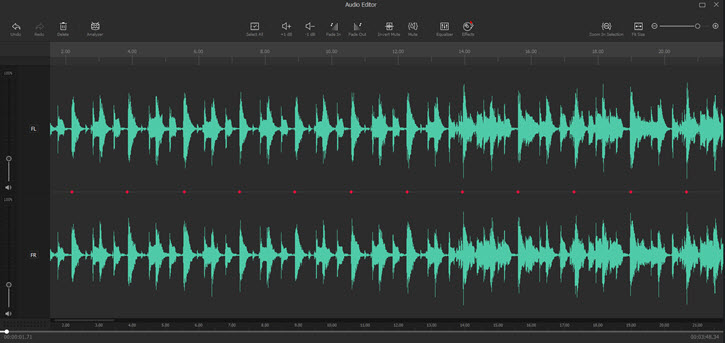
Option 1: Choose Audio Beat. It is suitable for rhythmic music and highlights beats evenly. Then set the interval between every two highlights by changing the number of beats. (VideoProc Vlogger highlights every 4 beats by default.) Check the option of Mark highlights only.
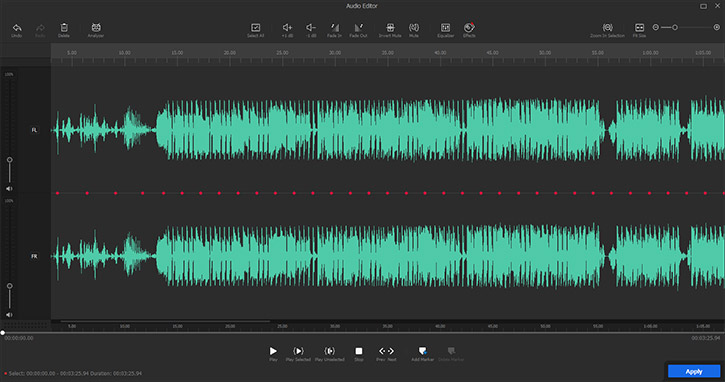
Hit the Analyze button to start detecting. When it is done, you can see red diamonds between the waveforms.
 Editing Tips
Sometimes the highlights don't match the musical beats as you wish. For example, they appear at the postion 2-beat before the stressed beats. Get back to the Audio Beat option in Analyzer, set the offset to 2, and analyze it again.
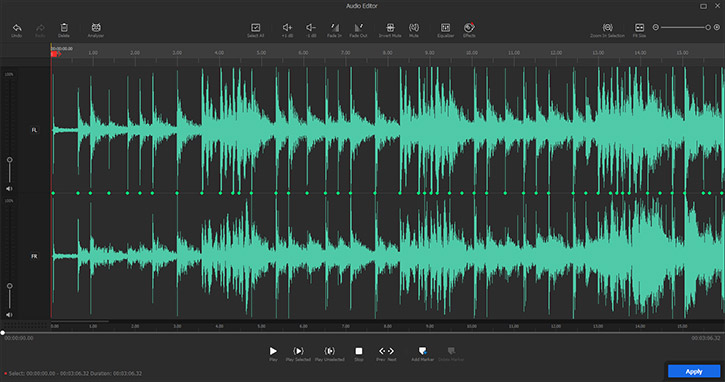
Option 2: Choose Audio Onset. It is suited to analyze music with percussion or sound effects like gunshots, fireworks, and bombs at irregular intervals. If the percussion is quite weak, decrease the threshold to make sure it can be detected. After the analysis, beats will be highlighted with green icons.
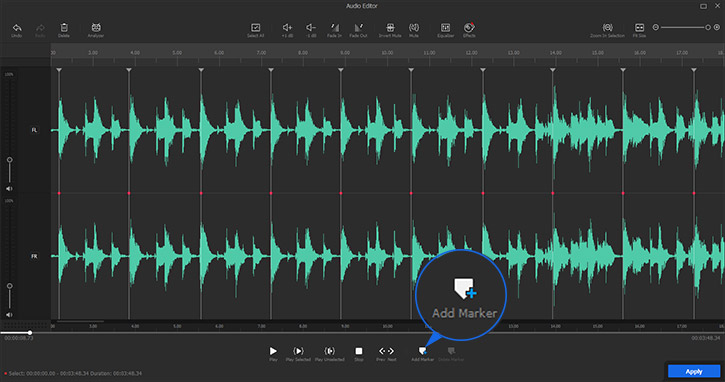
Step 3Add markers to the audio track
Press and drag your mouse on the waveform to select the section to which you want to add markers. By default, VideoProc Vlogger selects the whole music for you to mark up. Once selected, the area turns green and the rest is blue.
Click Add Marker at the bottom of the panel to lable musical beats in bulk and hit Apply to save the changes.
 Editing Tips
If you find any beat is marked by mistake, you can navigate the postion, and click the Add Marker option or Delete Marker option at the bottom to add or remove them manually.
Step 4Rearrange footage to the beat
Drag video clips from Media Library to the video track. Re-sequence and align video clips to beat markers added to background music.
 Two methods to cut video clips to the beat:
- Time Stretch - Change the speed to fit the duration by dragging either edge of a clip in the timeline.
- Ripple Edit – Trim off the in/out range of a video clip by dragging its edges in the timeline.
Step 5Apply more edits in sync with the beat
If necessary, add texts, effects, or transitions at the position where beats are marked up.
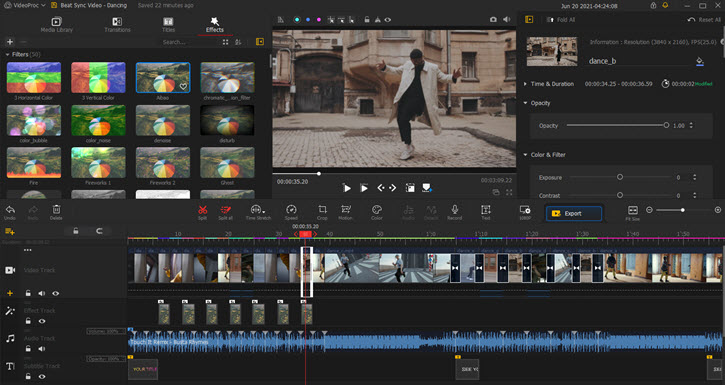
When everything is done, export the video from VideoProc Vlogger.
How to Make a Beat Sync Slideshow
Slideshows are plain and seem like a sequence of still images being auto-played. But by switching images to the music beat, they'll get catchier like dynamic videos.
Get your photos and background music ready, and make a beat sync slideshow with VideoProc Vlogger.
Step 0Create a new project
Launch VideoProc Vlogger and create a new project for your beat sync slideshow.
Step 1Load slideshow images and music
Hit the plus icon on the top left of Media Library to add images/image folders and background music to VideoProc Vlogger. Next, drag the music to the timeline.
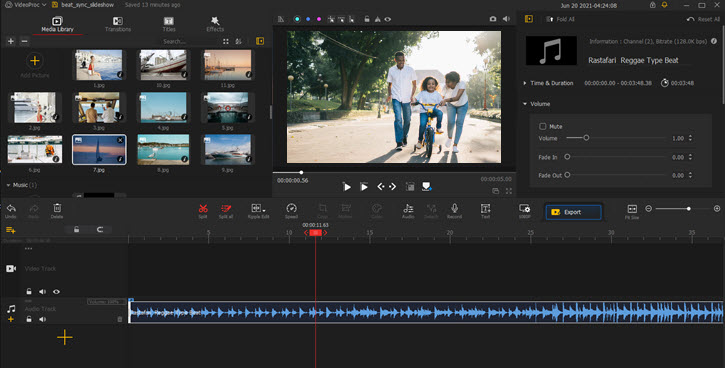
Step 2Detect the beat in the music
Move to the toolbar right above the timeline. Click Audio > Analyzer > Audio Beat.
Click Analyzer and choose Audio Beat mode. Set the interval between every two highlights by changing the number of beats. By default, VideoProc Vlogger highlights every 4 beats. Then, check the option of Mark highlights only.
Hit Analyze, and you can see red icons displayed in the middle of two waveforms.
If the highlight icons don't match the musical beat, open Analyzer and set the offset under Audio Beat to shift highlights to the desired beats.
Step 3Apply markers to the audio track
Click Add Marker > Apply at the bottom of the Audio Editor panel to add markers to the audio track.
 Editing Tips
To sync slideshow images to variable beats, you can add markers from the first analysis to parts of the music. Then detect beats in the Audio Onset mode, or change the interval of highlighted beats in Audio Beat, and apply these makers to other parts of the music.
Step 4Edit slideshow images to the music beat
Add pictures from Media Library to the video track and place them in a proper order in the timeline.
Drag the edge of each image to align with the markers on the audio track. Also, you can add animated texts, transitions, and effects to make the slideshow more engaging.
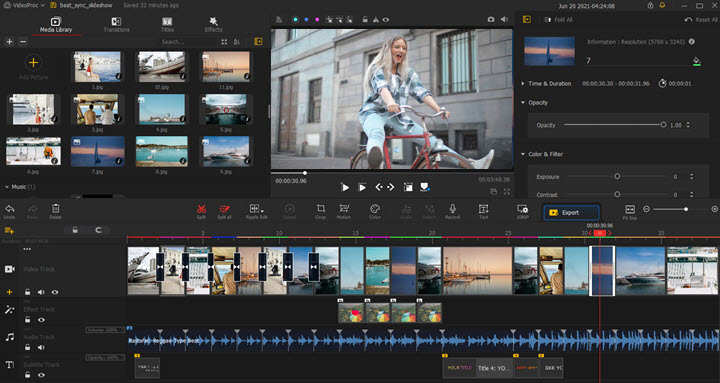
Play the whole video again to check if every picture shifts to the beat. At last, export the slideshow.
Download VideoProc Vlogger and take full advantage of the background music to make best beat sync videos now.
Related Guides:
- > Introduction to Audio Editor
- > Detach Audio from Video
- > Mute Audio
- > Reduce Background Noise of Video & Audio
- > Record Voiceover and Change Voice
- > Adjust Audio Speed without Changing Pitch
- > Add Filters to Audio
- > Using Audio Equalizer in VideoProc Vlogger
- > Volume Fade In and Out
For more guides of VideoProc Vlogger, please visit this page >
If you have any question, please email us or visit ![]()
![]()
![]()
Is this page helpful?
