Don't know how to change the aspect ratio in Premiere Pro? What to do if you have already started editing and find out the video is not in the desired aspect ratio as you wish? Maybe you want a 16:9 video and suddenly discovered that your video is 4:3 resolution. Or maybe you want to create a 1:1 square video for Instagram by changing the aspect ratio settings via sequence settings in Premiere.
Change Aspect Ratio in Premiere Pro for a New Sequence
In fact, the right workflow is to determine what aspect ratio you are going to use in the very beginning. With that answer in mind, you shall shoot in that aspect ratio, and set the corresponding aspect ratio in sequence settings before editing.
Follow these steps to set aspect ratio in Premiere Pro via Sequence Settings:
Step 1. Launch Premiere Pro and open your existing project (or create a new project).
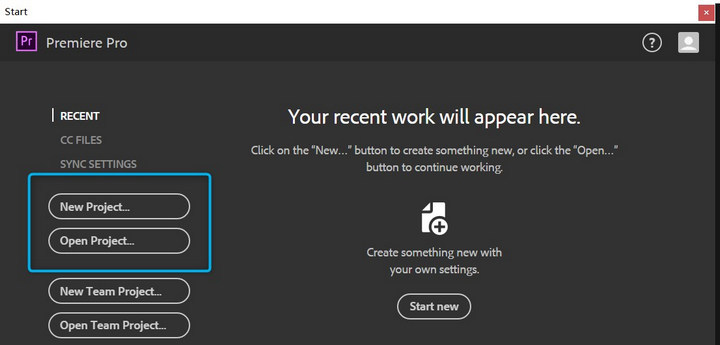
- Open up Premiere Pro and stay in the Start page.
- Click on the "New Project" to create something new with your own settings.
Step 2. Press Ctrl + N to create a new sequence (or go to Files > New > Sequence).
Step 3. Set sequence settings. The Frame size is the dimension of the video you are going to make. Once it's settled, you will see the aspect ratio right besides the box.

For instance, if the frame size is set at 1920 horizontal 1080 vertical, then the aspect ratio is 16:9. If you are going to make a square video, the number of pixels horizontally shall equals that vertically. Say, 1080x1080, 760x760, etc.
Editing Tips:
It's difficult for beginners to learn all those big concepts or to ensure that sequence settings match their source video. In that case, you can import the source video into resources bin, and drag it to timeline. Then Premiere will ask if you want the sequence settings to match your source video.
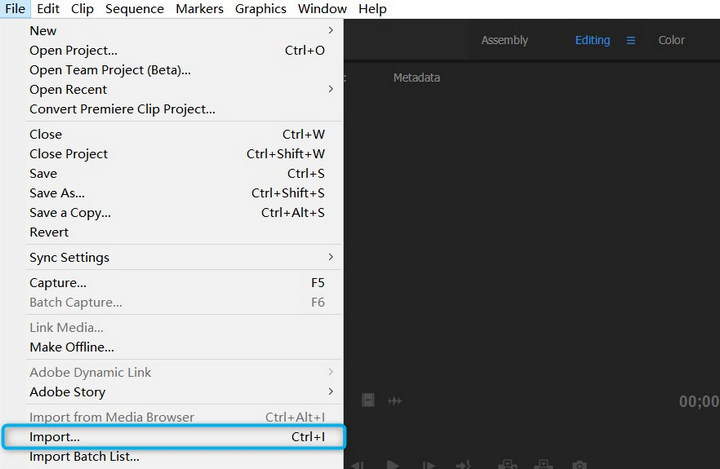
Step 4. Press Ctrl+ I to import a video (or go to File > import…)
Note: though you can directly drag and drop a video into the resource bin, or even directly drag it to the timeline, it is a good habit to import video the way step 4 does.
Step 5. Drag and drop your clip into the timeline.
If there is a mismatch, then you shall see the following dialog box.
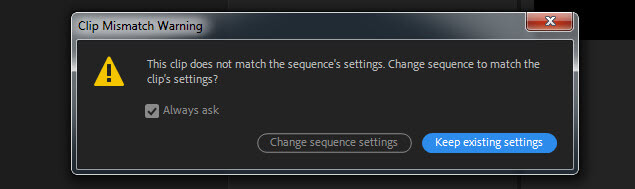
Step 6. Click change sequence settings.
By so doing, parameters such as timebase (Adobe's way of saying FPS), fields will match your video.
Step 7. Check what the current sequence settings are in Menu: Sequence > Sequence settings.
Step 8. Now that all the other settings match the source video, it's your call to change aspect ratio or leave it as it is.
The actions to take are case-specific, and largely depend on how you decide to reconcile the mismatch between source clips and the output video dimension you require.
Change Aspect Ratio in Premiere Pro for an Existing Sequence
"But what if I just notice the aspect ratio is wrong? How to change the aspect ratio of an existing sequence in Premiere Pro?"
There are three methods to convert a portrait video to landscape in Premiere.
- Crop the portrait video, and obviously, you will lose many interesting scenes because the top and bottom part of the video are being cropped.
- Pillar boxing the source video: this will add black bars on both sides of the vertical video.
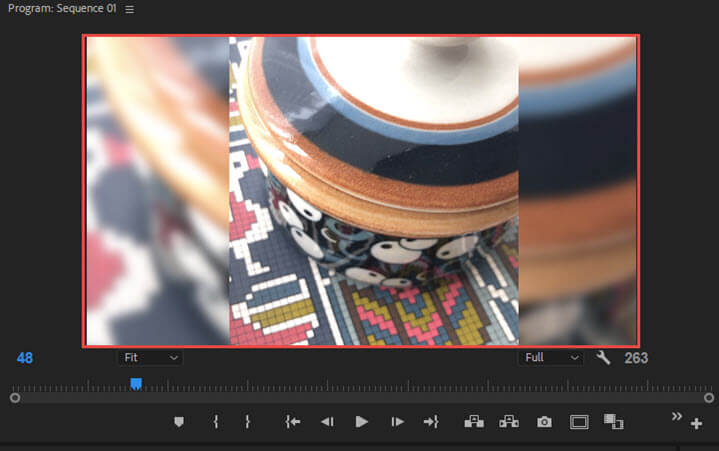
- A more popular way of pillar boxing: instead of adding black bars, a blurred background will be added, with the same content of the video.
To better illustrate the steps, we use cases below.
Method 1: Change Aspect Ratio by Cropping (Pan and Scan)
Step 1. Click sequence settings from the menu.
Step 2. Change 1080x1920 to 1920x1080.
Step 3. Click on the clip, and you shall see the blue box with pointers. Drag it to enlarge image to fill in the screen.
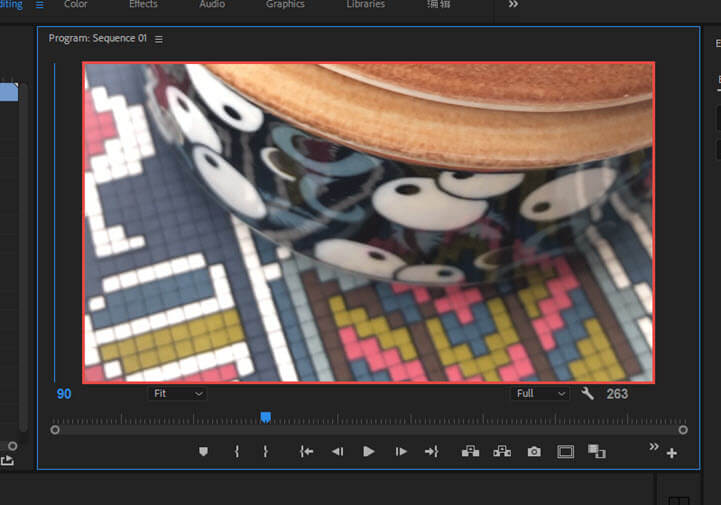
Since the top and bottom part of the video are cropped, you might want to add key frames and motion effects to pan the video to include more details of the scene.
Above all, this strategy is not recommended, unless what is being cropped won't affect how the video delivers its message.
Method 2: Change Aspect Ratio by Adding Black Bars
Step 1. Click sequence settings from the menu.
Step 2. Change 1080x1920 to 1920x1080.
Step 3. Click on the footage, and drag the blue pointers to resize the video.
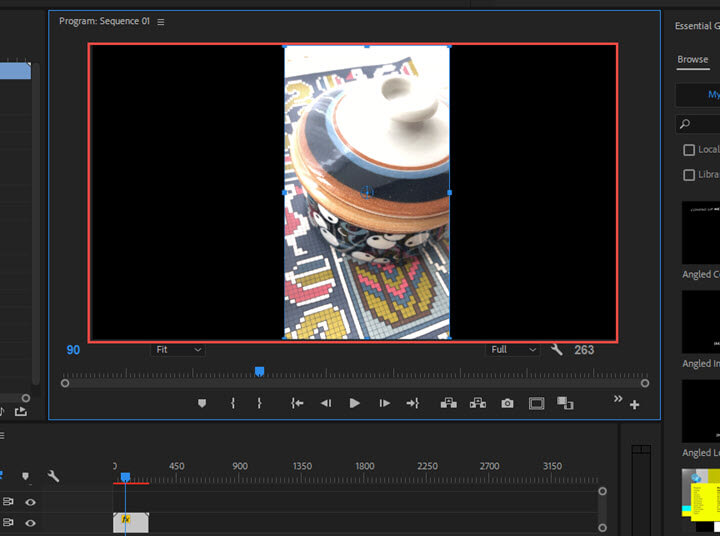
Though you can successfully change aspect ratio from 9:16 to 16:9, it is not practical in daily life. Though 4:3 to 16:9 works the same way, with less area of black bars, it is still not desirable. Our recommendation remains the same: think carefully and set correct aspect ratio before shooting the video.
Method 3: Change Aspect Ratio by Adding an Adjustment Layer
Step 1. Change sequence settings to 1920x1080.
Step 2. Drag your clip to video track 2.
Step 3. Copying your clip by pressing Alt (Option on Mac) and drag your clip to track 3.
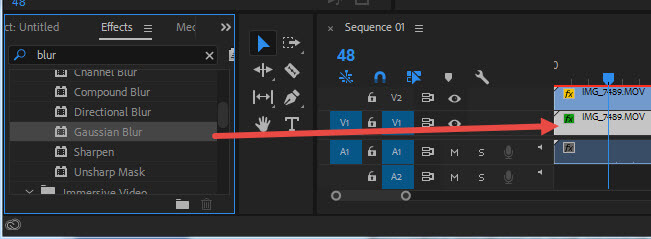
Step 4. Click video clip on the first track, and blur the video clip.
Bonus Tips: How to Quickly Change Aspect Ratio
For video editing beginners or occasional users, it would be an overkill to launch large programs to change aspect ratio. There are many lightweight video processing tools on the market to fulfill your need. VideoProc Converter AI is a handy and visualized video-processing software by which you can set aspect ratio with one mere click.

VideoProc Converter AI - Crop videos or change aspect ratio easily
- Built-in Crop feature to remove unwanted edges.
- Full list of aspect ratio options: 16:9, 16:10, 1:1, 4:3, 4:5, 2:1, 2:3, etc.
- One click to make a horizontal video to vertical, and vice versa.
- Convert video formats, transcode, change resolutions, etc.
- Editing features: compress, cut, crop, merge, stabilize and more.
Step 1. Free download VideoProc Converter AI.

Step 2. Load the original video.
- Open VideoProc Converter AI > click the first button "Video" to enter into Video Processing panel.
- Click on the "+Video" button to add the original video from the local drive.
Step 3. Modify the settings.
- Choose the target format in the bottom toolbar > Click Browse to select the save path > Click Crop button
Step 4. Aspect ratio change in VideoProc Converter AI.
In the Crop editing page, first check the box to Enable Crop, and there're two ways for you to change aspect ratio:
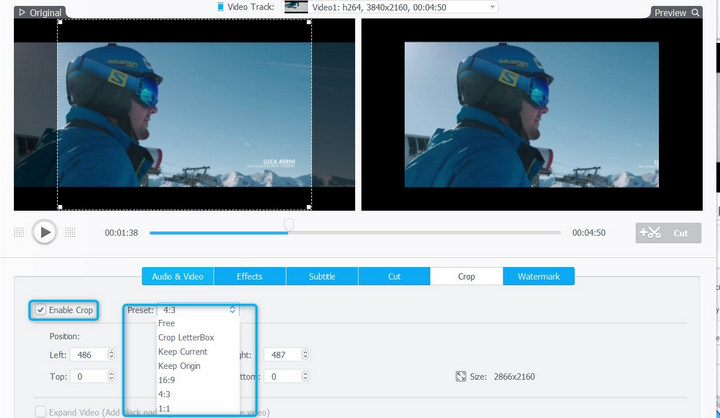
- Method 1: Mere one click - click Preset arrow to choose the common aspect ratio, such as 16:9, 4:3 and 1:1 (square video). That function is not supported in Premiere Pro and makes cropping easy especially for beginner-level users.
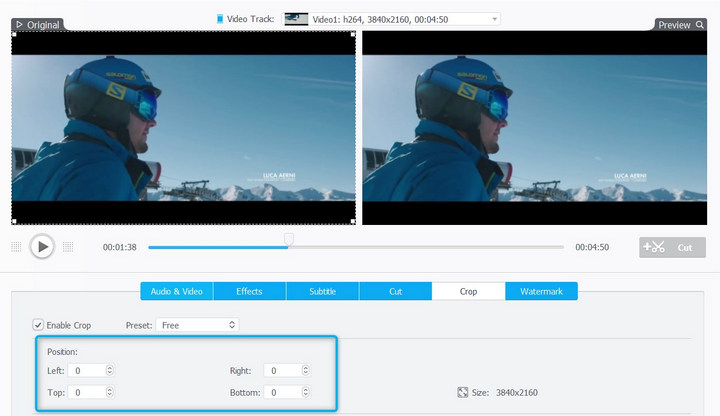
- Method 2: Crop the image from the left, top, right, bottom by adjusting position numbers. (Similar to percentage adjustment in Premiere Pro)
Step 5. Click Done and export the target video.
FAQs about How to Change Aspect Ratios in Premiere Pro
1. What is aspect ratio and why is it important?
Aspect ratio is the ratio of width to height of a video or an image. It determines how your video will fit on different screens and devices. Choosing the right aspect ratio for your video can enhance its visual appeal and avoid unwanted cropping, stretching, or black bars.
Different video recording standards use different aspect ratios. For example, people usually use a 16:9 frame aspect ratio for YouTube and a 9:16 aspect ratio for TikTok and other mobile videos. It is essential for your final delivery.
Commonly used aspect ratios are:
- Fullscreen (4:3): used on television before widescreen was introduced.
- Widescreen (16:9): the most commonly used aspect ratio for online videos, documentaries, and films.
- Anamorphic (2.40:1): wide widescreen often used in movies for a cinematic feel.
- Square (1:1): commonly used on Instagram and other social media.
- Vertical (9:16): used for videos recorded on your phone and mobile social media like Tiktok and YouTube short.
2. How do I change the aspect ratio of a new sequence in Premiere Pro?
To change the aspect ratio of a new sequence in Premiere Pro, you need to go to File > New > Sequence and click on the Settings tab. Then, under the Video section, you need to enter the horizontal and vertical values for your desired aspect ratio. For example, if you want a 9:16 aspect ratio, you can enter 1080 and 1920 respectively. You can also choose from some preset aspect ratios from the dropdown menu next to the Frame Size option.
3. How do I change the aspect ratio of an existing sequence in Premiere Pro?
To change the aspect ratio of an existing sequence in Premiere Pro, you need to right-click on the sequence in the Project panel and select Sequence Settings. Then, under the Video section, you need to enter the horizontal and vertical values for your desired aspect ratio. Alternatively, you can also use the Sequence > Sequence Settings menu option.
4. How do I make my video footage fit into a new aspect ratio in Premiere Pro?
To make your video footage fit into a new aspect ratio in Premiere Pro, you need to use the Crop or Scale effect. You can find these effects in the Effects panel under the Video Effects > Transform category. You can drag and drop the effect onto your video clip in the Timeline panel and adjust the parameters in the Effect Controls panel. For example, if you want to crop your video to a 1:1 aspect ratio, you can set the Left and Right values to 12.5% each. If you want to scale your video to a 4:3 aspect ratio, you can set the Scale Width value to 75%.
5. How do I use the Auto Reframe feature to change multiple aspect ratios in Premiere Pro?
The Auto Reframe feature is a smart tool that can automatically adjust the framing and aspect ratio of your video clips based on the content and motion. You can use this feature to change multiple aspect ratios in Premiere Pro by following these steps:
1. Select the sequence or the clips that you want to reframe in the Project panel.
2. Go to Clip > Auto Reframe Sequence or right-click and choose Auto Reframe Sequence from the context menu.
3. In the Auto Reframe Sequence dialog box, choose your target aspect ratio from the Aspect Ratio menu. You can also choose a preset or enter a custom value.
4. Choose a motion preset from the Motion Preset menu. This will determine how the Auto Reframe feature will track the movement of your video. You can choose from Default, Slower Motion, or Faster Motion.
5. Choose an option from the Clip Nesting menu. This will determine how the Auto Reframe feature will apply the reframing effect to your clips. You can choose from Don't Nest Clips, Nest Clips Individually, or Nest All Clips.
6. Click Create. This will create a new sequence with the reframed clips and the original sequence as a nested sequence.
Sum Up
A wrong aspect ratio would result in video distortion or unsightly black bars — if you are not adding it intentionally to create wide screen cinematic look — but the problem is, too often than not, one only notice the problem after editing is finished. Say, you already added titles, stickers, and everything. Later you find out the video is edited in 4:3, while popular YouTube video uploading setting is 16:9. If you go ahead and upload it anyway, there will be ugly black bars on the left and right sides.
Using VideoProc Converter AI, you can quickly change the aspect ratio of a video without a learning curve. Besides cropping a video and changing the aspect ratio, this software also helps you to fix Premiere won't support MKV errors, you can use it to rough cut video, convert video to editing friendly video format without quality loss.


