Get Started Editing
Add Black Bars to Video
VideoProc Vlogger allows you to stylish your video with black bars and make it cinematic.
Let's download, install and run VideoProc Vlogger. Follow the guides below to add black bars to video to achieve a widescreen movie effect.
Method 1: Change Video Resolution - Add Black Bars without Cropping
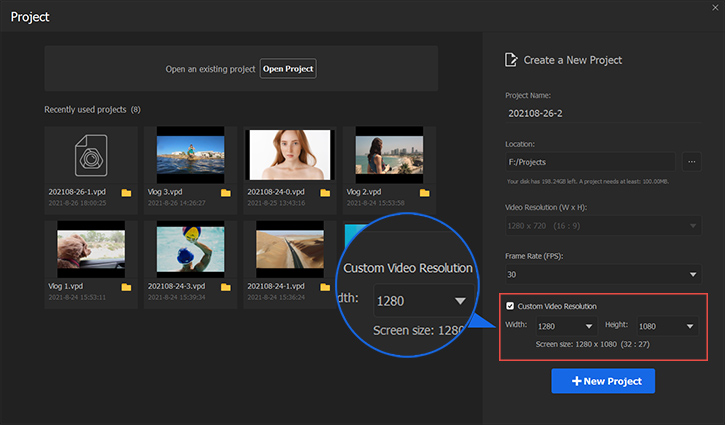
Step 1 Go to the Project window: Open VideoProc Vlogger, and you'll see the Project window.
Note: If you have already started a project in VideoProc Vlogger, click the gear icon named Change Video Parameters in the toolbar to custom the video resolution in a similar manner.
Step 2 Check the Custom Video Resolution. You can also custom video resolution by clicking the gear icon named Change Video Parameters in the toolbar.
Step 3 Personalize the parameters for black bars. For example, your original video resolution is 1280*720, and then you can set the resolution to 1280*1080. The logic is the width number is bigger than the original one. To meet the 1080 PX width, VideoProc Vlogger would add two black bars on top and bottom of images. Each one would be 180 PX.
 Editing Tips
Normally, we would like to recommend you increase the original width or height by around 30%-50% based on how you are going to change your video resolution. For instance, if you are using a resolution of 1280*740, you could change the height to around 1440.
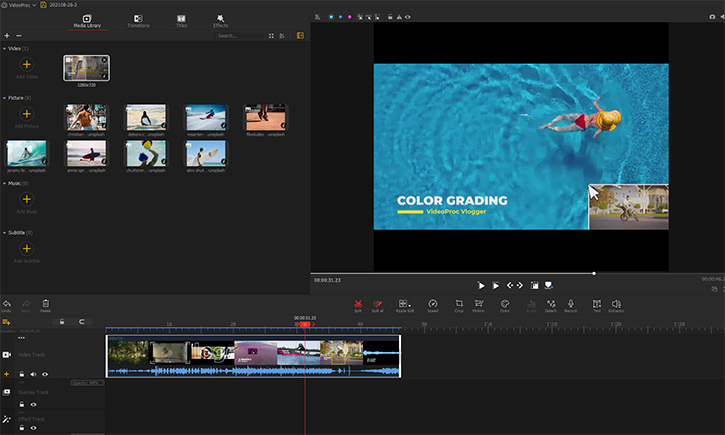
Step 4 You'll see the two bars are added through the Preview Panel. And then, you can start editing the video.
 Editing Tips
If you want to make a square video with Letterbox effect for uploading to social channels, you can set the video resolution to 1:1 ratio, for example, 1280x1280. Similarly, VideoProc Vlogger would add two black bars on the top and the bottom.
If you want to add four bars (borders) to a video, you can refer to this guide.
Method 2: Use Cropping to Create Black Bars
This method allows you to insert a black bar without modifying the resolution of the video. But before we get into the details, please notice that with this method, you might lose some information of the video since it is built on cropping. So if you want to keep all the pieces, check out the other methods on this page.
Step 1 Same as the first method, first you need to create a project. The difference is that you have no need to increase its orginal resolution any more. Just set the resolution paramter as what it is.
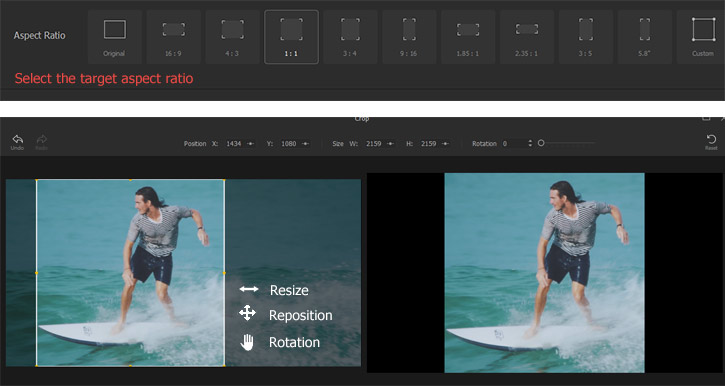
Step 2 Import the video and then drag it to the video track. Well, at this point, nothing has changed to the video. Now let's click on the Crop button, which will open the Crop window.

Step 3 Down here you could see a bunch of preset ratios that you could work with. Each time you select an option, the result is displayed in real time in the preview window on the right hand, which means you could see the edited effect here. So what you need to do is just try to select one option and see if it works for you.
 Editing Tips
1. If you find no desired one in the preset, try the custom feature. In this way, you could change the scale however you want, by dragging up and down the little yellow ball.
2. If you accidentally make some change that get the image look weird, click undo here on the top left corner to cancel the previous steps. Or use the reset button on the upper right to restore the image to the original state.
3. Whether your cropping on both sides are in the same length or not, the software will automatically center the clip not requiring you any manual work.
4. Besides, the system will keep the original info of the video, so if you are not satisfied with the effect afterwards, you could click crop again to re-modify it.
Once all the edits have been made, click the Apply button and the changes will take effect in your video clip.
Step 4 When you finish your editing, click the Export button.
Method 3: Compress the Frame
If you want to add a black bar to the image without altering the resolution or losing the content, you can try compressing the clip. But please notice that this method may lead to the image looking a little bit squashed, depending on how much width or height of the blak bars you want.
Step 1 Again, create a project that comes with the same resolution as the original footage. And then import the video clip and place the clip on the video track.
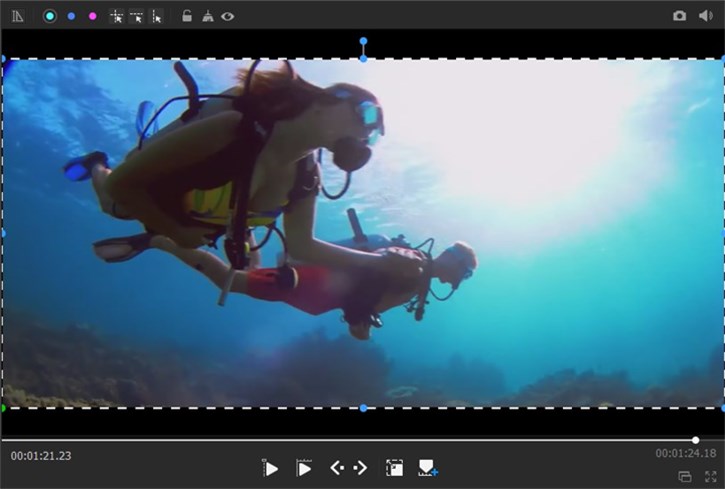
Step 2 Well, at this point, you don't need to click any tools or button. Simply double click on the screen in the preview window, and you could find 9 dots showing on the screen. What you need to do is simply select one of them to make a black bar. For example, let's select the top one and drag it downward, then you could see the first black bar being created at the top of the screen; if you do the same action to the little dot on the bottom, the black edge on the bottom also appears. You can adjust it as much as you want until you get a desired result. If you make a mistake, undo the previous steps by clicking undo on the left. Or you can also use the reset button at the upper right to return the images to the original state.
Step 3 Simply click the Export button when you finish all your edits. And you're done.
Method 4: Overlay an Black Bar PNG
Step 1 Download some black bar (letterbox) templates (.png) on the internet, and choose one you like.
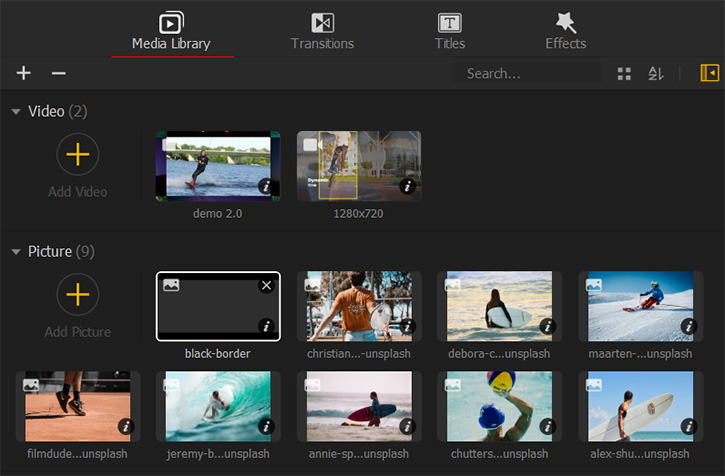
Step 2 Open VideoProc Vlogger, add both the source video and the black bar PNG in the Media Library.
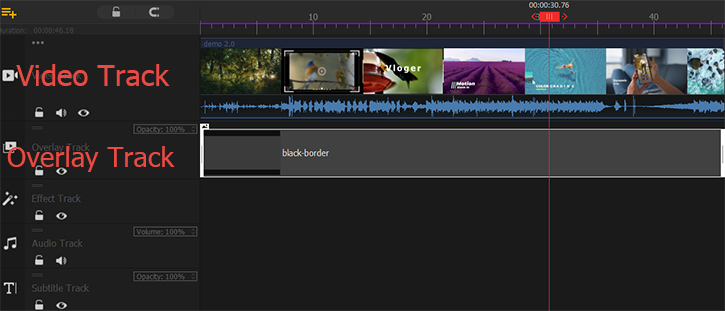
Step 3 Drag the video into the Video Track, and drag the black border image into the Overlay Track in the Timeline. Pull the image to cover the duration of video that you would like it show up on. You can pull it to the end or any marker (key frame) of the clip easily because VideoProc Vlogger has the Magnet to help automatic alignment.
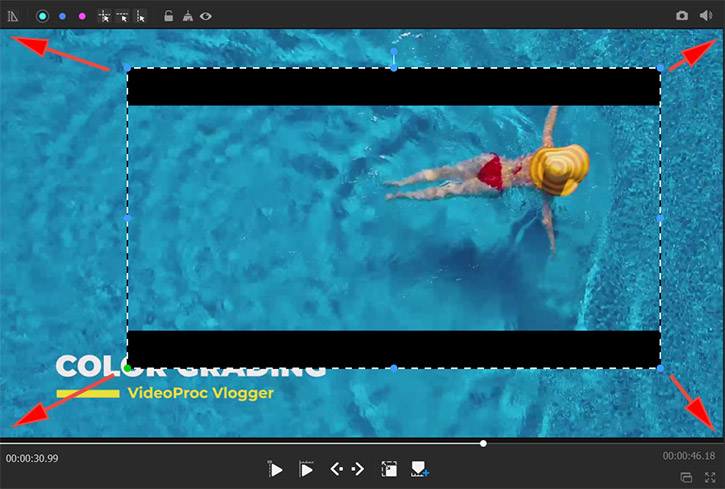
Step 4 Double click the overlay image in the Preview Window, and drag the edges of image and stretch to fit the full size of video.
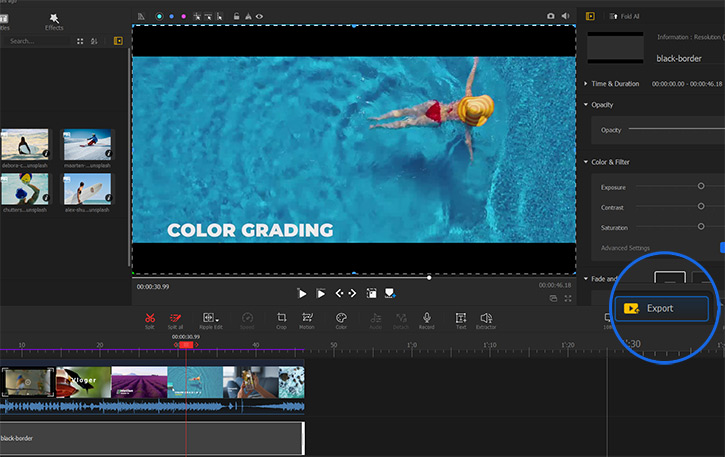
Step 5 Hit the Export button on the right to output the video. You’ll get the final video with black bars.
Related Guides
- > Get Rid Off Black Bars
- > Add Background Image to Video
- > Add Watermark to Video
- > Denoise Video Image
- > Reverse Play Video
For more guides of VideoProc Vlogger, please visit this page >
If you have any question, please email us or visit ![]()
![]()
![]()
Is this page helpful?
