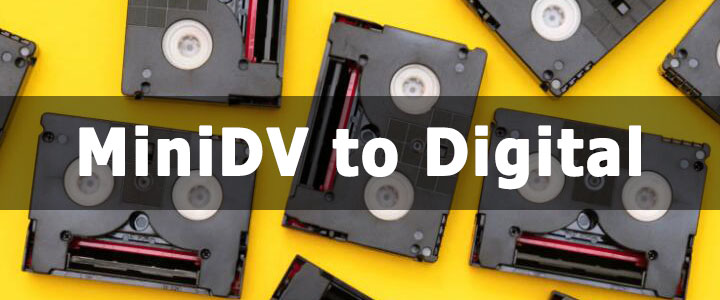
You might have a bunch of old MiniDV tapes sitting in some box that you haven't seen in years. MiniDV was the "it" format for home video in the late 1990s and early 2000s. Those tiny tapes contain cherished moments, but they aren't built to last. Magnetic tape can degrade over time. Heat, humidity, and just age can cause the magnetic particles to lose the data. Plus, finding a working camcorder or tape deck is getting harder every day. So, now is the time to digitize them.
Unlike VHS, MiniDV is actually a digital format, which is what the D stands for. Unlike analog formats, the data on MiniDV can be copied exactly without quality loss. This guide explains how to convert MiniDV to digital or transfer it to a computer, from what you need to how to do it properly, and when it makes sense to use a professional service.
Typical Supplies Needed
Converting MiniDV tapes yourself can be rewarding and cost-effective if you're willing to invest some effort. Essentially, the process involves playing the tape from a camcorder and capturing the video onto a computer in real time.
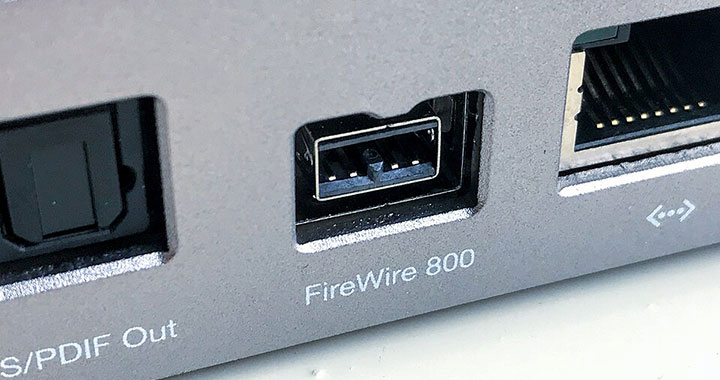
The optimal way to do this is via a FireWire connection, which transfers the digital data directly with no quality loss. It preserves ancillary data like timestamp, etc. Here are a few basic items you'll need at least:
- A working MiniDV camcorder or tape deck: You need something to play the tapes. Ideally, this is the original camera you recorded them on, but any working MiniDV camcorder will do.
- A FireWire (IEEE 1394) cable: Most camcorders use a 4-pin DV-out port; computers may have 6-pin or 9-pin FireWire ports, so choose the correct 4-to-6 or 4-to-9 cable.
- Capture software: Free programs like WinDV or HDVSplit on Windows, older versions of iMovie or QuickTime Player on Mac.
- A Computer to receive FireWire: This can be a Windows PC or a Mac. Make sure you have enough storage space (~13 GB per hour of footage).
The way to convert MiniDV to digital depends largely on what kind of computer you have. Not all computers have FireWire ports. Older PCs and Macs often have built-in FireWire, but modern ones may not, so you may need additional hardware, which we'll discuss later.
How to Convert MiniDV to Digital
On Older Computers with FireWire on Board
If you have an older desktop tower from around 2010 or earlier or an older MacBook, you are in luck. Most older Windows desktops and some laptops include FireWire ports, and Apple has a long list of FireWire-capable Macs on board. They can serve as a dedicated capture station to easily transfer the DV data bit-for-bit with no quality loss.
Here's how to transfer MiniDV to your computer.
- Connect the camcorder to the computer using an appropriate FireWire cable.
- Power on the camcorder and set it to VCR or Playback mode.
- Open the capture program, and the software should detect the camcorder as a DV device.
- Hit "Capture" or "Record" on the software when you see the preview of your video, then press "Play" on the camcorder.
- Wait to stop the recording and the camcorder when the tape ends. The result is a digital video file, usually DV AVI or QuickTime MOV.
On Desktop Computers Without FireWire
For computers lacking FireWire, you have a few options to add it:
- Thunderbolt-to-FireWire Adapter
- Add-in FireWire Card
A Thunderbolt-to-FireWire adapter works on devices with Thunderbolt but no built-in FireWire. However, these adapters can be hard to find and pricey, as Apple has discontinued them in recent years.
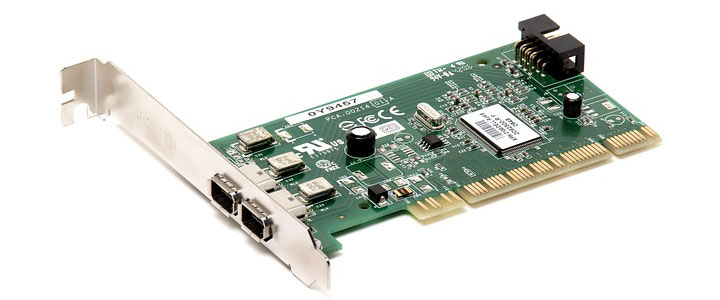
If you are on a desktop PC, the good news is almost any of them with available expansion slots will let you install a FireWire card easily. They are cheap and readily available. You just need to determine whether you need a PCI or PCIe card, and choose one that has the appropriate port for your cable.
On Modern Laptops
Most new laptops do not have FireWire ports. This makes things a bit trickier if you don't want to pay for an expensive adapter, but here's a workaround.
Simply put, you place a desktop FireWire PCIe card inside a PCIe-to-M.2 adapter, and then into a USB4/Thunderbolt NVMe enclosure. This assembly plugs into a laptop's USB-C or Thunderbolt port and exposes a FireWire port. Then you can convert MiniDV to digital using the same steps as on an older computer.
MiniDV to Digital Converter Service
Services make sense when you have only a few tapes or lack the time, whereas do-it-yourself becomes economical for large collections. If you'd rather avoid dealing with old hardware and real-time capture, professional digitization services will handle everything for a fee.
Companies like Legacybox, Kodak Digitizing, or iMemories accept MiniDV tapes by mail and return digital files via download links, on USB drives, or on DVDs. A good service uses high-quality DV decks, cleans tape heads and tackles issues like tracking problems or color correction. Some even trim out blank sections or perform minor enhancements. Prices typically range from around US $20 per tape. Bulk packages can reduce the per-tape cost. Turnaround time is usually two to four weeks, since you must ship your tapes in and wait for processing.
The main advantages are convenience and peace of mind. You avoid hunting for old equipment, capturing the tapes yourself or troubleshooting drivers. Downsides include the cost, the small risk of losing tapes in transit, and less control over the output. Services often deliver compressed MP4 files at 640x480 or 720x480 resolution. If you want raw DV files, ask whether the service offers that option.
What Happens After Capture
Digitizing your tapes is just the first step. To make your videos more usable, consider the following practices.
Transcode to a Modern Format
Raw DV files take about 13 GB per hour, usually DV AVI or QuickTime MOV. They are great as digital backups of your MiniDV tapes, but may not be ideal for sharing to social media or playing on all your devices. For maximum compatibility, consider converting them to H.264 or HEVC MP4 video format using a video converter. These tools can also de-interlace the footage as you need for smoother playback.
Enhance and Restore Video Quality
If your tapes look soft, noisy or dated on today's monitors, you can also consider editing and improving your digitized videos as a worthwhile additional step. Modern AI video restoration software can reduce blur and noise, increase the resolution of old footage, refine colors, and even more. Some models are designed to make archive footage sharper and more vibrant.

VideoProc Converter AI - Post-Digitization Converter & Enhancer
- All-in-one: converter, compressor, AI enhancer tools, DVD backup, etc.
- Convert 420+ codecs and formats without quality loss
- Compress large videos by up to 90% using a simple percentage slider
- Upscale and enhance old videos for less noise and better detail with AI
- Back up DVDs to 1:1 quality or convert to formats like MP4, AVI, etc.

Backup and Archive
Store the original DV files and compressed versions in multiple places. For example, an external hard drive and a cloud storage service are good starting points. Keep the tapes as an additional backup as they last a long time when stored properly.
Conclusion
That's all about MiniDV to digital. MiniDV tapes hold priceless memories, yet the tapes and the equipment to play them are aging fast. Digitizing them now safeguards your footage for future generations and makes sharing and editing simple. The highest-quality method is capturing over FireWire on a computer equipped with a FireWire port or adapter, but analog capture with a USB dongle is a viable fallback. If you prefer a hands-off approach, professional services will convert tapes for you but at a per-tape cost.
After the digitization, remember to back up the files in multiple locations. You can also choose to edit or enhance your videos. VideoProc Converter AI is a cost-effective all-in-one video converter and AI enhancer. With a small investment of time or money, your MiniDV memories can be enjoyed on today's devices without fear of degradation or obsolescence.


