
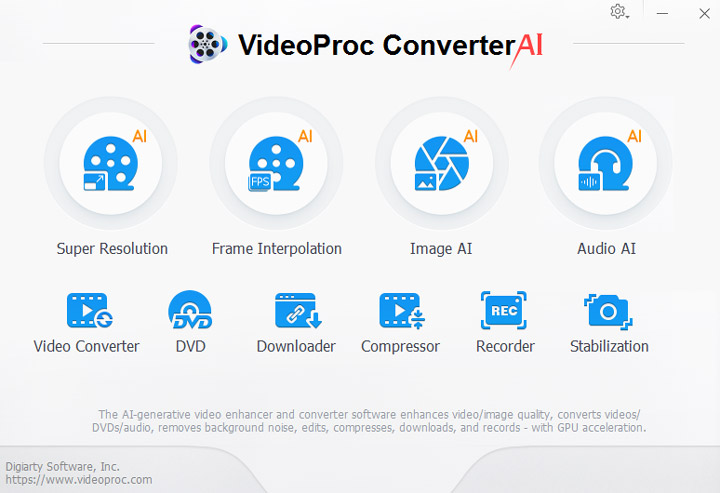
Big Update Alert: VideoProc Converter AI is Upgraded
VideoProc Converter AI has been updated with key improvements for AI video enhancement. The Windows version now offers 40%-80% faster in Super Resolution. Mac users can now utilize AI video and image features.
A user from the GoPro community complained the GoPro HERO10 footage looks grainy and noisy, even shooting outdoors in sunny weather. Similar grumbles of 'why does my GoPro footage look grainy' can be heard here and there; another GoPro user claimed he just bought a GoPro HERO11 the other day, but when he imported the footage filmed using GoPro Quick to his PC, the footage came out extremely grainy.
Though GoPro is counted as one of the best in the action camera industry and favored by most extreme sports enthusiasts, the complaints about GoPro HERO11/10/9/8/7 footage looking grainy have never ceased. Thus in this post, we will be taking you on a full journey, showing you how to troubleshoot the GoPro grainy video issue.
Why My GoPro Footage Looks Grainy
Your GoPro footage shot in HERO11/10/9/8 is likely to look perfect on the camera, but grainy on PC. Also, it might be 4K UHD in Quik but pixelated on YouTube. Well, the reasons vary from high ISO to low light to bad SD cards. For example, a random ISO setting would give a grainy GoPro video when shooting indoors and at night, and some other settings that could lead to a Grainy GoPro Video include:
- GoPro grainy video issue often happens when shooting in low light condition, for example, indoor and at night.
- Those GoPro recording settings would raise the possibility of video grain and noise: high ISO, fast shutter speed, and high frame rate.
- Using an unapproved SD card might pixelate an HD footage.
- Uploading a large 4K GoPro video to YouTube with wrong compression settings would drastically degrade your video, making it grainy, blurry or pixelated.
No worry, there are 13 ways you can use to reduce and avoid grainy footage.
Note: if the grainy video isn't the only issue you are struggling with while using GoPro HERO 11/10/9/8, you need to confirm what the problem is and use other methods to improve video quality.
How to Solve GoPro Grainy Video Issue
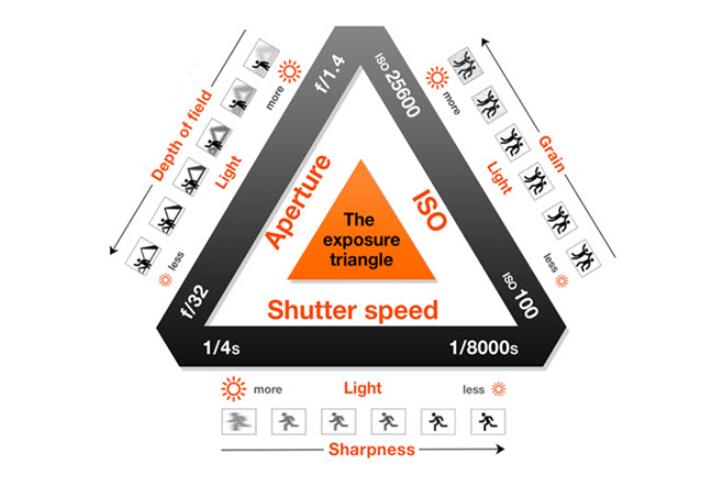
GoPro footage grainy problem is mostly caused by improper settings with low light shooting. To solve the video noise issue once and for all, you actually need some tips of the best GoPro settings for shooting at night. True, light level affects video quality a lot. No wonder that people want to make their night shots brighter. But the dilemma is there is always a compromise between noise and low light. And the light compensation can be done through the following three ways:
- Increase the aperture size (GoPro X)
- Decrease the shutter speed (GoPro √)
- Select high ISO (GoPro √)
But be careful with those settings as they might be the very reasons why your GoPro footage looks grainy. Thus, how to shoot a video with GoPro at night without grain or noise exactly? And is there any way to fix grainy footage in the post-editing process? Read through to learn the suggestions!
1. Before Shooting - Film in Well-Lit Areas to Avoid GoPro Grainy Video
#1. Use Officially Recommended SD Cards: The type and quality of your SD card significantly impact video recording. Always use officially approved, high-speed SD cards (e.g., Class 10, U3/V30 rated). Inferior or slow cards can lead to dropped frames, corrupted data, and grainy or glitchy footage. Be aware that some specific cards, like certain SanDisk Ultra models, have been known to cause issues with GoPros.
#2. Clean Your Lens: This is a simple but often overlooked step. Always ensure your GoPro's lens is spotlessly clean and smudge-free before every shoot. Fingerprints, dust, or dirt can cause soft, blurry, or seemingly "grainy" spots in your footage.
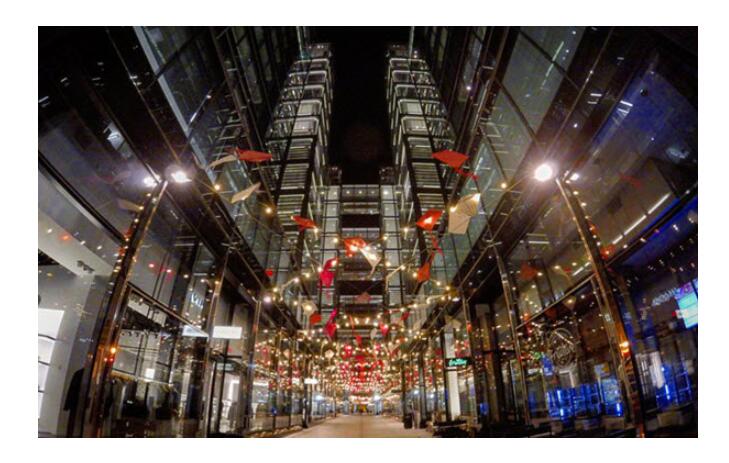
#3. Prepare light condition: Many shutterbugs get stumped on how to shoot in low light without grain, or rather, how to set a perfect exposure. You should know that light is the linchpin in getting proper exposure. If you have to film at night, there has to be enough light in the scene, or the video will either be too dark or too grainy. It doesn't need to be as bright as day. Just find some kind of light source. Below is an example of GoPro night shots without grain.
You can:
- Capitalize on streetlights
- Try different locations and angles
- Or add more light manually
2. While Shooting - Use Best GoPro Settings to Avoid GoPro Grainy Footage
Capturing clean, high-quality GoPro footage begins even before you hit record. Beyond ensuring good lighting, adjusting your camera's settings correctly is crucial for minimizing grain, especially in challenging low-light environments.
#1. Master Your GoPro's Manual Settings (Protune)
For ultimate control over your footage and to combat grain effectively, dive into your GoPro's Protune settings.
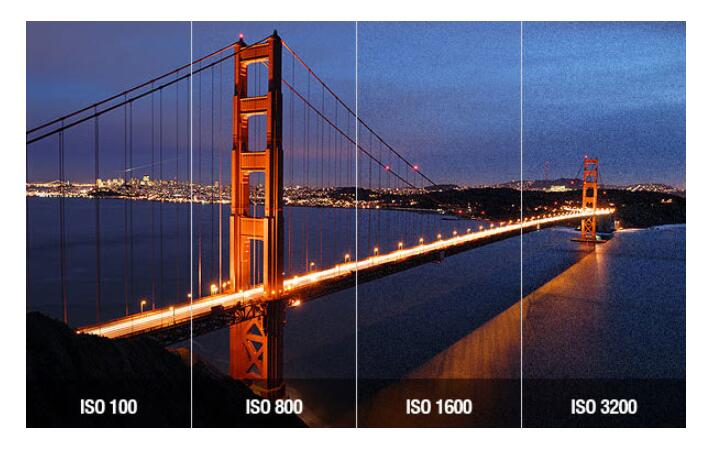
1. ISO Sensitivity: This setting controls how sensitive your camera's sensor is to light.
Keep ISO Low: While a higher ISO brightens a dark scene, it introduces digital noise, leading to grainy footage. For the best quality, aim to set your ISO Max Limit to 400 or 800. Even in dim light, rarely go above ISO 1600. Remember: the lower the ISO, the cleaner your image, even if the initial preview appears darker.
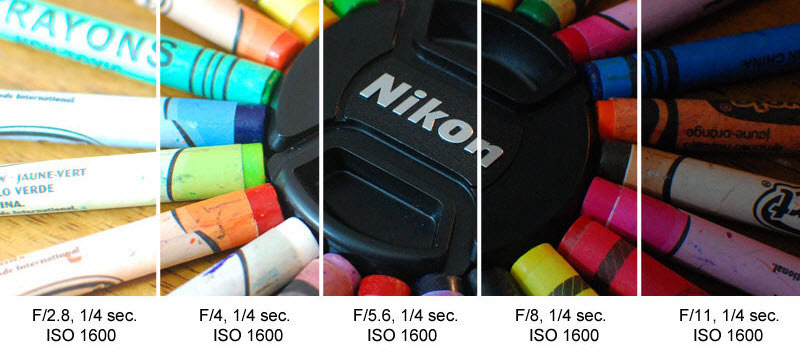
2. Shutter Speed: This determines how long the camera's sensor is exposed to light.
- The 180-Degree Rule: For natural-looking motion blur and cinematic fluidity, set your shutter speed to approximately twice your frame rate (e.g., 1/60th of a second for 30fps footage). This is ideal for most scenarios.
- Low Light & Freezing Action: In very dark conditions, a slower shutter speed (e.g., 1/30s or 1/50s) allows more light to hit the sensor, brightening the video without relying on high ISO. However, this increases the chance of motion blur, so using a tripod is highly recommended. Conversely, for freezing fast-moving action, a faster shutter speed (e.g., 1/120, 1/240) is necessary, but be aware this reduces light intake, potentially leading to darker, grainier footage in insufficient light.
3. Sharpness: GoPros often apply aggressive in-camera sharpening, which can unfortunately introduce artificial "grain" or halos, making footage look less professional. Always set your in-camera sharpness to "Low" or "Medium". You'll have more control and achieve better results by adding sharpness in post-production if needed.
4. EV (Exposure Value) Compensation: GoPros can sometimes tend to overexpose scenes, especially in bright conditions. To encourage the camera to use a lower ISO and/or a faster shutter speed, consider setting a negative EV compensation (e.g., -0.5 or -1.0). This tells the camera to slightly underexpose, often resulting in cleaner images.
5. Bitrate: This defines the amount of data your GoPro records per second. A higher bitrate means less compression, preserving more image detail and leading to cleaner, less grainy footage. Always set your camera's bitrate option to "High".
6. HEVC (H.265) Codec: This efficient video compression standard offers better quality at smaller file sizes compared to H.264. For 4K footage, HEVC is typically enabled automatically. However, for 1080p recordings, you may need to manually configure your GoPro to use HEVC for improved compression and image quality.
#2. Frame Rate Considerations
Choosing the right frame rate impacts not only the look of your video but also how your camera handles light.
- Impact on Light Intake: A higher frame rate means the sensor is exposed to light for a shorter duration per frame. This can lead to less light intake and potentially more grain in low-light situations.
- Optimal Low Light Frame Rate: For better low-light performance, consider shooting at 30fps (frames per second) or even 24fps if available. While 60fps offers smoother slow-motion capabilities, it often results in darker, grainier footage in dim environments. For instance, 1080p at 60fps will generally appear much clearer in low light than 4K at 60fps due to the different processing requirements.
- "Auto Low Light" Mode: Your GoPro might have an "Auto Low Light" mode. When enabled, if your original setting is 60fps, it can intelligently adjust the frame rate down to 30fps in low-light conditions to brighten the footage. Note that this often involves duplicating frames, so you'll still have 60 frames, but only 30 unique ones.
#3. Leverage Advanced Firmware (GoPro Labs)
For users comfortable with experimental features and advanced workflows, GoPro Labs firmware offers an unparalleled level of control. This can include the ability to disable in-camera noise reduction (NR01=x). By turning off the camera's built-in noise processing, you get raw footage with all its original noise, allowing you to apply more sophisticated and less destructive noise reduction techniques in professional post-production software. This is a powerful option for maximizing image quality.

3. After Shooting - Use Video Editors to Reduce GoPro Grainy Footage
If you have chosen wrong GoPro settings and got a grainy, some editor software can give you a leg up. To reduce grain and noise in GoPro video, Adobe Premier Pro, Adobe After Effect, and VideoProc Converter AI are recommended most.
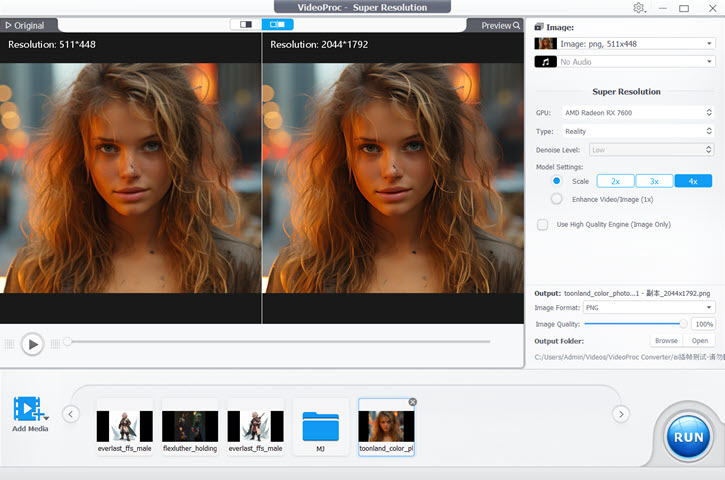
#1. How to reduce grain in GoPro video with VideoProc Converter AI
A feature in video editing tools and software called Super Resolution is made to improve the resolution and general quality of a video. It is especially helpful when you wish to upscale lower-quality movies to a higher resolution while preserving or enhancing their visual clarity.
In VideoProc Converter AI, there is a Super Resolution through AI-based upscaling and restoration, excelling at AI denoising to effectively fix GoPro or other grainy videos and improve the overall quality of videos and images. It has several well-trained AI models in the Super Resolution module, such as Real Smooth and Gen Detail to denoise, deblur, upscale, and enhance. By increasing the pixels and scaling them up by 200%, 300%, or 400% to get up to 4K resolution, you can noticeably improve the quality of low-resolution footage. It means that you can clear up aged, loud, grainy, and compressed videos.
Step 1. Download and install VideoProc Converter AI on your computer.

Step 2. Choose the Super Resolution feature from the main UI.
Step 3. Choose 2X, 3X or 4X upscaling, depending on your specific needs.
#2. How to reduce grain in GoPro video with Adobe Premiere Pro
Adobe Premiere Pro absolutely is an industrial standard video editing software. Even though it is a bit hard for beginners to understand, most of the video noise reduction guides you can find online are telling about how to reduce grain with Premiere. But if you are trying to fix shaky or blurry video, VideoProc Converter AI should be an easier alternative of Premiere for beginners. So how does Premiere Pro work with video noise? It simply blurs together the selected pixels in your frames, as a result of which individual specks of grain look less obvious.
Step 1. Download and install Premiere Pro from Creative Cloud on your computer. It offers a 7-day free trial for all newcomers.
Step 2. Import your grainy GoPro footage into Adobe Pr and add it to the timeline for video.
Step 3. Move to the Effects Panel and find 'Median' in 'Noise and Grain' under 'Video Effects'.
Step 4. Drag it onto your grainy footage and then go back to the Effects Control Panel.
Step 5. Change the radius value to make colors blend and select the mask tool. Pick a specific area of the video you want to reduce grain. If there are several areas that need to be cleaned up, apply the mask several times.
Step 6. Set the feather value and adjust the Radius based on your need. Grain should be reduced after that, although it won't be removed.
#3. Reduce GoPro video grain in Adobe Premiere Pro with plugins
Instead of grappling with how to reduce grain in Premiere Pro by yourselves, an easier way is to use plugins. Most plugins have versions for different video editors. For example, Neat Video is a plugin specifically designed for dealing with grainy videos. It can be used in Premier Pro, After Effects, Final Cut Pro, Vegas, etc.
Just drag it into the timeline and then find 'Reduce noise' under 'Video Effects' in the Effect Controls panel. There should be an Auto Profile, which picks up the grainy area and analyze the noise level. Apply the effect and noise will be reduced.

#4. How to reduce grain in GoPro video with Adobe After Effects
Step 1. Search 'Remove Grain' in the Effects & Presets panel, apply it to the video and you would see a rectangle on the footage, which can be dragged around to show you the noise reduction effect.
Step 2. Adjust the settings like Noise Reduction, the number of Passes and the Channel Mode. And you will get a comparatively clear footage. Surely there are advanced settings.


