
How to sharpen a video in Premiere Pro? Sharpening a video is an essential step if you want a punchier and more vibrant look in your footage. Though it cannot utterly fix out-of-focus video, it's capable to make your soft-focus videos crispy to the eye, bring out more details of a creamy footage and visually lit the image.
Smart phone videographers are left with little choice but to rely on post-processing, and for DLSR enthusiasts, though "in-camera sharpening" is an option, it can produce unwanted noise, that's where post-editing comes to help. This tutorial focuses on how to sharpen a video in Premiere Pro and VideoProc Converter AI for pros and novices.
How to Sharpen a Video in Premiere Pro with Unsharp Mask
There is no such a thing as 1-click sharpen if you are going to use USM (Unsharp Mask) in Premiere. There are three sliders in Unsharp Mark, namely, Amount, Radius, and Threshold for you to tweak in order to deliver an ideally sharpened video instead of ruin the footage with noisy image. But it's hard to find an optimal setting unless you know exactly what these three sliders are doing.
If you are in a rush and prefer an easier method to sharpen a video, you can jump to part 2 How to Sharpen a Video in the Easiest Way that makes you a video editing ninja in no time.
What is Amount, Radius, and Threshold
Unlike general Sharpen effect that works by making a contrast between color shades, Unsharp Mask Effect in Premiere can detect edges in images and increase in contrast along these edges, or smaller adjacent areas.
- Amount controls how intense you want to sharpen blurry video. By dialing it up, you will see that the light edge grows lighter and dark edge, darker. So this parameter generally means how much contrast you would like to add.
- Redius refers to "the distance from the edge at which pixels are adjusted for contrast" according to Adobe Help. You can understand it as how big you want the edge to be. If you set it to a larger number, it grows the edges in pixels.
- Threshold helps you to blur out high contrast edge and avoid sharpening noise.
You can experiment with these sliders, nudging the knob back and forward to get the best sharpened footage you want.
Tutorial: How to Sharpen a Video in Premiere Pro
Step 1: Create a Premiere project, import a video clip that need sharpening and drag it to the timeline.
Step 2: Click the file icon right beside the dust bin and select to create an adjustment layer. Drag newly created adjustment layer to the timeline on the track above your video clip.
- Note: the reason to create an adjustment layer is that, you can later add effects onto the adjustment layer instead of adding effects directly to your video clips. In that way, you can flexibly control any effect by moving around or deleting an adjustment layer that you don't want without affecting your source video.
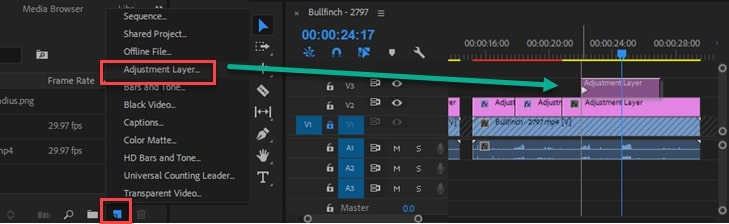
Step 3: Decide whether you want to sharpen the whole footage or an array of inconsecutive sections of the video clip. If you feel like the latter option, choose razor tool (shortcut "c" on keyboard) to cut adjustment layer into several clips or copy and paste adjustment layer to the sections you want.

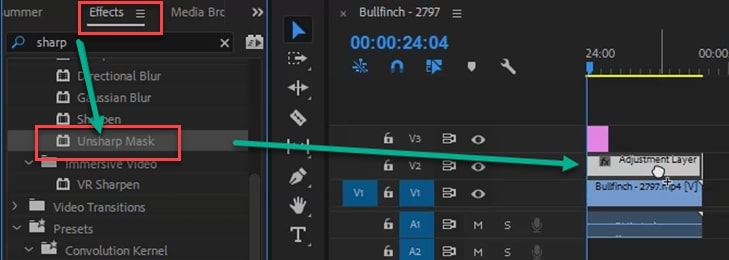
Step 4. Click at the adjustment layer, you will only find basic effect (fx) in "Effect controls" such as Motion and Opacity. Go search "sharp" in Effects and drag Unsharp Mask into corresponding adjustment layer. Now click at the adjustment layer and you will see the newly added effect "Unsharp Mask". Click to expand and you will see Amount, Radius and Threshold under this effect for you to manipulate.
Step 5. Adjust the value of each slider to sharpen your video and achieve more favorable effect. You can add a maximum amount and gradually slide it back to the point you feel just right on your footage. The parameter settings really depend on how crispy you want your footage to be and whether it brings out the detail you want.
- Tip 1. You can add mask (oval/rectangle/pen icon) to sharpen part of the image within the mask.
- Tip 2. You can click on "fx" to switch on and off that effect and see the difference of your footage with or without an effect. It is really handy for you to decide whether you want further editing.
- Tip 3. You don't have to sharp every video clip, instead, you can copy and paste effect-laden adjustment layer above other video frames if you are happy with the look it brought to your image.
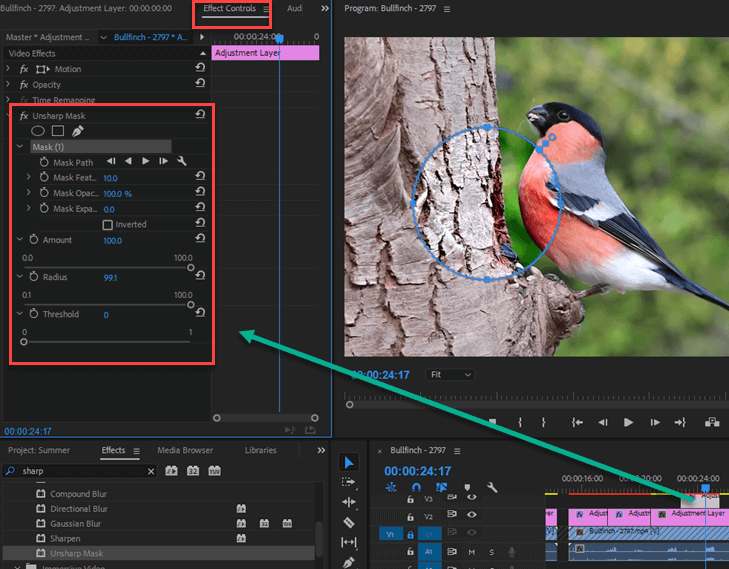
Step 6: Use Threshold to blur out unwanted high contrast and image noise. To better observing detailed part on the image, you might want to zoom in your footage in preview window by click the fit option and change it to larger scale, say, 150% or 200%. Then adjust the value of threshold to for a delicate editing.
Tip: you can widen the effect control panel to have a longer threshold bar to adjust the parameter more precisely.
How to Sharpen A Video in Premiere Companion - AI Enhancer
The built-in video sharpening algorithms in Premiere are non-AI powered. Premiere uses traditional video sharpening and unsharp mask. There is a chance that the Firefly AI algorithms will be integrated into Premiere, but it has not happened yet. You can use a dedicated AI-powered video sharpener to improve the video quality before or after using Premiere.
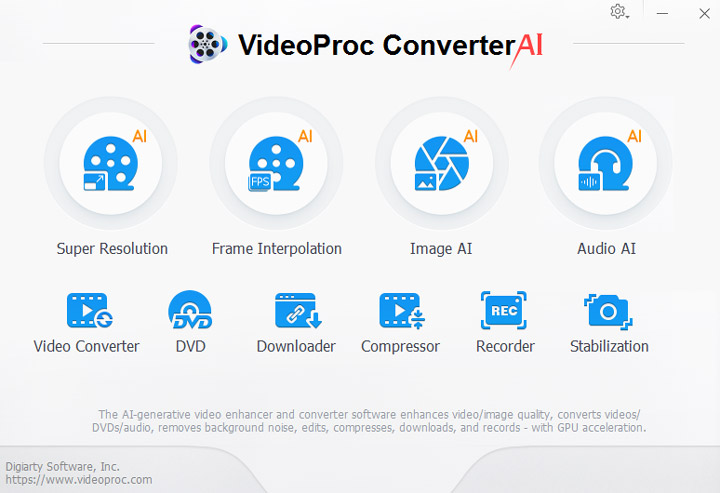
One of the best choices is VideoProc Converter AI, a leading AI-powered video processing software.
It is also a robust companion for Premiere and other video editors, because it has a toolkit to improve the productivity of video editing. There are rough cut features, converter, downloader, recorder, and DVD ripper built-in, making it a handy tool to for pre-cut and video processing.
Here is a quick demonstration of how to sharpen a video:
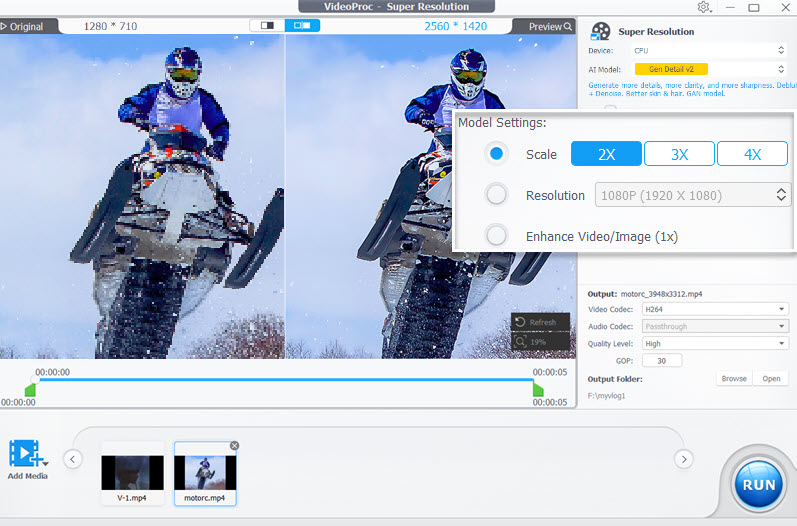
Step 1. Install VideoProc Converter AI and go to the Super Resolution module.

Step 2. Add the video into the working area, and choose a model type.
- For general upscaling, choose Real Smooth Model. This model enhances clarity and provides a smoother overall appearance. It makes your photos or videos look more polished and high-quality.
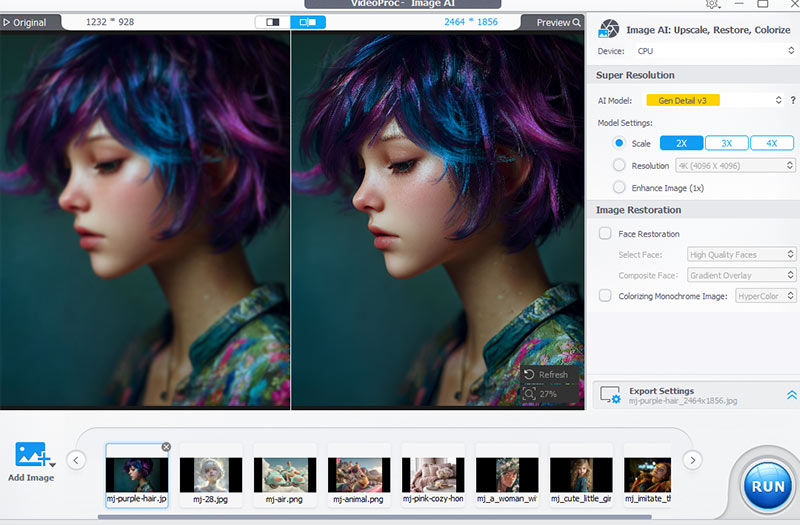
- For upscaling with details (improve skin, fabric, fur, hair, feathers, etc.), choose Gen Detail Model.
- For 2D, cartoon, and anime upscaling, use the dedicated Anime Model.
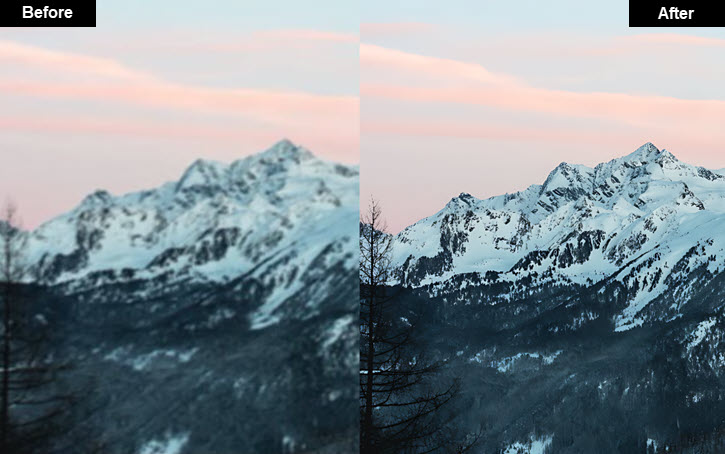
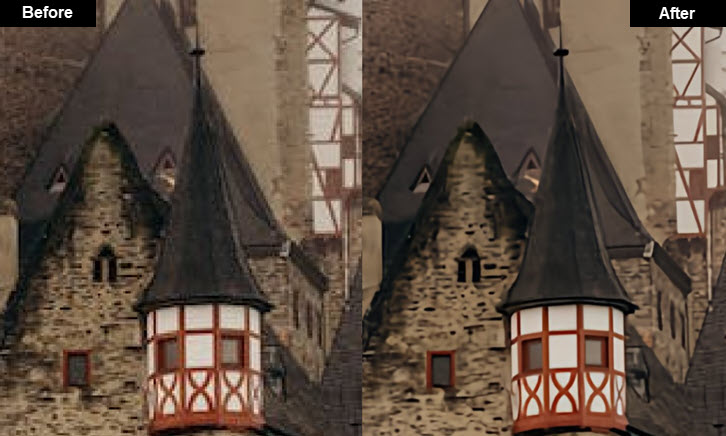
The models have been trained with auto-process to deblur+denoise+deCompression videos, the output videos and images will be sharp and clear. You can enjoy 1-click enhancement with auto AI inference.
Step 3. Hit the enhance video option. You can also upscale the video, as it will improve the clarity and sharpness of the video in higher resolutions.
You can compare the before and after effects in the preview window. The difference will be more amazing when you export the video and playback in full screen, such as 4K large display.
How to Sharpen a Video in Premiere Alternative Editor
If you are fed up with running Premiere Pro on a small screen and a slow computer, or you simply feel lazy today and want an easier way to quickly sharpen your footage, install this light-weight and easy-to-use video editor and follow steps below.
VideoProc Vlogger - Free Video Editor to Sharpen Your Video
- Free video editor with advanced features and low-spec PC friendly.
- Sharpen, edit, denoise, color grade videos, and use templates easily.
- Process footage from smart phones, DSLR, GoPro, 4K UHD HEVC.
- Fast render experience with full level Hardware Acceleration.
Before we get started, make sure you have clicked the download button above to free download and install VideoProc Vlogger for Windows or Mac.
Step 1. Import video into VideoProc Vlogger.
- Launch VideoProc Vlogger and click the create New Project button.
- Add video into the Media Library on the top left panel.
- Drag and drop the video into the timeline to start editing.
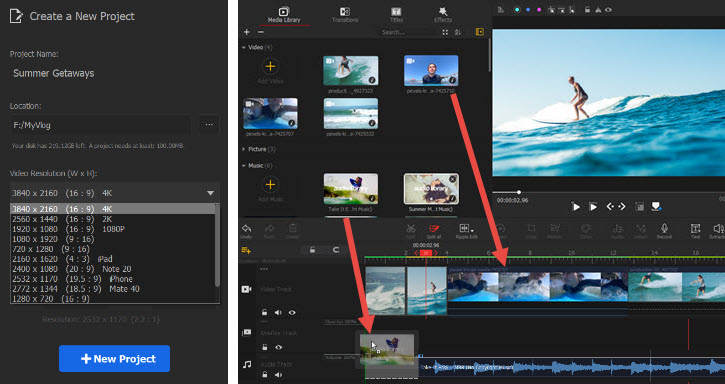
Note: You can check the original resolution and FPS of the video, and create the project accordingly. Alternatively, you can choose resolution and FPS that best fit your needs, for instance, 1920x1080 for YouTube, 4K for TV, etc.
Step 2. Sharpen the video.
- Click on the video clip to make sure it is selected, and hit the Color icon from toolbar.
- Enable Sharpen tool inside the Color Editor.
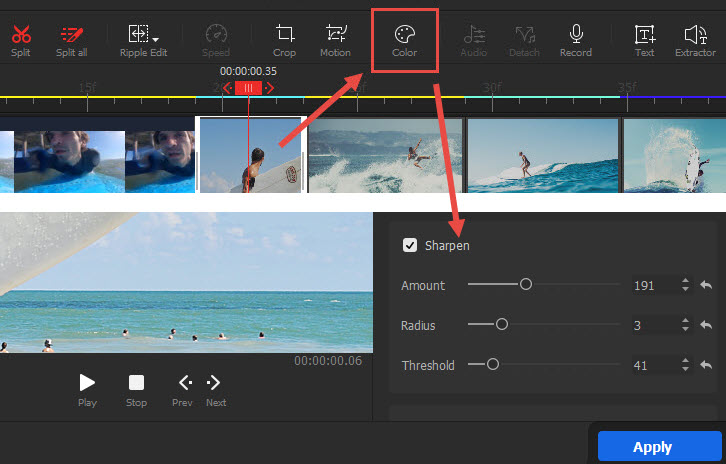
Step 3. Adjust the sharpen parameters.
There are three separate controls – the Amount, Radius and Threshold that work together to sharpen a video.
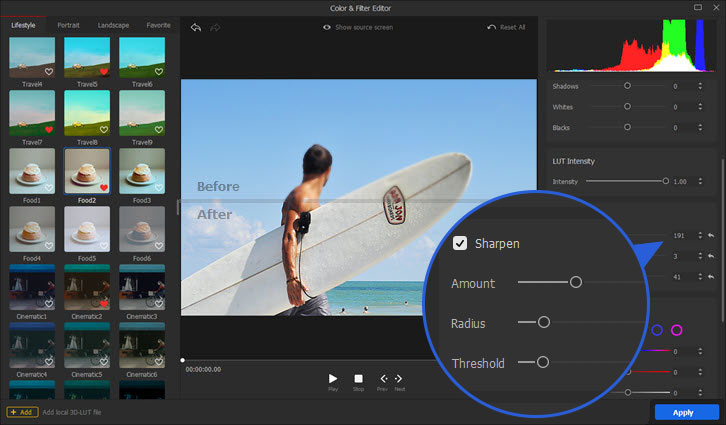
- Amount determines how intense you prefer the sharpen effects to be, or, in essence, it adjusts the degree of contrast by dialing the luminance level of lighter pixels and darker pixels.
- Editing Tips: If the amount is too high, the video image will look grainy. Since the lighter pixels become brighter, and darker pixels dimmer, it will result in an overly contrast effect.
- Radius determines the range of the edges to be influenced, or how large the rims of the wide should be.
- Editing Tips: A larger radius value mean a wider area of each edge will be affected. In that sense, if the radius is too high, you might see artifacts such as halos or glowing outlines near the edges.
- Threshold controls the starting point for pixels to be sharpened regarding the level of contrast. Higher threshold value entails that only highly contrasted areas should have undergone the sharpening process.
- Editing Tips: Low threshold values will sharpen more because more areas are included.

Step 4. Export the sharpened video.
Apply the sharpening effects, and click the Export Button.
- Beginners can leave all the settings as default in Export window and hit start.
- Power users can manage format, video and audio codec, bitrate (video quality), etc.
Click the buttons below to free download VideoProc Vlogger for Windows or for Mac:
Final Words:
Unsharp Mask in Adobe Premiere works really well if you want to simultaneously reducing noise and sharpening. Though it takes time to learn term-rich properties and requires a high-performance computer to deliver a tasteful video, it is worth your effort if you are going to display the final product onto a large screen where every detail matters.
If you want to sharpen a video quickly and effectively in one shot with AI-powered algorithms, use VideoProc Converter AI. If you are looking for a light-weight video editor with sharpening features and everything, use VideoProc Vlogger.


