
Summary: How to video record yourself presenting a PowerPoint? Check out the post and learn the best 4 ways!
Technology has revolutionized formal communication, and PowerPoint stands as a prime example, as it shapes the way ideas are exchanged and narratives unfold. However, there are instances where the demand emerges to record oneself giving a PowerPoint presentation to foster a sense of connection even in asynchronous settings. Then how to video record yourself presenting a PowerPoint? Below, we have collected the best 4 methods that you can leverage to video record yourself presenting a PowerPoint. Read on!
Best Way to Video Record Yourself Presenting a PowerPoint
Designed as a free PowerPoint recorder, VideoProc Converter AI allows you to video record yourself presenting a PowerPoint with the best image quality. It offers the most flexible way to capture the entire or partial PowerPoint presentation and record video from your webcam. Besides, packed with a basket of utility tools, you can crop, draw, and highlight any content while giving a PowerPoint presentation, and even add outlines, texts, arrows, voiceover, images, and more.

VideoProc Converter AI – Record Yourself Presenting a PowerPoint with Ease
- Record yourself presenting a PowerPoint with system and external sound.
- Capture full or selected 4K/HD presentation slides in multiple recording modes.
- Support picture-in-picture or green screen mode.
- Record, edit, compress, convert, and trim screen recording in one-stop.
Excellent ![]()
![]()

Step 1. Free download VideoProc Converter AI and launch it on your Windows/Mac.
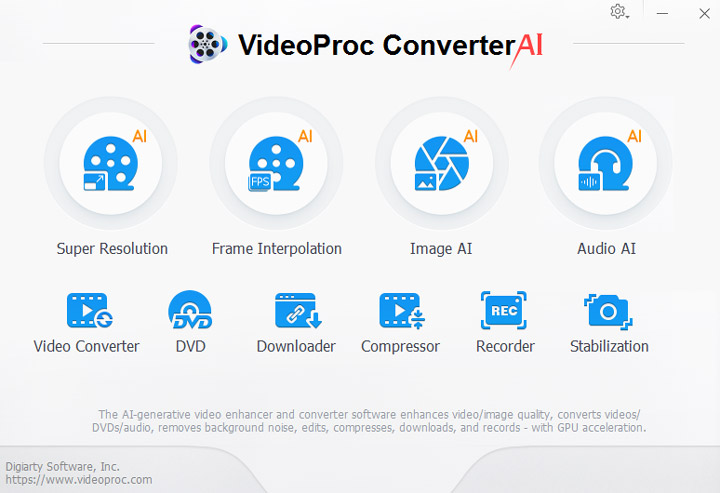
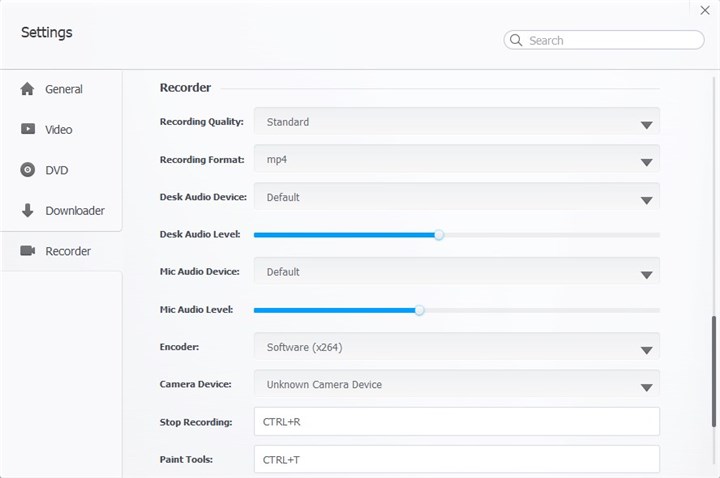
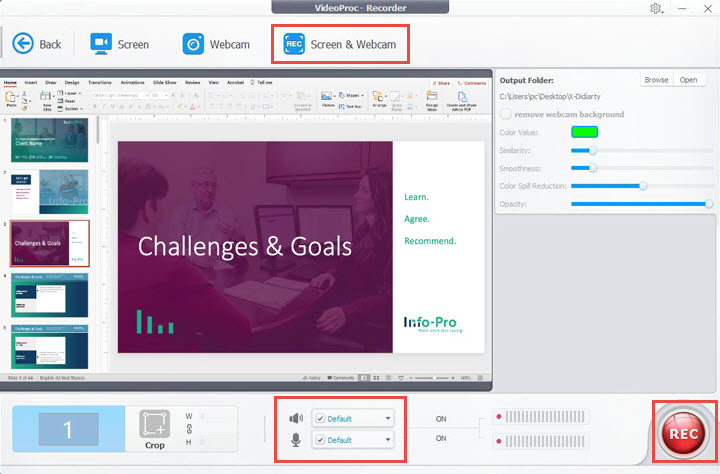
Step 2. Tap Recorder on the home page, and select the Screen & Webcam recording mode. Click on the Wrench icon at the top-right corner to adjust the video quality, format, output path, and other settings.
Step 3. Go to the PowerPoint presentation you wish to record yourself in. You can use the Crop tool to select to record a part of your screen if needed. Enable audio devices so the recorder can capture both the microphone and system audio while recording yourself on PowerPoint.
Step 4. Ensure that your webcam is enabled and correctly positioned, and when you are ready to give the PowerPoint presentation, click on the Rec button to start recording.
For added convenience, you can use the shortcut 'Ctrl+Alt+Shift+T' to activate the painting tools during recording on PowerPoint.
Step 5. Once finished, click the Stop button to stop recording, and the PowerPoint presentation video clips will be stored in the location previously configured.
Video Record Yourself Presenting a PowerPoint in the Default Way
Microsoft 365 comes with a recording feature that allows you to record yourself presenting a PowerPoint without downloading any third-party recording tools. With this tool, you can effortlessly record yourself presenting with audio, and guide your audience through the content. Follow the steps below to record yourself presenting a PowerPoint using the Windows built-in camera.
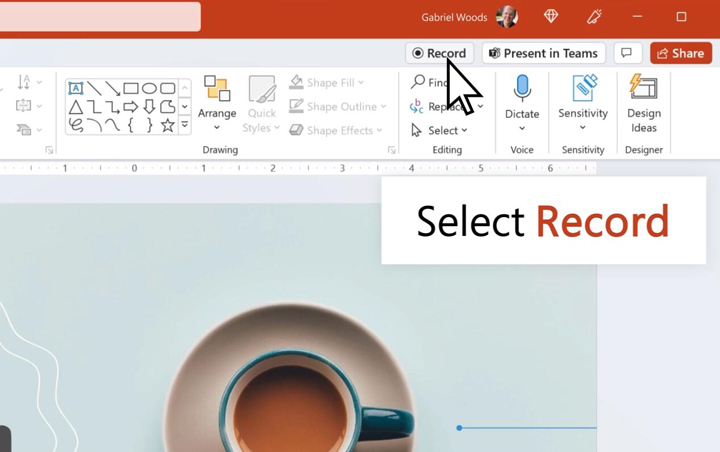
Step 1. Open the PowerPoint slide you wish to record. Go to the upper right of the window, and select Record. This will bring you to the record mode.
Step 2. On the top bar, click the camera icon to enable the camera. Tap the three-dot button to change the source Microphone and Camera. And at the bottom right, select camera mode to blur the background if needed.
Step 3. When you are ready, select the red round Rec button to start recording yourself presenting a PowerPoint after the countdown.
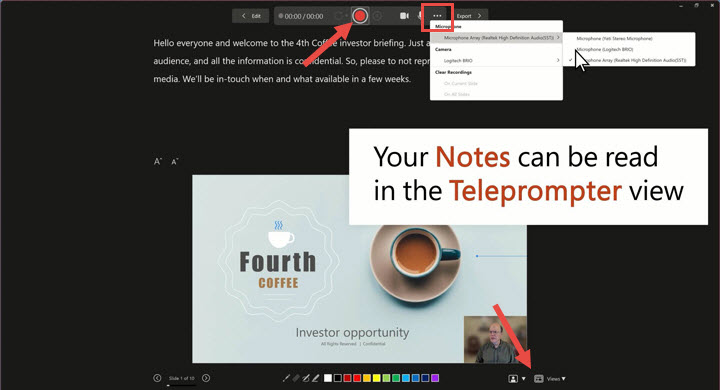
Note: Note that narration isn't recorded during slide transitions. Therefore, pause your speaking when transitioning between slides, and then resume once the transition is complete.
Step 4. Once finished, click the Rec button to stop recording, and select Export to export the PowerPoint presentation clip.
Video Record Yourself Presenting a PowerPoint Using OBS
As an alternative to free recording yourself presenting a PowerPoint, OBS features remarkable flexibility that allows you to easily capture the entire or specific PowerPoint slides while giving a presentation. It seamlessly integrates webcam feeds, overlays, images, and text, providing a comprehensive toolkit for dynamic PowerPoint recording. Moreover, with an array of customization options, you to fine-tune settings such as bitrates, frame rates, and other parameters to ensure the perfect recording result. Free download OBS and follow the steps below to record yourself presenting a PowerPoint using OBS.
Step 1. Go to the PowerPoint. Launch the software, right click on the screen, and select Add > Display Capture.
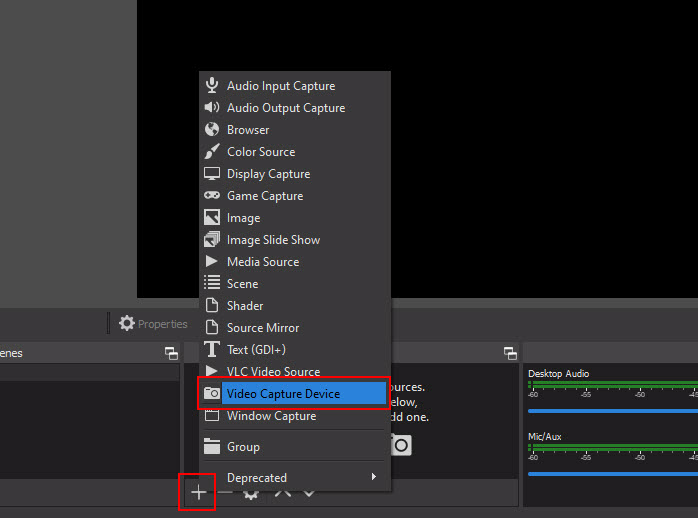
Step 2. To record yourself on PowerPoint, right-click on the recording interface, and select Add > Video Capture Device > OK. You shall now see yourself on the screen. You can adjust the size through zooming in or out.
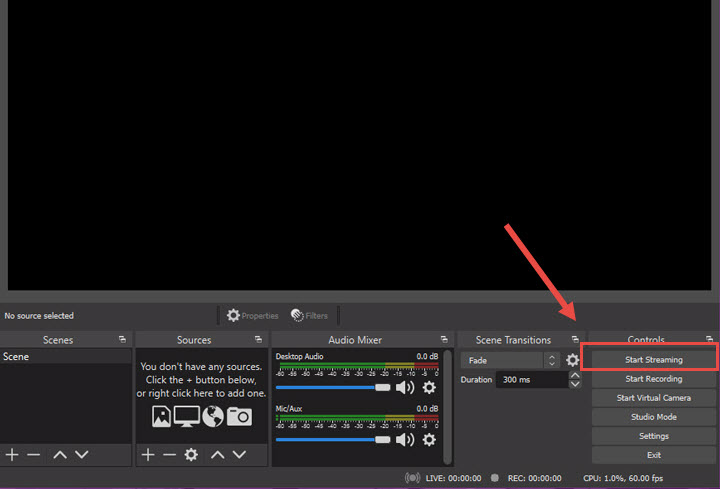
Step 3. Configure other recording settings if needed. Once you are prepared to give a PowerPoint presentation, click on the Controls panel > Start Recording to record yourself on PowerPoint.
Step 4. Once finished, click on Stop Recording, and the PowerPoint presentation recording clip will be saved to the folder you specified earlier.
Video Record Yourself Presenting a PowerPoint Using Online Tool
For those who are reluctant to download and use any third-party software to record themselves on PowerPoint, on top of the default camera suggested in the second part, an additional solution is the online recording tool.
As a Chrome screen recorder extension, Loom allows you to easily record engaging PowerPoint presentations online without installing any third-party software. With the tool, you can effortlessly capture your PowerPoint slides along with your HD webcam, microphone, and system audio. Now add the Loom extension to your browser, and follow the steps below to record yourself giving a PowerPoint presentation.

Step 1. Run Loom in your browser.
Step 2. Choose 'Screen and Camera' to record yourself presenting a PowerPoint.
Step 3. Locate and find the PowerPoint slides you wish to record. Once you are ready, click Start Recording to start the process.


