Wonder how to record video on Mac? Recording a video on Mac is a common task. You may need to lecture your students at home, fix Internet or printer problems remotely with your teammates or IT, create a how-to tutorial for publishing on YouTube, send an online video opened with Safari to your friends, watch a Zoom meeting after it's over, re-watch a live streaming video, or you just need to retrace a voice call. 3 times out of 5 what you need is to record videos on Mac. So how do you record video on Mac? Here in this post, I'm going to walk you through 6 different ways to go about this.

#1. How to Record Video on Mac With VideoProc Converter AI
What Can You Actually Do With VideoProc Converter AI Screen Capture?
- Record screen in 4K/HD at 60fps/30fps on Mac.
- Record the entire or partial of your screen flexibly.
- Record videos with the Mac built-in or external camera and microphone.
- Record Zoom meetings, WhatsApp call, or other video/voice calls.
- Edit the recording for sharing on YouTube, Facebook, and Vimeo…

Step 1. Enable the Recorder Feature.
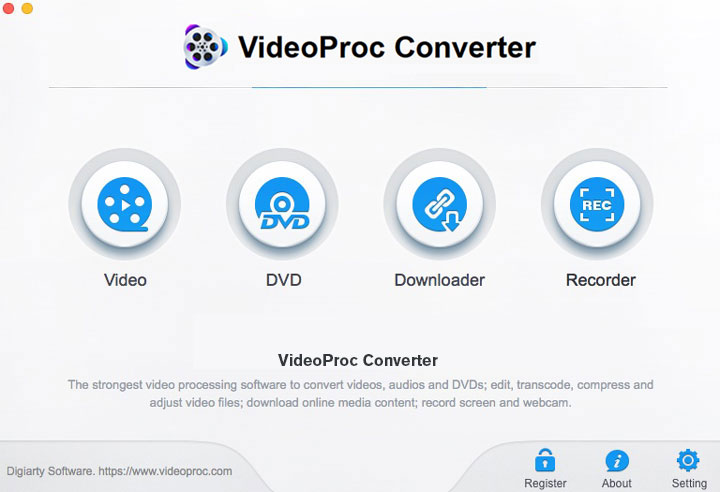
Launch VideoProc Converter AI on your Mac and hit Recorder to enter the panel for screen recording. Click the Browse option on the right of Output Folder to set up a folder for saving the recorded video on Mac.
Step 2. Choose What You Want to Record.
Come over to the top of the interface, you can press Desktop to record your Mac screen (YouTube/live streaming/ Skype video and more); Press Camera > Desktop & Camera to record your camera and screen simultaneously; Press Camera > Camera to record your camera only; Choose iPhone to record the screen of the connected iPhone device.
Step 3. Define the Recoding Range.
By default, VideoProc Converter AI will record the entire Mac screen. Suppose you just want to record a part of the screen. Navigate to the bottom of the recording window, choose Crop. Now you click and drag on your screen to define the area that you'd like to record.
- To record sound, press the arrow icon next to Microphone to find all the available microphones. Hit the needed one.
- To record the voice from the computer, enable the System Sounds.
Step 4. Start Recording.

Hit REC to record videos on Mac. Press the red button on the top right corner and choose Stop Recordings to finish the video recording. You can check up the Zoom recording on the right of the VideoProc Converter AI recorder panel.
Your Go-To Option to Record Video on Mac - VideoProc Converter AI
VideoProc Converter AI can record livestream videos, video calls, online videos, computer screens, and everything else displayed on your Mac machine. Thanks to the support of HD video recording, you are able to capture videos and microphones without taking compromise quality. The editing options of VideoProc Converter AI are plentiful, so that you can cut, trim, split, crop, and apply a few other edits to polish your recordings.
Video tutorial: how to record a video on Mac and Windows
#2. How to Record Video on Mac With QuickTime
What Can You Actually Do With QuickTime Player?
- Record you or your screen, or both.
Step 1. Open QuickTime Player on the Mac.
Step 2. Change the Video Recording Devices and Preferences.
If you want to record your screen,
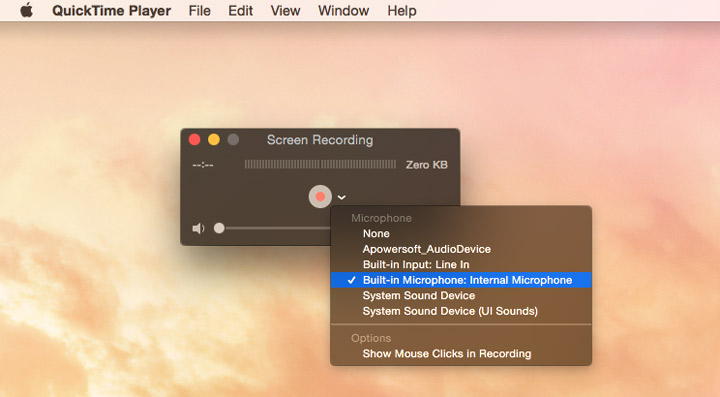
- Hit File > New Screen Recording to open up a brand new screen-recording window. Click on the arrow next to the shown up red dot to choose the microphone used for recording the videos on Mac.
- Press Record. You can click to record the full screen or drag to choose the specific zone that you need to record.
If you want to record your face and screen,
- Tap on View and hit New Movie Recording to enter the movie screen window. Place this window on any corner of your Mac screen. You can also drag one of its corners to change the box size.
- Next, you hit File > New Screen Recording from the menu bar to open up the screen recording window. Press the arrow down icon next to the recording dot to pick up the needed microphone.
Step 3. Start the Video Recording on Mac.
Press the Record button. You can click to record the full screen or drag to choose the specific zone that you need to record. Click the stop button in the menu bar to end up the video recording on Mac.
Just a Heads Up
You are required to install Soundflower into the program for recording videos with system audio. Apart from that, QuickTime Player constrains you to record videos in MOV formats.
#3. How to Record Video on Mac With Zoom
What Can You Actually Do With Zoom Screen Capture?
- Record videos with the Mac built-in or external camera and microphone.
- Record you and your screen at the same time.
Step 1. Start A New Meeting.
Go to Zoom official site to find the install pack of Zoom, download it, and follow up the setup instruction to have it installed on your Mac. Afterward, launch it up and choose New Meeting. Now the conference window shows up the footage from your webcam.
Step 2. Record the Screen With or Without Your Face.
- To record the screen and webcam: Open up the things you want to record. Go back to Zoom, press Share Screen to choose the target screen you'd like to share. The shared screen will cover the entire screen. Next, find the little box that shows up your face, and drag it over any place inside the shared screen.
- To record the screen only: Minimize the camera window, or move it out of the shared screen zone.
Step 3. Start to Record Videos on Mac With Sound.
Find More on the menu bar and press Record or Record to this Computer to start recording videos on Mac. A paid user can choose Record to the Cloud to record and save up the recorded videos on Mac.
Just a Heads-up
- The whole process is very complicated as you have to open and share the specific screen before recording.
#4. How to Record Video on Mac With iMovie
What Can You Actually Do With iMovie?
- Record your face.
- Make basic edits.
Step 1. Start A New Project.
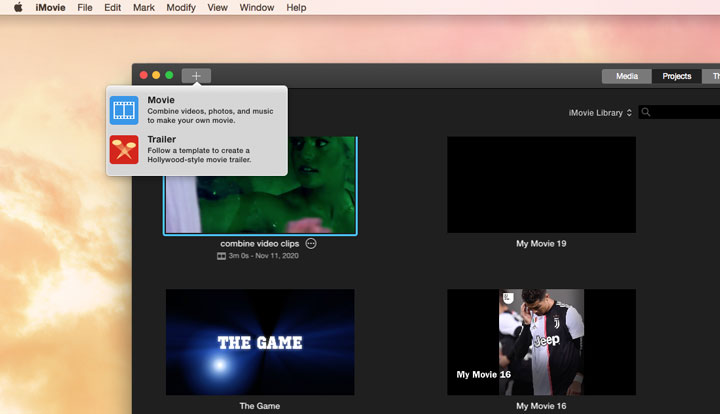
After opening up the iMovie on Mac, hit Project, and then you come over to the top left corner of the interface. Press the + button and select Movie. You'll then be asked to choose the theme and name the new created project. As your target is recording videos, here you pick No Theme. Next, you click on Create.
Step 2. Enable the iMovie Recorder Feature.
Hit Import Media and choose FaceTime HD camera or other external cameras that you'd like to apply to record your face.
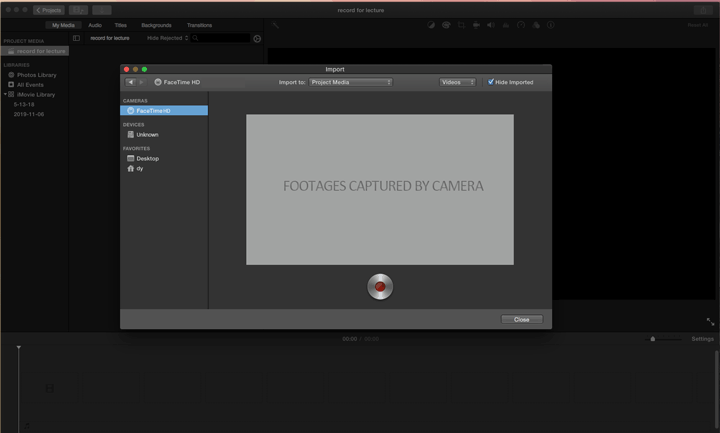
Step 3. Record Video on Mac via iMovie.
Press the red dot icon to record videos on Mac. To end up the recording, click on the red dot icon again. Close the import panel to watch the video you just recorded.
Just a Heads Up
- iMovie doesn't let you record webcam videos on Mac.
- The options to change the recording format, resolution, and other recording preferences are absent.
#5. How to Record Video on Mac With Photo Booth
What Can You Actually Do With Photo Booth?
- Record your face
Step 1. Open up Photo Booth.
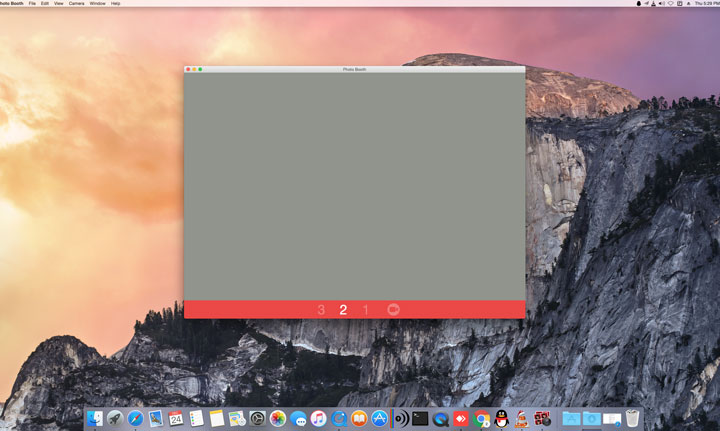
Step 2. Choose the camera film icon to ensure you are going to record videos instead of photos.
Step 3. Hit the red record button. Photo Booth will record videos on Mac after counting down for 3 seconds.
Just a Heads Up
- Photo Booth doesn't enable you to record camera and audio from an external microphone.
- You are not allowed to change the recording range, quality, and format.
#6. How to Record Video on Mac With the Native Screen Recorder
What Can You Actually Do With the Native Screen Recorder?
- Record your screen.
Step 1. Activate the Native Screen Recorder Feature.
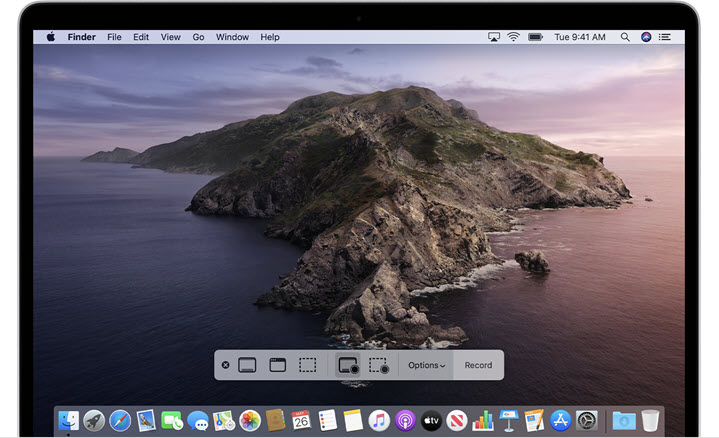
Press Command - Shift - 5 on your keyboard to activate the native screen recorder of your Mac computer.
Step 2. Select the Video Recording Area.
Click the Fullscreen Record button to record activity of the entire Mac screen; Click the Selection Record button and drag the recording box to choose the specific area that you would like to record.
Step 3. Record Videos on Mac with the Built-in Recorder.
Click on anywhere on the screen on your Mac or press Record to start recording videos on Mac. Press Stop or press Command–Control–Esc to stop the recording.
Just a Heads Up
- You can't record video on mac with external camera.
- It appears time-consuming when recording you and your screen at the same time.
- Only the users of macOS Mojave or higher have the option to record videos.
FAQs
How Do I Record A Video of Myself on My Mac?
1. Open QuickTime Player on your Mac, hit View, and press New Movie Recording to open up the movie recording window.
2. Press the arrow down icon next to the red round button to find the options of all the built-in/external cameras and microphones detected by QuickTime Player, choose the needed ones.
3. Choose the quality grade for the video that you are going to record.
4. Press the red dot button to start recording a video of yourself on Mac.
How to Record Video on Mac With External Camera?
1. In QuickTime Player, select File > New Movie Recording to get access to the video recording panel.
2. Click on the red dot icon on the new panel to get all the external cameras detected by QuickTime Player.
3. Choose the needed one, press the red dot button to start to record videos on Mac with the external camera.


