
FaceTime is a free service developed by Apple, allowing people to make video calls, audio calls, or group calls between Apple devices worldwide. It has become an integral part of daily life during the global pandemic because many of us have been keeping in touch with family and friends on video chat via FaceTime.
It's great to see each other on a video chat, but what if you want to keep those special moments in a FaceTime call? Can you screen record facetime? There's still no recording feature on FaceTime. No sweat. This article will show you how to record FaceTime with sound on your iPhone, iPad, and Mac.
Part 1. How to Record FaceTime Call on iPhone and iPad
Most of us would prefer to make FaceTime calls using mobile devices, and we are not always near to our computers.
#1. Record FaceTime Call Using the Built-in Screen Recording Tool
iPhone and iPad made the addition of a screen recording feature to Control Center, which lets you record all activities happening on your screen with internal sound and voice-over.
However, considering the fact that FaceTime adopts Apple's FairPlay Streaming technology, which will mute your recordings out of copyright-protection and privacy protection, so it's impossible to get the audio portion of a FaceTime call using iPhone and iPad screen recording features.
Anyway, you can still save the video portion of a FaceTime call using the iOS and iPadOS screen recording. The guide has been rounded up below.
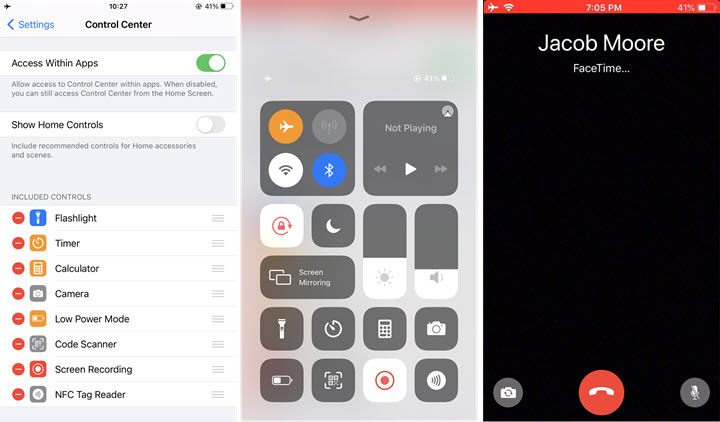
- Swipe up from the bottom edge of your iPhone or iPad to check if there's a screen recording feature in the Control Center. If not, head to Settings > Control Center, and add the Screen Recording option.
- Fire up Control Center and tap the screen recording button. After three seconds countdown, a red status bar will show at the top of your screen to indicate screen recording is on.
- Launch FaceTime and start a video call.
- Tap the screen recording button once again to stop recording. And video clips will be automatically saved to the Photos app.
#2. Record FaceTime Call Using QuickTime
Tested almost all iPhone and iPad's screen recorders, they are also unable to record audio as soon as FaceTime engages for it has been well-protected by the FairPlay Streaming DRM technology as previously described.
The only solution to record two-way audio on a FaceTime video call is to hook up your iPhone/iPad to a Mac and record the screen using QuickTime.
- Connect your iPhone or iPad to a Mac with a cable and tap Trust on your iDevice to continue.
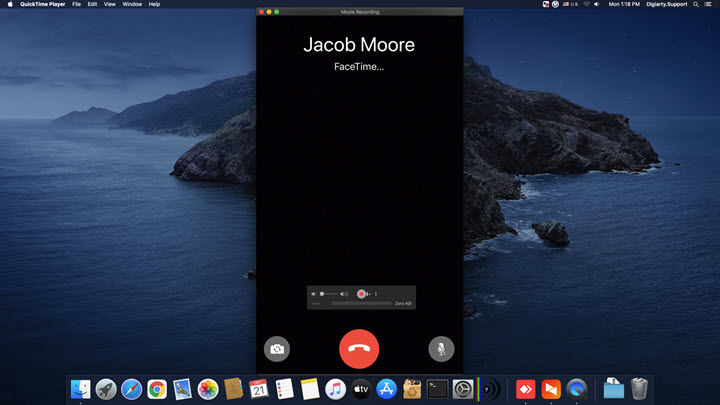
- Then Open QuickTime and go for File at the top > New Movies Recording from the context menu, and a screen recording window with recording controls will pop up.
- Now click the arrow icon next to the record button in recording controls > select to record [Your name] iPhone from the menu. Make sure the microphone of your Mac is selected, either.
- Click on the record button in QuickTime and begin your FaceTime call on your iDevice.
- When the FaceTime call is done, click the Stop Recording button at the top-right menu bar.
- Go for File > Save. Name your recording and select a location, and click Save in the dialogue box.
Part 2. How to Record FaceTime Call on Mac
The FaceTime free service is available to macOS, either. The real fun of making FaceTime calls on a Mac computer lies in the facecam. You can use the facecam that comes with your Mac or use high-definition facecams from other manufacturers to yield a better video quality, especially when making online conferences or online training courses.
There are two methods to record FaceTime with Audio on Mac. If your Mac computer is in macOS Mojave or later, you can use the native Screenshot toolbar. If your Mac computer isn't running in macOS Mojave or later, you should take a look at QuickTime or other alternatives.
#1. Record FaceTime Call on Mac With the Screenshot Toolbar
- To invoke the Screenshot Toolbar, press Command + Shift + 5 on your keyboard. And the toolbar will appear in the lower area of the screen.
- Now go for either Record Entire Screen or Record Selected Portion, and enable the microphone sound in the Options menu. You can make other changes like location, timer, etc.
- You will next begin a FaceTime call on your Mac and click the Record button on the control bar.
- When the FaceTime call is over, click on the small Stop button at the upper-right corner to end the screen recording. And the video clip will be automatically saved to the location you chose.

#2. Record FaceTime Call on Mac With QuickTime
The majority would be willing to upgrade their Mac computers to a newer version for better performance and more nifty tools. There are also some people who would prefer to use the original version. If you are one of them, you can use the preinstalled QuickTime to record FaceTime on Mac.
- Open QuickTime and go to File > New Screen Recording, and the recording controls will appear.
- Click the arrow icon to select the system microphone and drag the volume cursor to the level you need.
- Click on the record button and choose to record the entire screen or part of the screen. And screen recording begins.
- Make a FaceTime call on your Mac.
- When the video call is ended, click the small stop button at the upper right-hand corner to stop recording.
- Go to File > Save to name and choose a location to store video clips.
Part 3. How to Record FaceTime Call With Audio
Due to the adoptation of FairPlay Streaming to FaceTime, you won't record the audio portion of a FaceTime. And some readers reported that the Screenshot toolbar and QuickTime might have no sound when recording screen, which lets you fail to record FaceTime calls with sound correctly. More so, Screenshot Toolbar and QuickTime might have other annoying glitches, such as:
- QuickTime terminates abnormally.
- QuickTime "Cannot Record" error.
- QuickTime might fail to recognize iPhone/iPad.
- QuickTime screen recording taking forever.
- Screenshot toolbar hotkeys aren't available.
Those are the situations where the third-party screen recorder can help you out. For me, VideoProc Converter AI is the best alternative to record FaceTime video and audio. Let's explore!
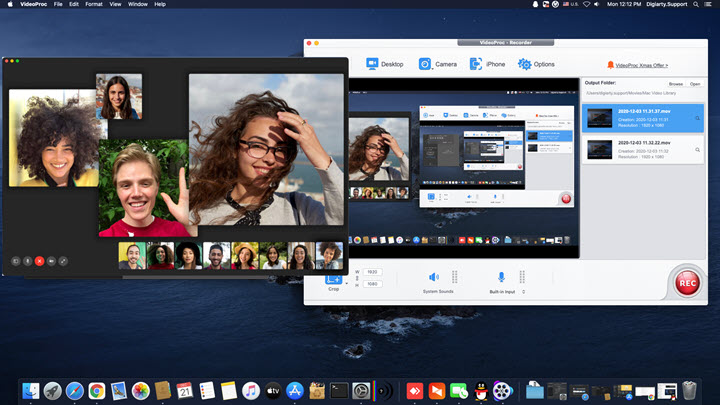
VideoProc Converter AI - Best Screen Recorder to Record FaceTime With Audio
- Record iPhone and iPad screen through a Mac computer.
- Record Mac computer screen in high video and audio quality.
- No restriction on video length.
- Record screen with hardware acceleration for Nvidia, Intel, and AMD cards.
- The basic video editing features are the icing on the cake.

#1. For iPhone and iPad
- Connect your iPhone or iPad to a Mac with a cable, then tap Trust on your iDevice to continue.
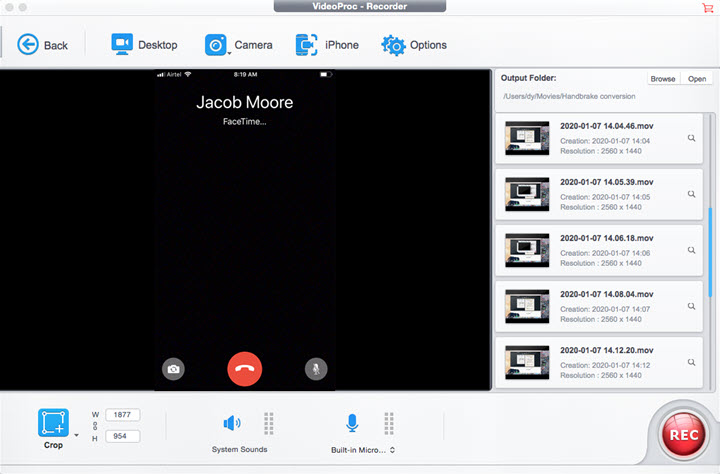
- Fire up VideoProc Converter AI on your Mac Computer and head over to the Recorder option at the main interface.
- Select the iPhone mode at the top and Enable microphone sounds in the lower area. You can also choose a location for output files.
- Click on the RUN button to start recording, then begin a FaceTime call on your iPhone or iPad.
- When the FaceTime call is finished, click on the small stop button at the top-right corner, the video clip will be saved to your chosen location by default.
#2. For Mac Computers
- Open VideoProc Converter AI and select Recorder on the main page.
- Select the Desktop recording mode at the top and toggle on the microphones in the lower area.
- You will next click on the RUN button to start screen recording, and open FaceTime on your Mac to make a video call.
- Once the video call is over, click the small stop button at the upper right to end the recording.
People Also Ask About How to Record FaceTime
1. How to record a FaceTime call on your iPhone using your Mac?
- Connect your iPhone or iPad to your Mac with a Lightning cable.
- Open QuickTime on your Mac from your dock or Applications folder.
- Click File in the Menu bar.
- Click New Movie Recording.
- Click the arrow next to the record button in the QuickTime window.
- Choose your iPhone from the list of available cameras.
- Unlock your iPhone. Its display should now appear in QuickTime on your Mac.
- In QuickTime for Mac, make sure the volume bar is turned up. Otherwise, you won't be able to hear your call.
- Open FaceTime on your iPhone.
- Click the Record button in QuickTime on your Mac to start recording.
- Begin your FaceTime call.
- Click the Stop button in QuickTime when you're done.
- Choose a save location for your recording and click Save.
2. How to screen record FaceTime with audio on your iPhone?
- Make sure you have added Screen Recording to the Control Center on your iPhone. You can do this by going to Settings > Control Center > Customize Controls and tapping the green + icon next to Screen Recording.
- Swipe down from the top-right corner of your screen to open the Control Center.
- Tap and hold the Screen Recording icon.
- Tap Microphone to turn it on. You should see a red icon next to it.
- Tap Start Recording. You will see a three-second countdown before the recording begins.
- Swipe up to close the Control Center and open FaceTime.
- Begin your FaceTime call. You will see a red bar at the top of your screen indicating that the recording is in progress.
- To stop recording, tap the red bar and confirm by tapping Stop. Alternatively, you can open the Control Center again and tap the Screen Recording icon. Your recording will be saved in the Photos app, where you can view, edit, or share it.
3. How to use a filter on FaceTime?
- Open FaceTime on your iPhone or iPad and start a call with someone.
- Tap the star icon at the bottom left corner of the screen.
- Swipe through the effects and filters and tap the one you want to use. You can also tap the X icon to remove any effect or filter. The effect or filter will be applied to your video and visible to the other person on the call.
4. How to blur your background on FaceTime?
- Open FaceTime on your iPhone or iPad and start a call with someone.
- Tap the portrait icon at the top right corner of the screen. Your background will be blurred and your face will be in focus. You can also tap the portrait icon again to turn off the blur effect.
5. How to edit your FaceTime recordings?
- Open the Photos app on your iPhone, iPad, or Mac and find the recording you want to edit.
- Tap or click Edit at the top right corner of the screen.
- You can trim the recording by dragging the yellow handles at the start and end of the timeline. You can also mute the audio by tapping or clicking the speaker icon at the top left corner of the screen. Tap or click Done when you're satisfied with your edits.
6. How to record group FaceTime calls?
The process of recording group FaceTime calls is similar to recording one-on-one calls, depending on which device and method you are using. However, there are some limitations and considerations you should be aware of:
- You can only have up to 32 people in a group FaceTime call.
- You need iOS 12.1.4 or later, or macOS Mojave 10.14.3 or later, to join a group FaceTime call.
- If you are using Screen Recording on your iPhone or iPad, you will only capture the video of the person who is speaking at the moment, not everyone in the group.
- If you are using QuickTime Player on your Mac, you will only capture the video of yourself, not anyone else in the group.
- If you are using Screenshot Toolbar on your Mac, you will capture all the participants' videos in a grid layout, but they may appear smaller than usual.
Wrap Up
It's 100% impossible to record the audio portion of a FaceTime call on your iPhone/iPad with the native screen recorder. That's because the FaceTime service is protected by Apple technology. If you want to record video and audio of a FaceTime call, you can record your iPhone, iPad through a Mac computer or directly record FaceTime on a Mac with a screen recorder.
A slight word of warning at the very end: it's immoral and illegal to record anyone without their permission, you should require the consent of all parties before recording a FaceTime call.


