In-page Navigation
Compositing with Blend Mode in VideoProc Vlogger
Compositing in video post production is a process of combining visual elements from multiple layers into a single image or frame. Besides adjusting the opacity of video on the upper layer, using the blend modes can create more interesting effects.

A blend mode can determine how the two layers interact with each other by blending pixels of each other, thus creating different types of effects.
Free download VideoProc Vlogger to get creative with blend modes:
1. Use Blend Mode in Compositing
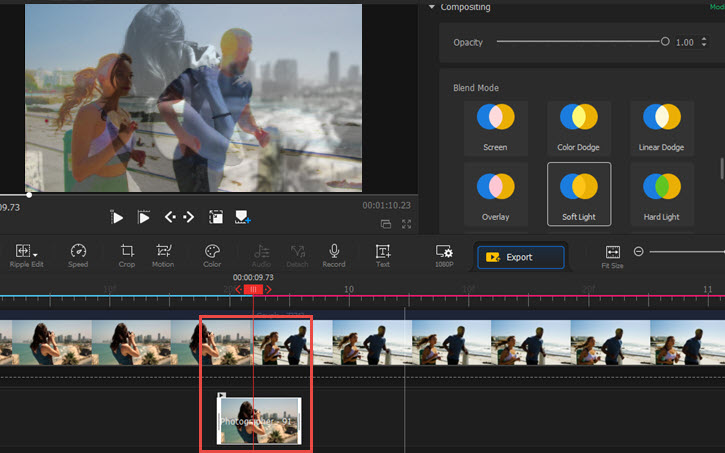
The blend mode can be found in the compositing section from the Inspector Panel. To apply it to a clip, you need to make sure the clip is selected on the timeline.
Step 1 Create a new project in VideoProc Vlogger and import video clips into the media library.
Step 2 Drag the video to the Video track on the timeline.
Step 3 Drag the overlay video to the Overlay track on the timeline.
Step 4 Click on the footage to show the bounding box, and drag its corner to upscale it to fit the full screen.
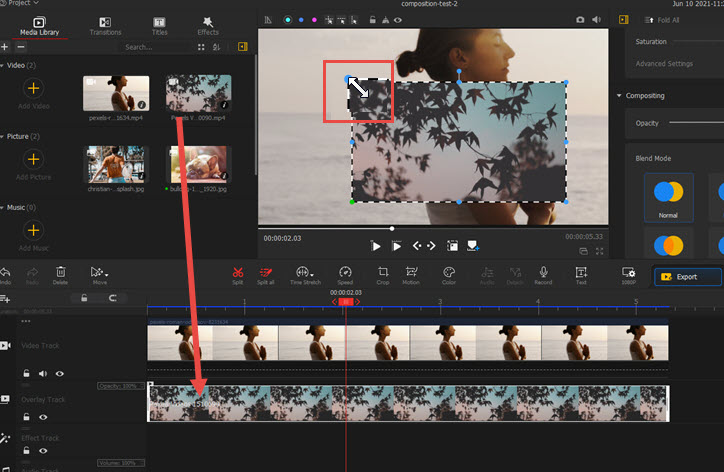
Step 5 Make sure the overlay clip is selected on the timeline, and scrolling in the Inspector panel on the right side to the Compositing section.
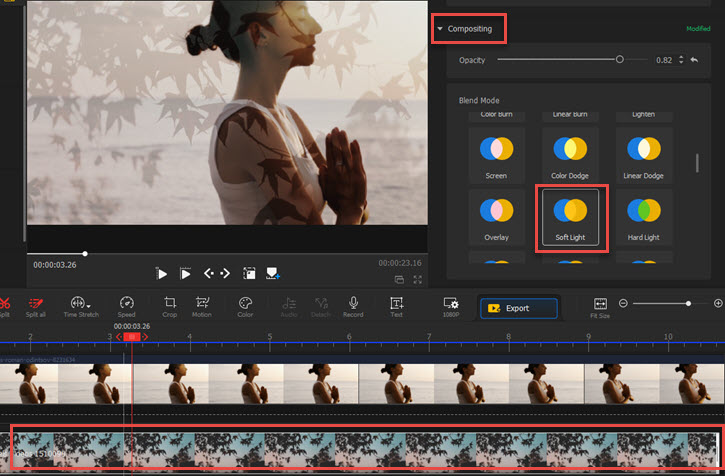
Step 6 Choose a blend type. In this example, Soft Light is used.
You can see that the video on the overlay track are blend with the video on the main Video Track.
 Video Editing Tips
You can click the eye icon on the timeline control panel to quickly preview the video with and without the composition effects.
2. Fine-tune Blend Effects via Color Editor
To achieve certain blend effects, you can color grade the overlay video/picture purposefully, and then apply the blend effect.
Analysis:
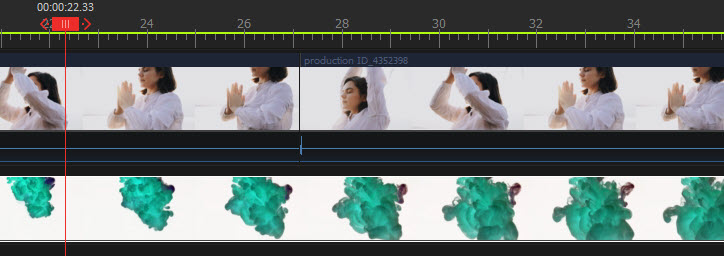
To create the double exposure effect like the following picture, you will need footage with pure background, and a clip featuring smoke, which can be found on stock video sites.

Overlay the stock video. It looks like this on the timeline.
In the Inspector Panel, go to compositing section, and choose Screen as the blend mode.
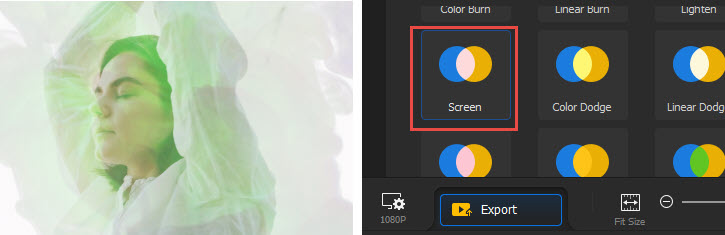
The greenish-shade of the smoke is blend with the base video, which is not the effect we want.
In such a case, we can use the Color Editor in VideoProc Vlogger to adjust the tone of the overlay footage.
Follow the steps below:
Step 1 Make sure the overlay footage is selected on the timeline, and click Color icon on the toolbar.

Step 2 Inside the Color Editor, choose Mono LUTs. The footage turns into black and white color.
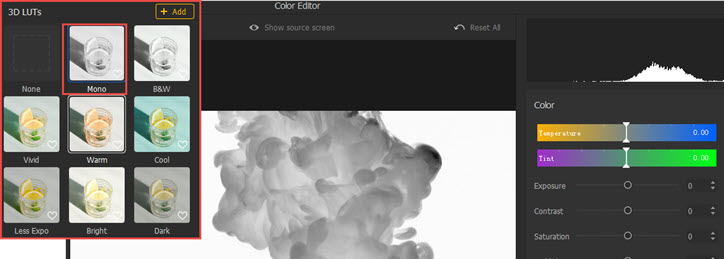
Step 3 Click Apply Color.
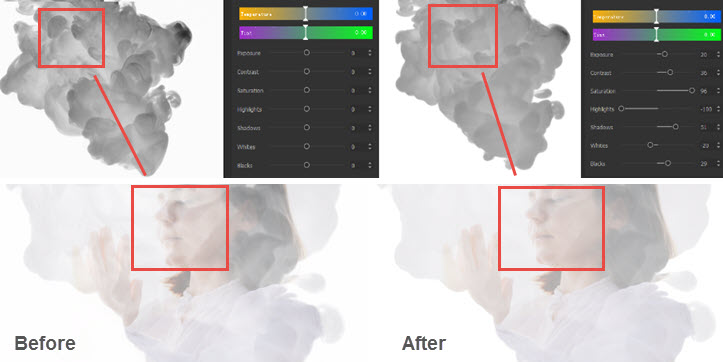
Step 4 Back to the timeline, you can see the girl's face is vaguely covered. We still need to flat the color of the smoke effects.

Step 5 Fine-tune the colors.
Adjust parameters such as saturation, highlights, shadows, and so on to make the color more flat inside the smoke, while keep the contrast between the white background and the black smoke.
3. Create Double Exposure Effect
After learning how to use the blend mode and how to adjust colors for the effects to work, you can create fantastic effects in VideoProc Vlogger.
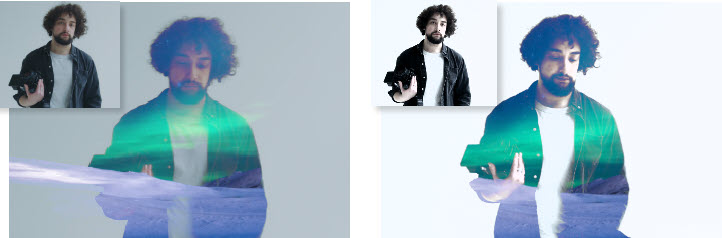
For instance, to create a double exposure effect featuring the aurora blending with the people, the result is better achieved when the background is white.
You can adjust the parameters in Color Editor to make sure the pure background is white and bright, and in good contrast with the object in the photo, in this case, the photographer.
Follow the detailed steps below:
Step 1 Drag the photographer's video to the main Video Track.
Step 2 Drag the video of aurora to the Overlay Track.
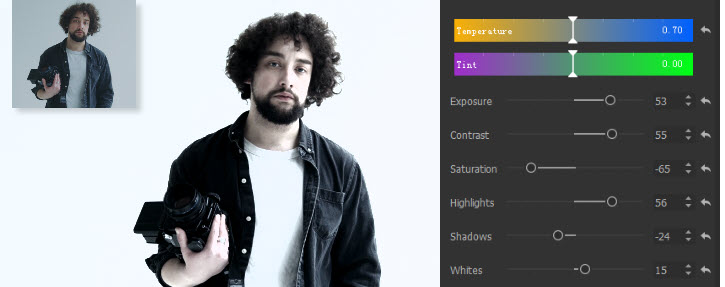
Step 3 Select the main video, and click Color Editor.
Step 4 Change parameters such as Exposure, Contrast, Saturation, Highlights, etc. and Apply Color.
Step 5 Click on the overlay track, and use the Lighten effect in blend mode.
You can try other blend modes to create the following effects.
 Editing Tips:
To create a neat double exposure video, the main video with a white background works the best.
As for the overlay video, you can use timelapse, hyperlapse video with movement and colors.
Video Tutorial on Double Exposure in Blend Mode
4. Create a Flash Transition with Blend Mode
Besides creating a specific look on the video, you can use blend mode as a trick for flash transition.
Step 1 Drag Clip A and Clip B to the timeline.
Step 2 Duplicate Clip A to the Overlay Track.
You can copy and paste it using the short cut Ctrl+C/Ctrl+V, or drag it from media library to the overlay track.
Step 3 Split the video to keep a small portion of it.
Step 4 Delete the previous part, and move the overlay clip to the point you want the transition to occur.
Step 5 Choose a blend mode you like.
Then you can play to preview the effects. For a quick and flash transition, you can adjust the duration of the overlay clip, to make it short.
5. More Blend Composition Ideas
Besides the above examples, there are endless possibilities to create nice effects using the blend mode. Below are some inspirations for you:
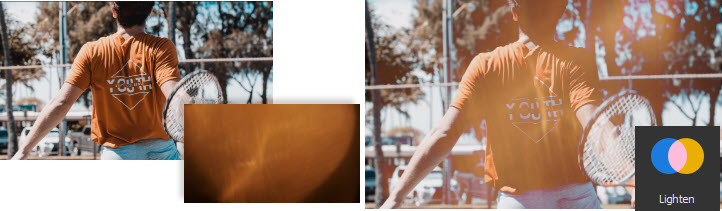
1. Add a light flare effects video as the overlay, and use the Lighten blend mode on the Overlay track.
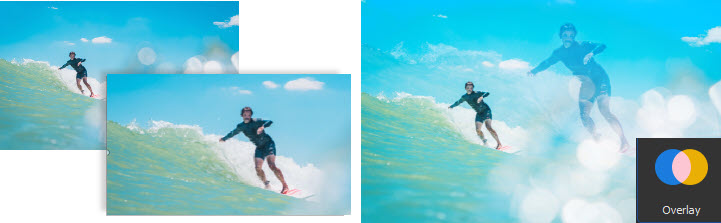
2. Place the same video clip on the Video Track and the Overlay Track, adjust the size and position of the overlay video, and use the Overlay Mode on the Overlay track to create a double-exposure look.
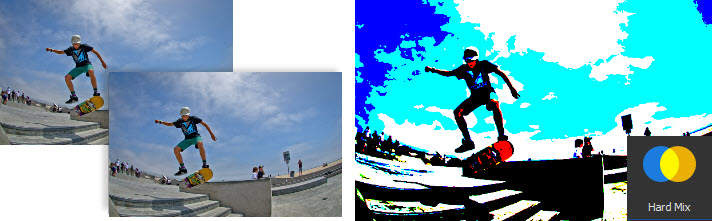
3. Add the same clip to the Video track and the Overlay track, make sure they are of the same size and position, and use the Hard Mix mode on the overlay track.
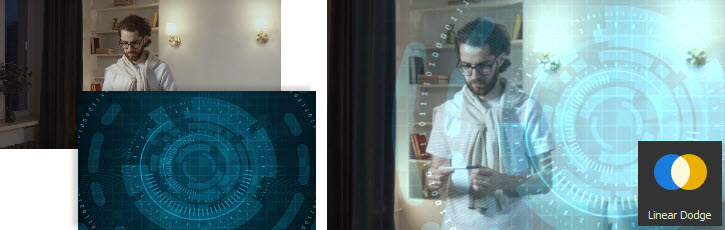
4. Add a futuristic effects video to the overlay track, and apply the Linear Dodge as the blend mode.
Depending on the colors of the overlay video and the base video, the effects can be varied. You can play with each mode to find one what works for the effect to your liking.
Free Download VideoProc Vlogger to use the blend mode for creative effects:
Related Guides:
For more guides of VideoProc Vlogger, please visit this page >
If you have any question, please email us or visit ![]()
![]()
![]()
Is this page helpful?
