
Summary: This post shares how to make watermark on CapCut in easy steps.
Putting a watermark on your video is a good way to advertise and promote your business. For those not in business, a watermark can help prove the source of the video you shared on TikTok, YouTube, Facebook, or other platforms. It helps to prevent anyone from lifting or stealing your creation and making it their own. A watermark can be the static or moving text, image, video, or a combination of these. All can be made inside CapCut - a versatile and free video editor.
The thousands of fonts, stickers, animation effects, and music presets make it an amazing tool for beginners to create compelling storytellings. It's a great pick for users of all levels to make a simple watermark. You can also manage the transparency for keeping the watermark from being too distracting for your audience.Here in this post, let’s walk through the steps on how to make a watermark on CapCut.
How to Make a Picture/Video Watermark on CapCut App
Step 1. Go to your project on CapCut app.
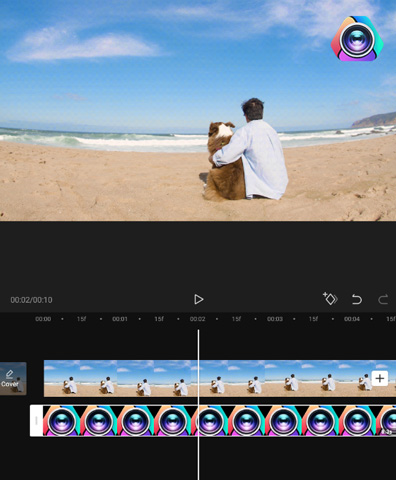
Step 2. Navigate to the bottom editing menu bar to find the Overlay button and tap on it.
Step 3. Tap Add overlay and then select the video or the photo on your camera that you want to use as a watermark from the camera raw of your smartphone.
Step 4. Pinch two fingers on the preview window for resizing the watermark.
Step 5. Drag around the watermark for changing its location.

Step 4. Pinch two fingers on the preview window for resizing the watermark.
Step 5. Drag around the watermark for changing its location.
Step 6. Drag the end of the watermark clip to adjust its duration.
Step 7. Tap on Opacity. Move the opacity slider for managing the transparency of the watermark.
Step 6. Drag the end of the watermark clip to adjust its duration.
Step 7. Tap on Opacity. Move the opacity slider for managing the transparency of the watermark.
How to Make a Text Watermark on CapCut App
Step 1. On your Android or Apple smartphone, go to your project on the CapCut app.
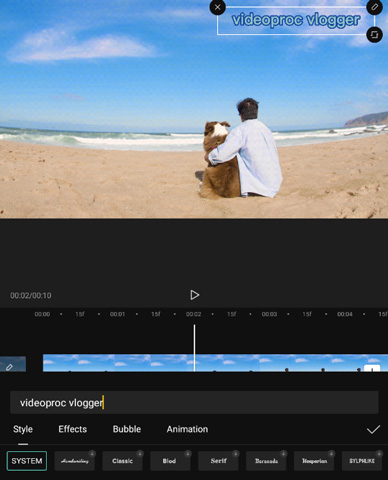
Step 2. Tap the Text button which is located at the bottom.
Step 3. Choose Add Text and then enter the needed text content. You can choose Font, Style, Bubble Effect, or other options to customize the appearance of the text watermark.
Step 4. Go to the preview window and pinch to resize the watermark.
Step 5. Drag around the text box on the preview window to reposition the text watermark.
Bonus: How to Make a Watermark on CapCut Web Editor
ByteDance released the CapCut Web Editor earlier in the Jun of 2022 with the intent to help beginners quickly create engaging videos for social media right on their browser. It gives you nearly as much basic control as a mobile version of CapCut, allowing you to add a text, image, or video watermark. Unfortunately, it might disappoint users who need to add a transparent PNG watermark since it will automatically convert the PNG into a JPG with white background. Worse still, it will store the project files and media files in the cloud which only gives 512MB of free storage space. Anyway, if you really want to make a watermark on CapCut Web Editor, follow the steps below:
Step 1. Go to your project on CapCut for PC.
Step 2. Hit Upload. Select the picture or video clip that you want to use as the watermark for uploading to the program.
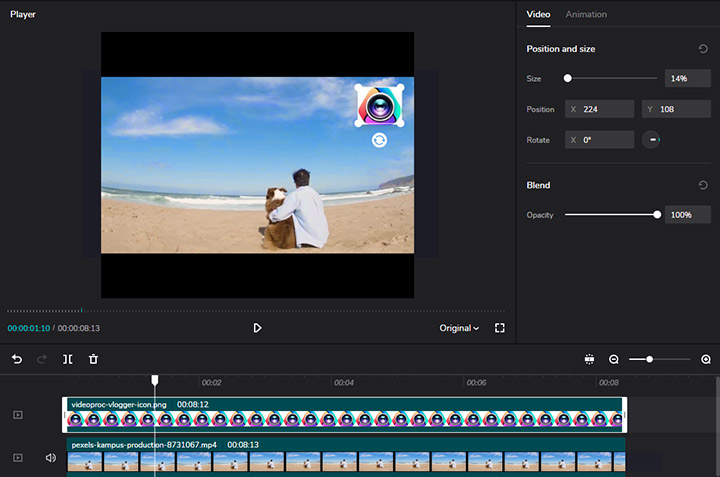
Step 3. Drag the imported watermark file onto the timeline and place it over the main material of your project.
Step 4. Drag the 4 white points to resize the watermark. Click the watermark and move the mouse to reposition it.
Step 5. Move the slider of Opacity to change the transparency of the watermark.
Bonus: How to Make a Watermark with CapCut Alternative for PC
Putting a watermark to a video via CapCut is easier than ever. However, the small screen of CapCut makes it hard for us to keep our eyes on all the elements and details of our edit. The web version of CapCut seems like a capable option at the first glance. Unfortunately, it lacks many basic and sophisticated controls. With it, you can’t make a transparent watermark, key out a background, or reposition the watermark at different frames…
Thus, we recommend you make a watermark with VideoProc Vlogger – an easier, faster, and more capable alternative for CapCut. It provides you with an awful lot of controls for fun or creativity, through which you are able to add whatever types of watermark, manage the opacity and positions with the progress of time, and apply advanced effects such as speed remap and motion crop…

More Reasons to Make a Watermark with VideoProc Vlogger
- Add PNG, JPG, GIF, video, text, or a combination of these as the watermark
- Make the opacity, position, and size of the watermark change over time
- 999+ tracks for making watermark, overlay, split screen, and PiP effortlessly
- Loads of speed ramp, motion crop, filter & effects, transition & text presets
- Color grading with tons of Luts and sophisticated color control options
- 100% free of charge. 0 learning curve.

Step 1. Import the Video and Watermark Files
Download, install, and open VideoProc Vlogger. Complete the project settings to create a new project. Drag the main material and the watermark file(s) onto the Media Library.
Step 2. Add a Watermark to the Video
Add the main material onto the video track. Drag the watermark files(s) onto the overlay track.

Tips:
To add a combination of picture and video files as a watermark, simply hit the plus icon of the overlay track to add one or more overlay tracks and then drag the watermark files to these overlay tracks respectively.
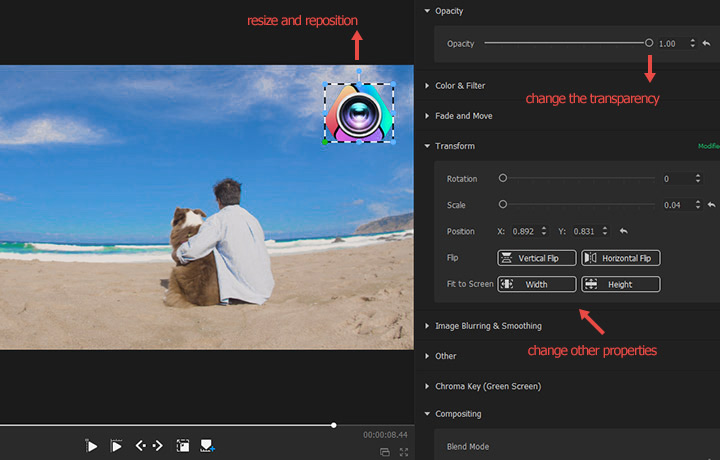
Step 3. Adjust the Watermark
Double-click the watermark clip on the preview window to adjust the location and size. Drag the ends of the watermark clip on the timeline to change its duration.
More Tips:
• To add some texts as the watermark, hit Text on the toolbar, and then go to the inspector panel on the right to customize the opacity, content, size, animation, border color, and plenty of other properties. Drag the ends of the text clip on the timeline to change its duration.

• You can also add the combination of text and video/picture clip as the watermark.


