
Are you facing issues with Premiere Pro crashing or not responding? You're not alone! Premiere Pro frequently becomes lagging and not responding when you apply simple tasks like cutting, moving, or playing videos. Additionally, opening or exporting projects, importing media files, or launching new panels can trigger the same freezing or not responding error.
Worse still? Many users experience Premiere Pro crashing as soon as they launch the program. Sometimes, the splash screen doesn't even appear, causing frustration for beginners and professionals alike. Thankfully, the reasons behind these crashes are often easy to fix in Premiere Pro.
Why Premiere Pro Not Responding or Keeps Crashing
There're myriads of reasons why Premiere Pro not responding or keep crashing, but two of the most common traps that cause frustrating crashes are:
1. Insufficient System Requirements
One of the most prevalent reasons for Premiere Pro not responding or crashing is when your system doesn't meet the software's requirements. Premiere Pro demands a substantial amount of processing power and virtual memory to function smoothly. If your system falls short of meeting the minimum requirements or is barely meeting them, it can lead to performance issues. You can find the minimum specifications for Windows & Mac in the table below:
| Device | Operating System | Processor | System Memory | GPU Memory |
|---|---|---|---|---|
Windows |
Windows 10 (64-bit) V20H2 or later |
Intel® 6th Gen or newer; AMD Ryzen™ 1000 Series or newer |
8 GB of RAM |
2 GB |
Mac |
macOS 11 Big Sur or later |
Intel® 6thGen or newer |
8 GB of RAM |
Apple Silicon: 8 GB of unified memory; Intel: 2 GB |
Note:
Premiere Pro is a resource-intensive video editing program. Even if your system meets the minimum requirements, you might still experience laggy, freezing, and other issues while editing high-end footage and video codecs in Premiere Pro.
To make your life easier, we recommend using a fast and lightweight alternative to Premiere Pro, known as VideoProc Vlogger. This video editor is entirely free of charge and supports level-3 GPU acceleration technology. The best part is that it has very low system requirements, requiring just 1GB of RAM, a Windows GHz Intel® or AMD® processor, and 512MB GPU VRAM (or higher OpenGL 3.3). With VideoProc Vlogger, anyone can create professional-looking videos smoothly without any lag on even less-powerful computers.
2. The Media Files Are Not Well Supported by Premiere
One common issue that can lead to Premiere Pro keeps crashing or not responding is the usage of video formats that are not well-supported by the software. Although Premiere Pro supports popular codecs like HEVC and H.264, editing with these formats can sometimes be a challenge. The thing is, decoding and re-encoding these codecs demands a lot of computing power, and that can overload your system, causing Premiere Pro to freeze or become unresponsive. To enjoy smoother editing, you're suggested to convert your footage to more compatible codecs like MOV ProRes and MP4 MPEG4.
13 Ways to Fix Premiere Pro Not Responding or Keeps Crashing
If you've confirmed that your system meets the requirements to run Premiere Pro properly yet you're still facing issues such as Premiere Pro not responding and Premiere Pro keeps crashing, try the following solutions.
1. Convert Videos to Premiere Friendly Formats
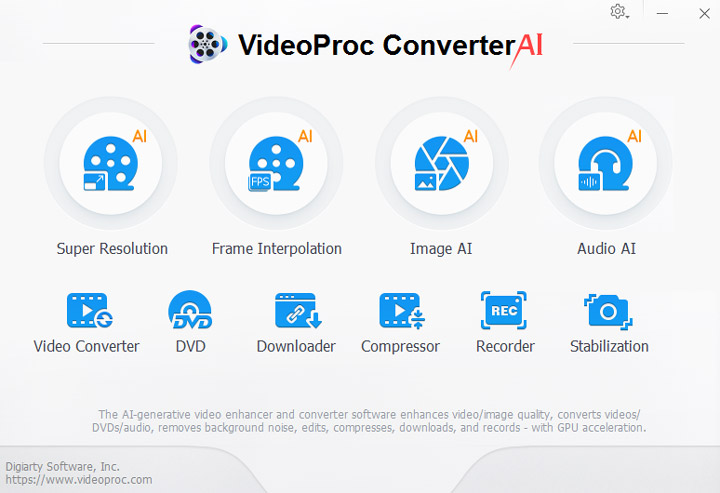
As said, one of the most common issues that can lead to Premiere Pro crashing or not responding is using video formats that are not well-supported by the software. To avoid this problem, it is recommended to convert your video files to Premiere Pro-friendly formats like MOV ProRes. Fortunately, you can easily resolve this by using VideoProc Converter AI, which is considered one of the best video converter software options. With just a simple click, you can convert your videos between more than 370 formats without any noticeable loss in quality
Just free download and install VideoProc Converter AI and start converting your video files to Premiere Pro friendly formats!

Step 1. Launch VideoProc Converter AI. Hit Video and then drag the source video files from the local drive into the program.
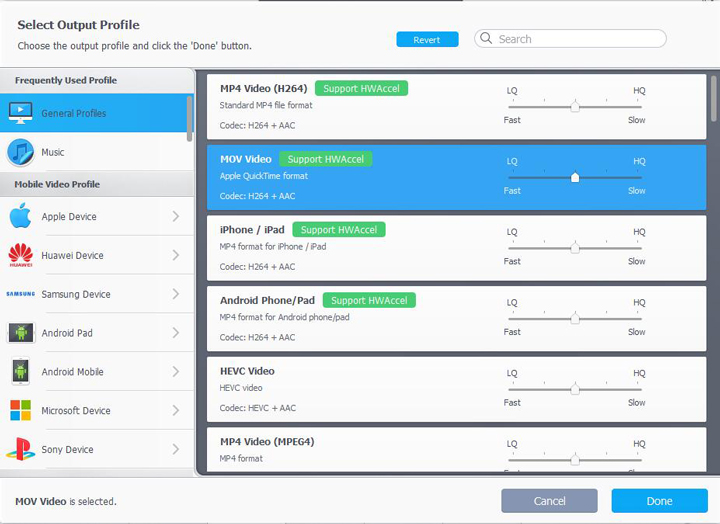
Step 2. Click on Target Format and select a format that is compatible with Premiere Pro. Since MOV ProRes works well with all versions of Premiere Pro, I'll opt for MOV ProRes as the output format. Click Done to Confirm your selection.
Step 3. Hit RUN to start converting your video files to Premiere Pro friendly formats, and then try to import to Premiere Pro to check if the error still exists.
2. Restart Premiere Pro
When you encounter issues with Premiere Pro not responding, crashing, or the splash screen failing to appear during launch, one potential solution is to try restarting the software. Restarting can often resolve memory-related problems or corrupted processes that may be causing the issues.
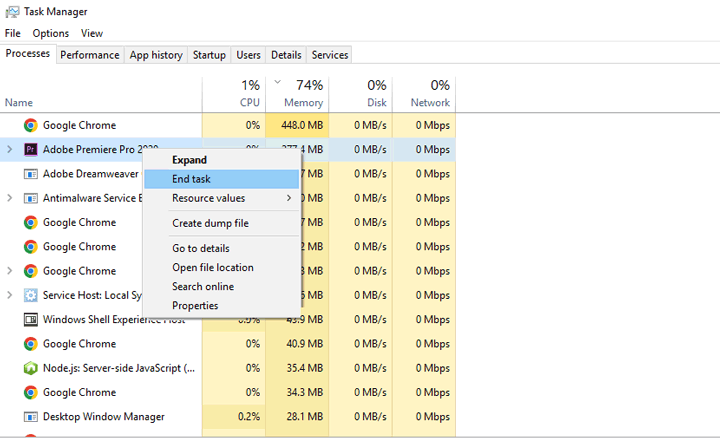
Step 1. Right-click on the bottom bar of the Windows computer and select Task Manager.
Step 2. Right-click Premiere Pro on the pop-up Task Manager and click End Task.
Step 3. Open Premiere Pro to see if the error gets fixed.
3. Reset the Preferences
By resetting the preferences, you essentially return Premiere Pro to its default state, eliminating any potential conflicts or errors within the preference settings. This action clears out any problematic configurations, providing a fresh start for the software. It's akin to starting with a clean slate, and in many cases, this simple step can resolve issues like Premiere Pro not responding or keep crashing.
Step 1. Press and hold Alt on your keyboard while you're launching Premiere Pro.
Step 2. Follow the instruction on the pop-up window to reset the preferences.
Tips:
Don't want to reset all of your preferences? Resetting your current workspace may also help to address the issue.
To do that, click Windows located in the top menu bar, select Workspace, and choose Reset to Saved Layout.
4. Disable Imported Workspaces
Another helpful solution is to disable workspaces imported from previous projects, as they could potentially cause odd errors like Premiere Pro keeps freezing and Premier Pro not responding.
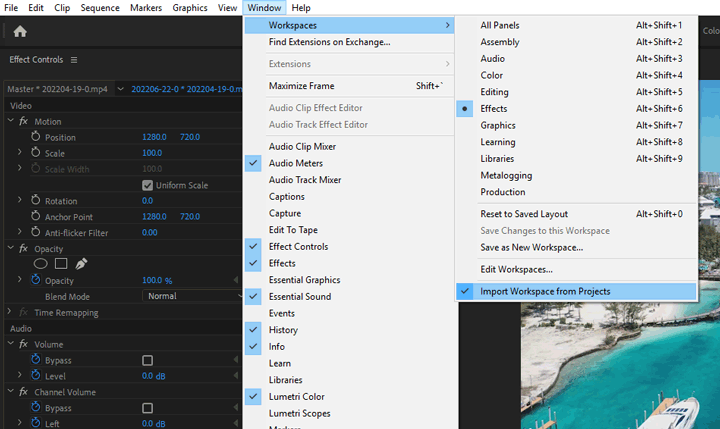
Step 1. Go to the top menu bar of Premiere Pro to find Windows and you click on that.
Step 2. Select Workspaces and uncheck Import Workspace from Project.
5. Clear Media Cache Files
Regularly deleting the media cache files is a common troubleshooting solution that helps users get avoid Premiere Pro running slow/crashing or not responding. By deleting and allowing the cache files to be re-created, you ensure a fresh start and potentially address the problems that were plaguing your editing process.
Step 1. Close the existing projects on Premiere Pro. Go to the top menu bar and hit Edit.
Step 2. Choose Preference > Media Cache and then click Delete.
Step 3. Restart Premiere Pro and check if the error still exists.

6. Change the Font
If you're using a font that doesn't work well with Premiere Pro, you might notice that the program becomes laggy or even stops responding. The good news is, you can easily fix this problem by changing the font.
7. Close CPU Intensive Programs
Premiere Pro is a powerful video editing program that requires a lot of computer resources. If you run multiple programs simultaneously, they can eat up your RAM, CPU, or memory, causing errors like Premiere Pro not responding or Premiere Pro keep crashing. So, if you come across any errors, one solution could be to close other resource-intensive programs, like your Chrome browser. By doing so, you'll free up resources and potentially resolve the issue, allowing Premiere Pro to run smoothly.
Step 1. Right-click on the bottom bar of your Windows PC and select Task Manager.
Step 2. Look for programs that are using too much RAM, CPU, or memory. Right-click on those programs and choose "End Task".
8. Update Premiere Pro
It's essential to keep your Premiere Pro up-to-date with the latest version. Adobe regularly adds bug fixes and performance improvements to each update, ensuring you get the best possible performance. So, always make sure you're using the latest version to get the most out of Premiere Pro.
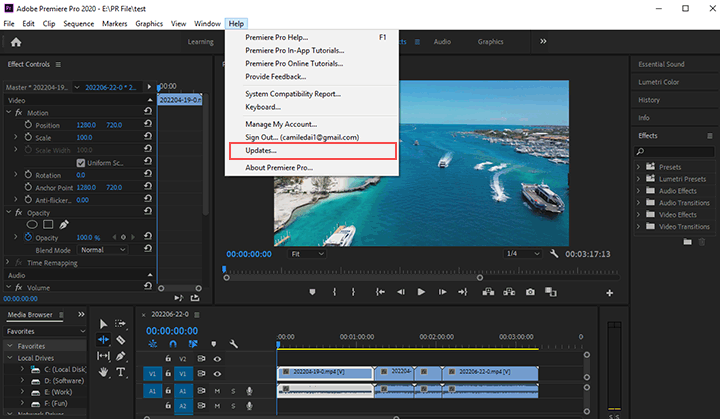
Step 1. Click Help which is located in the top right corner and select Update.
Step 2. Adobe Creative Cloud now pops up and searches for available updates. You can follow the instructions on Adobe Creative Cloud to install the most recent release of Premiere Pro installed.
9. Upgrade Graphics Card
One common reason for this error is having an incompatible or outdated graphics card. First, visit the official Premiere Pro site to verify if your graphics card model is supported. If it is not supported by Premiere Pro, disable it while editing your videos. Let's see if the graphics card is compatible with Premiere Pro, then you should check whether you have the latest version of the graphics card's driver installed. If it's not, updating your graphics card drivers to the latest version by following the below steps should help resolve the error.
Step 1. Check your graphic card brand and model.
On Windows: Press Windows Key + X, then click on Device Manager. Look under Display Adapters for the information.
On Mac: Click the Apple icon in the menu, then select About this Mac. You'll find the Graphics section with the information.
Step 2. Visit the corresponding manufacturer's website.
- For Intel: Go to https://www.intel.com/content/www/us/en/support/detect.html
- For NVidia: Visit https://www.nvidia.com/en-us/geforce/drivers/
- For AMD: Go to https://www.amd.com/en/support/kb/faq/gpu-driver-autodetect
Step 3. Download and upgrade your graphics card driver.
10. Drag and Drop Media
If you're experiencing the Premiere Pro not responding error when you're importing media from the File menu, then very probably you can get the error fixed by dragging and dropping your media files directly into Premiere Pro. Additionally, if you have a large number of source media files that need to be imported, you're recommended to import a few clips at a time instead of importing all of them simultaneously. This approach can help streamline the importing process and potentially prevent any issues related to the volume of files being imported at once.
11. Don't Open Old Projects, Import Them
If the Premiere Pro not responding error occurs when you're opening a specific project, then a recommended solution is to create a new project from scratch and import the old project into it. This approach ensures a clean slate, avoiding potential corruption and compatibility issues, and offers a fresh start for an optimized editing experience in Premiere Pro.
Step 1. Relaunch Premiere Pro and create a new project.
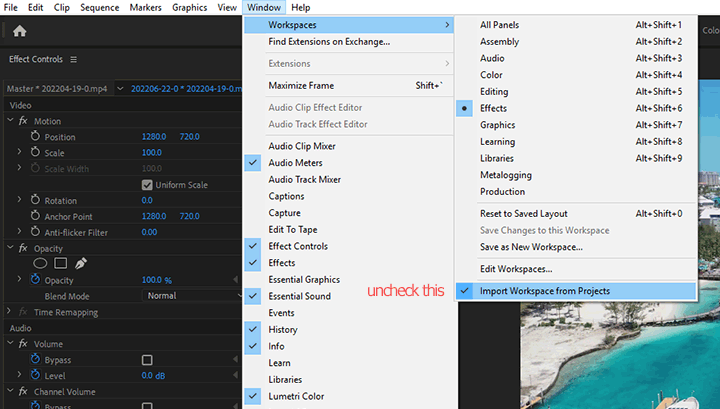
Step 2. Go to Windows, click Workspace, and then uncheck Import Workspace from Project.
Step 3. Click on File, choose Import, and then select the old project for loading to the program.
12. Remove the Incompatible Plugin
If you're stuck on the splash screen while launching Premiere Pro, you should take a close look at the splash screen to see if the program is freezing while loading a specific plugin. If so, removing that plugin might resolve the problem.
Step 1. Located the plugin file on your computer.
- On Windows, locate the files at: C:\ProgramFiles\Adobe\Common\Plug-ins\7.0\MediaCore.
- On macOS, find the files at Macintosh HD/Library/Application Support/Adobe/Common/Plug-ins/7.0/MediaCore.
Step 2. Temporarily move the plugins from this location to another folder, and then check if Premiere Pro works without the third-party plugins. If the issue is resolved, update the plugins or contact the plugin vendor for a compatible version.
13. Update Visual C ++ Libraries
If you come across the Premiere error code 0xc000007b along with the program keeps crashing, resolving the issue can be straightforward. To tackle this, update your Visual C++ Libraries from Microsoft. These libraries are essential components that software like Premiere Pro relies on to function correctly. By ensuring you have the latest version of these libraries, you can effectively address the error and stabilize your Premiere Pro experience.
About The Author


Cecilia Hwung is the editor-in-chief of Digiarty VideoProc. With over a decade of experience, she specializes in delivering insightful content on AI trends, video/audio editing, conversion, troubleshooting, and software reviews. Her expertise makes her a trusted ally in enhancing users' digital experiences.

Digiarty Software, established in 2006, pioneers multimedia innovation with AI-powered and GPU-accelerated solutions. With the mission to "Art Up Your Digital Life", Digiarty provides AI video/image enhancement, editing, conversion, and more solutions. VideoProc under Digiarty has attracted 5.2 million users from 180+ countries.
Subscribe to VideoProc
Stay current with our latest updates, guides, and subscriber-only offer.
Choose Language
Copyright © 2026 Digiarty Software, Inc. All rights reserved.
Any third-party product names and trademarks used on this website, including but not limited to Apple, are property of their respective owners.
