Have you ever encountered the frustrating issue of a black screen and no audio when using Windows Movie Maker? If so, you're not alone. Many users have experienced this problem, which can be caused by various factors such as incompatible video formats, corrupted files, or outdated drivers.
In this article, we're going to explore nine methods to fix the Windows Movie Maker black screen no audio issue. But before we dive into the solutions, let's briefly discuss what Windows Movie Maker is and what it can do.
Windows Movie Maker is a video editing software developed by Microsoft. It allows users to create and edit videos by combining photos, videos, and audio files. With its user-friendly interface and various editing tools, Windows Movie Maker has become a popular choice for beginners and casual video editors.
Now, let's get into the solutions to fix the black screen no audio issue in Windows Movie Maker.
Method 1: Reinstall Windows Movie Maker
Sometimes, reinstalling Windows Movie Maker can resolve the black screen no audio issue. This process will help replace any corrupted or missing files that may be causing the problem. Here's how you can do it:
1. Uninstall Windows Movie Maker: Press the Windows + R keys to open the Run box. Type "appwiz.cpl" and click OK. Look for "Windows Essentials" from the list of programs and click on "Uninstall/Change." Follow the on-screen instructions to uninstall Windows Movie Maker and other components of Windows Essentials.
2. Download and install Windows Movie Maker: Restart your computer. Visit Microsoft's official website or a trusted source to download Windows Movie Maker. Run the downloaded file and follow the on-screen instructions to install Windows Movie Maker and other components of Windows Essentials.
3. Launch Windows Movie Maker: After the installation is complete, launch Windows Movie Maker. Check if the black screen no audio issue is resolved.
Method 2: Update Windows Movie Maker and Video Drivers
Outdated or corrupted drivers can also cause the black screen no audio issue in Windows Movie Maker. Updating the drivers for your graphics card and sound card can often fix this problem. Here's how you can update your drivers using Device Manager:
1. Update the graphics card driver: Press the Windows + X keys and select Device Manager from the menu. Expand the "Display adapters" category and right-click on the graphics card driver. Select "Update driver" from the context menu and choose "Search automatically for updated driver software." Wait for Windows to download and install the latest driver for your graphics card.
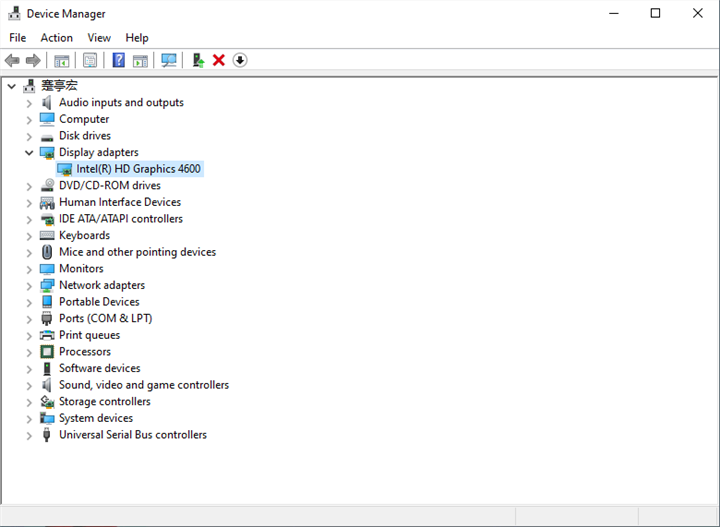
2. Update the sound card driver: Repeat the same steps as above, but this time, expand the "Sound, video and game controllers" category. Right-click on the sound card driver and select "Update driver." Choose "Search automatically for updated driver software" and let Windows install the latest driver for your sound card.
3. Restart your computer: After updating the drivers, restart your computer. Check if the black screen no audio issue in Windows Movie Maker is resolved.
Method 3: Convert Video Formats
Formats like MKV, FLV, and MOV may not be compatible with Windows Movie Maker and can also lead to the black screen issue. But don't worry, there's a simple solution: converting the video format.
To convert the video format to a compatible one, you'll need a video converter software. One reliable option is VideoProc Converter AI. Here's a step-by-step guide on how to use it:
Step 1: Download and install VideoProc Converter AI on your computer. You can find it on their official website.
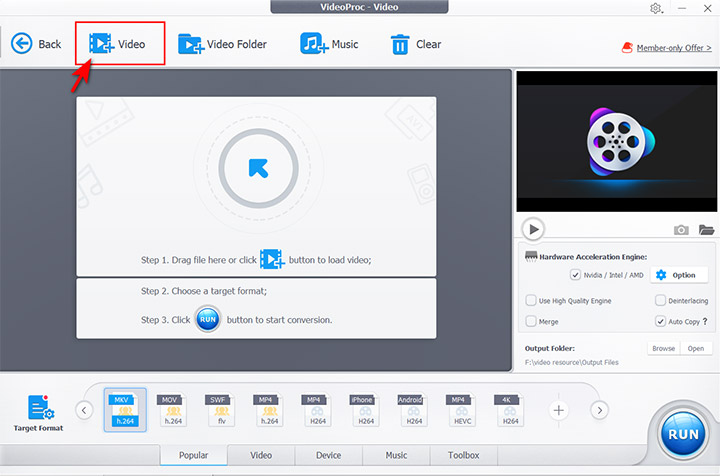
Step 2: Launch VideoProc and select the "Video" tab.
Step 3: Click the "Add Video" button and select the MKV file (or any other unsupported format) you want to convert from your hard drive.
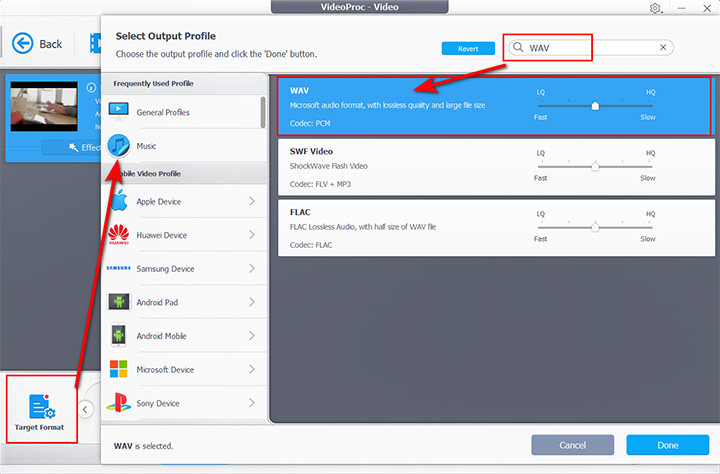
Step 4: Go to the "Target Format" section and search for the "WMV" format. This format is compatible with Windows Movie Maker. Select it as the output format.
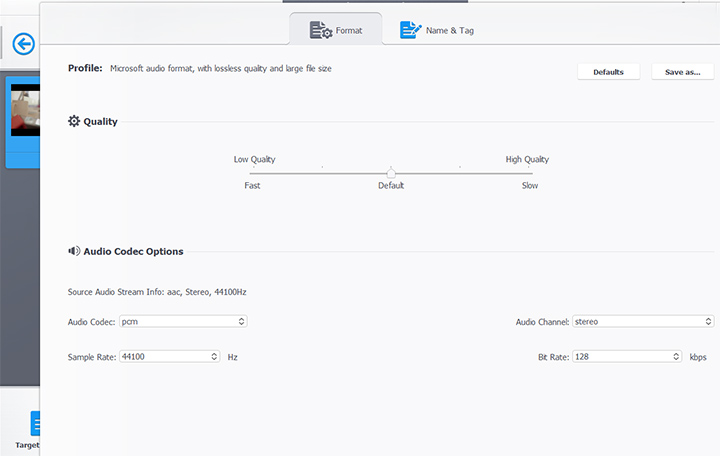
Step 5: If desired, you can customize the output settings, such as audio quality, sample rate, and channel.
Step 6: Once you're satisfied with the settings, click the "Run" button to start the conversion process. VideoProc will convert the video to the selected format.
Step 7: After the conversion is complete, the converted video file (in this case, a WMV file) will be saved to your designated location. You can now import this file into Windows Movie Maker and check if the black screen no audio issue is resolved.
Method 4: Change Video Settings
If converting the video format doesn't solve the black screen no audio issue, you can try changing some video settings in Windows Movie Maker. Here's how you can do it:
1. Open Windows Movie Maker and click on the "Tools" tab in the menu bar.
2. From the drop-down menu, select "Options."
3. In the Options window, click on the "Advanced" tab.
4. Under the "Video properties" section, change the video format to NTSC or PAL according to your region. This ensures compatibility with your video source.
5. Scroll down to the "Video acceleration" section. Move the slider to "None" or "Full" depending on your preference. Experiment with different settings to see which works best for your video.
6. Under the "Aspect ratio" section, choose either 4:3 or 16:9 depending on your video source. This ensures the correct display aspect ratio.
7. Click "OK" to save the changes and restart Windows Movie Maker.
By adjusting these video settings, you may be able to resolve the black screen no audio issue in Windows Movie Maker.
Method 5: Disable Hardware Acceleration
Hardware acceleration is a feature that utilizes the graphics card in your computer to enhance the performance of certain applications, including Windows Movie Maker. It offloads some of the processing tasks from the CPU to the GPU, resulting in smoother and faster performance.
While hardware acceleration can greatly improve the performance of Windows Movie Maker, it can also cause some issues with video playback. For example, enabling hardware acceleration may lead to a black screen or no audio during playback. This can be frustrating when you're trying to edit your videos or watch them back.
Disabling Hardware Acceleration in Windows Movie Maker
To disable hardware acceleration in Windows Movie Maker, follow these steps:
1. Open Windows Movie Maker and click on Tools in the menu bar.
2. Select Options from the drop-down menu.
3. Click on the Advanced tab.
4. Uncheck the box next to "Use hardware acceleration if available."
5. Click OK to save the changes.
6. Restart Windows Movie Maker.
Disabling Hardware Acceleration in Windows Settings
In addition to disabling hardware acceleration in Windows Movie Maker, you may also need to disable it in your Windows settings. Here's how:
1. Press the Windows key + I to open the Settings window.
2. Select System from the options.
3. Click on Display in the left pane.
4. Scroll down to Graphics settings.
5. Click on Browse and select Windows Movie Maker from the list of apps.
6. Click on Options.
7. Choose Power saving from the drop-down menu.
8. Click Save and close the Settings window.
Once you've disabled hardware acceleration both in Windows Movie Maker and in your Windows settings, check if the black screen or no audio issue is resolved. If not, don't worry! We have another method to try.
Method 6: Fix Windows Movie Maker Black Screen Issue Caused by Insufficient Overlapping Media
Another common cause of the black screen issue in Windows Movie Maker is insufficient overlapping media. This means that the video clips on your timeline do not have enough frames to create a smooth transition, resulting in a black screen during playback. Fortunately, there's an easy fix for this problem: increasing the duration of overlapping media.
To increase the duration of the overlapping media in Windows Movie Maker, follow these steps:
1. Select the video clip that has the black screen issue on the timeline.
2. Click on the Edit tab.
3. Click on the Trim tool.
4. Drag the left or right handle of the trim bar to adjust the start or end point of the video clip.
5. Make sure that the video clip has enough frames to overlap with the previous or next clip.
6. Click on Save trim to apply the changes.
Repeat these steps for any other video clips that have the black screen issue. By increasing the duration of the overlapping media, you'll ensure that the transition between clips is smooth and that you no longer experience a black screen during playback.
Method 7: Fix Windows Movie Maker Black Screen Issue Caused by Corrupted Project Files
Another reason why your Window Movie Maker gets black screen is that your project files are corrupted, which prevents Windows Movie Maker from rendering the video properly. But don't worry, there's a simple fix.
To resolve this problem, you'll need to delete or rename the corrupted project files and create a new project in Windows Movie Maker. Here's how to do it:
1. Close Windows Movie Maker and open File Explorer.
2. Navigate to the folder where you saved your project files. Typically, this can be found at C:\Users\username\Documents\Windows Movie Maker Projects.
3. Right-click on the project file that has the black screen issue and select Delete or Rename from the context menu.
If you choose to rename the file, add a suffix like .bak or .old to distinguish it from the original file.
Now that you've dealt with the corrupted project file, it's time to create a new project in Windows Movie Maker:
1. Open Windows Movie Maker and click on File > New Project.
2. Import your video clips and any other media files you need for your project.
3. Edit your video clips, add transitions, effects, and audio as desired.
4. Save your project and try playing it back. You should no longer encounter the black screen issue.
Method 8: Fix Windows Movie Maker Black Screen Issue Caused by Incompatible Video Codecs
Sometimes, the black screen issue in Windows Movie Maker is caused by incompatible video codecs. Video codecs are software components that compress and decompress video data. Certain codecs, like H.264 or HEVC, may not be compatible with Windows Movie Maker. To fix this issue, you'll need to install or update the video codecs on your computer. Here's how:
1. Download a reliable video codec pack, such as the K-Lite Codec Pack or visit Microsoft's website for official codec updates.
2. Run the downloaded file and follow the on-screen instructions to install or update the video codecs.
3. Restart your computer to ensure the changes take effect.
Now, try opening Windows Movie Maker and playing back your video project. The black screen issue should be resolved, and you'll be able to edit and render your videos without any problems.
Method 9: Fix Windows Movie Maker Black Screen Issue Caused by Corrupted Registry Entries
Corrupted registry entries can also contribute to the black screen issue in Windows Movie Maker. Registry entries are data files that store information about the software installed on your computer, including Windows Movie Maker. When these registry entries become corrupted, it can affect the functionality of the program. Here's how you can fix this issue:
1. Download and install a reputable registry cleaner software, such as CCleaner, from the official website.
2. Launch CCleaner and click on the "Registry" option from the left pane.
3. Check all the boxes under "Registry Cleaner" and click on "Scan for Issues."
4. Wait for CCleaner to scan your computer and find the corrupted registry entries related to Windows Movie Maker.
5. Click on "Fix selected Issues" and choose "Yes" to back up the registry before making any changes.
6. Click on "Fix All Selected Issues" and then close CCleaner.
7. Restart your computer to ensure the changes take effect.
Alternative Software Recommendation: VideoProc Vlogger
If none of the above methods work for you, it may be time to switch to an alternative video editing software that is more reliable and powerful than Windows Movie Maker. Our recommendation is VideoProc Vlogger.
Here are some features and benefits of VideoProc Vlogger:
- It supports a wide range of video formats, including MKV, FLV, MOV, and more.
- It has advanced editing tools, such as trimming, cropping, rotating, splitting, merging, and more.
- It offers various effects and transitions, such as color correction, filters, titles, animations, and more.
- It allows you to export your videos to various platforms, such as YouTube, Vimeo, Facebook, and more.
- It is free to use for personal and educational purposes.
- And more…
In Conclusion
Fixing the Windows Movie Maker black screen and no audio issue is crucial for a better video editing experience. We have provided 9 methods to troubleshoot the issue, as well as an alternative software recommendation, VideoProc Vlogger. Give these methods a try and let us know if they worked for you. And don't forget to check out our other related articles for more tips and tricks on video editing. Happy editing!


