
Screen recording on a Dell laptop is a handy trick in variety of situations, such as downloading non-downloadable videos, reporting technical issues, capturing exciting gaming moments, and creating instructional tutorials.
The best part is all recent modes of Dell laptops (XPS, Alienware, Latitude, Inspiron, and more) offer the built-in tool for screen recording. There're also many trustworthy third-party screen recorder programs that you can rely on to capture everything happening on your Dell laptop screen with crispy quality. Thus, in this post, let's dive into 6 of the best ways to screen record on a Dell laptop!

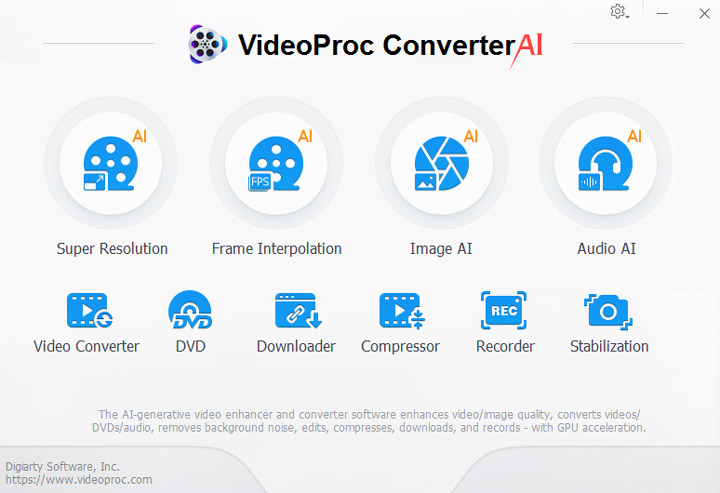
How to Screen Record on Dell Laptop via VideoProc Converter AI
VideoPro Converter is a straightforward yet powerful video screen recorder that seamlessly works with all Dell devices. It enables you to capture anything shown on your Dell laptop screen, including live streams, YouTube videos, lectures, online meetings, and gameplays.
It also records your webcam, internal sound, and external microphone audio. You can easily choose what to record and customize the resolution (HD 1080P) format, quality, and audio level, during the setup. This capable screen recorder offers real-time drawing tools for conveniently annotating the points while recording. What's more? There is a comprehensive set of editing tools, allowing you to quickly polish and enhance your recordings with ease.

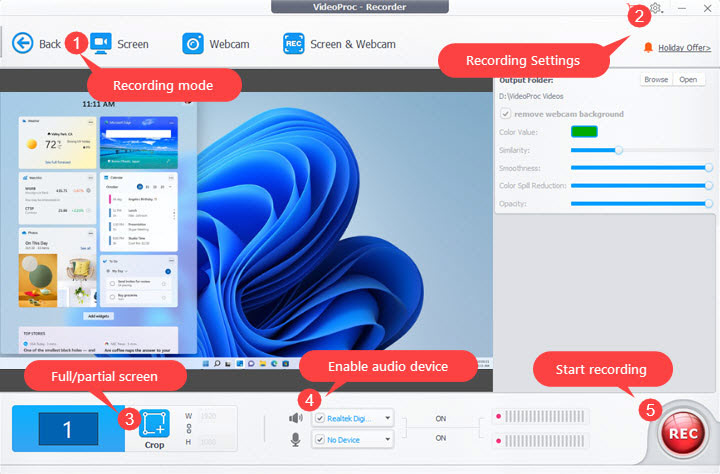
Step 1. Download, install, and run VideoProc Converter AI on your Dell laptop. Hit Recorder.
Step 2. Select Screen or Webcam to record only the screen or the webcam. You can also choose Scree & Webcam to record both the screen and the webcam.
Step 3. Check the icon of the microphone, speaker, or both to screen record on a Dell laptop with audio from the microphone, system sound, or both. Check the unfold icon and choose the specific devices which you want to record the sound from.
Step 4. If you want to record only a certain part of the screen, Hit Crop and then drag the box to select the recording range. Hit the green check icon to confirm your selection. Hit REC to start screen recording on your Dell laptop.
Tips:
Before recording, you can hit the gear icon and then customize a few advanced recording settings such as the format, quality, and audio level.
Step 5. Hit Stop to end the recording. To play your recording, hit the folder icon next to the thumbnail of the recording and then double-click it.
How to Screen Record on Dell Laptop via ShareX
ShareX is widely known as one of the best open-source and free screen capture software. It supports capturing scrolling snapshots and offers a large number of annotation tools (magnify, highlight, freehand, text, speech balloon, and more) that you can use while or after the recording. To speak of its screen recording feature, you're allowed to record the entire or part of your Dell laptop screen with the audio from the microphone, system audio, or both.
Unfortunately, you don't have any options to annotate the screen while recording. There aren't tools for editing the recorded videos. One of the most annoying things is it doesn't support recording your webcam.
Step 1. Go to the official site of ShareX. Download and install the most recent release of ShareX on the Dell laptop.
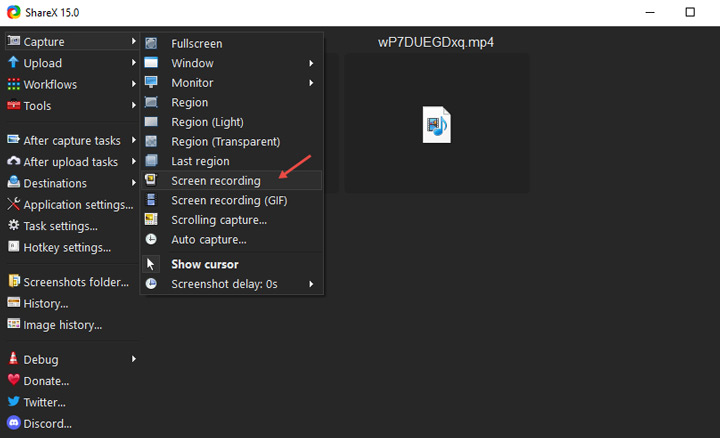
Step 2. Launch up ShareX. Hit Task settings to open the Task settings panel. Go to the Capture section and select Screen recorder. Hit Screen recording options to access the advanced screen recording options.
Step 3. Bear in mind that ShareX records your screen without audio by default. If you want to screen record on a Dell laptop with audio, then come over to the Audio Source menu and choose the target audio source. You're only allowed to choose the audio from one device directly. Suppose you want to record the screen with audio from two more devices, you have to enter the corresponding command line.
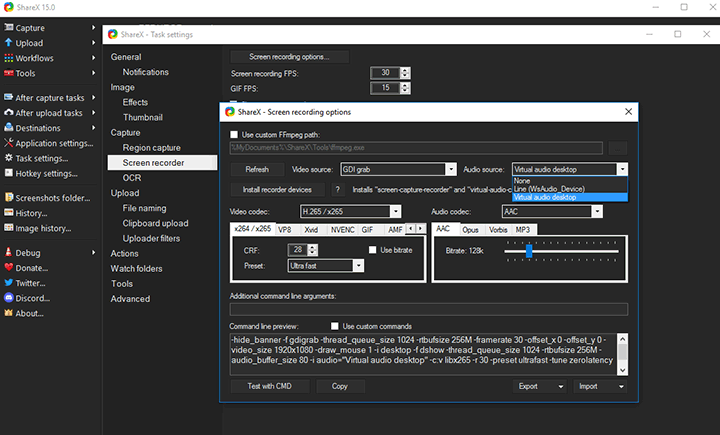
Step 4. Customize the codec, CRF, and bitrate of the video, according to your preferences. Surely, you can also adjust the encoding settings of the audio. Once you're satisfied with your adjustments, hit the exit button. If necessary, change the frame rate of your recording. After that, hit the exit button again to return to the main interface.
Step 5. Hit Capture > Screen recording. To select a specific area on your Dell laptop screen for recording, simply drag the selection box using your mouse. Once you've made your selection, the recording will start instantly. To stop the screen recording on a Dell laptop, just hit Stop.
How to Screen Record on Dell Laptop via OBS
If you want to achieve some professional results without paying a dime, you're willing to do a lot of initial work to set up the recording tools and presets, and you don't mind the bells and whistles, then OBS may be a good pick. Its reputation as one of the best free screen recorders is well-founded, with loads of fascinating features that other screen recorders don't have, for example, creating scenes made up of multiple sources, recording gameplay in 60FPS, and mixing audio from different sources.
However, as said, OBS is not an ideal option for beginners who want to do some simple screen recording tasks on the Dell laptop. Its interface is crammed with unexplained icons and it takes a lot of computing resources. Bugs like black screens and crashes happen from time to time.
Step 1. Come over to the official site of OBS Studio. Hit Windows to get the latest version of OBS downloaded and installed on your Dell laptop.
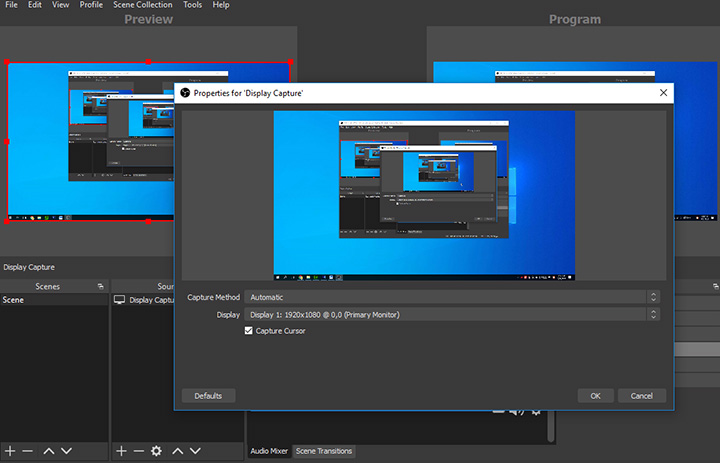
Step 2. Launch up OBS. Navigate to the Resource section, hit Add, and then choose the desired recording source. In my case, I want to record the displayed screen, thus I select Display Capture. Hit OK to proceed. You can uncheck Capture Cursor on the pop-up new panel to hide the cursor while recording the Dell laptop screen. Hit OK.
Step 3. Hit Settings which is located on the bottom right. Hit Audio and selected the needed audio devices under the Gloable Audio Devices segment. If necessary, you can adjust the sample rate, channels, bitrate, and other properties. Hit Done to confirm your adjustments.
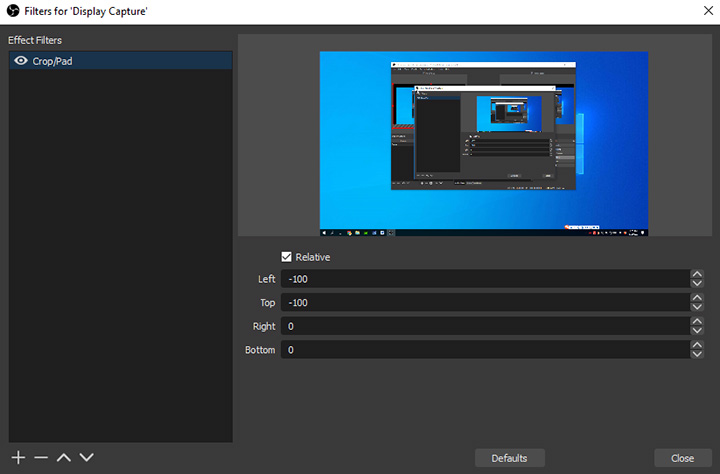
Step 4. OBS records the entire screen by default. If you want to record a certain part of the screen, right-click the recording source, select Filters > Crop/Pad, and then click OK. Now, you can adjust the values for Top, Bottom, Right, and Left to specify the recording area. Hit Close to proceed.
Step 5. Click on Start Recording to start screen recording on your Dell Laptop for free using OBS.
How to Screen Record on Dell Laptop via Game Bar
Game Bar is what we called the built-in screen capture of Dell laptops. It's a free tool developed by Microsoft and integrated into not just Dell laptops but all PCs that runs the Windows 10/11 operating systems. The recording capability is pretty much basic, compared to VideoProc Converter AI and other professional screen recorders.
It doesn't allow you to record only part of your screen, mark the highlights, choose the recording format… No advanced recording options are available here. What's even worse? It sometimes failed to show up, due to a lot of known or unknown reasons. The recording often comes with bad quality yet large size. Once you exit or minimize the application, the recording will end instantly.
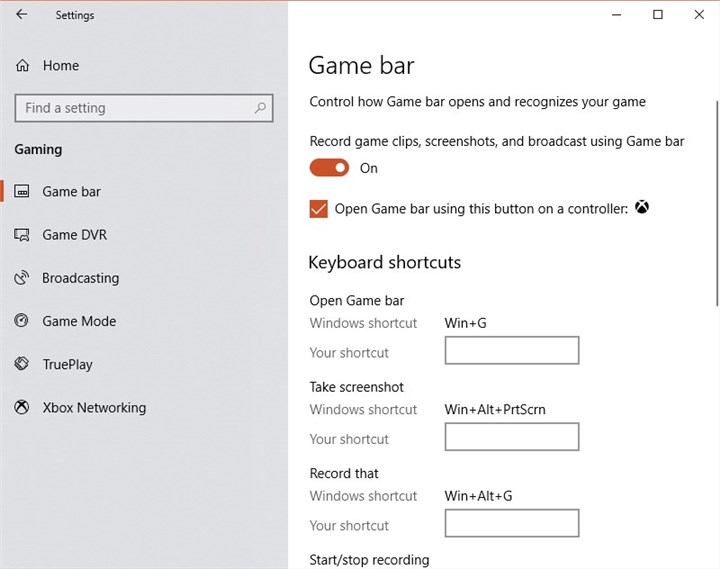
Step 1. Click the Windows icon and hit Settings to open the Windows Settings panel. Search for game and then choose Xbox Game Bar. Toggle on the option of “Enable Xbox Game Bar for things like recording ame clips”. Exit the Windows Settings panel.
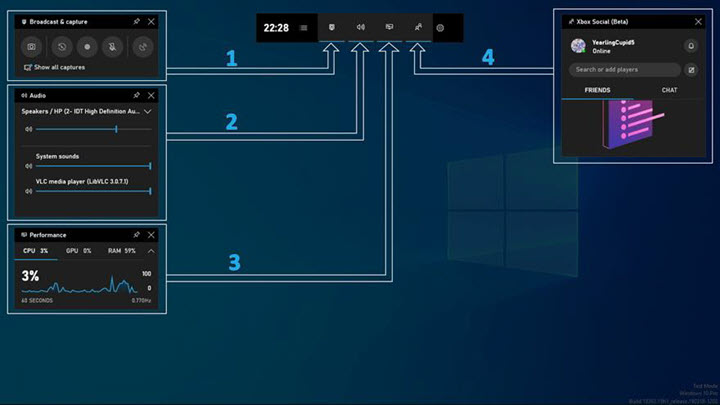
Step 2. Press Win + G to open the Game Bar screen recorder. If you want to screen record on your Dell laptop with your voice, then do remember to click the Microphone icon.
Step 3. Open the gameplay or other things that you want to record. Hit the white dot icon or press Win + Alt + G on your keyboard to start screen recording on a Dell laptop. Click the red dot button to stop the screen recording.
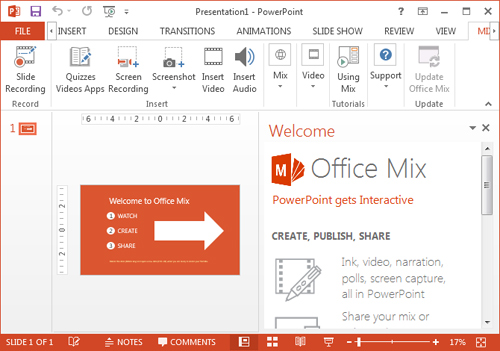
How to Screen Record on Dell Laptop via PowerPoint
Every Windows 10 and Windows 11 Dell laptop is equipped with a pre-installed trial version of Microsoft Office 365. Among the suite of productivity tools offered by this cloud-based platform, PowerPoint stands out as our focus today, since it provides a pretty simple screen recording tool. While it may not provide the extensive features or advanced controls that most users desire, it serves as a handy option for beginners to record selected parts of the screen without breaking a sweat.
Step 1. Open Microsoft PowerPoint and your Dell laptop. Open the existing PowerPoint slides or create a new one.
Step 2. Navigate to the top menu bar to find the Insert icon. Click on it and then choose Screen Recording to launch the built-in screen recorder of PowerPoint.
Step 3. Click on Select Area. Drag the selection box to make sure it covers the range that you want to record. If you don't specify the recording area, Powerpoint will screen the entire screen of your Dell laptop.
Step 4. Click the Record button to start recording the screen. Click on the timer button to stop the screen recording.
Step 5. The recording now shows up on your slide, right click on it and choose Save Media As. Name the video and choose the output folder.
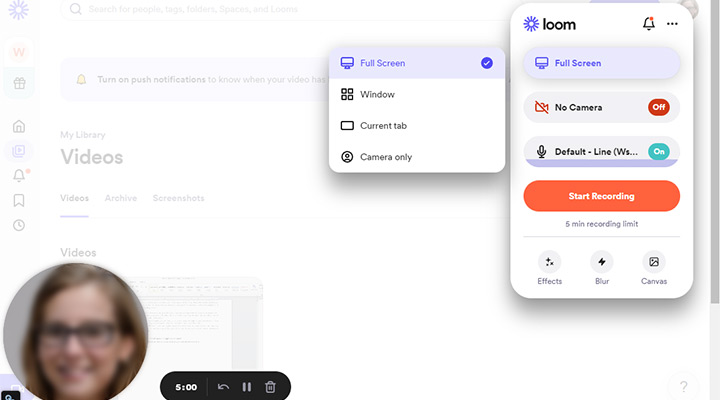
How to Screen Record on Dell Laptop via Loom
Loom is the only screen recorder listed in this post that can work right off your Chrome browser. It offers most options that we can expect from a desktop-based screen recorder, including the ability to record a certain tab opened in your browser, the selected part of the Windows screen, and your webcam. It even allows you to add a blur effect to protect sensitive information and add a customizable recording backdrop to make the recording look more captivating. However, it's not a good option for screen recording for a long time, since users with a free account can only record a maximum of 24 videos, each with a duration not exceeding 5 minutes.
Step 1. Go to the official website of Loom. Click on Get Loom for free and follow the prompt to get Loom's Chrome screen recorder installed.
Step 2. Click on the Extensions icon, find Loom, and enable it.
Step 3. According to your preference, select a recording mode from Full Screen, Window, Current tab, and Camera only. Specify whether you want to record the screen with your face in the webcam and the audio from the microphone.
Step 4. Hit Start Recording to start recording the screen on your Dell laptop. Hit the Finish recording button to end the screen recording. You can now edit your recording and then share or download it.


