Blurry photos can be frustrating, especially when they capture precious moments. Whether it's due to camera shake, poor focus, or other factors, the good news is that there are effective ways to unblur an image and restore its clarity.
In this comprehensive guide, we'll explore various techniques and tools to help you bring your blurred photos back to life.
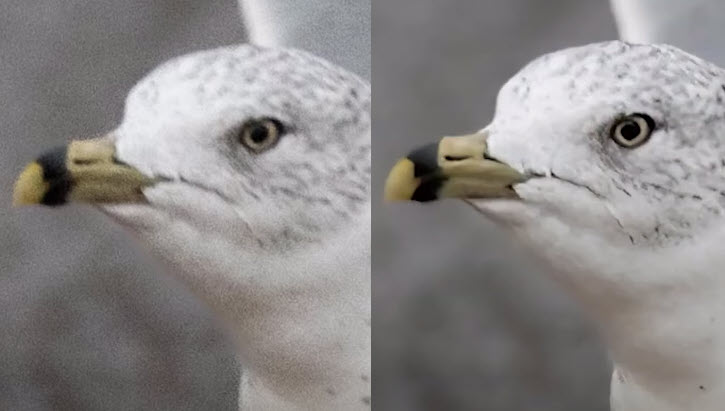
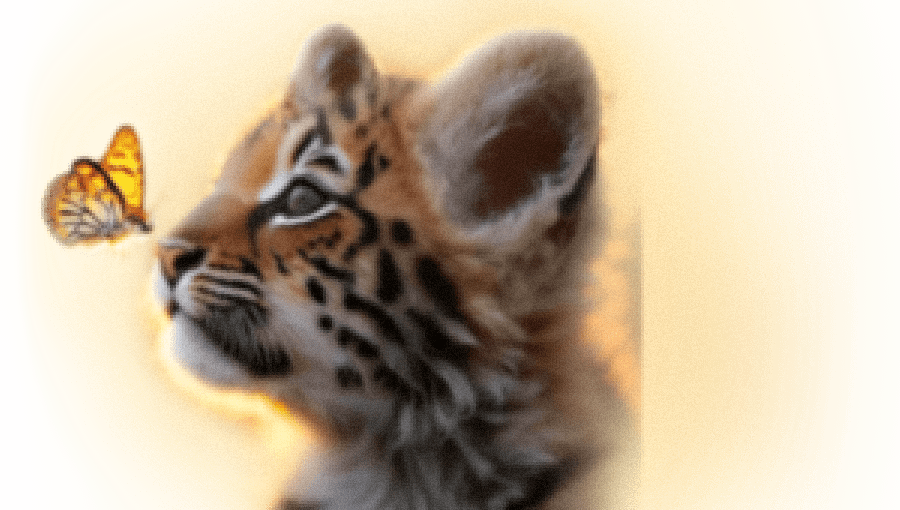
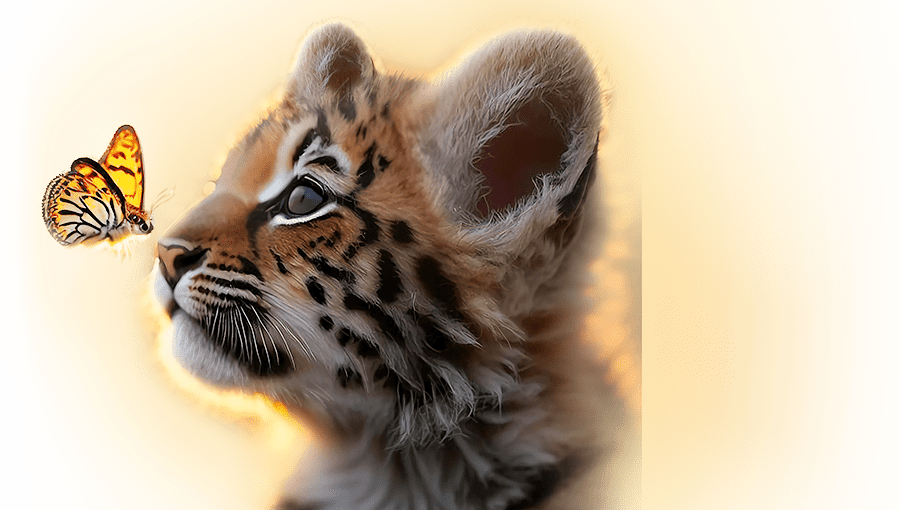
Method 1 features AI-powered tools to deblur and sharpen images, while the rest of the methods use traditional algorithms to bring clarity to the photo.
1. How to Unblur an Image in VideoProc Converter AI
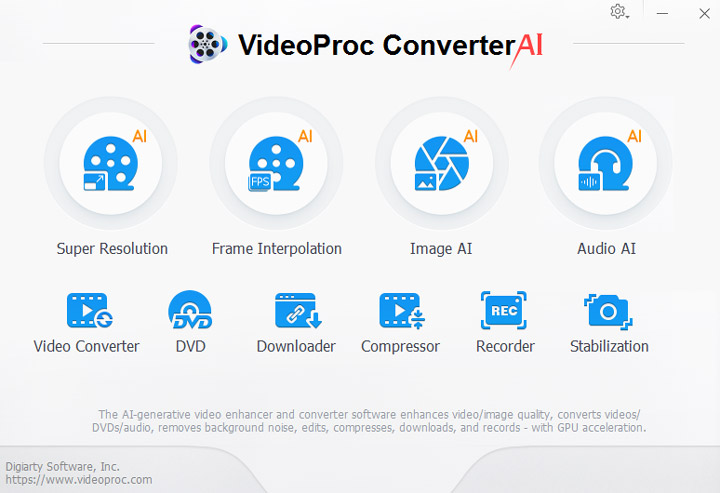
VideoProc Converter AI has emerged as a game-changer in the world of image and video enhancement. It offers not only versatile conversion and editing features but also powerful AI-driven tools.
It allows you to enhance image clarity, fix blurry photos, reduce pixilation, and increase image resolution. It also works for videos.
Below is a quick demonstration on how to unblur an image by using this capable AI imgae enhancer.
Step 1. Download and install VideoProc Converter AI, launch it and go to the AI Image module.

Step 2. Import the blurry photos into the panel.
You can add images in batch, or drag and drop the entire folder to enhance productivity.
Step 3. Tweak the parameters in the Image AI panel to unblur the image.
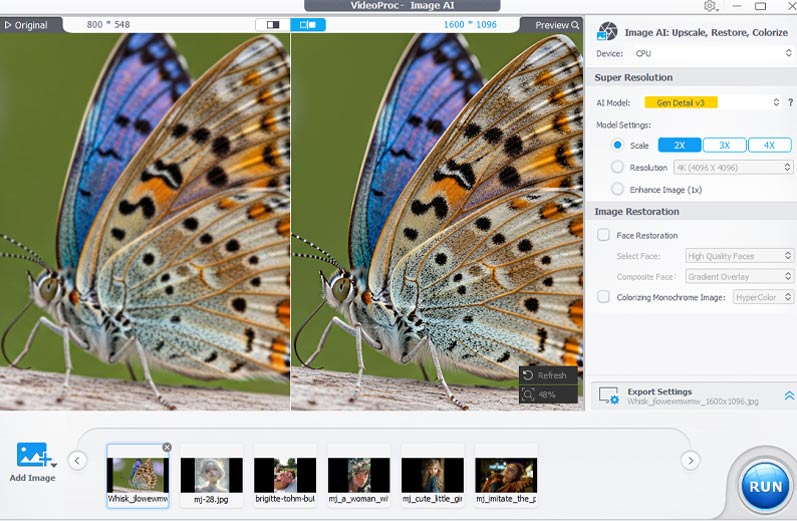
For the AI Model option, leave it as Gen Detail v3 if your images are depicting real world scenes or comes with lot of details. Switch it to Real Smooth v3 or Anime if your images feature 2D illustrations, manga, anime, cartoons, comics, etc.
In the Model Settings section, click the Enhance Image (1x) option for unbluring your image with the original resolution. Surely, if you to upscale the resolution, simply choose the resolution upscale ratio or the target resolution. You can check the real-time comparison in the previewing window.
Step 4. Export the images to finish deblurring the image.
You can select either the PNG or the JPEG image format.
For the image quality, leave it at 100% to achieve the best quality.
When you are happy with the settings, click the Run button to initiate the image enhancing process.
Video Tutorial:

VideoProc Converter AI - Best AI Image/Video Enhancer
- Deblur images in 1-click, no learning curve at all. It also supports video enhancement.
- No need to create a project before unblurring. Simply drag-n-drop to ehnhance.
- AI upscaling images to avoid pixilation and blurriness when zoomed-in, or printing.
- 10K/8K/4K upsampling! Realistic details preserved, and eliminate artifacts.
- All-in-one tools: deblur, upscale, convert, edit, compress, rip DVDs, fix old photos, etc.
![]() Excellent
Excellent ![]()
2. How to Unblur an Image in Photoshop
Note: Except for the VideoProc Converter AI method above, all the other methods below use traditional algorithms to unblur an image. They are not AI-powered.
There are several image deblurring tools in Photoshop. By understanding and fine-tuning the settings, you can effectively deblur your images and bring out the intricate details in your photo. Please note that, these photo unblurring features in Photoshop are not AI-powered, and can result in sharpening artifacts such as glowing outlines and halos.
Step 1. Create a Photoshop project, and set the project resolution the same as your source image.
For the DPI, you set it at 300DPI if you are going to print the photos after deblurring. For web display or sharing to friends over the internet, 96DPI is ok.
Step 2. Unlock the background, and create a new layer. Drag and drop your image into Photoshop, set its positions on the canvas, and press Enter to finish positioning the image.
Step 3. Duplicate the layer as a backup copy. You can restore to the original photo at any time you want.
Simply click on the layer, and right-click to select Duplicate Layer. The shortcut key is Ctrl/Cmd+J.
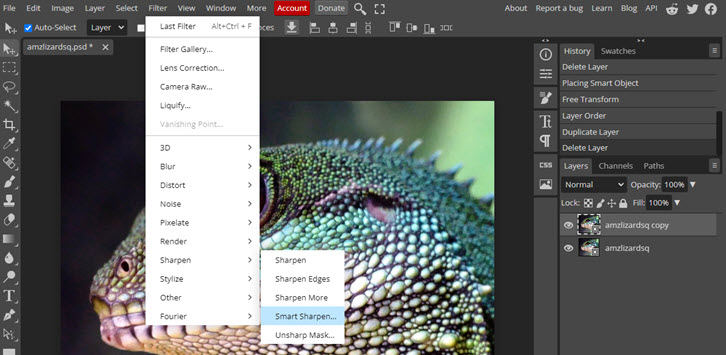
Step 4. Unblur the image using the Sharpen filters in Photoshop.
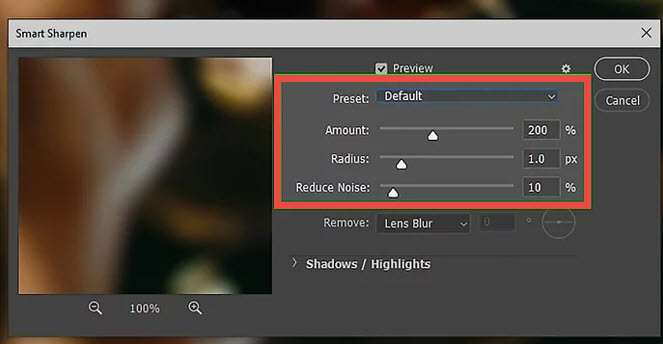
For the Smart Sharpen Parameters in Photoshop:
- Amount: It controls the intensity of sharpening. Start with a conservative value and increase it gradually. It will adjust the control along the edges of the image, thus giving you an illusion of sharp imagery, and less blurry photos.
- Radius: It dictates the size of the pixels being affected alongside the edge. For instance, a higher value will result in more pixels to be influenced in the deblurring process.
- Reduce Noise: Use this option cautiously to balance between sharpening and noise reduction. A higher value will result in less noises.
Remove different types of image blur:
Photoshop allows you to unblur images that are caused by different types of blurriness.
- Motion blur: It removes blurriness that are caused by the movement of the subject in the photo.
- Lens blur: It removes blurriness caused by camera shake, or deals with out-of-focus photos.
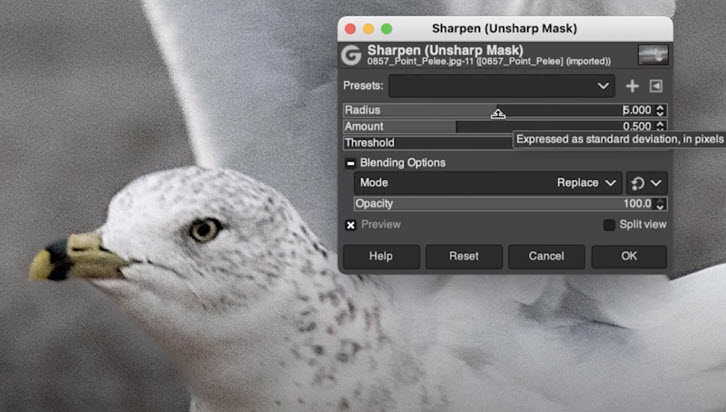
For the Unsharp Mask Parameters in Photoshop:
If your photos suffers from severe blurriness, and you want a stronger sharpening effect that the Smart Sharpen feature, you can use the Unsharp Mask in Photoshop.
The Unsharp Mask works by identifying pixels that are different from their surrounding pixels, and increasing the contrast there within.
To determine what should be recognized as a different pixel, it introduces the Threshold parameter. Values between 2 and 20 are good starting point to experiment with.
Other parameters such as Amount and Radius are comparable to those in the Smart Sharpen feature.
Step 5. Finish unblurring the images, and export the files.
Once you are happy with result, you can export the images in File > Export As.
3. How to Unblur an Image using Photopea Online
If you want to unblur an image easily online, without installing a large chunk of Adobe products, you can use online image editing tools. Photopea is an online photo editing tool that closely resembles Adobe Photoshop. You can use the Smart Sharpen and Unsharp Mask similarly as you do in Photoshop.
Please note that unblurring an image is a complex task, and the success of the process depends on the extent of blurring and the specific details of the image. If you have a picture that's severely blurred, there might be not way to clear it up for better resolutions using Photopea.
Step 1. Visit Photopea.com and drag and drop your images into the working panel.
You can click on the layer of this image, and press Ctrl/Cmd+J to duplicate the layer. By so doing, you can have a separate copy of the image, and restore it to the initial stage if you are not satisfied with the deblurring effect.
Step 2. Click Filter > Sharpen, and choose an deblurring method.
You can go on with Smart Sharpen, Unsharp Mask, Sharpen edges, etc.
Step 3. Adjust the parameters in the new dialogue window.
You can drag the slider to adjust deblurring parameters, such as Amount and Radius. It is the same as those in Photoshop. If you forget their functions, you can refer to steps in the above part.
4. How to Unblur an Image in GIMP
Using GIMP is another free way to unblur an image. Although it lacks the AI-powered free Super Resolution tool baked in VideoProc Converter AI, it can be used as a temporary solution. For 1-click image unblurring, refer back to part 1 featuring VideoProc Converter AI. Tips: you can also use an open source AI image enhancer to unblur your image for free.
Follow the steps below to unblur an image in GIMP.
Step 1. Download and install GIMP from its official website.
Step 2. Open up the Unsharp Mask in GIMP.
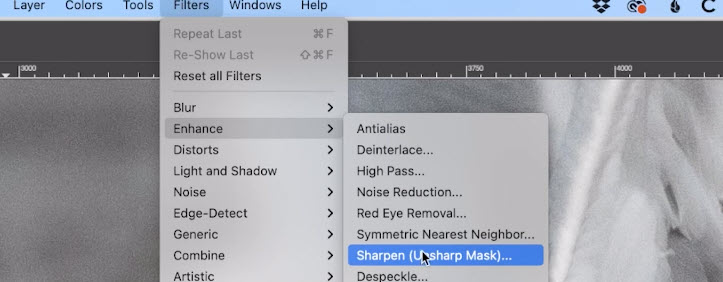
You can simply hover to the menu > Enhance > Sharpen (Unsharp Mask), and click on it.
Step 3. Drag the sliders of Radius, Amount and Threshold to unblur images and make them sharpener.
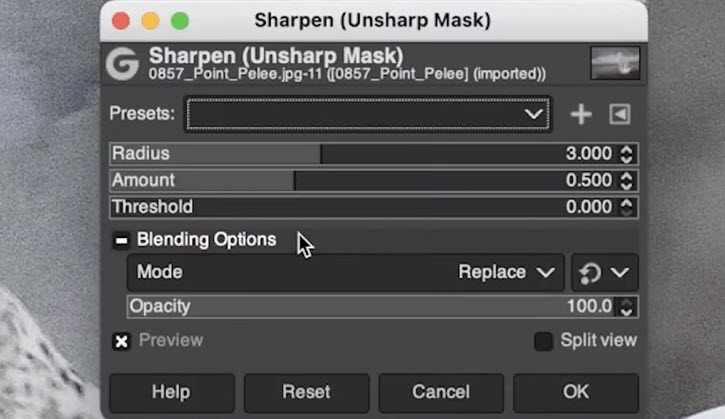
If you don't have a theoretical knowledge of what all these mean, you can scroll up and find the explanation in the Photoshop section. The parameters in Unsharp Mask works the same, irrespective of which software you are using.
Step 4. Export the deblurred image, and start to enjoy clear visuals.
Note, in pre-production, you can use faster shutter speed to eliminate possible camera blur.