Overwatch is an incredibly popular team-based multiplayer game developed and published by Blizzard Entertainment. With its unique characters, exciting gameplay, and vibrant visuals, it's no wonder that Overwatch has captured the hearts of millions of players worldwide.
Whether you're a casual player or a competitive gamer, there are many reasons why you might want to take screenshots while playing Overwatch. From capturing epic moments and sharing achievements to reporting bugs and creating wallpapers, screenshots can add an extra layer of fun and creativity to your gaming experience.
In this article, we'll explore different methods and platforms that you can use to take screenshots on Overwatch. Whether you're playing on PC, PlayStation, or Xbox, there's a method for everyone. Let's dive in!
Method 1: In-game Keyboard Shortcuts
The first method we'll explore is using in-game keyboard shortcuts. This is the simplest and fastest way to take screenshots in Overwatch. Keep in mind that the keyboard shortcuts may vary depending on your platform, so make sure to check the specific commands for your setup. Here's a handy table of keyboard shortcuts for different platforms:
| Platform | Keyboard Shortcut |
|---|---|
| PC | PrtScn |
| Mac | Command + Shift + 3 |
| Xbox One | Xbox button + Y |
| PS4 | Share button + Triangle |
To use these keyboard shortcuts, simply press the designated keys simultaneously. For example, on a PC, press the PrtScn button. On a Mac, press Command + Shift + 3. The screenshot will be saved automatically.
If you want to change the default save location, you can do so through the game's settings menu or your platform's system settings. In Overwatch, navigate to Options > Video > Screenshot Folder to choose a different folder to save your screenshots.
Here are a few tips and tricks for using keyboard shortcuts in Overwatch:
- Tip 1: Change the screenshot folder location to easily organize your screenshots.
- Tip 2: Hide the user interface (UI) by pressing Alt + Z before taking a screenshot for a cleaner image.
- Tip 3: Utilize the replay feature to rewatch your matches and capture screenshots from different angles and perspectives.
Method 2: In-game Commands
Another method to take screenshots in Overwatch is by using in-game commands. These commands can be accessed by opening the chat window, usually by pressing Enter or /.
Here are some useful in-game commands for taking screenshots:
- /screenshot: This command takes a screenshot and saves it in the Documents folder.
- /screenshot_ui: Use this command to capture a screenshot without the user interface (UI).
- /screenshot_jpeg: This command takes a screenshot in JPEG format, which saves space and uploads faster.
- /screenshot_png: This command takes a screenshot in PNG format, preserving image quality and transparency.
To use these commands, simply type them in the chat window and press Enter. The screenshot will be saved automatically in the designated folder.
Using in-game commands can be a great alternative if you prefer typing commands rather than using keyboard shortcuts. Experiment with different commands to find the one that suits your needs best.
Method 3: Windows Built-in Tools
For Windows Overwatch players, this system has some built-in tools that can do the job just fine. Here, we'll explore three of these tools: Snipping Tool, Snip & Sketch, and Game Bar.
1. Snipping Tool
The Snipping Tool is a basic screenshot tool that comes pre-installed on Windows. While it may not have all the bells and whistles of other software, it gets the job done.
Advantages:
- Allows you to select a specific area or window to capture.
- Has basic editing features such as pen and highlighter.
- Can save screenshots in different formats such as PNG and GIF.
Disadvantages:
- Not very convenient for taking multiple screenshots.
- Cannot capture the cursor or the UI.
- May cause lag or stuttering in the game.
Here's how to use the Snipping Tool to capture screenshots on Overwatch:
1. Launch Overwatch and enter a game mode or a custom game.
2. Find a scene or a moment that you want to capture.
3. Press Alt + Tab to switch to your desktop and open Snipping Tool from the Start menu or by typing it in the search box.
4. Choose a snip mode from the drop-down menu (such as Free-form Snip, Rectangular Snip, Window Snip, or Full-screen Snip) and click New.
5. Select the area or window that you want to capture and release the mouse button.
6. Edit the screenshot using the tools on the Snipping Tool window, such as the pen and highlighter.
7. Save the screenshot to your desired location and format by clicking File > Save As or by pressing Ctrl + S.
2. Snip & Sketch
Snip & Sketch is an upgraded version of the Snipping Tool, offering more options and features for capturing and editing screenshots.
Advantages:
- Similar to the Snipping Tool but with more options such as delay and fullscreen capture.
- Has more editing features such as crop and rotate.
- Can share screenshots directly to other apps or social media.
Disadvantages:
- Same as the Snipping Tool, plus may not work well with some games or graphics settings.
To use Snip & Sketch to capture screenshots on Overwatch, follow these steps:
1. Launch Overwatch and enter a game mode or a custom game.
2. Find a scene or a moment that you want to capture.
3. Press Windows + Shift + S to open Snip & Sketch.
4. Choose a snip mode from the toolbar at the top (such as Rectangular Snip, Freeform Snip, or Fullscreen Snip) and click or drag on the screen to capture the area that you want.
5. Edit the screenshot using the tools on the Snip & Sketch window, such as crop and rotate.
6. Save the screenshot to your desired location and format by clicking File > Save As or by pressing Ctrl + S, or share it directly to other apps or social media by clicking Share.
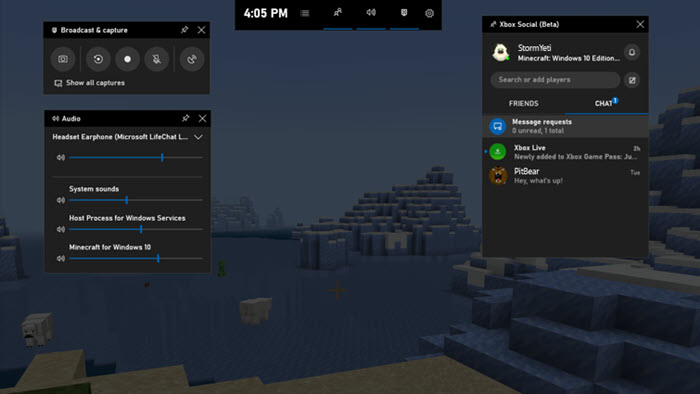
3. Game Bar
If you're a serious gamer, you may already be familiar with the Game Bar. It's a feature built into Windows that's designed specifically for gaming, and it has its own screenshot functionality.
Advantages:
- Designed for gaming, with a dedicated screenshot button and keyboard shortcut (Windows + Alt + PrtScn).
- Can capture the cursor and the UI.
- Can record videos and audio as well.
Disadvantages:
- May not be compatible with some games or graphics settings.
- May affect performance or cause errors in the game.
- Screenshots are saved in JPG format, which may reduce quality.
To take screenshots on Overwatch using the Game Bar, here's what you need to do:
1. Launch Overwatch and enter a game mode or a custom game.
2. Find a scene or a moment that you want to capture.
3. Press Windows + G to open the Game Bar.
4. Click on the Camera icon on the Game Bar toolbar to take a screenshot, or press Windows + Alt + PrtScn as a keyboard shortcut.
5. View the screenshot by clicking on the Show all captures button on the Game Bar toolbar or by going to the Videos > Captures folder on your computer.
Here are also some tips and tricks to enhance your screenshot-taking experience with these built-in tools:
Snipping Tool:
- You can set a delay for taking screenshots by clicking on the Delay button and choosing a time from 0 to 5 seconds.
- You can copy the screenshot to your clipboard by clicking Edit > Copy or by pressing Ctrl + C, and then paste it to another app or program by pressing Ctrl + V.
Snip & Sketch:
- You can access Snip & Sketch from the Action Center by clicking on the Screen snip button or by pinning it to your taskbar for quick access.
- You can use keyboard shortcuts for different snip modes, such as Windows + Shift + A for Rectangular Snip, Windows + Shift + F for Freeform Snip, and Windows + Shift + M for Fullscreen Snip.
Game Bar:
- You can customize the Game Bar settings by clicking on the Settings icon on the Game Bar toolbar or by going to Settings > Gaming > Game bar on your computer.
- You can change the screenshot folder location, format, quality, and keyboard shortcut by going to Settings > Gaming > Captures on your computer.
Method 4: Third-party Software
Besides, there are also many third-party software options available that can enhance your Overwatch screenshot-taking capabilities. First, let's take a closer look at some of the advantages and disadvantages of using third-party software, compared to the tools mentioned before:
Advantages:
1. More features and options: Third-party software often provides more advanced features and customization options compared to the built-in game screenshot feature. You can have more control over the screenshot format, quality, and other settings.
2. Better quality and format: Third-party software can capture screenshots in high-quality formats such as BMP, JPG, PNG, or TGA, ensuring that your screenshots look crisp and vibrant.
3. Capture cursor and UI: Unlike the built-in game screenshot feature, third-party software can capture not only the gameplay but also the cursor and user interface elements. This can be useful if you want to showcase specific in-game elements or interactions.
4. Record videos and audio: In addition to taking screenshots, many third-party software options also allow you to record videos and audio while playing Overwatch. This can be valuable if you want to create gameplay montages or highlight reels.
Disadvantages:
1. Installation, registration, or payment: Depending on the software you choose, you may need to install and register the software on your computer. Some software options also require payment for full access to all features.
2. Performance impact and errors: Some third-party software can have an impact on your computer's performance or cause errors in the game. It's important to choose software that is compatible with your system and doesn't negatively affect your gaming experience.
3. Compatibility issues: Certain third-party software may have compatibility issues with specific games or graphics settings. It's worth researching and testing different software options to find one that works well with Overwatch.
Now that we've explored the advantages and disadvantages of using third-party software let's take a look at some popular options and their features. Here we recommend you Fraps and Bandicam.
- Fraps is a well-known screen capture and video recording software specifically designed for games.
- It can capture screenshots in various formats such as BMP, JPG, PNG, or TGA.
- Fraps can also record videos in high quality and resolution, making it a versatile tool for capturing gameplay moments.
- Additionally, Fraps can display the frames per second (FPS) in games, which can be useful for monitoring performance.
- Fraps offers both a free version with limited features and a paid version with full features.
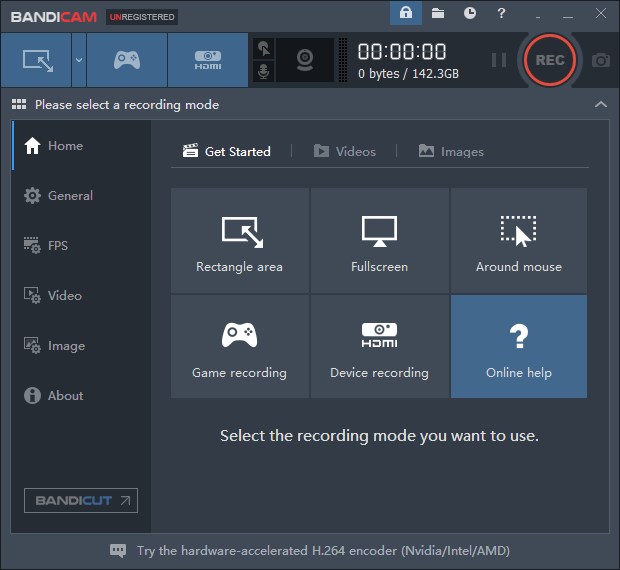
- Bandicam is another popular screen recorder and video editor software that is commonly used for gaming.
- It allows you to capture screenshots in formats such as BMP, PNG, or JPG.
- Bandicam is known for its low CPU usage, making it ideal for recording videos in high quality and resolution without impacting performance.
- It also offers additional features such as the ability to add webcam overlay, voice commentary, mouse effects, and more.
Method 5: Online Services
If you prefer a more lightweight and accessible option, online services can be a great choice for taking screenshots in Overwatch. Here are some advantages and disadvantages of using online services:
Advantages
1. No installation or registration required: Online services allow you to take screenshots without the need to install any software or create an account. You can access them directly from your browser.
2. Accessible from any device: Online services are not limited to a specific operating system or device. You can use them on your computer, smartphone, or tablet, as long as you have an internet connection.
3. Easy sharing: Online services often provide convenient sharing options, allowing you to share your screenshots with others using a link or QR code. This makes it effortless to show off your gaming moments to friends or on social media.
4. Online editing tools: Some online services offer basic editing tools, allowing you to crop, resize, add text, draw, or apply filters to your screenshots directly within the service.
Disadvantages
1. Internet connection required: Since online services are web-based, you need an internet connection to use them. This can be a limitation if you're playing in an area with limited or no internet access.
2. Limited features or options: Online services may not offer as many features or customization options as third-party software. If you're looking for advanced editing or recording capabilities, you may need to consider other alternatives.
3. Lower quality or resolution: Due to the nature of online services, the quality or resolution of the captured screenshots may not be as high as what you can achieve with third-party software.
4. Privacy and security concerns: When using online services, it's important to consider the privacy and security of your data. Make sure to choose reputable services and review their privacy policies before sharing any screenshots.
Here is an example of popular online services and its features:
- Gyazo is a free and fast online screenshot and video capture tool that is compatible with any browser or device.
- It allows you to capture any area of your screen with a simple click or drag.
- Gyazo also offers the ability to record videos of your screen with sound and webcam.
- You can easily share your screenshots and videos with others using a link or QR code or save them to your computer or cloud storage.
In Conclusion
As you see, there are different methods and platforms for taking screenshots on Overwatch. Keyboard shortcuts are the simplest and fastest way to take screenshots on Overwatch. In-game commands are another way to take screenshots on Overwatch that can be accessed by opening the chat window. Third-party software are programs that can be used to take screenshots on Overwatch that offer more features, options, and flexibility…
But the point is that we hope you can find one method which you like and help you make the job done easily.


