There are a variety of creative and practical reasons you may need to record audio on Windows 10. Whether you're a podcaster looking to capture engaging conversations with your guests or simply want to save the audio track from a YouTube video for offline listening, knowing how to record audio on Windows 10 is a valuable skill to have. The best part is, Windows 10 comes equipped with a free voice recording app called Voice Recorder, with which you can quickly capture lectures, conversations, interviews, and more.
The problem:
1. Voice Recorder not working or there is no sound with recordings made in Voice Recorder. Voice Recorder is set to record the audio from the input sound device, by default. That is to say, it records only your voice coming from your microphone rather than the sound coming from the system sound cards. This can be frustrating when you attempt to record audio from live streams, YouTube videos, or stock sites, resulting in silent recordings.
2. Voice Recorder has some limitations in terms of recording functions. For example, it only allows you to save recordings in the M4A format and doesn't offer the ability to trim off multiple silent parts. These restrictions can hinder your recording experience and limit your options when it comes to editing and sharing your audio files.
Thus, in this post, we will walk you through the process of configuring Windows 10 Voice Recorder, so you can record whatever you can hear from the Windows 10 computer. Additionally, we'll explore some easier and better solutions to record audio on Windows 10.
How to Record Audio on Windows 10 via Voice Recorder
With the right configuration settings, Voice Recorder allows you to record both your voice from a microphone and audio from popular platforms like YouTube, Vimeo, Zoom, and more. As said, it's pre-installed in Windows 10 and you can access it through the Start menu. In the rare instance that you don't find it, just manually install it from Microsoft Store.
Step 1. Click the search icon located in the bottom left corner of your Windows 10 computer.
Step 2. Search into voice recorder. Hit the Voice Recorder which is shown on the search result to open the program.
Step 3. Now, we can start recording audio on Windows 10. Simply hit the Record icon to start recording your voice from the microphone. If you need to record the audio on Windows 10, then you should go to the Windows settings panel, hit Sound > Sound Devices, and then choose Manage sound devices. Click on the Enable icon of Stereo Mix. Once you're done, you can go to Voice Record and hit the record button to record the audio on Windows 10.
Optional Reading
How does it work? Why you can record audio on Windows 10 via Voice Recorder after enabling Stereo Mix?
Stereo Mix (used to be "What You Hear") is a virtual audio device on your computer that combines all the audio channels into a single output stream. With Stereo Mix, you can record the sounds coming from your speakers or headphones, along with any other audio inputs, such as a microphone. This feature is particularly useful when you want to create recordings that include both system audio and your own voice, such as capturing online music or conducting live commentary while gaming or watching videos.
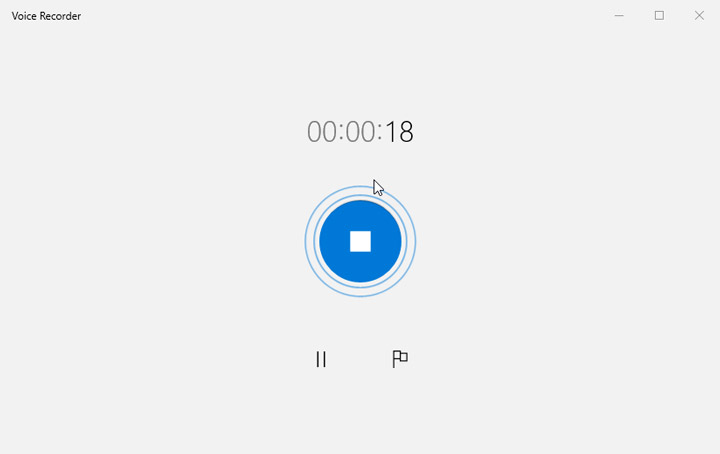
Step 4. While recording audio on Windows 10, you can hit the Flag icon to mark the point or the mistake part. Click on the pause icon to pause the recording. Click the Stop icon to end the recording.
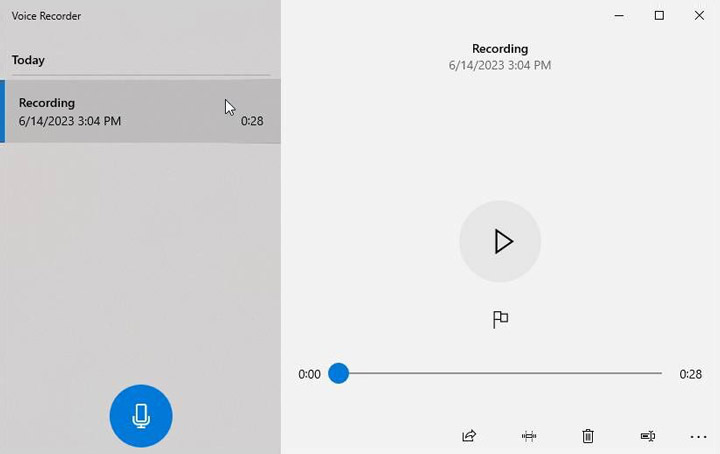
Step 5. If you need to trim your recording, then you need to hit the Trim button and drag the knobs to select the segment that you want to keep. However, it's worth noting that you're not allowed to cut unwanted parts from the middle of your recording. Click on the Save icon to save your recording in .m4a format in the Sound recordings folder below Documents.
How to Record Audio on Windows 10 via VideoProc Converter AI
VideoProc Converter AI is a versatile audio recording program running on Windows 11/10/8/7 and Mac. It enables you to easily record audio from websites, applications, system sound, and microphones, while also providing the flexibility to adjust volume levels across various devices. Its standout feature lies in the comprehensive control it offers over recording quality, allowing you to convert recordings to your preferred audio formats such as MP3, AAC, FLAC, and OGG, with customizable settings for sample rate, bitrate, and channel number.
Now free download install VideoProc Converter AI to record audio on Windows 10 easily.

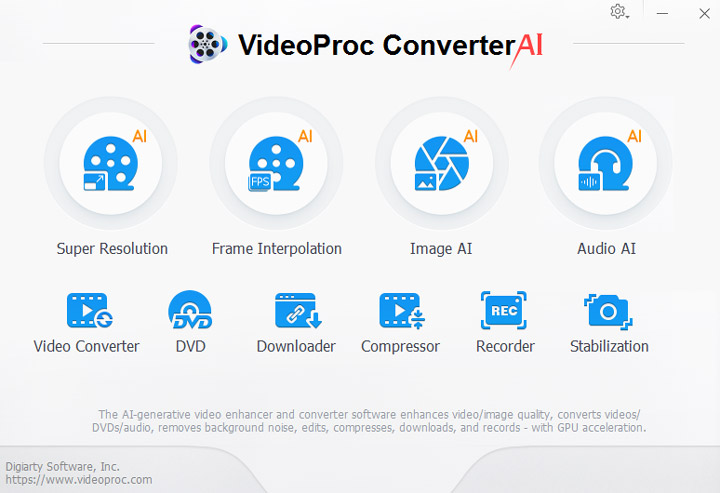
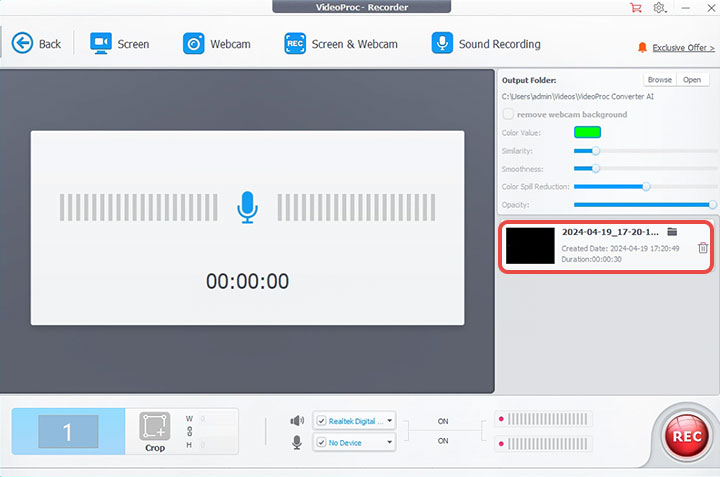
Step 1. Open VideoProc Converter AI and select Recorder on the main interface.
Step 2. Hit Audio Recorder. Navigate to the audio device setting area. Select the target audio source. For example,
- To record the internal audio from Windows 10, such as the system sound and the music playing on YouTube/Vevo, check the speaker icon and select the using system speaker from the drop-down menu.
- To record your voice, check the microphone icon. If necessary, you can specify the target microphone source.
- To record your voice and the system sound simultaneously, simply check the icons of the microphone and speaker.

Step 3. Play the audio or start speaking with your mic. Click REC to start recording. Click Stop to stop the recording. Click the file folder icon to find the recorded audio file.
How to Record Audio on Windows 10 via Audacity
Audacity, with hundreds of millions of users worldwide, is one of the most popular audio recorders and audio editors in the market. It can hook up one or more inputs to record any type of audio. Be it vocals from a microphone, live music from Stereo Mixer, or the midi keyboard connected by the USB port. You can export your recordings in prevalent audio formats like MP3, OGG, FLAC, and WAV.
What's more, this free and open-source tool also comes with a wide selection of audio editing toolkits, including cut, trim, paste, and tons of audio effects. With these amazing editing features, you can easily level up and shape your recordings. Unfortunately, these fantastic features come at the cost of a steep learning curve. Newcomers may be baffled by the often overwhelming interface.
Step 1. Go to the official site of Audacity. Download and install the most recent release of this free audio recorder on your Windows 10 computer. Launch it up.
Step 2. Specify the audio recording settings according to your need. To take recording the audio on Windows 10 via Audacity as an example, there are two common ways to get things done.
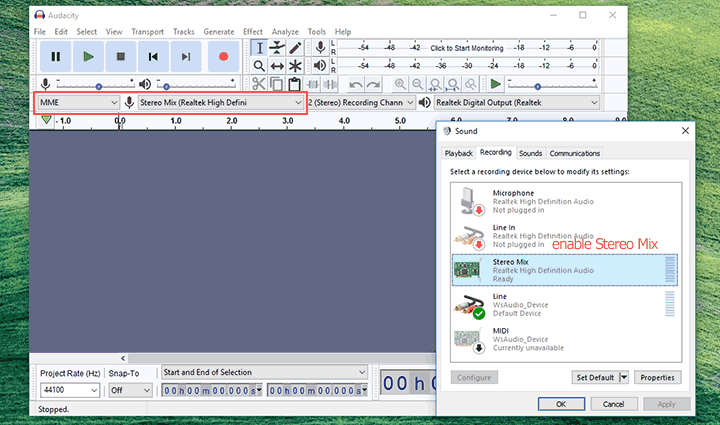
Option 1. Rich click the audio icon located on the bottom right of your Windows 10 computer, select Audio Device, and then hit Recording. Enable the Stereo Mix feature. Afterward, go to Audacity and choose MME as the host. Choose Stereo Mix or What U Hear from the drop-down of the Recording device menu.
Option 2. Choose Windows WASAPI as the host. Choose the loopback input for the computer playback device you will be listening to. In my case, I choose "Speakers (Realtek High Definition Audio) (loopback)". In my case, recording audio on Windows 10 via Audacity in this way brings better sound quality.

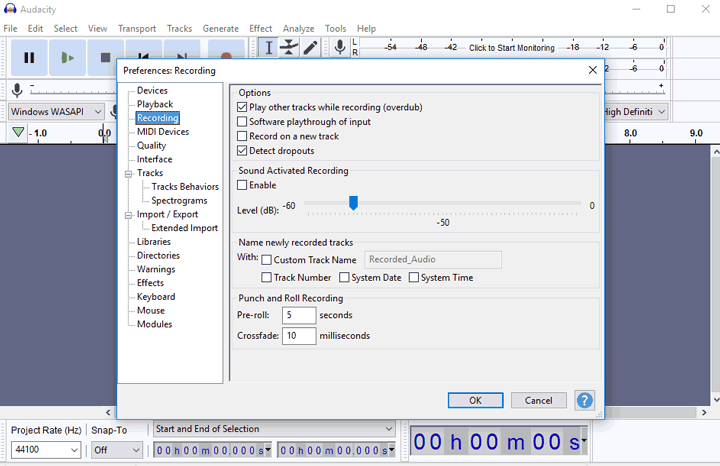
Step 3. You can drag the slider of the microphone and the speaker to adjust the volume. To adjust advanced recording settings, such as the sample rate and sample rate, go to the top menu bar, just choose Edit > Preferences, and then adjust the corresponding properties.
Step 4. Hit the red Record button to start recording audio on Windows 10. Hit the small square icon to stop recording. You can use the quick editing toolkits to quickly remove unwanted segments, remove noise, adjust the balance, etc. Hit the green playback icon to preview the result of your edits in real-time.
Step 5. Once you're satisfied with your recording, hit File > Export and then choose Export as MP3 for saving your recordings in MP3 format.


